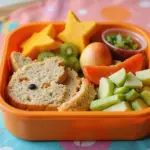
When it comes to school lunches, we all know the struggle. You want something that tastes great, but it also needs to look good. This time of year has me craving meals that not only satisfy my hunger but also bring a little flair to the lunchbox. If you’re a student, a parent packing lunches, or just someone who enjoys pretty food, this post is for you.
I’ve gathered 25 aesthetic lunch ideas that are as delightful to the eyes as they are to the taste buds. You’ll find colorful wraps, delicious bowls, and fun snacks that will make lunchtime something to look forward to. It’s all about making that midday meal feel special, even if you’re sitting at a cafeteria table. Being creative with your food can turn an ordinary lunch into an enjoyable mini celebration.
What’s the benefit? These lunch ideas are not only visually appealing, but they also encourage healthy eating habits. You’ll discover simple recipes and tips that will make packing lunches a breeze. Whether you want to impress your friends or just enjoy a little more excitement in your day, you’ll find inspiration here. So, grab your lunchbox and let’s dive into deliciousness!
1. Rainbow Veggie Wraps

Start your lunchtime journey with Rainbow Veggie Wraps that are as delightful to eat as they are to look at. These wraps burst with colors and flavors, featuring bright bell peppers, crunchy cucumbers, and smooth avocado. Not only do they please the eye, but they also pack a punch of essential vitamins and minerals. Pair them with homemade hummus for a tasty and nutritious dip, creating a lunch that’s both satisfying and healthy!
Making these wraps is easy and fun. Grab your favorite whole wheat tortillas to keep it wholesome. You can customize them with whatever veggies you love, making this meal perfect for picky eaters. For a budget-friendly option, shop at local markets for fresh produce. These wraps are ideal for school lunches, making every bite feel like a mini celebration!
Here’s how to create your Rainbow Veggie Wraps:
Ingredients:
– 2 large whole wheat tortillas
– 1 cup mixed greens
– ½ cup bell peppers (red, yellow, green), sliced
– ½ cucumber, thinly sliced
– ½ avocado, sliced
– ¼ cup hummus
Instructions:
1. Spread a generous layer of hummus over each tortilla.
2. Add mixed greens, followed by the sliced bell peppers, cucumber, and avocado.
3. Roll the tortilla tightly, and slice it in half for a beautiful presentation.
4. Serve with extra hummus on the side for dipping.
Tips for the best wraps:
– Use colorful veggies to enhance visual appeal.
– Add protein like grilled chicken or chickpeas for a filling option.
– Experiment with different wraps such as spinach or tomato for variety.
– Enjoy them fresh for the best taste; they’re best eaten the same day.
Now you’re all set to impress your friends with these tasty and colorful wraps at school! Enjoy your lunch!
Rainbow Veggie Wraps
Editor’s Choice

365 Everyday Value Flour Tortillas Burrito Size, 16 Oz (Frozen)

365 By Whole Foods Market, Organic Hummus, Original, 8 Ounce

Mueller The Real Original Pro Chopper since 2013 Vegetable Chopper Mando…
2. Quinoa Salad Jars

Quinoa Salad Jars are a fantastic choice for a delicious and visually appealing lunch. These jars are not just pretty; they help keep your ingredients fresh until it’s time to eat. Picture vibrant layers of colorful veggies and fluffy quinoa, all packed neatly in a clear jar. You can customize each one to fit your mood or dietary needs, making it a fun and tasty option for school lunches.
To make your own, start with a base of cooked quinoa. Next, add a rainbow of chopped veggies such as juicy cherry tomatoes, crunchy cucumbers, and sweet bell peppers. Toss in some feta cheese or chickpeas for a protein boost. Just before you dig in, drizzle your favorite dressing to keep the veggies crisp and the flavors bright!
Here’s how to make these delightful jars:
Recipe Overview:
– Servings: 4
– Prep Time: 15 minutes
– Cook Time: 15 minutes
– Total Time: 30 minutes
– Calories: 400 per jar
Nutrition Information:
– Calories: 400
– Protein: 15g
– Carbs: 60g
– Fat: 12g
Ingredients List:
– 1 cup cooked quinoa
– 1 cup cherry tomatoes, halved
– 1 cucumber, diced
– 1 bell pepper, diced
– ½ cup feta cheese, crumbled
– ¼ cup olive oil
– 2 tablespoons lemon juice
– Salt and pepper to taste
Instructions:
1. Cook the quinoa according to package instructions and let it cool.
2. In a jar, layer the quinoa first, followed by the veggies, feta, and dressing on top.
3. Seal the jar and refrigerate until lunchtime.
Tips:
– Use mason jars for easy transport.
– Add nuts for an extra crunch and nutrition boost.
– These salads stay fresh in the fridge for up to three days, making them perfect for meal prep!
With Quinoa Salad Jars, you’ll have a tasty, nutritious lunch that looks as good as it tastes. Enjoy experimenting with different ingredients and dressing combos to keep your lunches exciting!
Quinoa Salad Jars
Editor’s Choice

Success Boil-In-Bag Quinoa, Quick Tri-Color Quinoa, 12-Ounce Box (Pack o…
![VITEVER [6 Pack] Salad Dressing Container To Go, 2.7 oz Glass Small Cond...](https://m.media-amazon.com/images/I/71L5at9WZBL._AC_UL320_.jpg "25 Aesthetic Lunch Ideas for School That Look as Good as They Taste 11")
VITEVER [6 Pack] Salad Dressing Container To Go, 2.7 oz Glass Small Cond…
3. Creative Sushi Rolls

Elevate your lunch game with Creative Sushi Rolls that bring a taste of the sushi bar right to your lunchbox. These colorful rolls are not only fun to make but also a delight to eat. Picture vibrant layers of mango, crisp cucumber, and creamy avocado rolled up in savory nori, all sitting atop a fluffy bed of sushi rice. This trendy meal idea is perfect for adding a pop of color to your lunchtime routine, and it’s sure to impress your friends!
Ready to make your own? It’s simple and budget-friendly! You can find all the ingredients in your local grocery store. Plus, experimenting with different fillings means you can customize each roll to suit your taste. This approach makes sushi-making a creative outlet, perfect for those days when you want to impress or simply enjoy a healthy meal.
Recipe Overview:
– Servings: 2
– Prep Time: 20 minutes
– Cook Time: 30 minutes
– Total Time: 50 minutes
– Calories: 450
Nutrition Information:
– Calories: 450
– Protein: 10g
– Carbs: 75g
– Fat: 8g
Ingredients List:
– 1 cup sushi rice
– 2 cups water
– 4 sheets nori
– 1 avocado, sliced
– 1 cucumber, julienned
– 1 mango, sliced
– Soy sauce for serving
Instructions:
1. Rinse the sushi rice until the water runs clear, then cook it in a pot with water.
2. Once cooked, let the rice cool slightly.
3. Place a sheet of nori on a bamboo mat. Spread a thin layer of rice evenly over it.
4. Add your choice of fillings like avocado, cucumber, and mango.
5. Roll the nori tightly, then slice into bite-sized pieces.
6. Serve with soy sauce on the side for dipping.
Tips:
– Use a sharp knife to achieve clean cuts.
– Choose fillings that excite you; try crab meat or bell peppers for variety!
– Don’t forget to pack some extra soy sauce for dipping!
Frequently Asked Questions:
– Can I use brown rice instead of sushi rice? Yes, but it will have a different texture.
With these Creative Sushi Rolls, lunchtime becomes an art form. Enjoy the fresh flavors and the joyful process of rolling your own sushi at home!
Creative Sushi Rolls
Editor’s Choice

Sushi Making Kit, Delamu Bamboo Sushi Mat, Including 2 Sushi Rolling Mat…


CHOI’s 1(Daechun) Roasted Seaweed, Gim, Sushi Nori /(50 full sheets) /Go…
4. Fruit and Nut Energy Bites

Looking for a delicious and energizing snack for school? Try these Fruit and Nut Energy Bites. They are perfect for a quick boost during your busy day. Made from wholesome ingredients like dates, nuts, and seeds, these little bites are both tasty and nutritious. You can even roll them in coconut or cocoa powder for a sweet finishing touch. They look adorable in your lunchbox, making every bite a treat!
Making these energy bites is super simple and takes just 10 minutes. They’re great for portion control too; grab a couple to curb your hunger without ruining your lunch. Plus, they keep well in the fridge, so you can make a batch ahead of time. These bites are perfect for busy students or anyone needing a quick snack on the go!
Here’s how to make them:
Ingredients:
– 1 cup dates, pitted
– ½ cup nuts (like almonds, walnuts, or cashews)
– ¼ cup seeds (chia or flax)
– ½ cup shredded coconut (optional)
– 1 tablespoon cocoa powder (optional)
Instructions:
1. In a food processor, blend the dates and nuts until finely chopped.
2. Add the seeds and mix until combined.
3. Roll the mixture into small balls.
4. Optional: Roll the balls in coconut or cocoa powder for extra flavor.
5. Store in an airtight container in the fridge.
Keep these tips in mind:
Use a mix of nuts for added flavor.
Store them in the fridge for freshness.
Experiment with different seeds for variety.
Make a big batch to enjoy throughout the week.
Frequently Asked Questions:
How long do they last? These bites can last up to 2 weeks in the refrigerator. They are not only tasty but also a healthy snack option that fits perfectly in your school lunch. Enjoy making and munching on these delightful energy bites!
Fruit and Nut Energy Bites
Editor’s Choice

Hamilton Beach Food Processor & Vegetable Chopper for Slicing, Shredding…

Rubbermaid Brilliance 16-Cup Airtight Food Storage Container with Lid Cl…

Amazon Fresh, Unsweetened Cocoa Powder, 8 Oz (Pack of 3)
5. Caprese Skewers

Caprese Skewers: A Delightful Lunch Treat
Looking for a lunch idea that’s both tasty and visually appealing? Caprese Skewers are here to save the day! These little bites pack a punch of flavor and color, making them perfect for school lunches. Imagine fresh mozzarella balls nestled between juicy cherry tomatoes and aromatic basil leaves, all on a skewer. Drizzling them with balsamic glaze adds a sweet and tangy finish that makes every bite delightful. Not only do they taste fantastic, but they also look gorgeous, brightening up any lunch box!
Making these skewers is as simple as it gets. You can whip them up in just 10 minutes, which is a huge win for busy mornings! Plus, you can even prepare them in advance. Just wait to drizzle the balsamic glaze until you’re ready to eat, and they’ll stay fresh and delicious. These skewers are not only a hit with kids but also a great way to introduce more veggies into their diets.
Ingredients:
– 10 cherry tomatoes
– 10 mozzarella balls
– 10 fresh basil leaves
– Balsamic glaze for drizzling
– Salt and pepper to taste
Instructions:
1. Grab a skewer and start by threading on a cherry tomato.
2. Next, add a fresh basil leaf followed by a mozzarella ball.
3. Repeat this process until all ingredients are used up.
4. Arrange the skewers on a plate and drizzle them with balsamic glaze.
5. Sprinkle with salt and pepper to taste before serving.
Tips for the Perfect Caprese Skewers:
– Use a mix of colorful tomatoes for a pop of color.
– Make a larger batch for parties or family gatherings.
– Experiment with different cheeses for unique flavors.
– Pack them in a lunch box with an ice pack to keep them fresh.
With Caprese Skewers, your lunch will be both stylish and scrumptious. Enjoy every bite!
Caprese Skewers
Editor’s Choice

HOPELF 12″ Natural Bamboo Skewers for BBQ,Appetiser,Fruit,Cocktail,Kabob…

Filippo Berio Glaze with Balsamic Vinegar of Modena, 8.4 Ounce Plastic B…

Cool Coolers by Fit & Fresh 4 Pack Slim Ice Packs, Quick Freeze Space Sa…
6. Spinach and Feta Stuffed Peppers

These Spinach and Feta Stuffed Peppers are a delicious way to brighten up your lunch! They’re not just tasty; they’re also packed with nutrients. Imagine biting into a sweet, tender bell pepper filled with sautéed spinach, creamy feta cheese, and wholesome quinoa. The colors alone will make your lunch box stand out, making lunchtime more fun!
Not sure how to make them? Here’s a simple recipe to get you started:
Recipe Overview:
– Servings: 4
– Prep Time: 15 minutes
– Cook Time: 25 minutes
– Total Time: 40 minutes
– Calories: 220 per pepper
Ingredients List:
– 4 bell peppers (choose your favorite color)
– 1 cup cooked quinoa
– 2 cups fresh spinach, sautéed
– ½ cup feta cheese, crumbled
– 1 teaspoon olive oil
– Salt and pepper to taste
Instructions:
1. Preheat your oven to 375°F (190°C).
2. Slice the tops off the bell peppers and remove the seeds.
3. In a bowl, mix together the cooked quinoa, sautéed spinach, feta cheese, olive oil, salt, and pepper.
4. Stuff the mixture into each bell pepper, packing it in nicely. Arrange them in a baking dish.
5. Bake for 25 minutes, or until the peppers are tender and slightly charred.
Need a flavor boost? Add herbs like basil or parsley for that extra zing. You can also make these ahead of time and just heat them up for lunch!
Frequently Asked Questions:
– Can I use other fillings? Absolutely! Try black beans, chicken, or even corn for a twist.
With these stuffed peppers, you’ll have a nutritious and visually appealing lunch that’s sure to impress. Enjoy every vibrant bite!
Spinach and Feta Stuffed Peppers
Editor’s Choice

Bento Box Adult Lunch Box, Containers for Adults Men Women with 4 Compar…

BetterBody Foods Organic Quinoa, Vegan, Gluten Free, Low Glycemic Rice R…

9 Herb Indoor Garden Kit – Unique Kitchen Gift for Women, Men, Mom, Frie…
7. Creamy Avocado Toast

Creamy avocado toast is a lunch staple that’s both stylish and satisfying. You’ll love how the rich, green spread on toasted whole-grain bread looks and tastes. Top it with colorful sliced radishes, juicy cherry tomatoes, or even a perfectly poached egg for that extra flair. This dish not only nourishes your body but also pleases the eyes—perfect for school lunches. Plus, it’s a hit on Pinterest, with endless variations to inspire your creativity.
To make your avocado toast shine, keep it simple and fresh. Start with a good quality whole-grain bread to give it a hearty base. If you’re looking to save money, buying avocados in bulk can help you whip up this dish anytime. A squeeze of lemon juice not only brightens the flavor but also keeps the avocado from browning. Enjoy this quick meal that feels gourmet yet is super easy to prepare!
Ingredients:
– 1 slice whole-grain bread
– ½ ripe avocado
– Toppings: sliced radishes, cherry tomatoes, poached egg (optional)
– Sesame seeds or chili flakes for garnish
– Lemon juice (optional)
Instructions:
1. Toast the whole-grain bread until it’s golden brown and crispy.
2. Mash the ripe avocado in a bowl, adding a bit of lemon juice for flavor.
3. Spread the creamy avocado generously on the toast.
4. Layer on your toppings: add sliced radishes, halved cherry tomatoes, or a poached egg for protein.
5. Finish with a sprinkle of sesame seeds or chili flakes to add a pop of color and flavor.
Tips:
– Use different breads like rye or sourdough for variety.
– Experiment with other toppings like feta cheese or microgreens.
– Prepare the avocado mixture the night before, but toast the bread fresh for the best texture.
– If you’re in a hurry, skip the poached egg for a quicker option.
Frequently Asked Questions:
– Can I make this ahead of time? It’s best served fresh to keep the bread crispy and the avocado vibrant.
Creamy Avocado Toast
Editor’s Choice

8. Sweet Potato and Black Bean Tacos

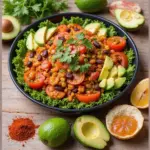
Discover the delightful world of Sweet Potato and Black Bean Tacos, a vibrant twist on traditional tacos that you will love. Imagine roasted sweet potatoes, soft and sweet, paired with hearty black beans for a filling that satisfies your hunger and your taste buds. Top them with creamy avocado and fresh cilantro for a burst of flavor and nutrition. These tacos not only taste amazing, but they also look visually stunning when wrapped in colorful corn tortillas, making your lunch the envy of your friends.
Want to make them? It’s easy! Start with just a few simple ingredients that are budget-friendly. You can whip these up in no time, making them perfect for busy school days. Plus, they’re a great way to sneak in some veggies. These tacos are not just food; they’re a fun, tasty experience that will brighten your day and fuel your body.
Here’s how to make Sweet Potato and Black Bean Tacos:
Ingredients:
– 2 medium sweet potatoes, diced
– 1 can black beans, rinsed and drained
– 1 teaspoon cumin
– 1 teaspoon chili powder
– Corn tortillas
– Toppings: sliced avocado, fresh cilantro, lime wedges
Instructions:
1. Preheat your oven to 400°F (200°C).
2. Toss diced sweet potatoes with cumin and chili powder on a baking sheet. Roast for 25 minutes until they are tender and slightly caramelized.
3. Warm your corn tortillas in a skillet or microwave until pliable.
4. Fill each tortilla with a generous scoop of roasted sweet potatoes and black beans.
5. Add slices of avocado and a sprinkle of cilantro on top. Serve with lime wedges for an extra zing!
Tips:
– Add a drizzle of lime juice for a fresh kick.
– Make a double batch to enjoy leftovers later in the week!
– Feel free to swap black beans for pinto or kidney beans for variety.
This taco recipe is a delicious way to enjoy a nutritious meal, perfect for school lunches or an easy dinner. Make these Sweet Potato and Black Bean Tacos your new go-to recipe, and enjoy every colorful bite!
Sweet Potato and Black Bean Tacos
Editor’s Choice

Guerrero 6 Inch White Corn Tortillas, 80 ct, 4.58 lb by Mission Foods
9. Zucchini Noodle Salad

Get ready to enjoy a delightful twist on lunch with a Zucchini Noodle Salad! This fresh, vibrant dish uses spiralized zucchini as its base, giving you the satisfaction of pasta without the heaviness. Imagine bright cherry tomatoes and savory olives mingling with the zucchini, all topped off with a sprinkle of parmesan. Drizzle it with a zesty homemade lemon vinaigrette, and you have a meal that’s not only healthy but also a feast for the eyes!
This salad takes just 15 minutes to prepare and is perfect for school lunches. It’s light yet filling, making it a great choice to keep your energy up throughout the day. Plus, it’s a fun way to sneak in some veggies! Whether you’re packing it for yourself or your kids, this salad is sure to impress.
Here’s how to whip it up:
Ingredients:
– 2 medium zucchinis, spiralized
– 1 cup cherry tomatoes, halved
– ½ cup olives, sliced
– ¼ cup parmesan cheese, grated
– 2 tablespoons olive oil
– Juice of 1 lemon
– Salt and pepper to taste
Instructions:
1. In a mixing bowl, combine the spiralized zucchini, cherry tomatoes, and olives.
2. In a small jar, whisk together the olive oil, lemon juice, salt, and pepper.
3. Drizzle the dressing over the salad and toss gently until well combined.
4. Finally, top it off with the grated parmesan cheese before serving.
Enjoy it right away to keep those noodles crisp! If you want to add more protein, consider tossing in some grilled chicken or chickpeas.
Frequently Asked Questions:
– Can I make this ahead of time? Yes! Just wait to add the dressing until you’re ready to eat. This keeps everything fresh and crunchy.
This Zucchini Noodle Salad is not just a meal; it’s a colorful, nutritious burst of flavor that will brighten up your lunch hour!
Zucchini Noodle Salad
Editor’s Choice

Brieftons 5-Blade Vegetable Spiralizer: Strongest-Heaviest Spiral Slicer…

50 Pack (100-Piece) 32 oz Meal Prep Containers Reusable with Lids 3-Comp…

AOZITA 17oz Glass Olive Oil Bottle Dispenser – 500ml Green Oil and Vineg…
10. Pesto Pasta Salad

Craving a lunch that’s both tasty and gorgeous? Look no further than the vibrant Pesto Pasta Salad! This dish is not only a feast for the eyes but also a delicious way to fuel your school day. Imagine the fresh green of pesto, the bright red of cherry tomatoes, and the creamy white of mozzarella all mixed together. It’s a colorful explosion that will make lunchtime feel special.
You can whip this up in just 20 minutes using whole wheat or gluten-free pasta. It’s perfect for busy mornings! Plus, you can make it ahead of time, allowing all the flavors to blend beautifully overnight.
Here’s how to create this delightful salad:
Recipe Overview:
– Servings: 4
– Prep Time: 10 minutes
– Cook Time: 10 minutes
– Total Time: 20 minutes
– Calories: 350 per serving
Nutrition Information:
– Calories: 350
– Protein: 12g
– Carbs: 50g
– Fat: 14g
Ingredients:
– 2 cups cooked pasta
– ½ cup pesto (homemade is best!)
– 1 cup cherry tomatoes, halved
– 1 cup mozzarella balls
– ¼ cup pine nuts
– Salt and pepper to taste
Instructions:
1. In a large bowl, mix the cooked pasta with the pesto, cherry tomatoes, mozzarella balls, and pine nuts.
2. Gently toss everything together until well combined.
3. Season with salt and pepper to your liking before serving.
Tips:
– Use homemade pesto for a richer flavor.
– Store in the fridge overnight for even better taste.
This Pesto Pasta Salad is not just another meal; it’s a delightful experience that will brighten your lunch hour. Enjoy every bite and watch your friends envy your colorful, tasty dish!
Pesto Pasta Salad
Editor’s Choice

![100% Compostable Food Storage Bags [Snack 150 Pack] Eco-Friendly Freezer...](https://m.media-amazon.com/images/I/71tOdZDW59L._AC_UL320_.jpg "25 Aesthetic Lunch Ideas for School That Look as Good as They Taste 57")
100% Compostable Food Storage Bags [Snack 150 Pack] Eco-Friendly Freezer…
11. Savory Oatmeal Bowls

Savory Oatmeal Bowls are a fantastic twist on a classic breakfast dish. They transform humble oats into a hearty lunch that satisfies your hunger and your taste buds. Imagine creamy oatmeal cooked in rich vegetable broth, topped with vibrant sautéed mushrooms and fresh spinach. A sprinkle of cheese adds a delightful finish, making each bite comforting and visually appealing. Pinterest users are loving this trend for its simplicity and beauty!
Ready to whip up this delicious meal? It’s budget-friendly and quick, taking only about 15 minutes from start to finish. You can easily swap ingredients based on what you have at home, making it a flexible choice for busy school days. This dish not only nourishes your body but also brightens your lunch hour, making it perfect for sharing with friends or enjoying solo.
Here’s how to make your own Savory Oatmeal Bowls:
Ingredients:
– 1 cup rolled oats
– 2 cups vegetable broth
– 1 cup mushrooms, sliced
– 2 cups spinach
– ¼ cup cheese (cheddar or feta)
– Salt and pepper to taste
Instructions:
1. Cook the rolled oats in vegetable broth according to the package directions.
2. In a skillet, sauté the mushrooms and spinach until tender.
3. Serve the oatmeal in bowls, topping each with the sautéed veggies and cheese.
4. Season with salt and pepper before serving.
For an extra protein boost, add a fried egg on top. You can also experiment with toppings like creamy avocado or spicy hot sauce for a flavor kick!
• Use vegetable broth for a savory twist
• Choose different cheeses based on your preference
• Add a fried egg for a protein boost
• Experiment with toppings like avocado or hot sauce
This meal is not only tasty but also incredibly flexible. Enjoy your Savory Oatmeal Bowl, and let your creativity shine!
Savory oatmeal bowls show that aesthetic lunch ideas for school can be cozy, colorful, and fast. Swap sweet flavors for veggie-packed broth, mushrooms, and spinach, and you’ve got a lunch that’s delicious, shareable, and Instagram-worthy.
Savory Oatmeal Bowls
Editor’s Choice
![Bamboo Cutting Boards for Kitchen [Set of 3] Wood Cutting Board for Chop...](https://m.media-amazon.com/images/I/81gLwPfpWbL._AC_UL320_.jpg "25 Aesthetic Lunch Ideas for School That Look as Good as They Taste 60")
Bamboo Cutting Boards for Kitchen [Set of 3] Wood Cutting Board for Chop…

60 Sets (120-Piece) Deli Containers with Lids, 32/16/8 oz X 20 Set Each,…
Brieftons 5-Blade Vegetable Spiralizer: Strongest-Heaviest Spiral Slicer…
12. Mediterranean Chickpea Salad

Discover the delightful Mediterranean Chickpea Salad, a quick and colorful lunch that’s as tasty as it is healthy. Packed with protein and vibrant veggies, this salad bursts with fresh flavors that transport you to sun-kissed shores. Just picture crisp cucumbers, juicy tomatoes, and fragrant parsley all mingling together. This dish not only satisfies your hunger but also makes your lunchbox look appealing!
Perfect for meal prep, you can whip it up in just 10 minutes. This makes it a hassle-free option for busy school days. Plus, it keeps well in the fridge for a couple of days, so you can enjoy it again and again!
Here’s how to make it:
Ingredients:
– 1 can chickpeas, drained and rinsed
– 1 cucumber, diced
– 1 cup cherry tomatoes, halved
– ¼ red onion, diced
– ¼ cup parsley, chopped
– 2 tablespoons olive oil
– Juice of 1 lemon
– Salt and pepper to taste
Instructions:
1. In a large bowl, combine the chickpeas, cucumber, cherry tomatoes, red onion, and parsley.
2. Drizzle with olive oil and the fresh lemon juice. Toss everything together until well mixed.
3. Season with salt and pepper to your liking. Serve immediately, or chill it for a refreshing treat!
Want to add a little extra flavor? Add feta cheese for a salty kick! This salad is a great way to include more veggies in your diet while keeping things delicious.
Quick tips:
– UseChoosePickAdd
Mediterranean Chickpea Salad
Editor’s Choice
Bento Box Adult Lunch Box, Containers for Adults Men Women with 4 Compar…

TrendPlain 16oz/470ml Glass Olive Oil Sprayer for Cooking – 2 in 1 Olive…

OXO Good Grips Salad Spinner | Lettuce Spinner | Fruit Washer | Fruit Wa…
13. Mini Quiches

Mini quiches are a delightful solution for school lunches that are both fun and tasty. These bite-sized treats offer endless filling possibilities, making them a favorite among kids and adults alike. Picture golden, flaky pastry shells filled with a fluffy mix of eggs, cheese, and vibrant vegetables like spinach and bell peppers. They not only please the palate but also look beautiful on a lunch tray, adding a splash of color. As seen on Pinterest, these mini quiches are trending for their versatility and visual appeal.
To make these mini quiches at home, you don’t need to break the bank. Use pre-made pastry shells or even phyllo dough for a quick prep. You can customize the fillings based on what’s in your fridge or your child’s preferences. This means you can whip them up ahead of time and store them, making busy mornings a breeze. They’re perfect for any meal, whether warm or cold, and your little ones will love them!
Ingredients:
– 1 package pre-made pastry shells
– 4 eggs
– 1 cup cheese (cheddar, gouda, or feta)
– 1 cup vegetables (spinach, bell peppers, onions)
– Salt and pepper to taste
Instructions:
1. Preheat your oven to 375°F (190°C).
2. In a bowl, whisk the eggs. Add in your chopped vegetables, cheese, salt, and pepper.
3. Carefully fill each pastry shell with the egg mixture, leaving a little space at the top.
4. Bake for about 20 minutes, or until the egg is set and the tops are golden and puffy.
5. Let them cool slightly before enjoying.
Pro Tips:
– Make these ahead of time and keep them in the fridge for an easy grab-and-go lunch.
– Choose veggies that your child loves for a personalized touch!
– Freeze extras for quick meals later; they keep well for up to 2 months.
– Experiment with different cheeses or spices to keep things exciting!
Mini quiches make lunchtime not just nutritious but also exciting. With a bit of creativity, you can turn a simple meal into a culinary adventure that your kids will look forward to every day!
Fun fact: Mini quiches bake in about 15 minutes and stack neatly in a lunchbox, saving time and space. They’re a colorful way to pack eggs, cheese, spinach, and peppers into a kid-friendly bite—a perfect example of aesthetic lunch ideas for school.
Mini Quiches
Editor’s Choice

Athens Foods Mini Fillo Dough Shells 15 Per Box (3 Boxes)

HUAKENER 2 Pcs Silicone Muffin Top Pans for Baking, 4 Inch Non-Stick Rou…

Rubbermaid Brilliance Food Storage Containers BPA Free Airtight Lids Ide…
14. Almond Butter and Banana Sandwiches

Looking for a quick, tasty, and healthy lunch idea? Almond Butter and Banana Sandwiches are perfect for you! These sandwiches not only satisfy your sweet tooth but also pack a nutritious punch. Imagine creamy almond butter spread generously on whole grain bread, layered with fresh banana slices, and dusted with a sprinkle of cinnamon. This combination creates a delightful explosion of flavors and textures in every bite. Plus, you can cut them into fun shapes to make lunchtime feel special!
Let’s dive into how to make this simple sandwich. It only takes about five minutes, so it’s great for busy mornings. You can also keep it budget-friendly by using ingredients you likely already have at home. This sandwich is not just a treat; it’s a meal that helps you feel good and energized throughout the day.
Recipe Overview:
– Servings: 2
– Prep Time: 5 minutes
– Cook Time: 0 minutes
– Total Time: 5 minutes
– Calories: 300
Nutrition Information:
– Calories: 300
– Protein: 10g
– Carbs: 45g
– Fat: 12g
Ingredients List:
– 4 slices of whole grain bread
– 2 tablespoons of almond butter
– 1 ripe banana, sliced
– Cinnamon for sprinkling
Instructions:
1. Spread almond butter on two slices of whole grain bread.
2. Layer the banana slices evenly on top of the almond butter.
3. Place the other slices of bread on top and sprinkle with cinnamon.
4. Cut into fun shapes or halves for easy eating.
Want to make it even better?
• Use a cookie cutter for fun shapes.
• Add a drizzle of honey for extra sweetness.
• Sprinkle chia seeds for added nutrition.
• Mix in some berries for a fresh twist.
Frequently Asked Questions:
– Can you use peanut butter instead? Yes! It works just as well, and you’ll still enjoy a tasty lunch.
This sandwich is a great way to shake up your lunch routine while keeping things healthy and delicious. Enjoy every bite!
Almond Butter and Banana Sandwiches
Editor’s Choice

Cutter Shapes Set Different Sizes Cookie Cutters Set Fruit Cookie Pastry…

365 by Whole Foods Market, Organic Creamy Almond Butter, 16 Ounce

Garden of Life Chia Seeds 100% Organic for Smoothies, Pudding – Raw Orga…
15. Veggie Sushi Bowls

Imagine enjoying a colorful bowl that brings the delicious flavors of sushi right to your lunchbox. Veggie Sushi Bowls are not just tasty; they look stunning too! Picture fluffy sushi rice or quinoa layered with fresh, crunchy veggies like cucumber and bell peppers, creamy avocado, and a sprinkle of sesame seeds. Drizzle on some soy sauce or spicy mayo, and you’ve got a meal that’s as pleasing to the eyes as it is to the taste buds. Pinterest is buzzing with these bowls, making them a trendy choice for school lunches!
Creating these bowls is easy and budget-friendly. You can buy sushi rice or quinoa in bulk, which helps save money. Plus, you can swap in any veggies you have in your fridge. This flexibility means you can mix and match ingredients based on what’s in season or on sale. When you take a bite, you’ll feel the freshness and crunch, making lunchtime feel special and satisfying.
Here’s how to make your own Veggie Sushi Bowls:
Ingredients:
– 1 cup sushi rice or quinoa, cooked
– 1 avocado, sliced
– 1 cucumber, sliced
– 1 carrot, shredded
– ½ bell pepper, thinly sliced
– Soy sauce or spicy mayo for drizzling
– Sesame seeds for garnish
Instructions:
1. Start with a bowl and add your cooked sushi rice or quinoa as the base.
2. Layer the slices of avocado, cucumber, shredded carrot, and bell pepper on top.
3. Drizzle your choice of soy sauce or spicy mayo for that extra kick.
4. Finish by sprinkling sesame seeds over the top before serving.
Feel free to get creative! You can add any veggies you love or even throw in some spicy sriracha for an extra kick.
Tips:
– Use cauliflower rice for a low-carb option.
– Pick seasonal veggies for the freshest flavors.
– Add edamame for a protein boost.
– Choose brown rice for added fiber and nutrients.
With these delicious bowls, lunchtime will always be something to look forward to!
Veggie Sushi Bowls
Editor’s Choice


4 Pack Bento Lunch Box Set 3 Compartment Food Storage Containers Wheat S…

Terrasoul Superfoods Organic Black Sesame Seeds, 6 Lbs (3 Pack) – Raw | …
16. Greek Yogurt Parfaits

Greek Yogurt Parfaits are an excellent choice for a quick and healthy lunch that’s as beautiful as it is delicious. Imagine creamy Greek yogurt layered with bright, juicy berries and crunchy granola, all packed into a clear jar. This colorful treat not only satisfies your taste buds but also catches the eye, making lunchtime a little more special. Plus, it’s a hit on social media, with many food lovers sharing their parfait creations.
To make your parfaits even more enjoyable, consider prepping them the night before. This way, you’ll have a grab-and-go lunch ready to enjoy. Use seasonal berries for the best flavor and freshness. You can also mix in other ingredients like nuts or seeds to add texture and extra nutrients. These parfaits feel indulgent, yet they support a balanced diet.
Ingredients List:
– 2 cups Greek yogurt
– 1 cup mixed berries (strawberries, blueberries, raspberries)
– ½ cup granola
– Honey for drizzling (optional)
Instructions:
1. Start by spooning half of the Greek yogurt into a clear jar.
2. Add a layer of mixed berries on top.
3. Sprinkle a layer of granola over the berries.
4. Repeat the layers until the jar is full, finishing with granola on top.
5. Drizzle honey if you like a touch of sweetness before serving.
Tips for Success:
– Use seasonal fruits for the best taste.
– Make them the night before for a hassle-free lunch.
– Mix in nuts for added crunch and nutrition.
– Play with flavors by trying different types of yogurt.
With these tips in mind, you’ll create a satisfying lunch that not only nourishes but also delights. Feel free to experiment with flavors and textures to make your parfaits uniquely yours!
Greek Yogurt Parfaits
Editor’s Choice

Glass Regular Mouth Mason Jars, 16 oz Clear Glass Jars with Silver Metal…

KIND Healthy Grains Clusters, Granola Variety Pack, Healthy Snacks, Good…

FAGE Total Greek Yogurt, 0% Nonfat, Plain, 32 oz
17. Veggie-Packed Egg Muffins

Imagine starting your busy school day with a healthy, satisfying lunch that you can grab on the go. Veggie-Packed Egg Muffins are the perfect solution! These colorful, bite-sized treats are not only easy to make, but they also pack a nutritious punch. You can customize them with your favorite vegetables, making them a fun and delicious choice for lunch. Plus, they look great and taste even better!
To make these muffins, simply whisk together some eggs and toss in chopped veggies like vibrant spinach and crunchy bell peppers. Pour the mixture into a muffin tin and let them bake until they’re fluffy and set. The result? A delightful, portable meal that’s perfect for busy days. Pinterest loves these easy egg muffins, and you’ll see why once you try them!
Here’s how to whip up your own batch of Veggie-Packed Egg Muffins. They’re budget-friendly and great for meal prep. You can easily store them in the fridge or even freeze them for later. With so many filling options, you can keep your lunches exciting all week long!
Recipe Overview:
– Servings: 12 muffins
– Prep Time: 10 minutes
– Cook Time: 15 minutes
– Total Time: 25 minutes
– Calories: 100 per muffin
Nutrition Information:
– Calories: 100
– Protein: 7g
– Carbs: 2g
– Fat: 7g
Ingredients List:
– 10 eggs
– 1 cup spinach, chopped
– 1 cup bell peppers, diced
– ½ cup cheese (optional)
– Salt and pepper to taste
Instructions:
1. Preheat your oven to 350°F (175°C).
2. In a mixing bowl, whisk the eggs. Add the chopped spinach, bell peppers, cheese (if using), salt, and pepper.
3. Pour the egg mixture into a greased muffin tin, filling each cup about ¾ full.
4. Bake for 15 minutes or until the eggs are fully set.
5. Let the muffins cool for a few minutes before removing them from the tin.
Quick Tips:
– Store in the fridge for an easy grab-and-go meal.
– Choose your favorite veggies to mix things up.
– Freeze leftovers for quick lunches later.
– Add herbs or spices for extra flavor!
These muffins are not just a meal; they’re a versatile canvas for your culinary creativity. Enjoy them warm or cold, and watch as they brighten up your lunch routine!
Veggie-Packed Egg Muffins
Editor’s Choice

Silicone Muffin Pans for Baking with Metal Frame, Egg Bite Molds, Cupcak…
50 Pack (100-Piece) 32 oz Meal Prep Containers Reusable with Lids 3-Comp…
18. Chickpea and Avocado Smash

Chickpea and Avocado Smash is the perfect solution for anyone craving a healthy, tasty lunch that’s also visually stunning. This protein-rich spread combines the creaminess of avocado with the hearty texture of chickpeas, creating a delightful mix that you can enjoy in various ways. The bright green hue and rich flavor will make lunchtime feel like a special occasion. Serve it on whole grain bread, scoop it with crunchy crackers, or dip fresh veggies for a nutritious boost.
Ready to whip up this simple yet delicious dish? It takes just 10 minutes to prepare, making it an ideal choice for busy school mornings. You can even customize the spices to suit your taste. Want a little kick? Add a dash of chili flakes or some garlic powder. Plus, it keeps well in the fridge for a couple of days, so you can make extra for later!
Here’s how to make it:
Ingredients:
– 1 can chickpeas, drained and rinsed
– 1 ripe avocado
– Juice of 1 lemon
– A handful of cilantro, chopped
– Salt and pepper to taste
Instructions:
1. In a mixing bowl, mash the chickpeas and avocado together until creamy.
2. Stir in the lemon juice, chopped cilantro, salt, and pepper until well combined.
3. Spread on whole grain bread, pair with crackers, or enjoy with fresh veggies.
This Chickpea and Avocado Smash is not only quick to prepare but also packed with nutrients. Each serving has about 250 calories, making it a satisfying lunch option. Enjoy the creamy texture and zesty flavor, and feel good knowing you’re fueling your body right!
• Add garlic powder for an extra kick
• Store in the fridge for up to two days
• Use frozen chickpeas if fresh ones aren’t available
• Experiment with spices to personalize your flavor
Chickpea and Avocado Smash
Editor’s Choice


Palouse Brand Certified Glyphosate Residue Free Chickpeas | Garbanzo Bea…

Nature’s Own Perfectly Crafted Multigrain Bread, Thick Sliced Non-GMO Sa…
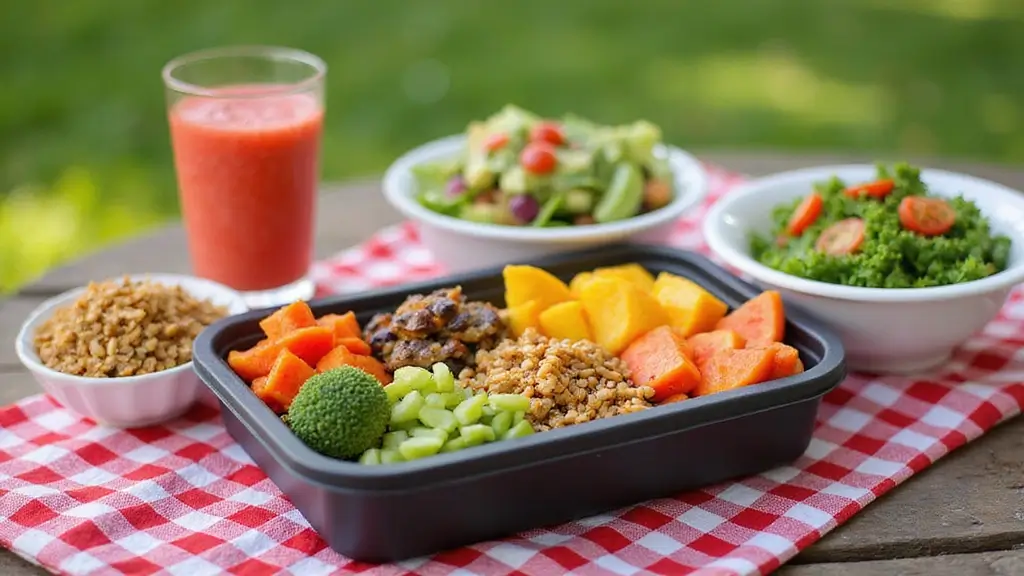
19. Savory Food Jars

Savory Food Jars are a fun and trendy way to enjoy a delicious lunch at school. They not only look great but also keep your meal fresh and flavorful. Imagine vibrant layers of brown rice, grilled chicken, and colorful veggies all packed neatly in a jar. This method is all about easy preparation and creative choices. You can customize your jar with whatever ingredients you love, making lunchtime exciting every day.
To get started, think about what you enjoy eating. You can use grains like quinoa or couscous, proteins like chickpeas or turkey, and a variety of fresh vegetables. Not only is this method budget-friendly, but it also helps you eat a balanced meal. Plus, the jars are portable and perfect for on-the-go lifestyles, making your lunch feel special every day.
Here’s how to make your own Savory Food Jars:
Ingredients:
– 1 cup cooked brown rice
– 1 cup grilled chicken, diced
– 1 cup mixed greens
– ½ cup cherry tomatoes, halved
– ¼ cup vinaigrette dressing
Instructions:
1. Start by layering the cooked brown rice at the bottom of your jar.
2. Next, add the diced grilled chicken on top.
3. Layer in the mixed greens and halved cherry tomatoes.
4. Just before you’re ready to eat, pour the vinaigrette dressing on top and shake to mix!
Make sure to use jars with wide openings for easy access. Feel free to swap in seasonal veggies or different proteins to keep things fresh and delicious. You can prepare these jars up to three days in advance, making them a hassle-free option for busy mornings.
• Choose your favorite grains for a hearty base
• Add proteins like beans or tofu for variety
• Include seasonal veggies for freshness
• Use jars with wide mouths for easy eating
These Savory Food Jars are perfect for adding a pop of color and flavor to your school lunch, making them not just nutritious but also visually appealing. Enjoy your meal, and let lunchtime be a little adventure every day!
Savory Food Jars
Editor’s Choice

Ball Wide Mouth Glass Mason Jars with Lids and Bands, Used for Canning, …

5Pcs Condiment Squeeze Bottles – 2 OZ Salad Dressing Container To Go, Le…

Lunch box Lunch bag for men women Insulated Lunchbox Lunch bags for Work…
20. Tofu and Veggie Stir-Fry

Looking for a quick, colorful lunch that’s as tasty as it is healthy? Tofu and veggie stir-fry is the answer! This vibrant dish combines crispy tofu with a mix of fresh vegetables, like bell peppers, broccoli, and snap peas, all tossed in a savory sauce. Serve it over brown rice or quinoa for a filling meal that’s sure to impress.
Not only does this stir-fry look stunning with its rainbow of colors, but it’s also bursting with flavor and nutrients. Plus, it’s a breeze to make! In just 25 minutes, you can whip up a lunch that’s perfect for school or work. Here’s how to do it:
Recipe Overview:
– Servings: 4
– Prep Time: 10 minutes
– Cook Time: 15 minutes
– Total Time: 25 minutes
– Calories: 300
Nutrition Information:
– Calories: 300
– Protein: 18g
– Carbs: 40g
– Fat: 10g
Ingredients:
– 1 block firm tofu, cubed
– 2 cups mixed vegetables (bell peppers, broccoli, snap peas)
– 2 tablespoons soy sauce
– 1 tablespoon sesame oil
– 1 tablespoon cornstarch (optional for extra crispiness)
Instructions:
1. Heat sesame oil in a skillet over medium heat.
2. Add the cubed tofu and sauté until golden brown, about 5-7 minutes.
3. Toss in your mixed vegetables and stir-fry until they are crisp-tender, about 3-4 minutes.
4. Drizzle the soy sauce over the mixture and cook for an additional minute.
5. Serve hot over quinoa or brown rice.
Want to amp up the flavor? Add some minced ginger or garlic for a delicious twist. If you like a kick, sprinkle in some red pepper flakes!
Frequently Asked Questions:
– Can I use other proteins? Absolutely! Chicken or shrimp can be great substitutes.
– What if I don’t like tofu? You can swap it with tempeh or just load up on veggies!
Tofu and Veggie Stir-Fry
Editor’s Choice
Bento Box Adult Lunch Box, Containers for Adults Men Women with 4 Compar…

CAROTE Nonstick Frying Pan Skillet,Non Stick Granite Fry Pan Egg Pan Ome…

EIKS Excelity Cruet Dispenser Set for Olive Oil Vinegar Soy Sauce with E…
21. Apple and Cheese Snacks

Elevate your lunch game with Apple and Cheese Snacks. This simple combination not only tastes amazing but also brings a burst of color and excitement to your lunchbox. Crisp apple slices, paired with creamy cheese, create a delightful mix of sweet and savory that satisfies your cravings. Sprinkle a bit of cinnamon on top to add a warm, inviting flavor. Arrange them beautifully on a plate, and you’ll feel like you’re dining at a café instead of just eating lunch!
Preparing this snack is a breeze. Just grab your favorite apple and cheese, and you’re ready to go. This lunch idea is not only quick but also budget-friendly. You can choose any cheese you love—cheddar, gouda, or mozzarella work beautifully. Plus, since apples are usually inexpensive, this snack won’t break the bank. It’s the perfect treat for busy days or when you want something special that feels indulgent.
Here’s how to make your Apple and Cheese Snacks:
Ingredients:
– 1 apple, sliced
– 1 cup cheese (try cheddar, gouda, or mozzarella)
– Cinnamon for sprinkling (optional)
Instructions:
1. Slice the apple into wedges.
2. Arrange the cheese slices next to the apple wedges on a plate.
3. If you like, sprinkle cinnamon over the apple slices.
Tips for Enjoying This Snack:
– Use
– Keep
– Add
– Pack
This snack is not just tasty; it’s also a great way to add vitamins and protein to your day. Enjoy it during lunch, or pack it for an after-school snack. You’ll love how it makes you feel energized and satisfied! Editor’s Choice Cauliflower Tabbouleh Salad is your new go-to for a fresh and healthy lunch! This dish swaps traditional bulgur for finely grated cauliflower, creating a low-carb twist that still bursts with flavor. You’ll mix in chopped parsley, diced tomatoes, and a zingy lemon dressing. The bright colors make this salad not just tasty, but a feast for the eyes, too. Perfect for meal prep, it stays fresh for several days, making your weekdays a breeze! Let’s get started on this easy and delicious recipe. It takes just 15 minutes, and with only a few ingredients, it’s budget-friendly. You can enjoy this salad on its own or as a side dish. It’s ideal for school lunches or a light dinner, making your meals feel special without the hassle. Recipe Overview: – Servings: 4 – Prep Time: 15 minutes – Cook Time: 0 minutes – Total Time: 15 minutes – Calories: 120 Nutrition Information: – Calories: 120 – Protein: 5g – Carbs: 15g – Fat: 6g Ingredients List: – 1 head cauliflower, grated – 1 cup parsley, chopped – 1 cup cherry tomatoes, diced – 1 lemon, juiced – 2 tablespoons olive oil – Salt and pepper to taste Instructions: 1. Grate the cauliflower using a food processor or box grater. 2. In a large bowl, combine the grated cauliflower, parsley, tomatoes, lemon juice, olive oil, salt, and pepper. 3. Toss everything together until well mixed. 4. Chill in the refrigerator for about 30 minutes to let the flavors meld. Want an extra crunch? Add diced cucumber! It adds freshness that pairs perfectly with the other ingredients. If you’re short on time, you can even use frozen cauliflower; just thaw and grate it before mixing. Tips for a Perfect Salad: – Choose fresh ingredients for the best flavor. – Store in an airtight container for maximum freshness. – Experiment with herbs like mint or basil for a twist. – Serve chilled for a refreshing meal on warm days. This Cauliflower Tabbouleh Salad is not just a meal; it’s a delightful experience that fits seamlessly into your busy lifestyle. Enjoy every bite! Editor’s Choice Indulge in the delightful combination of fruit and nut butter with this simple Nut Butter Fruit Dip. This tasty treat not only elevates your fruit game but also brings a pop of color to your lunch box. Imagine creamy almond or peanut butter swirling with yogurt and a hint of honey—it’s a feast for the eyes and the palate. Pair it with vibrant, fresh slices of apples, bananas, or strawberries, and you have an aesthetic lunch that looks as good as it tastes. Popular on Instagram and Pinterest, this dip is a trendy way to enjoy healthy snacks while keeping your meals visually appealing. Making this dip is a breeze and won’t break the bank. You can use any nut butter you have on hand or opt for a dairy-free yogurt for a vegan twist. This recipe is perfect for busy school days, as it takes just five minutes to prepare. Plus, it’s a fantastic way to sneak in some protein and healthy fats, making each bite satisfying. Enjoy this dip on its own or as part of a balanced lunch, and watch your friends ask for the recipe! Recipe Overview: – Servings: 2 – Prep Time: 5 minutes – Cook Time: 0 minutes – Total Time: 5 minutes – Calories: 200 per serving Nutrition Information: – Calories: 200 – Protein: 8g – Carbs: 25g – Fat: 10g Ingredients: – 1/4 cup nut butter (almond or peanut) – 1/4 cup yogurt (Greek or regular) – 1 teaspoon honey – Mixed fruit for dipping (apples, bananas, strawberries) Instructions: 1. In a small bowl, combine the nut butter, yogurt, and honey. Mix until smooth. 2. Slice your favorite fruits for dipping. 3. Serve the dip alongside the fruit and enjoy! Feel free to get creative! Experiment with different nut butters like cashew or sunflower for new flavors. Adjust the sweetness by adding more or less honey to suit your taste. This dip is versatile and can easily adapt to your preferences, making it a staple for your lunch rotation. • Mix different nut butters for variety • Choose yogurt based on dietary needs • Pair with seasonal fruits for freshness • Add a sprinkle of cinnamon for extra flavor Enjoy your Nut Butter Fruit Dip as a delicious and healthy addition to your school lunches! Editor’s Choice Roasted Vegetable Wraps are the perfect solution for a quick and colorful lunch that makes use of leftover veggies. You can mix and match your favorites, like zucchini, bell peppers, and carrots, to create a delicious wrap that not only tastes great but also looks vibrant. Imagine biting into a wrap filled with tender, roasted vegetables, paired with creamy hummus or rich cream cheese. It’s a feast for the eyes and the taste buds! These wraps are not only easy to prepare but also ideal for busy days. Just roast your veggies, spread your favorite dip on a tortilla, and you’re ready to go. Plus, they’re perfect for lunchboxes or picnics, making them a versatile option for any meal. Here’s how to make your own Roasted Vegetable Wraps: Recipe Overview: – Servings: 2 – Prep Time: 10 minutes – Cook Time: 20 minutes – Total Time: 30 minutes – Calories: 350 per wrap Nutrition Information: – Calories: 350 – Protein: 8g – Carbs: 45g – Fat: 12g Ingredients: – 2 tortillas – 1 zucchini, sliced – 1 bell pepper, sliced – 1 carrot, sliced – 1 tablespoon olive oil – Hummus or cream cheese for spreading Instructions: 1. Preheat your oven to 400°F (200°C). 2. Toss the sliced vegetables with olive oil and spread them on a baking sheet. Roast for about 20 minutes until they’re tender and slightly caramelized. 3. Spread a generous layer of hummus or cream cheese on each tortilla. 4. Fill the tortillas with the roasted vegetables, roll them tightly, and slice them in half. 5. Serve with extra dip on the side for a delicious touch. Tips: – Use seasonal veggies for a fresher taste. – Add protein like grilled chicken or chickpeas for a heartier meal. Can I make these ahead of time? Absolutely! Just wrap them tightly and store them in the fridge for a convenient grab-and-go option. Now you have a simple yet flavorful lunch idea that’s sure to brighten your day! Enjoy your colorful and nutritious Roasted Vegetable Wraps! Editor’s Choice Chia Seed Pudding is not just a tasty treat; it’s a canvas for your creativity! This nutritious dish is perfect for lunch or a quick snack, and it looks as good as it tastes. Imagine a jar filled with creamy pudding layered with vibrant fruits and crunchy nuts. It’s a feast for both the eyes and the stomach, making it a hit in school lunches. Pinterest is full of inspiration for stunning chia pudding presentations, so get ready to impress! To make this delicious pudding, you’ll need to plan ahead. It’s super easy to prepare and budget-friendly too. Just mix chia seeds with almond milk and a splash of maple syrup, then let it chill overnight. The next day, add your favorite fruits for a colorful display. This dish not only satisfies your hunger but also boosts your energy levels, perfect for those long school days! Here’s how to whip up your own Chia Seed Pudding: Ingredients: – ½ cup chia seeds – 2 cups almond milk (or any milk of choice) – 2 tablespoons maple syrup (adjust to taste) – Fresh fruits for layering (berries, bananas, mango, etc.) – Optional toppings: nuts, seeds, or granola for crunch Instructions: 1. In a medium bowl, combine chia seeds, almond milk, and maple syrup. Stir well to avoid clumping. 2. Cover the bowl and refrigerate it overnight, or for at least 4 hours, until it thickens. 3. In the morning, give the pudding a good stir. Layer it in a jar or bowl with your choice of fresh fruits. 4. Top with nuts or granola for added texture. Serve chilled and enjoy! Tips to elevate your pudding: – Use coconut milk for a tropical twist. – Add a dash of vanilla extract for extra flavor. – Mix in cocoa powder for a chocolatey treat. – Top with honey or agave if you like it sweeter. You can keep this pudding in the fridge for up to 5 days, making it a perfect grab-and-go option for busy mornings. With endless flavor combinations, you’ll never get bored. Enjoy your beautiful, nutritious Chia Seed Pudding! Chia Seed Pudding turns lunchtime into a tiny dessert science project. Prep a jar tonight, layer with fresh fruit, and your aesthetic lunch ideas for school will look as good as they taste. It’s easy, portable, and totally Instagram-worthy. Editor’s Choice Making your school lunches both aesthetic and nutritious is easier than you think. These 25 ideas not only cater to your taste buds but also make your lunchtime visually appealing. With these creative and healthy options, you’re sure to enjoy every bite and impress your friends along the way! Note: We aim to provide accurate product links, but some may occasionally expire or become unavailable. If this happens, please search directly on Amazon for the product or a suitable alternative. This post contains Amazon affiliate links, meaning I may earn a small commission if you purchase through my links, at no extra cost to you. Looking for easy ways to make your lunch visually appealing? Consider creating a colorful bento box! Fill it with fresh fruits, veggies, and protein sources like grilled chicken or chickpeas. You can also try arranging your meals in fun shapes or using vibrant containers to add an aesthetic touch to your school lunches. Remember, healthy lunch options aren’t just about taste; they can also be a feast for the eyes! Making healthy lunch options fun for kids can be a game-changer! Use cookie cutters to create fun shapes from sandwiches or fruits. Introduce colorful meal prep by incorporating a variety of fresh and seasonal ingredients. You can also create a DIY lunch assembly activity where kids can build their own wraps or salads, making lunchtime both creative and enjoyable! Absolutely! Some creative school lunches can be prepared in under 15 minutes. Try assembling a wrap using whole grain tortillas, hummus, and your choice of veggies and proteins. Another quick idea is to pack visually appealing snacks like yogurt parfaits with layers of fruit and granola. These options not only save time but also ensure your lunch is both nutritious and delightful! Bento boxes are perfect for making meals fun and visually appealing! Try a sushi-inspired bento with rice, cucumber, and avocado, or a rainbow bento featuring a variety of colorful fruits and veggies. You can also include small portions of dips like guacamole or tzatziki. The key is to mix textures and colors to create an engaging lunch experience that your kids will love. Get creative with your fun bento box ideas and watch lunchtime become a highlight of the day! To ensure your child’s lunches are both nutritious and aesthetic, focus on incorporating a balance of food groups. Include a source of protein, healthy fats, and plenty of colorful fruits and vegetables. Use vibrant containers and arrange the food artfully. You can also explore colorful meal prep techniques, such as layering ingredients in clear containers for a beautiful presentation. This way, you create a lunch that’s not just healthy, but also visually stunning! aesthetic lunch ideas healthy lunch options colorful meal prep visually appealing snacks creative school lunches fun bento box ideas easy lunch prep kid-friendly meals seasonal ingredients nutritious snacks balanced meals quick and easyApple and Cheese Snacks
4 Pack Bento Lunch Box Set 3 Compartment Food Storage Containers Wheat S…
PrepWorks Dishwasher Safe Apple Slicer and Corer – 16-Slice Thin Apple C…
True Gourmet 4-Piece Stainless Steel Cheese Knife Set with Acacia Wood H…
22. Cauliflower Tabbouleh Salad
Cauliflower Tabbouleh Salad
Electric Salt and Pepper Grinder Set Automatic Battery Pepper Mill Shake…
4 Pack Bento Lunch Box Set 3 Compartment Food Storage Containers Wheat S…
YARRAMATE 16oz/470ml Glass Olive Oil Sprayer for Cooking with Stickers, …
23. Nut Butter Fruit Dip
Nut Butter Fruit Dip
FAGE Total Greek Yogurt, 0% Nonfat, Plain, 32 oz
WhiteRhino Grape Cutter Grape Slicer for Toddlers Baby,Grape Cherry Toma…
24. Roasted Vegetable Wraps
Roasted Vegetable Wraps
Flipwrap Tortilla Wrap Maker Kit – Create Mess-Free, Restaurant-Quality …
Organic Extra Virgin Olive Oil – Premium Single-Source Greek EVOO with C…
Bento Box Adult Lunch Box, Containers for Adults Men Women with 4 Compar…
25. Chia Seed Pudding
Chia Seed Pudding
BetterBody Foods Organic Chia Seeds 2 lbs, 32 Oz, with Omega-3, Non-GMO,…
HOMBERKING 10 Pack Borosilicate Glass Meal Prep Containers with Locking …
Califia Farms – Organic Unsweetened Almond Milk, 48 Oz, Dairy Free, Keto…
Conclusion
Frequently Asked Questions
What Are Some Easy Aesthetic Lunch Ideas for School?
How Can I Make Healthy Lunch Options More Fun for My Kids?
Are There Any Creative School Lunches That Are Quick to Prepare?
What Are Some Fun Bento Box Ideas for School Lunches?
How Can I Ensure My Child’s Lunches Are Nutritious Yet Aesthetic?
Related Topics