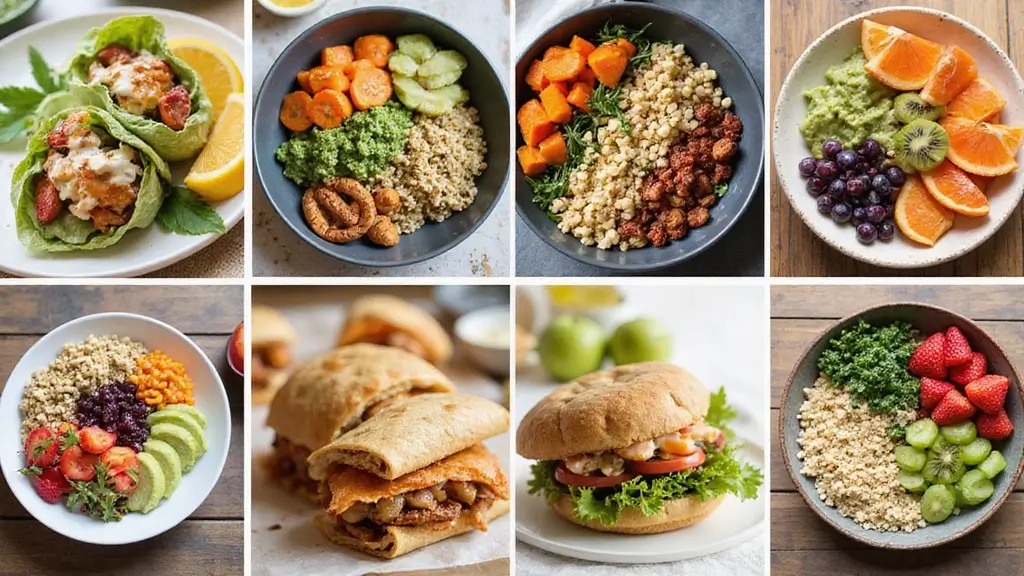
School lunches can feel like a never-ending cycle of boring sandwiches and uninspired snacks. If you’re a high schooler or a parent trying to pack something different, I totally get you. We’ve all been there, staring at the same old lunch options and wishing for something that actually excites our taste buds. That’s why I put together this list of 28 lunch ideas for high schoolers that are cool and nutritious.
If you’re someone who wants to break free from the mundane or just crave a little variety, this post is for you. High school is busy, and with so much going on, it’s easy to let lunch fall by the wayside. You deserve meals that not only fuel your day but also make lunchtime something to look forward to.
In this post, you’ll find a wide range of ideas that are simple, tasty, and packed with nutrients. From wraps to bento boxes, there’s something here for everyone. These meals are easy to prepare and perfect for those hectic mornings. Plus, you’ll impress your friends with how cool your lunch looks. Let’s dive in and make lunchtime fun again!
1. Turkey and Avocado Wrap
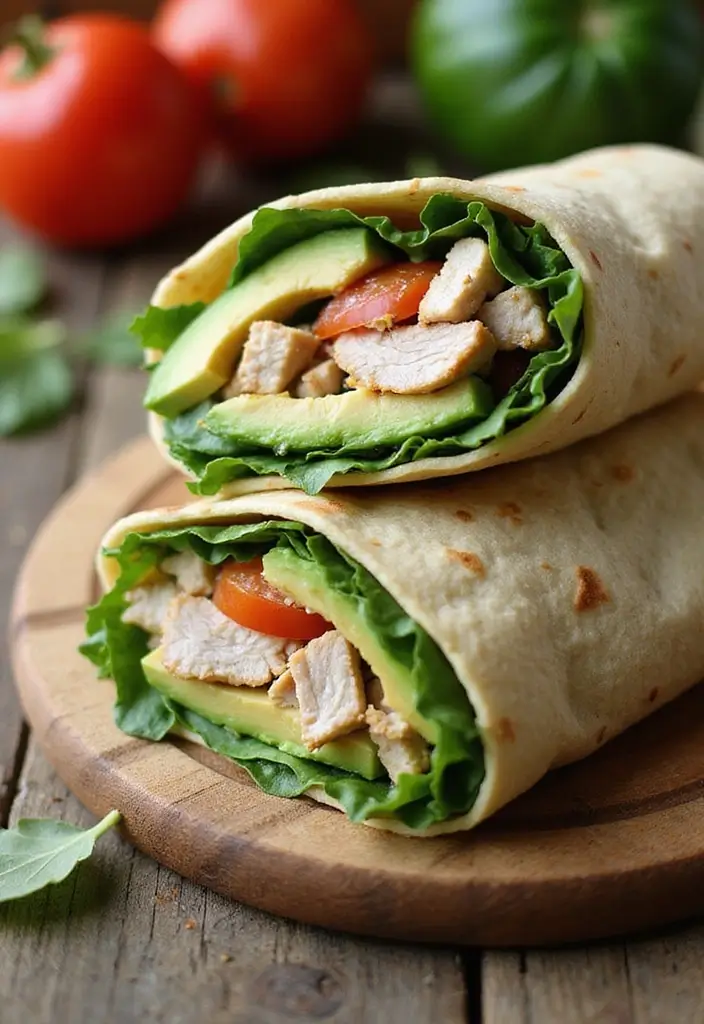
Start your lunch adventure with a delicious Turkey and Avocado Wrap! This meal is a fantastic choice for high schoolers because it combines lean protein and healthy fats to keep energy levels high and minds sharp throughout the school day.
To make this wrap, you’ll need a whole wheat tortilla. Spread a thin layer of hummus on it for a tasty twist. Then, pile on some sliced turkey, fresh spinach, and creamy avocado slices. Roll it tightly and cut it in half for easy handling. With its vibrant colors and satisfying flavor, this wrap is both cool and nutritious—perfect for lunch!
Recipe Overview
– Servings: 1
– Prep Time: 10 minutes
– Cook Time: 0 minutes
– Total Time: 10 minutes
– Calories: About 350
Nutrition Information
– Protein: 24g
– Carbs: 30g
– Fat: 15g
Ingredients
– 1 whole wheat tortilla
– 3-4 slices of turkey breast
– 1/2 ripe avocado, sliced
– 1 handful of fresh spinach
– 2 tablespoons hummus
Step-by-Step Instructions
1. Lay the tortilla flat on a clean surface.
2. Spread the hummus evenly over the tortilla.
3. Layer on the turkey, spinach, and avocado slices.
4. Roll the tortilla tightly from one end to the other.
5. Cut in half and pack it in your lunch container.
Want to add some extra crunch? Try adding shredded carrots or cucumber slices. These not only add texture but also boost the nutritional value!
Frequently Asked Questions
Q: Can I use a different type of meat?
A: Absolutely! Chicken or ham would taste great too.
This Turkey and Avocado Wrap is a simple, speedy lunch option that your taste buds will love. Give it a try and enjoy a healthy, satisfying meal!
Turkey and Avocado Wrap
Editor’s Choice
Mission 10 Inch Carb Balance Whole Wheat Tortillas LARGE Burrito 8 ct 20…
 Amazon$27.67

4 Pack Bento Lunch Box Set 3 Compartment Food Storage Containers Wheat S…
 Amazon$13.98
2. Quinoa Salad with Chickpeas
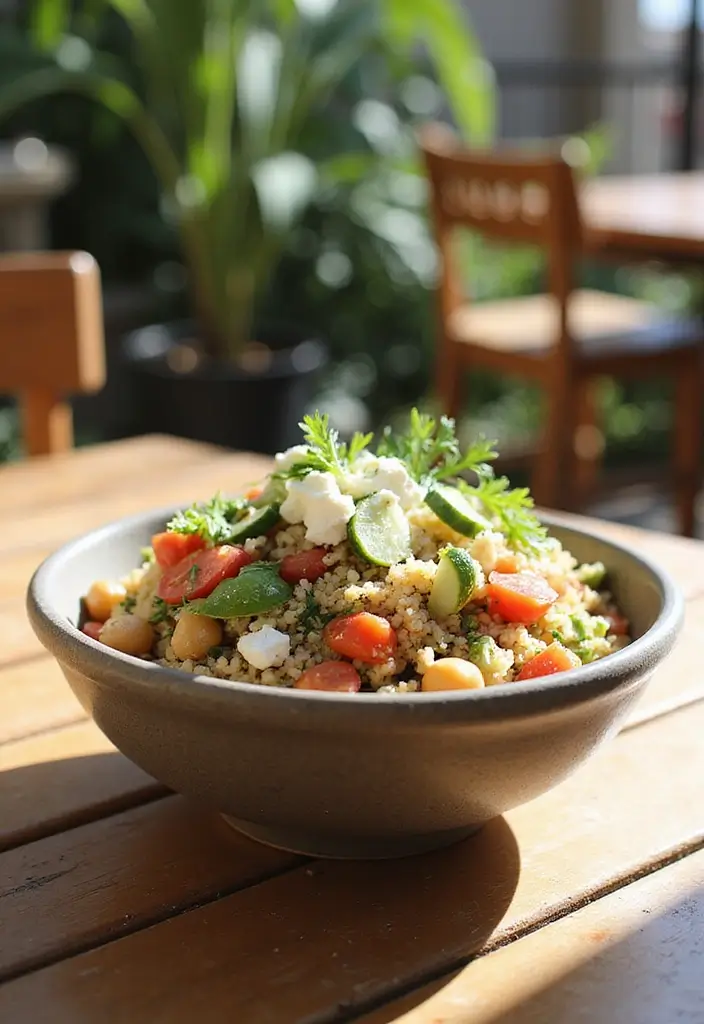
Quinoa Salad with Chickpeas is more than just a dish—it’s a delicious way to fuel your day! Quinoa is a fantastic grain that’s not only trendy but also loaded with protein and fiber. This salad is super easy to make and can be customized with whatever veggies you have in your fridge. It’s a perfect choice for busy high schoolers who want a nutritious meal that’s both cool and refreshing.
To whip up this salad, start by mixing cooked quinoa with rinsed chickpeas. Toss in diced cucumbers and halved cherry tomatoes for crunch and color. A drizzle of olive oil and fresh lemon juice brings everything together. For a tasty twist, add crumbled feta cheese on top. This salad is great for meal prep too—make it ahead of time and enjoy it cold for lunch!
Recipe Overview
– Servings: 2
– Prep Time: 15 minutes
– Cook Time: 15 minutes (for quinoa)
– Total Time: 30 minutes
– Calories: Approximately 300
Nutrition Information
– Protein: 12g
– Carbs: 45g
– Fat: 9g
Ingredients
– 1 cup cooked quinoa
– 1 cup canned chickpeas, rinsed
– 1/2 cucumber, diced
– 1 cup cherry tomatoes, halved
– 2 tablespoons olive oil
– Juice of 1 lemon
– 1/4 cup feta cheese (optional)
Step-by-Step Instructions
1. Cook the quinoa according to package directions and let it cool.
2. In a large bowl, mix the quinoa, chickpeas, cucumber, and cherry tomatoes.
3. Drizzle olive oil and lemon juice over the salad.
4. Toss everything together and add feta if you like.
5. Pack it up in a lunch container and enjoy!
Feel free to mix in any other veggies you love. Adding different colors not only makes the salad more appealing but also boosts its nutritional value!
Frequently Asked Questions
Q: Can I add more protein?
A: Absolutely! Grilled chicken or tofu make great additions.
This Quinoa Salad is your go-to for a meal that’s not only tasty but also good for you. Enjoy making it your own!
Quinoa Salad with Chickpeas
Editor’s Choice

Rubbermaid Brilliance Food Storage Containers BPA Free Airtight Lids Ide…
 Amazon$34.99
Nature’s Earthly Choice Premium Organic Quinoa 4 lbs. (pack of 3) A1
 AmazonCheck Price
Pompeian Robust Extra Virgin Olive Oil, Contains Polyphenols, First Cold…
 Amazon$15.64
3. DIY Sushi Rolls
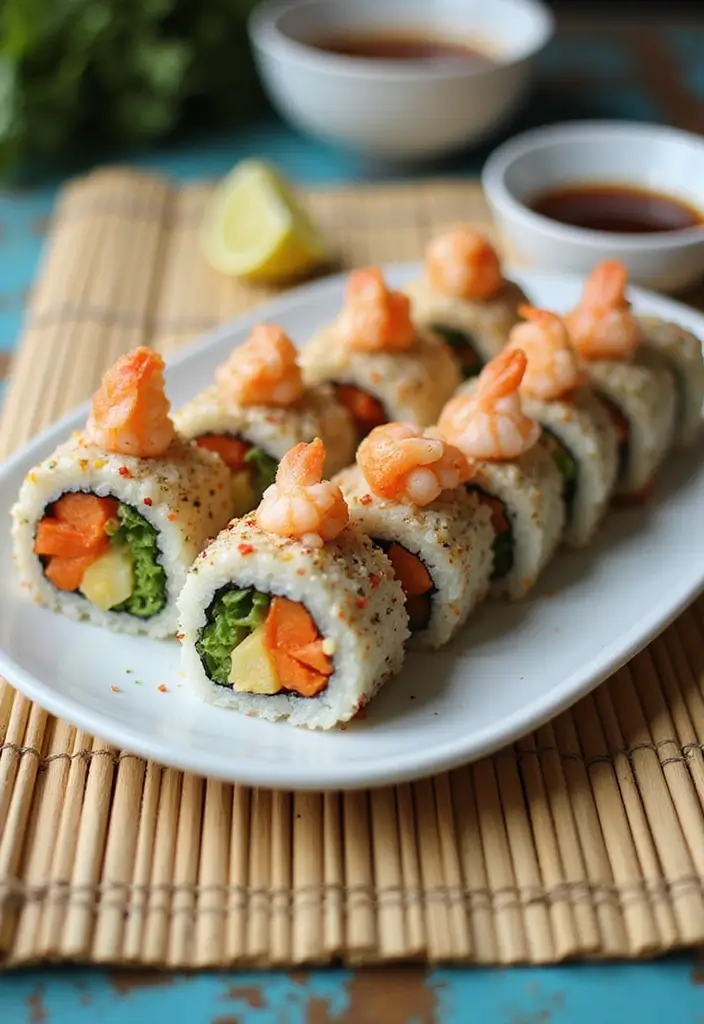
Make lunchtime fun with DIY Sushi Rolls! You don’t need to hit a fancy restaurant to enjoy sushi; you can easily create your own at home. This interactive meal allows you to get creative while loading up on healthy ingredients. Your teen will love the chance to roll their own sushi and show it off to friends!
To start, gather sushi rice, nori sheets, and tasty fillings like cucumber, avocado, and cooked shrimp. Sushi-making is simple: spread rice on a nori sheet, add your favorite fillings, and roll it up tightly. Serve with a splash of soy sauce for that authentic flavor. It’s a lunch that’s not just nutritious but also packed with fun.
Here’s how to make your sushi rolls:
Recipe Overview
– Servings: 2
– Prep Time: 20 minutes
– Cook Time: 10 minutes (for sushi rice)
– Total Time: 30 minutes
– Calories: Approximately 400
Nutrition Information
– Protein: 20g
– Carbs: 60g
– Fat: 10g
Ingredients
– 1 cup sushi rice
– 2 nori sheets
– 1/2 cucumber, sliced thin
– 1/2 avocado, sliced thin
– 1/2 cup cooked shrimp (optional)
– Soy sauce for dipping
Step-by-Step Instructions
1. Cook the sushi rice according to package instructions and let it cool.
2. Place a nori sheet on a bamboo sushi mat.
3. Spread a layer of sushi rice on the nori, leaving an inch at the top.
4. Add cucumber, avocado, and shrimp on the rice.
5. Roll it up tightly, using the mat for support.
6. Slice into pieces and pack with soy sauce on the side.
Want to switch things up? Try using cooked chicken or tofu for a different taste!
Frequently Asked Questions
Q: Can I use brown rice instead?
A: Yes! Just know it will change the texture slightly.
Get ready to enjoy a delicious and creative lunch! Your DIY sushi rolls are sure to impress and satisfy.
DIY Sushi Rolls turn lunch ideas for high schoolers into a mini chef project—fun, affordable, and protein-packed. Pro tip: prep fillings the night before, roll at lunch, and watch friends try to copy your sushi skills.
DIY Sushi Rolls
Editor’s Choice

2 Pack Bamboo Sushi Rolling Mat, Sushi roll maker,Sushi making kit, Bamb…
 Amazon$4.99

CHOI’s 1(Daechun) Roasted Seaweed, Gim, Sushi Nori /(50 full sheets) /Go…
 Amazon$14.99
4. Mediterranean Couscous Bowl
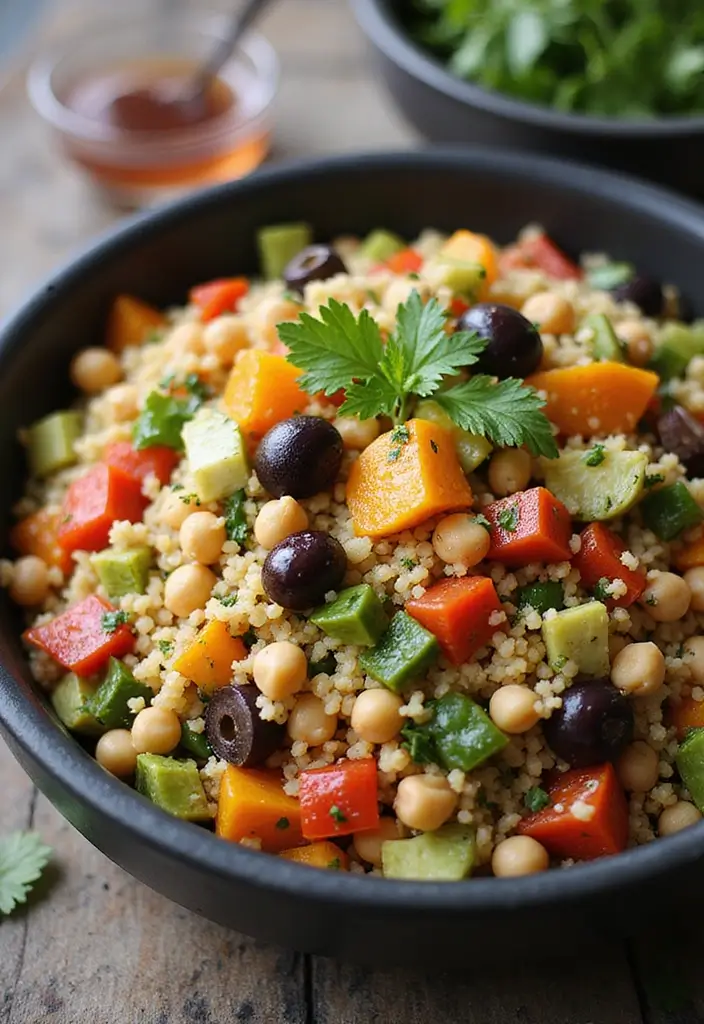
Get ready to treat your taste buds to a Mediterranean Couscous Bowl that’s as colorful as it is delicious! This dish is packed with fresh veggies, protein-rich chickpeas, and a tangy dressing that brings everything together. It’s like a mini vacation for your palate and a great way to switch up your lunch routine!
To whip this up, start by cooking couscous according to the package directions. Once it cools, mix in diced bell peppers, Kalamata olives, juicy cherry tomatoes, and hearty chickpeas. A drizzle of olive oil and a splash of red wine vinegar adds that zesty Mediterranean flair. This bowl is light, nutritious, and perfect for a midday meal.
Here’s a quick look at the recipe:
Recipe Overview
– Servings: 2
– Prep Time: 15 minutes
– Cook Time: 10 minutes
– Total Time: 25 minutes
– Calories: Approximately 350
Nutrition Information
– Protein: 12g
– Carbs: 54g
– Fat: 10g
Ingredients
– 1 cup couscous
– 1 bell pepper, diced
– 1 cup cherry tomatoes, halved
– 1 cup canned chickpeas, rinsed
– 1/4 cup Kalamata olives, sliced
– 2 tablespoons olive oil
– 1 tablespoon red wine vinegar
Step-by-Step Instructions
1. Cook couscous according to the package instructions and let it cool.
2. In a large bowl, combine the couscous, bell pepper, chickpeas, olives, and cherry tomatoes.
3. Drizzle with olive oil and red wine vinegar.
4. Toss everything together and pack it in a lunch container.
Feel free to sprinkle crumbled feta or fresh herbs on top for an extra burst of flavor!
Frequently Asked Questions
Q: Can I make this ahead of time?
A: Absolutely! This couscous bowl lasts in the fridge for up to three days, making it a perfect meal prep option.
Mediterranean Couscous Bowl
Editor’s Choice

Bento Box Adult Lunch Box, Containers for Adults Men Women with 4 Compar…
 Amazon$9.99
Amazon Grocery, Garbanzo Beans, Non GMO, 16 Oz (Previously Amazon Fresh,…
 Amazon$1.19
5. Pesto Pasta Salad
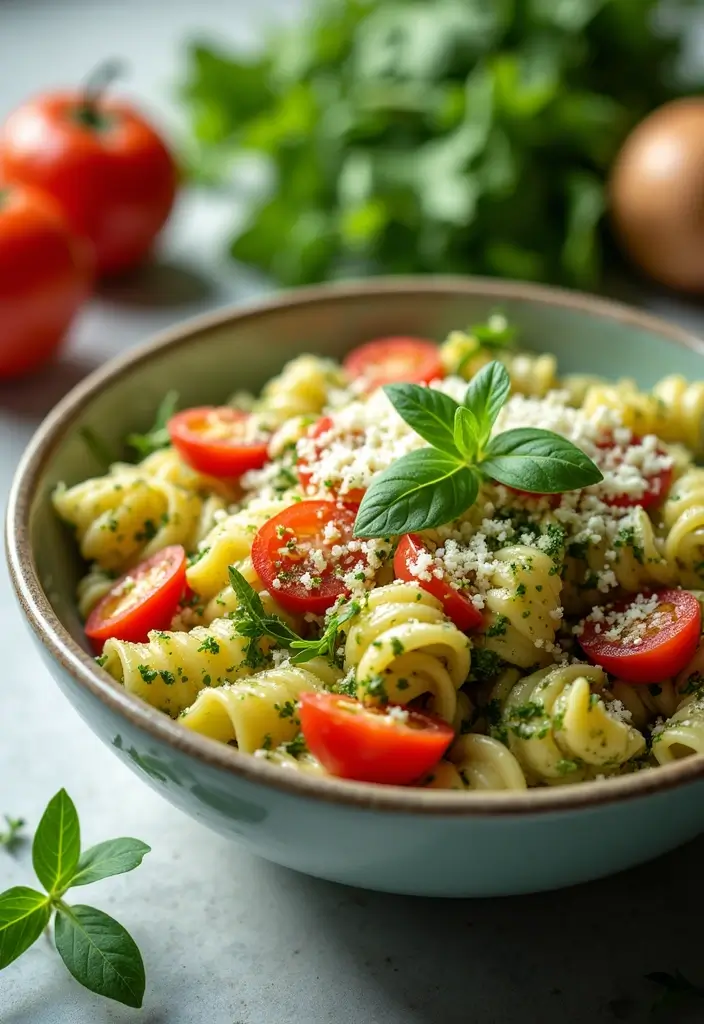
Meet the delicious Pesto Pasta Salad, your new go-to lunch! This dish is colorful, tasty, and packed with nutrients. It’s perfect for busy high schoolers who want a meal that’s both cool and satisfying. Plus, it’s a smart way to use up leftover pasta. The fresh pesto gives everything a burst of flavor, while the veggies add crunch and color.
Making this salad is a breeze. Just cook your favorite pasta, mix it with pesto, and toss in some fresh vegetables. It’s not just easy; it’s a guaranteed lunchtime favorite!
Recipe Overview
– Servings: 2
– Prep Time: 10 minutes
– Cook Time: 10 minutes
– Total Time: 20 minutes
– Calories: Approximately 450
Nutrition Information
– Protein: 15g
– Carbs: 60g
– Fat: 18g
Ingredients
– 2 cups cooked pasta (choose any shape you like)
– 1/2 cup pesto sauce (store-bought or homemade)
– 1/2 bell pepper, chopped
– 1 cup cherry tomatoes, halved
– 1/2 cup green beans, chopped and blanched
Step-by-Step Instructions
1. Cook the pasta according to the package instructions, then let it cool.
2. In a large bowl, mix the pasta with the pesto until well-coated.
3. Add the bell pepper, cherry tomatoes, and green beans.
4. Toss everything together gently and pack it up for lunch.
For an extra kick, sprinkle some parmesan cheese on top before serving!
Frequently Asked Questions
Q: Can I add protein?
A: Yes! Grilled chicken, chickpeas, or even tofu work great in this salad.
Enjoy your Pesto Pasta Salad, and make lunchtime fun and nutritious!
Pesto Pasta Salad
Editor’s Choice

MARCATO DESIGN 8320 Atlas Pasta Machine, Made in Italy, Includes Pasta C…
 Amazon$99.00
Filippo Berio Pesto, Organic Classic Basil, 6.7 Ounce Glass Jar, Gluten …
 AmazonCheck Price
50 Pack (100-Piece) 24 oz Meal Prep Containers Reusable with Lids, Sturd…
 Amazon$23.99
6. Smoothie Bowl
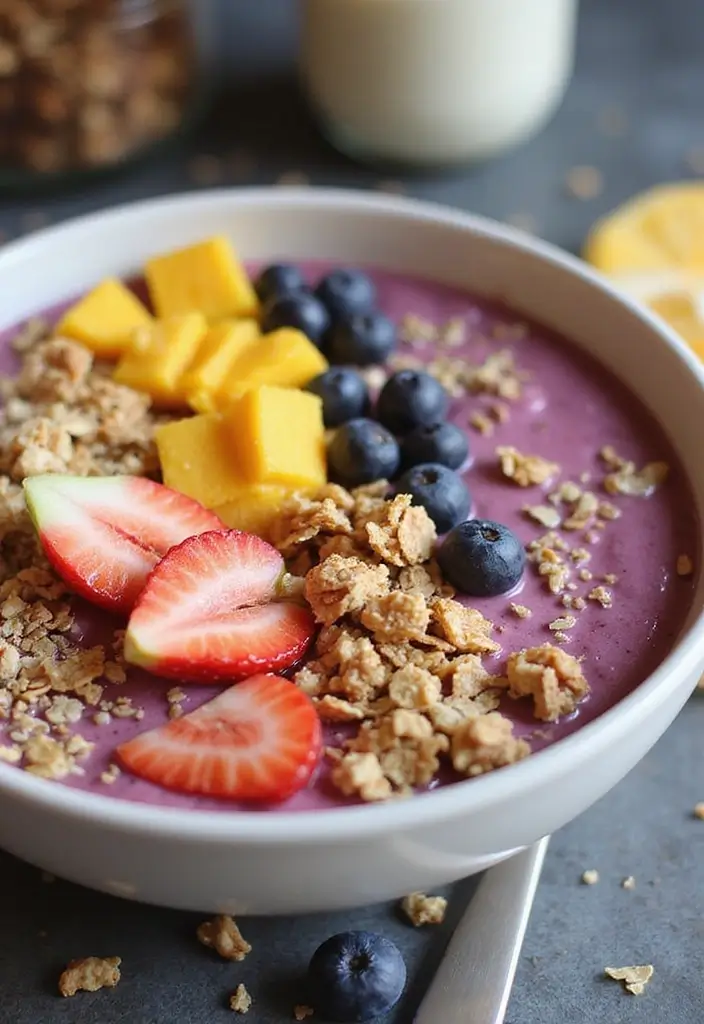
Smoothie bowls are a hit, especially among busy high schoolers! They combine nutrition and fun, making lunchtime exciting. You can whip one up in just 5 minutes and even prep it the night before. Picture this: a bowl filled with creamy goodness, topped with crunchy granola and colorful fruits. It’s not just a smoothie; it’s a feast for the eyes and the taste buds!
Start by blending your favorite fruits. Think bananas, spinach, and mixed berries, all swirled together with almond milk for a creamy texture. Pour the vibrant mix into a bowl and let your creativity shine with toppings like granola, nuts, and seeds. This way, you enjoy a smoothie with the added crunch of your favorite toppings!
Here’s how to make your delicious smoothie bowl:
Ingredients:
– 1 ripe banana
– 1 cup fresh spinach
– 1/2 cup mixed berries (fresh or frozen)
– 1/2 cup almond milk
– 1/4 cup granola (for topping)
– 1 tablespoon chia seeds (for topping)
Instructions:
1. In a blender, combine the banana, spinach, mixed berries, and almond milk. Blend until smooth.
2. Pour the smoothie into a bowl.
3. Top with granola and chia seeds for added texture.
4. Dive in right away or store it in a container for a tasty lunch later!
Feel free to mix and match fruits to keep things fresh and exciting. This recipe is not only easy but also budget-friendly, making it perfect for students on the go.
Quick Tips:
– Use any fruits you love, like mango or kiwi.
– Choose almond milk or yogurt for different flavors.
– Pack it in a container for an on-the-go meal.
– Add a scoop of protein powder for an extra boost!
Smoothie bowls are not just a meal; they’re a canvas for your creativity. Enjoy every spoonful!
Smoothie Bowl
Editor’s Choice

Bentgo Prep – 20-Piece 3-Compartment Reusable Meal Prep Containers with …
 Amazon$14.99
Nature Valley Protein Granola, Oats and Honey Granola, Resealable Snack …
 Amazon$5.98
7. Veggie Hummus Cups
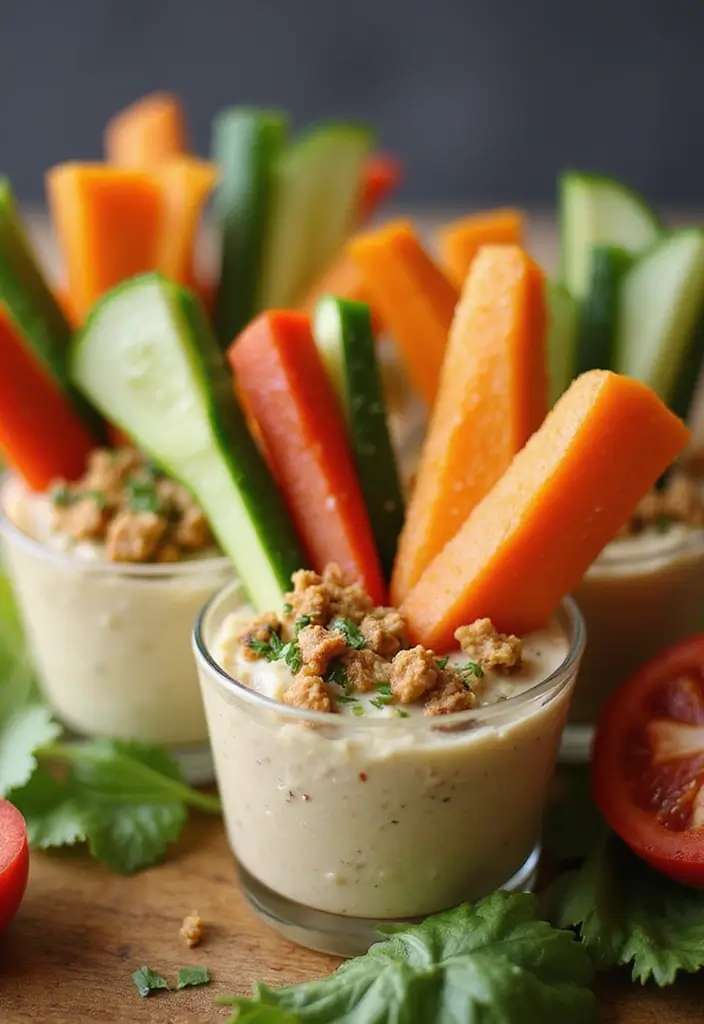
Imagine a lunch that’s not only fun to eat but also packed with nutrients. Veggie Hummus Cups are the perfect solution! These colorful cups are easy to prepare and make for a healthy meal you can take anywhere. They look great and encourage you to munch on fresh vegetables, making lunchtime exciting.
To make your Veggie Hummus Cups, simply grab some small cups or bowls. Fill them with your favorite hummus and stick in a variety of colorful veggies. Think about using sliced carrots, crunchy celery, sweet bell peppers, and juicy cherry tomatoes. This vibrant mix not only appeals to the eyes but also provides a delightful crunch.
Recipe Overview
– Servings: 1
– Prep Time: 10 minutes
– Cook Time: 0 minutes
– Total Time: 10 minutes
– Calories: Approximately 150
Nutrition Information
– Protein: 5g
– Carbs: 20g
– Fat: 8g
Ingredients
– 1/2 cup hummus
– 1/4 cup sliced carrots
– 1/4 cup sliced bell pepper
– 1/4 cup sliced celery
– 1/4 cup cherry tomatoes
Step-by-Step Instructions
1. Take a small cup and add hummus to the bottom.
2. Arrange the sliced veggies upright in the hummus.
3. Pack in a lunch container and enjoy your nutritious creation!
Feel free to use your favorite store-bought hummus or whip up a homemade batch for extra flavor.
Frequently Asked Questions
Q: Can I use different veggies?
A: Yes! Use any veggies you love or have on hand for variety.
Veggie Hummus Cups are not just a meal; they’re a way to make healthy eating fun! Enjoy this colorful treat and feel great about your lunch choice.
Veggie Hummus Cups
Editor’s Choice

Munchkin Snack Catcher Toddler Snack Cups, No Spill, 2 Pack, Blue/Green
 Amazon$5.42
Mezete Hummus Snack Pack with Breadsticks | Traditional Classic Hummus |…
 AmazonCheck Price
OXO Good Grips Handheld Mandoline Slicer for Kitchen, Adjustable Vegetab…
 Amazon$18.50
8. Caprese Skewers
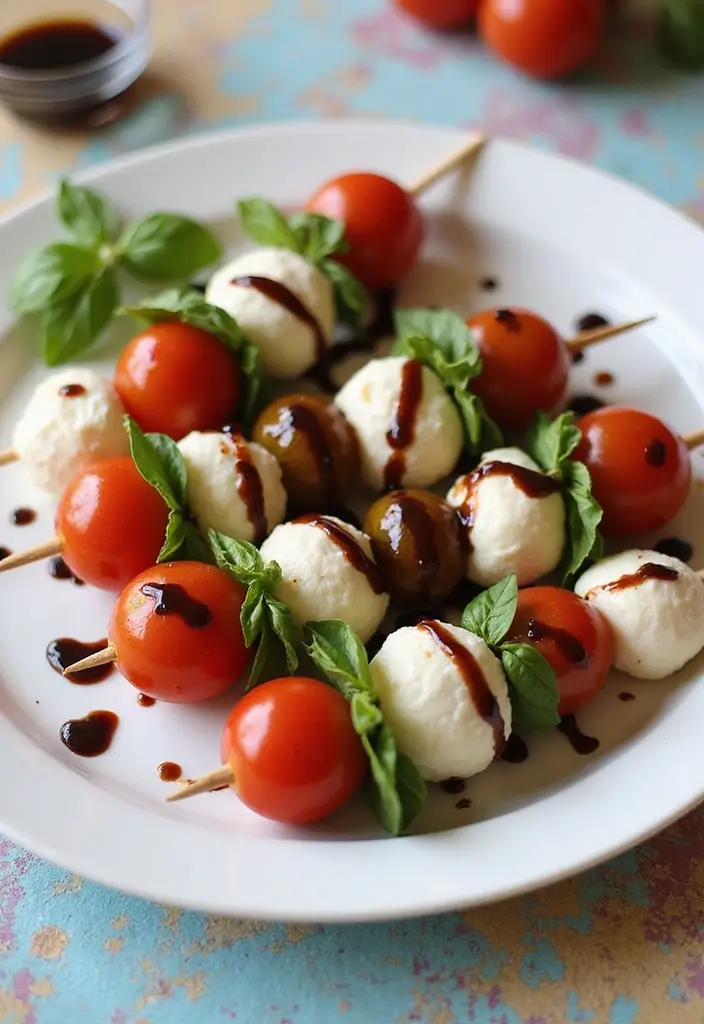
Imagine a snack that’s both fun to eat and visually appealing. Enter the delightful Caprese Skewers! These tasty bites combine the freshness of cherry tomatoes, creamy mozzarella, and aromatic basil. They’re perfect for high schoolers looking for a nutritious lunch or a cool snack on a hot day. Plus, they’re super easy to make!
Start by threading cherry tomatoes, mozzarella balls, and fresh basil leaves onto skewers. A drizzle of balsamic glaze adds a zing that elevates the whole experience. Not only will you impress your friends, but you’ll also enjoy a refreshing treat that packs a nutritional punch!
Here’s a quick overview of this easy recipe:
– Servings: 2
– Prep Time: 10 minutes
– Cook Time: 0 minutes
– Total Time: 10 minutes
– Calories: About 200
Nutrition Information:
– Protein: 15g
– Carbs: 10g
– Fat: 12g
Ingredients:
– 1 cup cherry tomatoes
– 1 cup mozzarella balls
– Fresh basil leaves
– Balsamic glaze for drizzling
Step-by-Step Instructions:
1. Take a skewer and thread a cherry tomato, followed by a basil leaf, and a mozzarella ball.
2. Repeat this pattern until the skewer is full.
3. Drizzle with balsamic glaze just before serving or packing.
Want to switch it up? Try adding avocado slices for a creamy twist!
Frequently Asked Questions
Q: Can I prepare these ahead of time?
A: Absolutely! Just hold off on the balsamic glaze until you’re ready to eat.
Enjoy these Caprese Skewers for a lunch that’s both cool and nutritious. They’re sure to be a hit!
Caprese Skewers
Editor’s Choice

HOPELF 12″ Natural Bamboo Skewers for BBQ,Appetiser,Fruit,Cocktail,Kabob…
 Amazon$6.99
Alessi Balsamic Vinegar Reduction, Autentico from Italy, Ideal on Capres…
 Amazon$26.99
Bento Box Adult Lunch Box, Containers for Adults Men Women with 4 Compar…
 Amazon$9.99
9. Fruit and Yogurt Parfait
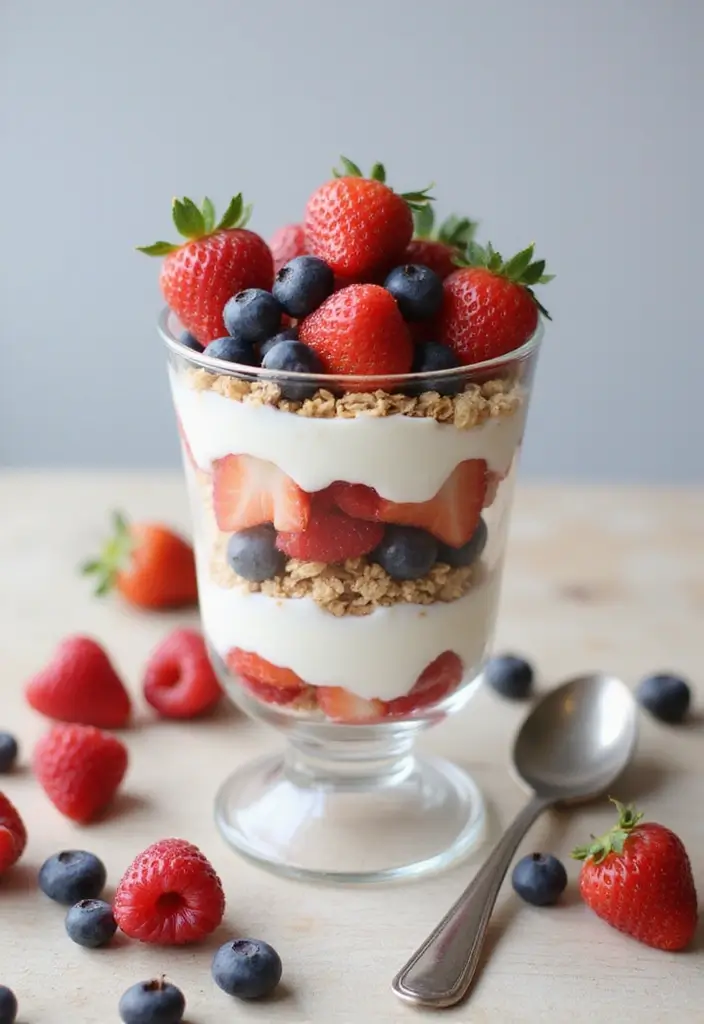
If you’re looking for a lunch that feels like a treat but is still healthy, a Fruit and Yogurt Parfait is the perfect choice! This tasty option has everything you need: protein, vitamins, and a fun way to enjoy your fruit. You can mix colorful fruits like strawberries, blueberries, and bananas to make it not only delicious but also visually appealing. Top it off with crunchy granola and a little drizzle of honey, and you have a meal that’s as pleasing to the eyes as it is to the taste buds.
Let’s get into how you can whip one up in just five minutes! Here’s what you’ll need:
Ingredients:
– 1 cup yogurt (choose Greek for extra protein or regular for a creamier texture)
– 1/2 cup mixed fruits (berries, banana, or any seasonal fruits)
– 1/4 cup granola (for that satisfying crunch)
– Drizzle of honey (optional for sweetness)
Step-by-Step Instructions:
1. Grab a glass or bowl and start with a layer of yogurt at the bottom.
2. Next, add a layer of your mixed fruits. Get creative with combinations!
3. Sprinkle granola on top for some delightful crunch.
4. Repeat the layers until your glass or bowl is full. Finish off with a drizzle of honey if you like it sweeter.
Enjoy your parfait fresh! The granola tastes best when it’s crunchy, so try to eat it soon after you make it.
Quick Tips:
– Use seasonal fruits for the best flavor and nutrition.
– Pack it in a portable container for an easy lunch on the go.
– Switch up the yogurt flavors to keep things interesting.
– Experiment with toppings like nuts or seeds for added texture.
A Fruit and Yogurt Parfait is not just a meal; it’s a fun and nutritious way to break the lunch routine. Perfect for those busy school days, it brings a little sweetness to your lunch while keeping it healthy!
Fruit and Yogurt Parfait
Editor’s Choice

Nature Valley Crunchy Granola, Oats and Honey, Resealable Snack Pouch, F…
 Amazon$6.57
10. Chicken Caesar Wrap
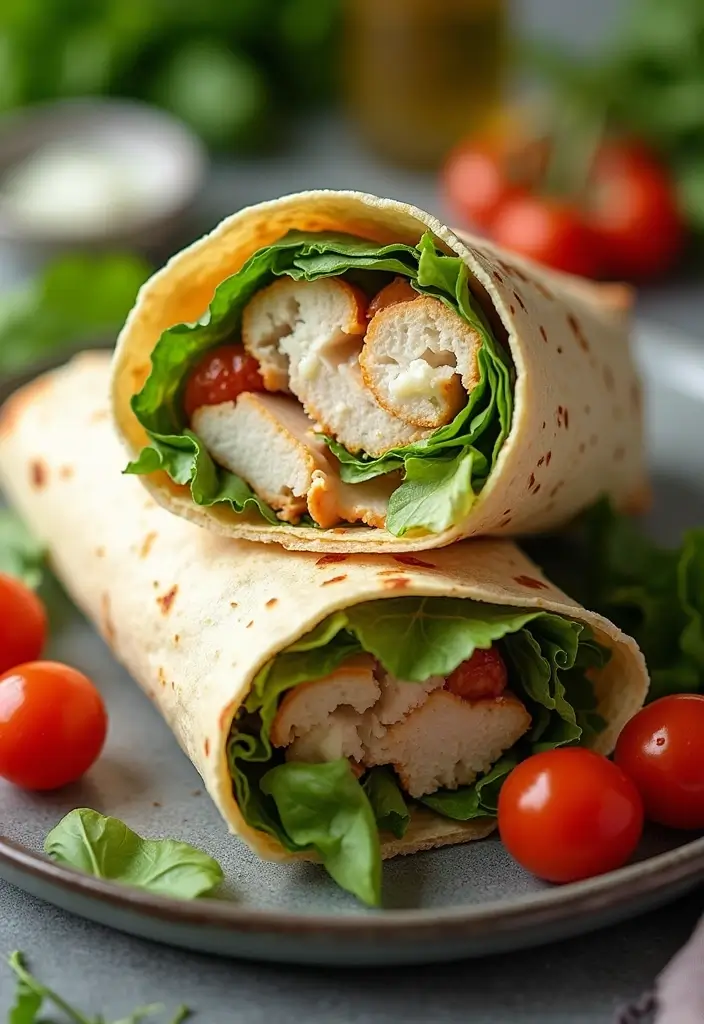
The Chicken Caesar Wrap is a lunch classic that never fails to impress. It’s packed with bold flavors and is super easy to make, making it a go-to meal for high schoolers. This wrap is not just delicious; it’s also nutritious, ensuring you stay energized throughout your day.
Start with a soft whole wheat tortilla as your base. Layer on tender grilled chicken strips, crisp Romaine lettuce, and a sprinkle of Parmesan cheese. Drizzle with creamy Caesar dressing for that extra zing. Roll it up tightly, slice it in half, and you’ve got a tasty lunch that travels well.
This meal is perfect for busy students needing something satisfying between classes!
Recipe Overview
– Servings: 1
– Prep Time: 10 minutes
– Cook Time: 10 minutes (for chicken)
– Total Time: 20 minutes
– Calories: Approximately 400
Nutrition Information
– Protein: 30g
– Carbs: 40g
– Fat: 15g
Ingredients
– 1 whole wheat tortilla
– 1 cup grilled chicken, sliced
– 1 cup Romaine lettuce
– 1/4 cup grated Parmesan cheese
– 2 tablespoons Caesar dressing
Step-by-Step Instructions
1. Lay your tortilla flat on a clean surface.
2. Add Romaine lettuce, grilled chicken, and Parmesan cheese on top.
3. Drizzle Caesar dressing over the ingredients.
4. Tightly roll the tortilla, then cut it in half for easy packing.
Want a vegetarian option? Simply swap the chicken for grilled tofu or chickpeas!
Frequently Asked Questions
Q: Can I add other veggies?
A: Absolutely! You can throw in some carrots or cucumbers for added crunch and freshness.
This Chicken Caesar Wrap is quick, delicious, and keeps you full. Perfect for anyone looking for a nutritious, on-the-go meal!
Chicken Caesar Wrap
Editor’s Choice

Mission 10 Inch Carb Balance Whole Wheat Tortillas LARGE Burrito 8 ct 20…
 Amazon$27.67
Whole Foods Market, Organic Grilled Chicken Breast Strips, Step 3, 8 Ounce
 Amazon$6.99
Amazon Grocery, Classic Caesar Dressing, 16 Fl Oz (Previously Happy Bell…
 Amazon$2.29
11. Egg Muffins

If you’re looking for a lunch that’s both quick and nutritious, try making Egg Muffins. These little powerhouses are packed with protein and can be made ahead of time. They’re perfect for busy high schoolers who need a filling meal on the go! Enjoy them warm or cold—either way, they’re a delightful treat.
Making egg muffins is super easy. Just whisk some eggs and toss in your favorite veggies, meats, or cheese. Pour the mixture into muffin tins and bake. You can whip these up in no time, and they store easily in the fridge, making them a great meal prep option!
Here’s a simple recipe to get you started:
Recipe Overview
– Servings: 6
– Prep Time: 10 minutes
– Cook Time: 20 minutes
– Total Time: 30 minutes
– Calories: Approximately 180 (per muffin)
Nutrition Information
– Protein: 12g
– Carbs: 3g
– Fat: 12g
Ingredients
– 6 eggs
– 1/2 cup chopped bell peppers
– 1/2 cup cooked ham, diced
– 1/4 cup shredded cheese
– Salt and pepper to taste
Step-by-Step Instructions
1. Preheat your oven to 350°F (175°C).
2. In a bowl, whisk the eggs and mix in the bell peppers, ham, cheese, salt, and pepper.
3. Grease a muffin tin, then pour the egg mixture into each cup.
4. Bake for about 20 minutes or until the muffins are set.
5. Allow them to cool before removing and packing them away.
These muffins are a fantastic way to use up leftovers, too. Just toss in whatever you have in the fridge!
Frequently Asked Questions
Q: How long do egg muffins last in the fridge?
A: They can stay fresh for up to a week if stored in an airtight container.
Now you can conquer your lunch hour with delicious and healthy egg muffins. Enjoy the taste and the energy boost they provide!
Egg Muffins
Editor’s Choice

Amazon Basics Nonstick Round Muffin Baking Pan, 12 Cups, Set of 2, Gray,…
 Amazon$14.97
50 Pack (100-Piece) 24 oz Meal Prep Containers Reusable with Lids, Sturd…
 Amazon$23.99
Stainless Steel Egg Whisk, Hand Push Rotary Whisk Blender, Versatile Mil…
 Amazon$7.15
12. Peanut Butter Banana Sandwich
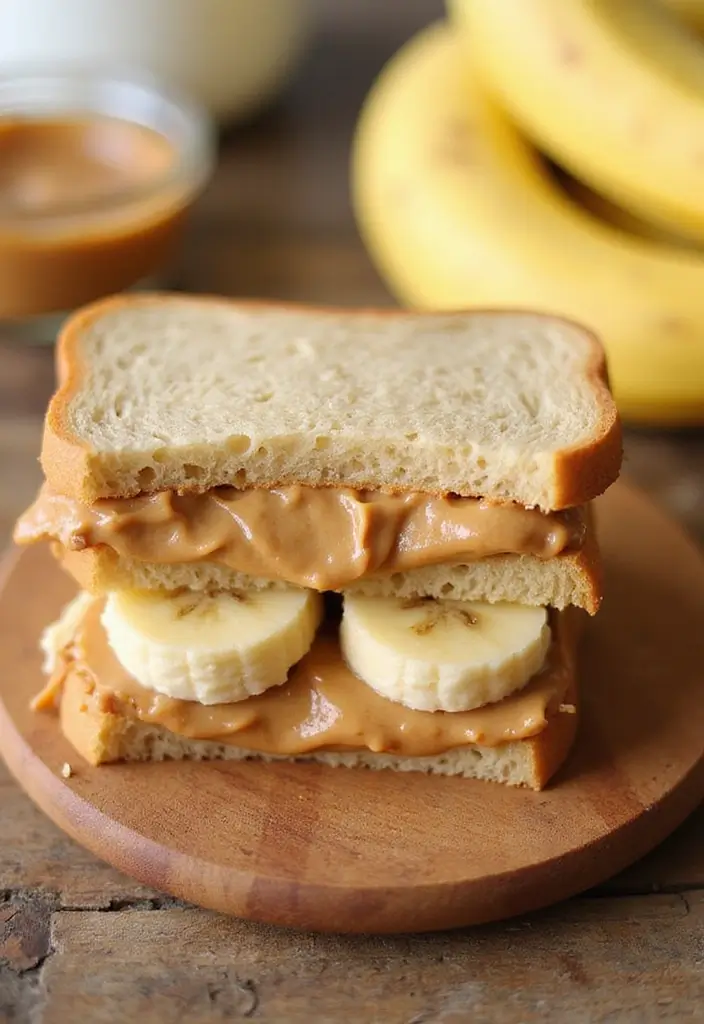
Take your lunch game up a notch with the classic Peanut Butter Banana Sandwich! This timeless favorite combines sweet and savory flavors, making it a delicious and quick meal option for busy high schoolers. Whether you’re rushing to class or enjoying a break with friends, this sandwich is both satisfying and nutritious.
To make it, simply spread creamy peanut butter on whole grain bread. Top it off with fresh banana slices. If you want a little extra sweetness, drizzle some honey on there. Close it up, cut it in half, and you have a tasty lunch that’s ready to grab and go! It’s perfect for a packed lunch that keeps you energized throughout the day.
Recipe Overview
– Servings: 1
– Prep Time: 5 minutes
– Cook Time: 0 minutes
– Total Time: 5 minutes
– Calories: Approximately 300
Nutrition Information
– Protein: 10g
– Carbs: 40g
– Fat: 12g
Ingredients
– 2 slices whole grain bread
– 2 tablespoons peanut butter
– 1 banana, sliced
– Drizzle of honey (optional)
Step-by-Step Instructions
1. Spread peanut butter on one slice of bread.
2. Layer banana slices on top of the peanut butter.
3. Drizzle honey if desired for extra sweetness.
4. Place the second slice of bread on top and cut in half.
Want to mix things up? Try using almond butter or sunflower seed butter instead of peanut butter for a different flavor twist!
Frequently Asked Questions
Q: Can I use other fruit?
A: Absolutely! Apples or strawberries make great alternatives.
This sandwich is not just quick and easy; it’s also a great way to fuel your body with healthy ingredients. Enjoy it as a filling lunch or a snack anytime!
Peanut Butter Banana Sandwich
Editor’s Choice

Dave’s Killer Bread 21 Whole Grains & Seeds Thin-Sliced, Whole Grain Org…
 AmazonCheck Price
SKIPPY Natural Creamy Peanut Butter Spread Twin Pack 2-Pack, 5 LB
 Amazon$9.42
Nate’s 100% Pure, Raw & Unfiltered Honey – Award-Winning Taste, 32oz. Sq…
 Amazon$10.63
13. Spicy Chickpea Wrap
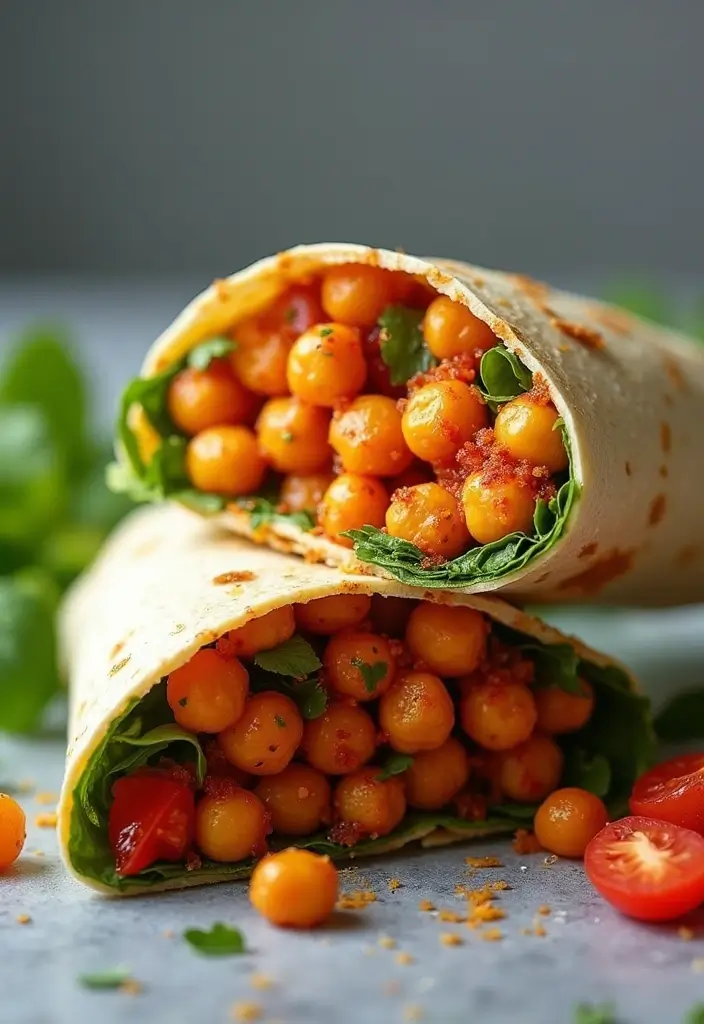
Looking for a lunch that packs a punch? The Spicy Chickpea Wrap is your answer! This wrap is not just tasty; it’s also a powerhouse of nutrition. With protein-rich chickpeas and a kick of sriracha, it keeps you full and energized for the rest of the day.
To start, grab a whole wheat tortilla. This will be the base of your wrap. Next, mash up a cup of canned chickpeas and mix them with sriracha for heat. Add some diced cucumbers, shredded carrots, and a handful of fresh spinach for crunch and nutrition. Roll it all up, and you’ve got a zesty, satisfying meal that’s perfect for lunch!
Recipe Overview
– Servings: 1
– Prep Time: 10 minutes
– Cook Time: 0 minutes
– Total Time: 10 minutes
– Calories: Approximately 400
Nutrition Information
– Protein: 15g
– Carbs: 50g
– Fat: 12g
Ingredients
– 1 whole wheat tortilla
– 1 cup canned chickpeas, drained and mashed
– 1 tablespoon sriracha (you can adjust to your taste)
– 1/2 cucumber, diced
– 1/2 cup shredded carrots
– 1 handful of fresh spinach
Step-by-Step Instructions
1. In a bowl, mash the chickpeas with sriracha until well mixed.
2. Spread the spicy chickpea mixture evenly on the tortilla.
3. Layer the diced cucumbers, shredded carrots, and spinach on top.
4. Roll the tortilla tightly, cut it in half, and it’s ready to pack!
Want to make it even creamier? Add some avocado slices for extra flavor and health benefits!
Frequently Asked Questions
Q: Can I use dried chickpeas?
A: Absolutely! Just cook and mash them beforehand for the best texture.
Enjoy this wrap whenever you need a quick, delicious, and nutritious lunch! It’s all about simple ingredients that come together to create something amazing. Perfect for school or on-the-go meals!
Spicy Chickpea Wrap
Editor’s Choice

Mission Soft Taco Whole Wheat Tortillas, Medium Size, 10 Count, Whole Grain
 Amazon$3.27
365 by Whole Foods Market, Unsalted Garbanzo Beans, 15.5 Ounce (Pack of 4)
 AmazonCheck Price
The Original Huy Fong Sriracha, 9 OZ Rooster Sriracha Chili Sauce, Spicy…
 AmazonCheck Price
14. Taco Salad in a Jar
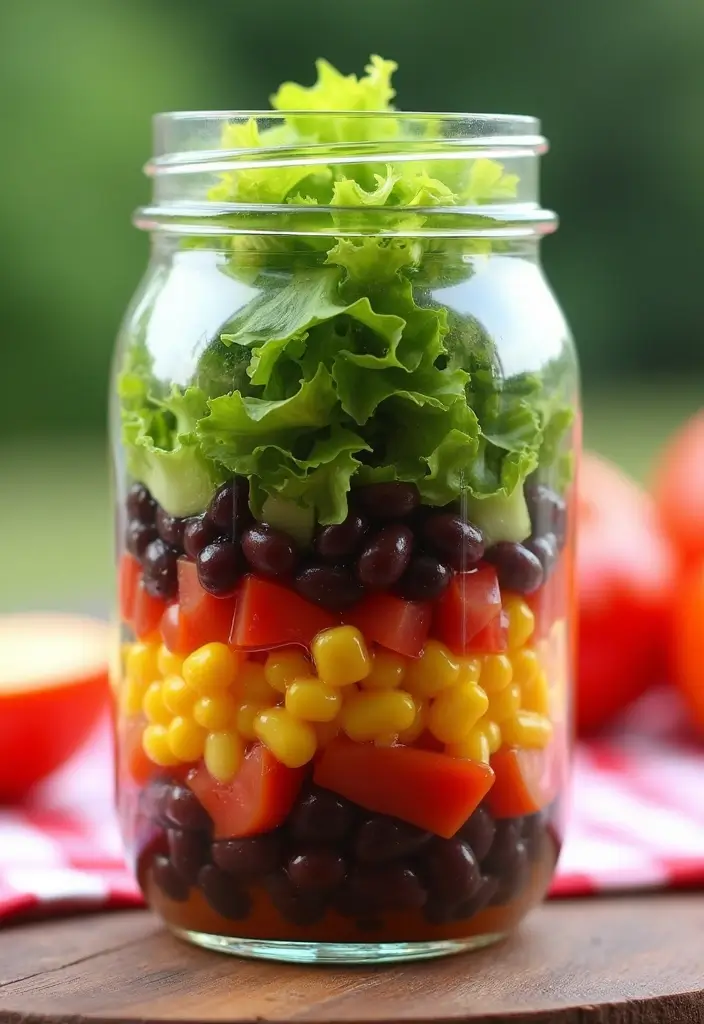
Taco Salad in a Jar is a creative and mess-free way to enjoy a classic dish. This colorful, layered lunch is not only easy to prepare but also fun to eat. Picture this: as you open your jar, you see bright beans, crunchy lettuce, and juicy tomatoes all waiting to be tossed together. It’s perfect for high schoolers who want a nutritious meal on the go!
To make this delicious salad, start by layering your favorite ingredients. Begin with the dressing at the bottom, followed by black beans, sweet corn, diced tomatoes, and crisp lettuce. Finish with taco meat or grilled chicken on top. When you’re ready to eat, just shake it up! This simple meal is portable and packed with flavor.
Here’s how to make your Taco Salad in a Jar:
Recipe Overview
– Servings: 1
– Prep Time: 15 minutes
– Cook Time: 10 minutes (for meat)
– Total Time: 25 minutes
– Calories: Approximately 450
Ingredients
– 2 tablespoons salad dressing
– 1/2 cup canned black beans, rinsed
– 1/2 cup corn
– 1/2 cup diced tomatoes
– 1 cup shredded lettuce
– 1/2 cup taco meat or grilled chicken
Step-by-Step Instructions
1. Pour the salad dressing into the bottom of a jar.
2. Layer the black beans, corn, diced tomatoes, and shredded lettuce.
3. Add the taco meat or grilled chicken on top.
4. Seal the jar tightly and pack it for lunch.
To keep your salad fresh, remember to layer the dressing at the bottom. This way, you avoid sogginess and keep everything crisp until you’re ready to enjoy.
Frequently Asked Questions
Q: Can I add other toppings?
A: Absolutely! Feel free to add avocado, shredded cheese, or jalapeños for extra flavor.
This Taco Salad in a Jar is not just a meal; it’s a fun way to eat healthy. Perfect for busy school days, it offers a balance of protein, carbs, and fats, making it a smart choice for lunch. Enjoy the taste and the ease of making this delightful dish!
Taco Salad in a Jar
Editor’s Choice

NETANY 6-pack 16 oz Overnight Oats Containers with Lids, Glass jars with…
 Amazon$19.99
4Pcs Squeeze Salad Dressing Bottles, Leakproof Mini Sauce Condiment Bott…
 Amazon$7.59
HOTOR Insulated Lunch Box for Men & Women – Leak-Proof Cooler Lunch Bag …
 Amazon$9.96
15. Hummus and Pita Chips
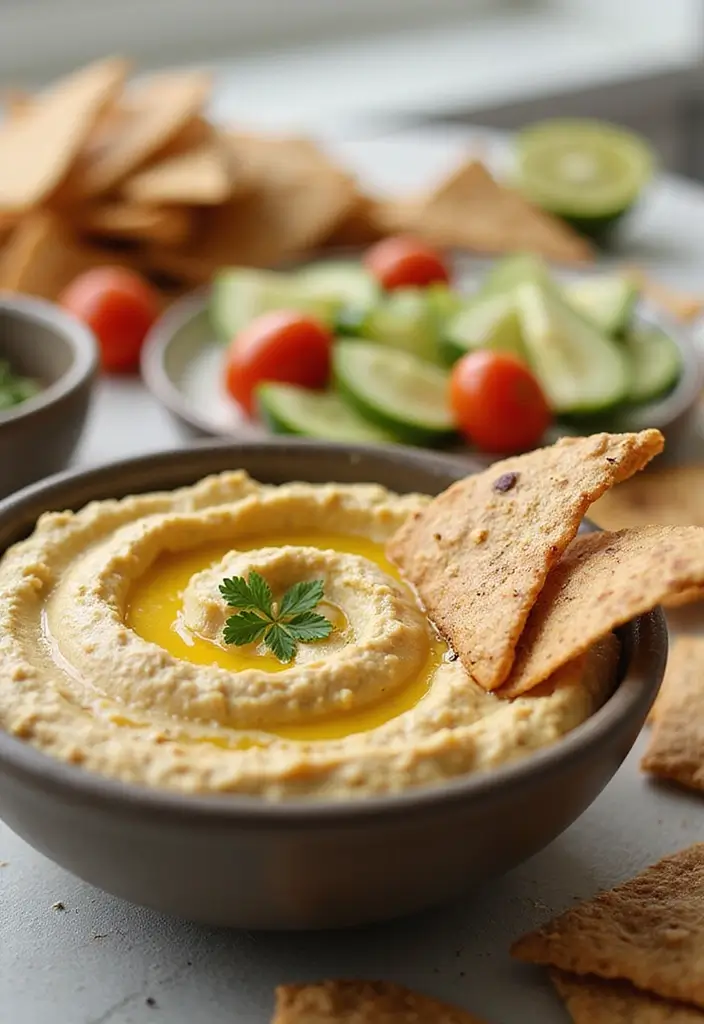
Imagine a lunch that’s crunchy, savory, and satisfies your snack cravings—all while being healthy! Hummus and pita chips are a fantastic choice for high schoolers like you who want something fun to eat. Pairing creamy hummus with crispy pita chips and fresh veggies gives you a well-rounded meal that feels like a treat.
To create this delicious lunch, grab some baked pita chips and your favorite hummus. You can also add colorful veggies like carrot sticks and cucumber slices for dipping. This lunch not only tastes great but also packs a nutritious punch—perfect for keeping your energy levels up throughout the day!
Recipe Overview
– Servings: 1
– Prep Time: 5 minutes
– Cook Time: 10 minutes (for homemade chips)
– Total Time: 15 minutes
– Calories: Approximately 250
Nutrition Information
– Protein: 8g
– Carbs: 30g
– Fat: 10g
Ingredients
– 1/2 cup hummus
– 1 serving of baked pita chips
– Veggies for dipping (carrots, cucumbers, etc.)
Step-by-Step Instructions
1. Make Pita Chips: Cut pita bread into triangles. Bake them at 350°F (175°C) for about 10 minutes until crispy.
2. Pack Your Lunch: In a container, add hummus, pita chips, and your choice of veggies for dipping.
Feel free to experiment with different types of hummus! Try roasted red pepper or garlic for a new flavor twist.
Frequently Asked Questions
Q: Can I use store-bought pita chips?
A: Yes! Just check the ingredients to pick a healthier option.
This lunch idea combines taste and nutrition, making it ideal for busy school days. Enjoy your snack time guilt-free!
Hummus and Pita Chips
Editor’s Choice

Stacy’s Pita Chips, Simply Naked, 1.5-Ounce Bags (Pack of 24)
 Amazon$15.29
Mezete Hummus Variety Pack | Authentic Middle Eastern | Free from Preser…
 Amazon$35.99
M&N HOME Honey Dish with 3 Dippers, Honey Jar, Large Glass Honey Pot sto…
 AmazonEUR 15.55
16. Grilled Vegetable Sandwich
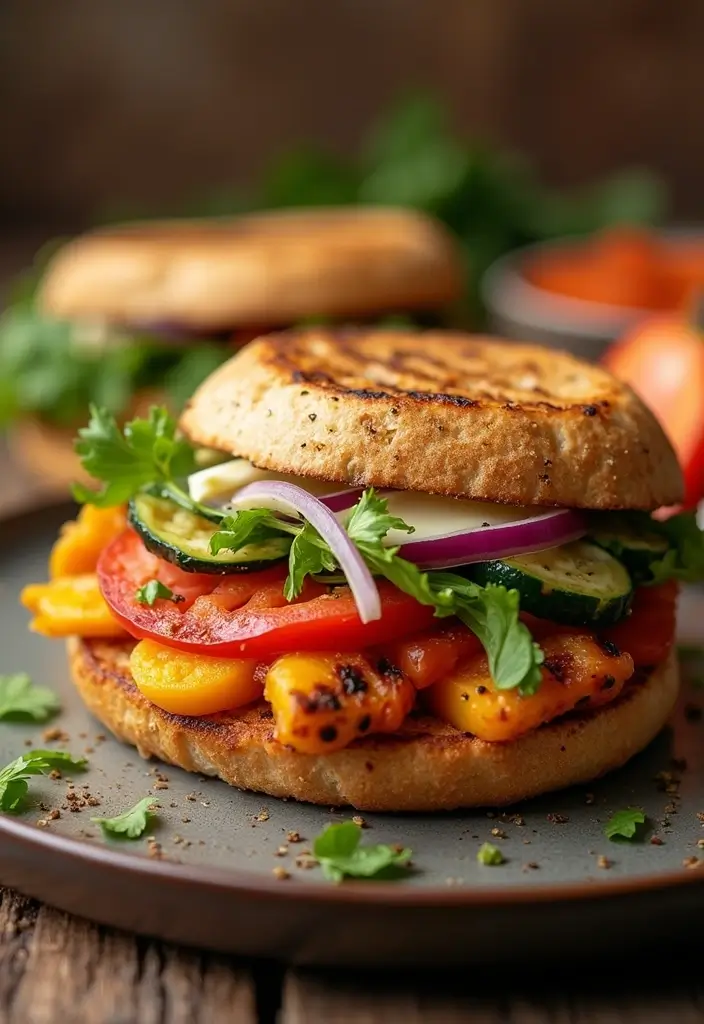
Here’s how you can whip up this tasty sandwich in no time. It’s budget-friendly and uses simple ingredients you can find at any grocery store. This sandwich is not just filling; it’s also a great way to show off your culinary skills. The combination of grilled veggies and cheese will make your lunch the envy of your friends!
Ingredients
– 2 slices whole grain bread
– 1/2 cup assorted grilled vegetables (like zucchini, bell peppers, and eggplant)
– 1/4 cup fresh mozzarella, sliced
– Balsamic glaze for drizzling
Instructions
1. Grill or roast your veggies until they’re nice and tender.
2. Take one slice of bread and layer on the grilled veggies and mozzarella.
3. Drizzle with balsamic glaze for a burst of flavor.
4. Top with the second slice of bread, press down gently, and your sandwich is ready to go!
Feel free to add a spoonful of pesto or some fresh spinach for extra flavor and nutrition. This sandwich is a great way to mix things up and enjoy a healthy lunch that fuels your day.
Frequently Asked Questions
Q: Can I use other types of cheese?
A: Absolutely! Feta or goat cheese can bring a whole new taste to your sandwich.
Enjoy your Grilled Vegetable Sandwich! With this recipe, lunchtime will never be the same.
Grilled Vegetable Sandwich
Editor’s Choice
SENSARTE Nonstick Grill Pan for Stove Tops, Versatile Griddle with Pour …
 Amazon$19.99
Filippo Berio Glaze with Balsamic Vinegar of Modena, 8.4 Ounce Plastic B…
 Amazon$5.79
Dave’s Killer Bread 21 Whole Grains & Seeds Thin-Sliced, Whole Grain Org…
 Amazon$5.99
17. Apple and Cheese Snack Box
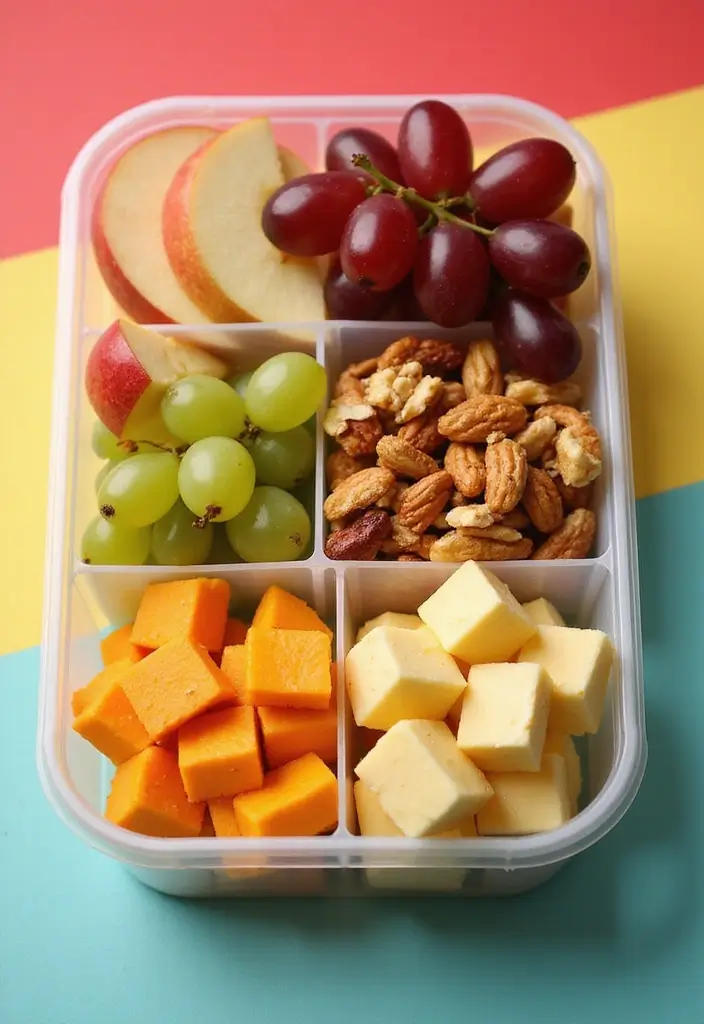
Looking for a tasty and easy lunch that your teen will love? The Apple and Cheese Snack Box is a fantastic option! This snack box combines sweet and savory flavors, making lunchtime exciting and nutritious. Imagine biting into crisp apple slices paired with creamy cheese. Add in nuts for crunch and juicy grapes for sweetness, and you have a balanced meal that’s perfect for school.
Best of all? This meal requires no cooking and takes just 5 minutes to prepare. It’s ideal for busy mornings when you need something quick yet healthy. Your teen can mix and match flavors, making each bite a little adventure.
Recipe Overview
– Servings: 1
– Prep Time: 5 minutes
– Cook Time: 0 minutes
– Total Time: 5 minutes
– Calories: Approximately 300
Nutrition Information
– Protein: 10g
– Carbs: 35g
– Fat: 15g
Ingredients
– 1 apple, sliced
– 1/2 cup cheese cubes (choose cheddar or gouda)
– 1/4 cup nuts (almonds or walnuts work well)
– A handful of grapes
Step-by-Step Instructions
1. Slice the apple into thin wedges.
2. Cut the cheese into cubes.
3. Arrange all the ingredients in a lunchbox or container.
4. Pack it up and enjoy this delightful snack!
Feel free to add other snacks like whole grain crackers or dried fruit for even more variety. This snack box is not only delicious but also keeps your teen energized and ready to tackle the day.
• Pack apples and cheese for a sweet and savory mix
• Choose a variety of nuts for added crunch
• Include grapes for a burst of sweetness
• Add crackers or dried fruits for extra options
With this simple recipe, lunchtime will never be boring again!
Fun fact: A no-cook Apple and Cheese Snack Box takes just 5 minutes to prep. It packs fiber, protein, and healthy fats, giving high schoolers steady energy for classes and after-school activities.
Apple and Cheese Snack Box
Editor’s Choice

Bentgo Kids Prints Leak-Proof, 5-Compartment Bento-Style Kids Lunch Box …
 Amazon$29.99

Kar’s Nuts Trail Mix Variety Pack, Pack of 24 – Yogurt Apple Nut, Mango …
 AmazonCheck Price
18. Spinach and Feta Stuffed Peppers
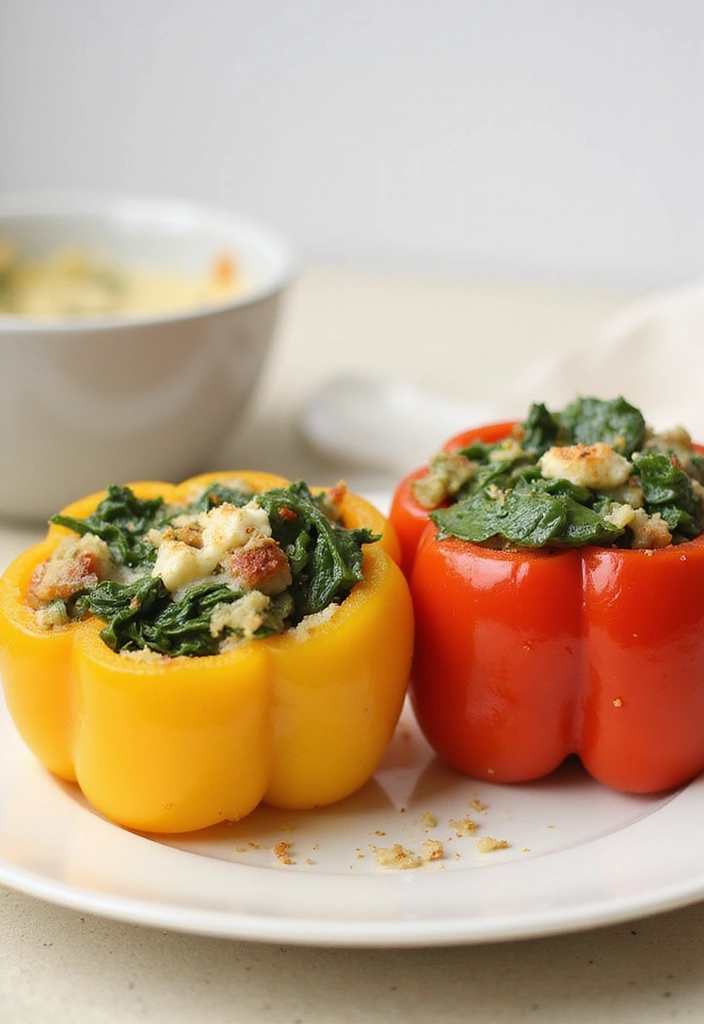
Looking for a lunch that’s both cool and nutritious? Try these Spinach and Feta Stuffed Peppers! They’re colorful, easy to make, and packed with flavors that will make your taste buds dance. Plus, they look amazing on your lunch plate!
To whip up this delicious meal, simply halved bell peppers stuffed with a tasty mixture of cooked quinoa, fresh spinach, crumbled feta cheese, and herbs. Once baked, the peppers turn tender, creating a delightful dish that’s perfect for using up leftover quinoa.
Recipe Overview
– Servings: 2
– Prep Time: 15 minutes
– Cook Time: 25 minutes
– Total Time: 40 minutes
– Calories: About 200 (per pepper)
Nutrition Information
– Protein: 12g
– Carbs: 30g
– Fat: 8g
Ingredients
– 2 bell peppers
– 1 cup cooked quinoa
– 1 cup spinach, chopped
– 1/2 cup crumbled feta cheese
– Salt and pepper to taste
Step-by-Step Instructions
1. Preheat your oven to 375°F (190°C).
2. Cut the bell peppers in half and place them in a baking dish.
3. In a bowl, mix together the quinoa, spinach, feta, salt, and pepper.
4. Fill each pepper half with the mixture.
5. Bake for about 25 minutes until the peppers are tender.
For an extra flavor boost, drizzle a little olive oil over the peppers before baking!
Frequently Asked Questions
Q: Can I make these in advance?
A: Absolutely! Store them in the fridge for up to three days. Just reheat before eating.
Enjoy these stuffed peppers for a lunch that’s not only good for you but also super tasty! They’re perfect for busy school days or a quick meal at home.
Spinach and Feta Stuffed Peppers
Editor’s Choice

HOMBERKING 10 Pack Borosilicate Glass Meal Prep Containers with Locking …
 Amazon$30.99
Success Boil-In-Bag Quinoa, Quick Tri-Color Quinoa, 12-Ounce Box (Pack o…
 AmazonCheck Price
Pompeian USDA Certified Organic Extra Virgin Olive Oil Non-Stick Cooking…
 Amazon$4.24
19. Thai Chicken Lettuce Wraps
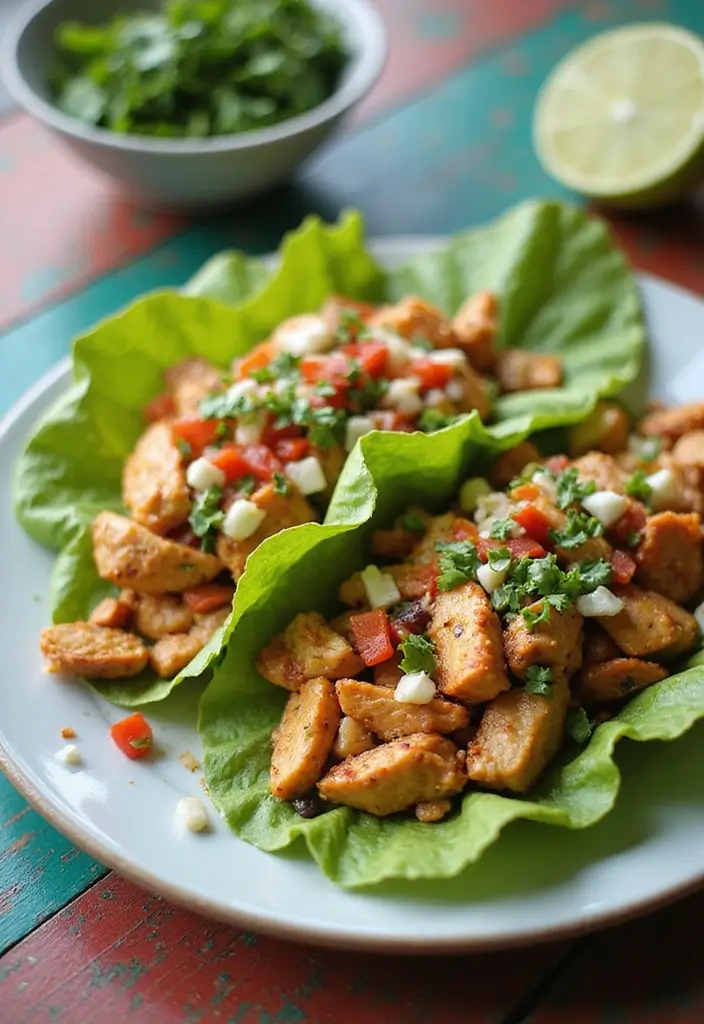
Discover a fresh twist on lunchtime with Thai Chicken Lettuce Wraps! These wraps are not only fun to make, but they also burst with flavor. You’ll love how the crisp lettuce pairs perfectly with the savory chicken, creating a meal that’s both cool and nutritious.
Imagine cooking ground chicken with aromatic garlic and zesty ginger, then mixing in a splash of soy sauce for that umami kick. Wrap it all in vibrant lettuce leaves, adding crunchy shredded carrots and a sprinkle of peanuts. It’s a hands-on meal, perfect for customizing. Want more spice? Toss in some chili flakes! Prefer it sweeter? Add a drizzle of honey.
This recipe is a breeze to whip up. Here’s how to make it:
Recipe Overview
– Servings: 2
– Prep Time: 15 minutes
– Cook Time: 10 minutes
– Total Time: 25 minutes
– Calories: Approximately 300
Nutrition Information
– Protein: 25g
– Carbs: 10g
– Fat: 15g
Ingredients
– 1 pound ground chicken
– 2 tablespoons soy sauce
– 2 garlic cloves, minced
– 1 tablespoon ginger, minced
– 1 cup shredded carrots
– Lettuce leaves (like iceberg or butter lettuce) for wrapping
– Chopped peanuts for topping
Step-by-Step Instructions
1. In a skillet, heat up a little oil and cook the ground chicken with the minced garlic and ginger until it’s browned, about 5-7 minutes.
2. Add the soy sauce and stir everything together. Remove from heat.
3. Take fresh lettuce leaves and fill them with the chicken mixture.
4. Top with shredded carrots and chopped peanuts for added crunch.
5. Squeeze a little lime juice over the top for a refreshing twist!
These wraps are not only delicious but also let you get creative in the kitchen. You can switch up the protein too. Ground turkey or even diced tofu can work just as well.
So, if you’re looking for a quick, healthy lunch that’s sure to impress your friends, Thai Chicken Lettuce Wraps are the way to go. Enjoy the fun of assembling your wraps while savoring every bite!
Frequently Asked Questions
Q: Can I use a different protein?
A: Yes! Ground turkey or tofu would work well too.
Thai Chicken Lettuce Wraps
Editor’s Choice

50 Pack (100-Piece) 32 oz Meal Prep Containers Reusable with Lids 3-Comp…
 Amazon$21.99
Chicken Dust Bath Tub, 31.5” D * 7.9” H Chicken Dust Bath Container wi…
 Amazon$16.99
20. Chocolate Chia Pudding
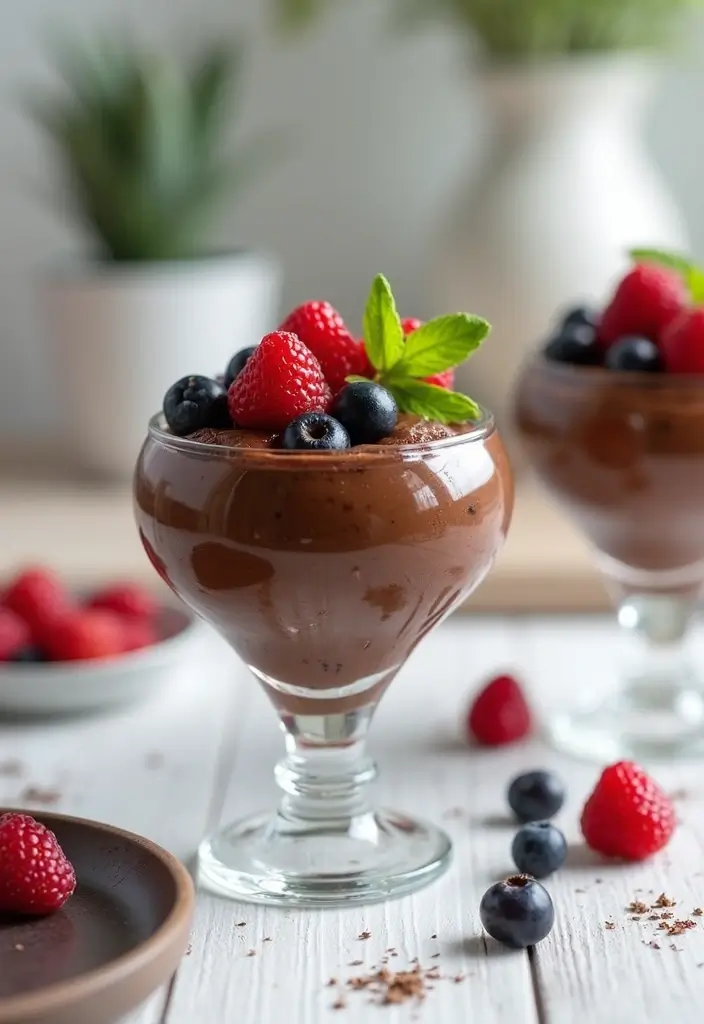
Indulge your sweet tooth without straying from healthy eating with a tasty treat: Chocolate Chia Pudding! This dessert-like lunch is not just delicious; it’s packed with omega-3 fatty acids and fiber. You’ll feel satisfied after each spoonful, making it a fantastic choice for those midday cravings. Plus, it’s quick to prepare and can be customized to your liking!
To make this delightful pudding, combine chia seeds, almond milk, cocoa powder, and a dash of honey. Allow it to chill overnight in the fridge. The next day, top it off with fresh berries or crunchy nuts for an extra burst of flavor. Enjoy the rich taste of chocolate while nourishing your body with healthy fats and antioxidants!
Here’s how to whip up your own Chocolate Chia Pudding:
Ingredients:
– 1/4 cup chia seeds
– 1 cup almond milk
– 2 tablespoons cocoa powder
– 1 tablespoon honey or maple syrup
– Fresh berries or nuts for topping
Instructions:
1. In a bowl, mix the chia seeds, almond milk, cocoa powder, and honey.
2. Stir everything together until well combined.
3. Cover the bowl and refrigerate overnight.
4. The next day, serve your pudding topped with fresh berries or nuts.
Feel free to get creative with toppings! Add a swirl of peanut butter or a sprinkle of granola for added texture and flavor.
Frequently Asked Questions
Q: How long can I keep this pudding in the fridge?
A: Enjoy it within 3-4 days for the best taste and texture.
Now you have a delicious, nutritious lunch option that feels indulgent but is still good for you. Perfect for school or a quick snack at home!
Chocolate Chia Pudding
Editor’s Choice

Terrasoul Superfoods Organic Black Chia Seeds, 2.5 Pounds, Nutrient-Pack…
 AmazonHKD 155.48
Silk Shelf-Stable Almond Milk, Unsweetened Vanilla, Dairy-Free, Vegan, N…
 Amazon$11.27
21. Baked Sweet Potato Fries
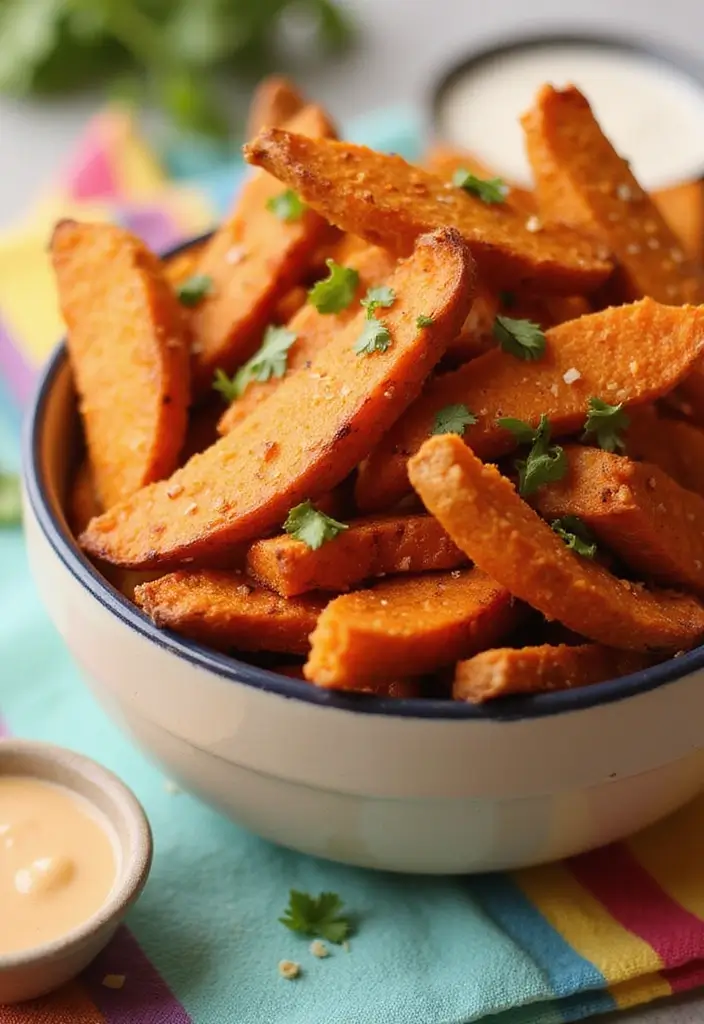
Baked Sweet Potato Fries are the ultimate lunch sidekick for high schoolers. They’re not just tasty; they are packed with nutrients and offer a healthier twist on traditional fries. Imagine sinking your teeth into crispy, golden fries that are slightly sweet and full of flavor. Pair them with a creamy dip like hummus or guacamole, and you’ve got a winning combo that’s as fun as it is nutritious!
Making these fries is simple and quick. All you need are a couple of sweet potatoes, some olive oil, and your favorite seasonings. This dish is perfect for meal prep, and it adds a pop of color to your lunchbox. Plus, baked sweet potato fries are trendy on social media, making your lunch look even cooler!
Let’s get cooking. Here’s how to whip up a batch of these delicious fries:
Ingredients:
– 2 medium sweet potatoes
– 2 tablespoons olive oil
– Salt and pepper to taste
– Optional spices (like paprika or garlic powder)
Instructions:
1. Preheat your oven to 425°F (220°C).
2. Wash and peel the sweet potatoes (if desired), then slice them into fry shapes.
3. In a large bowl, toss the sweet potato slices with olive oil, salt, and your chosen spices until they’re evenly coated.
4. Spread the fries in a single layer on a baking sheet lined with parchment paper.
5. Bake for 30 minutes, flipping them halfway through for even crispiness. Keep an eye on them to avoid burning!
These fries are a delicious way to add a nutritious side to your lunch. They’re not just a hit; they’re also budget-friendly and easy to make in large batches.
Quick Tips:
– Use regular potatoes if you prefer; the method works just as well.
– Try different spices to change up the flavor, keeping lunch exciting.
– Make extra and save them for a snack or dinner side.
With this recipe, you’re set for a cool and nutritious lunch that your friends will envy!
Baked Sweet Potato Fries
Editor’s Choice

SupMaKin Safe Mandoline Slicer for Kitchen, Potato Slicer for Chips, Veg…
 Amazon$26.99
200Pcs Parchment Paper,12×16 Inches Non-Stick Precut Parchment Paper She…
 Amazon$9.89
YARRAMATE 16oz/470ml Glass Olive Oil Sprayer for Cooking with Stickers, …
 Amazon$8.99
22. Berry Oatmeal Bars
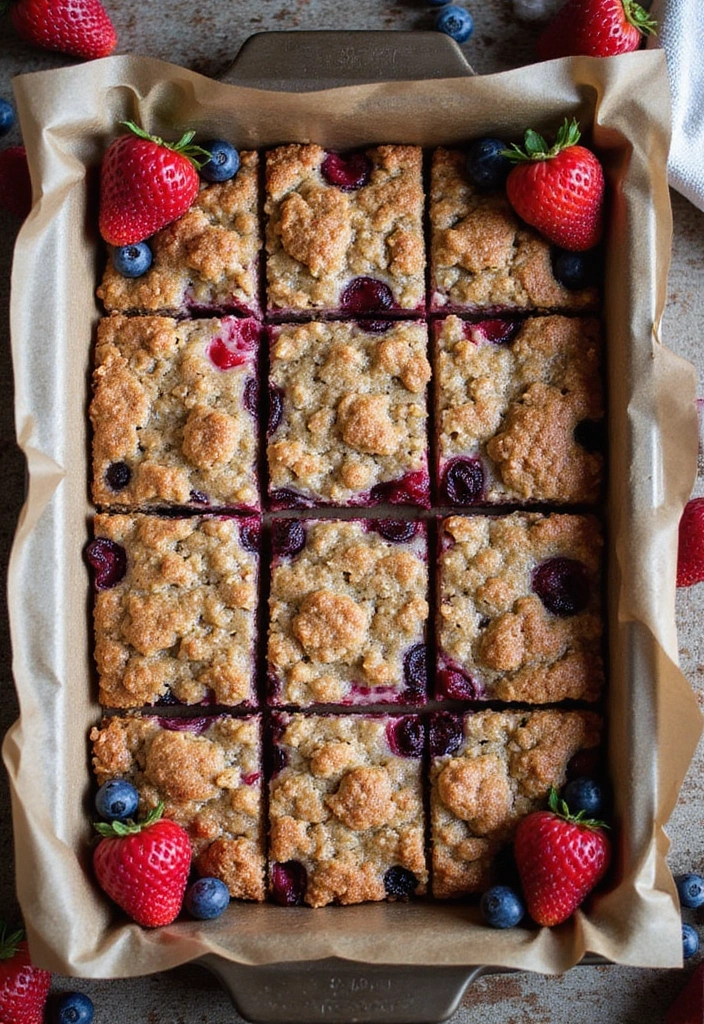
Berry Oatmeal Bars make lunchtime easy and delicious for high schoolers. These bars are packed with flavor and nutrition, making them a perfect grab-and-go option. Imagine biting into a chewy, sweet bar filled with juicy berries. They’re not just tasty; they’re a smart choice for busy days!
To whip up these delightful bars, you’ll mix oats, almond butter, honey, and your favorite berries. Then, press the mixture into a baking dish and bake until golden. Once they cool, cut them into bars for a snack that’s both satisfying and wholesome!
Here’s what you need to know:
Recipe Overview
– Servings: 8
– Prep Time: 15 minutes
– Cook Time: 20 minutes
– Total Time: 35 minutes
– Calories: Approximately 200 (per bar)
Nutrition Information
– Protein: 5g
– Carbs: 30g
– Fat: 8g
Ingredients
– 2 cups rolled oats
– 1/2 cup almond butter
– 1/4 cup honey
– 1 cup mixed berries
Step-by-Step Instructions
1. Preheat your oven to 350°F (175°C).
2. In a large mixing bowl, combine the oats, almond butter, honey, and berries. Stir until everything is well mixed.
3. Press the mixture firmly into a greased baking dish.
4. Bake for about 20 minutes or until lightly browned. Let cool completely before slicing into bars.
For a fun twist, try swapping the berries for chocolate chips. It’s a great way to satisfy sweet cravings!
Frequently Asked Questions
Q: How long do these bars last?
A: Store them in an airtight container for up to a week.
With these Berry Oatmeal Bars, you can enjoy a nourishing lunch that fuels your day and tastes amazing!
Fun fact: Berry Oatmeal Bars can pack roughly 6-8 g of protein and 3-5 g of fiber per bar. They’re a smart, grab-and-go lunch idea among lunch ideas for high schoolers.
Berry Oatmeal Bars
Editor’s Choice

Amazon Basics Silicone Rectangular Baking Mat, Non-Stick Reusable Oven B…
 Amazon$16.79
50 Pack (100-Piece) 32 oz Meal Prep Containers Reusable with Lids 3-Comp…
 Amazon$21.99
23. Creamy Avocado Toast
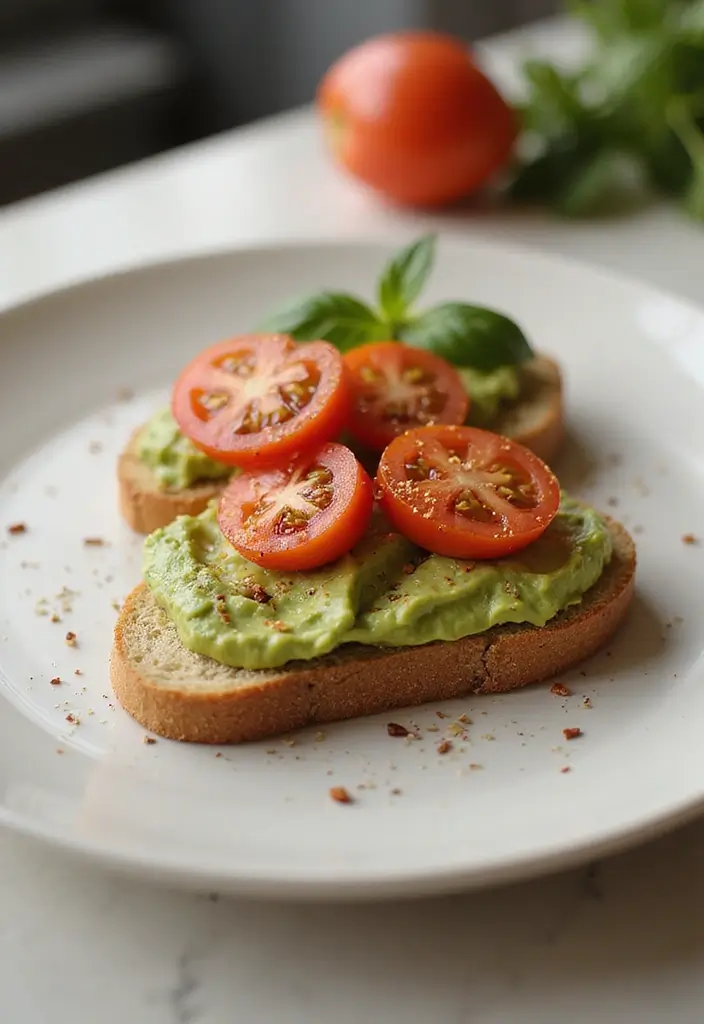
Creamy Avocado Toast is not just a meal; it’s a delicious way to fuel your day! Packed with healthy fats and fiber, this trendy lunch option is quick to make and utterly satisfying. Imagine digging into a plate of bright green avocado spread on warm, toasty bread. It’s a treat that makes lunchtime feel special.
To whip up this easy dish, start with a slice of whole grain bread. Toast it until it’s golden brown. Then, take a ripe avocado and mash it up in a bowl. Spread that creamy goodness over your toast. Sprinkle a pinch of salt and pepper for flavor, and if you’re feeling adventurous, add some chili flakes for a nice kick! For an extra crunch, top it off with sliced tomatoes or radishes. This meal is nutritious and looks great too—perfect for impressing your friends!
Recipe Overview
– Servings: 1
– Prep Time: 5 minutes
– Cook Time: 0 minutes
– Total Time: 5 minutes
– Calories: Approximately 250
Nutrition Information
– Protein: 6g
– Carbs: 30g
– Fat: 12g
Ingredients
– 1 slice whole grain bread
– 1/2 avocado, mashed
– Salt and pepper to taste
– Chili flakes (optional)
– Toppings (tomato, radish, etc.)
Step-by-Step Instructions
1. Toast the whole grain bread until golden brown.
2. In a bowl, mash the avocado until creamy.
3. Spread the mashed avocado generously on the toast.
4. Season with salt, pepper, and chili flakes if desired.
5. Add your favorite toppings, like sliced tomatoes or radishes, for extra flavor and crunch.
6. Drizzle with lemon juice to keep the avocado fresh and prevent browning before packing it up.
Want to mix it up? You can also add toppings like sliced eggs or smoked salmon for variety!
This creamy avocado toast is not only a crowd-pleaser but also a fantastic way to enjoy a healthy meal that keeps you energized. Plus, it’s so easy to make that you’ll want to whip it up again and again!
Creamy Avocado Toast
Editor’s Choice

Dave’s Killer Bread 21 Whole Grains & Seeds Thin-Sliced, Whole Grain Org…
 AmazonCheck Price
52USA Premium Sichuan Chili Flakes(8 OZ), Ground Sichuan Red Chili Pepper
 AmazonCheck Price
24. Zucchini Noodles with Marinara
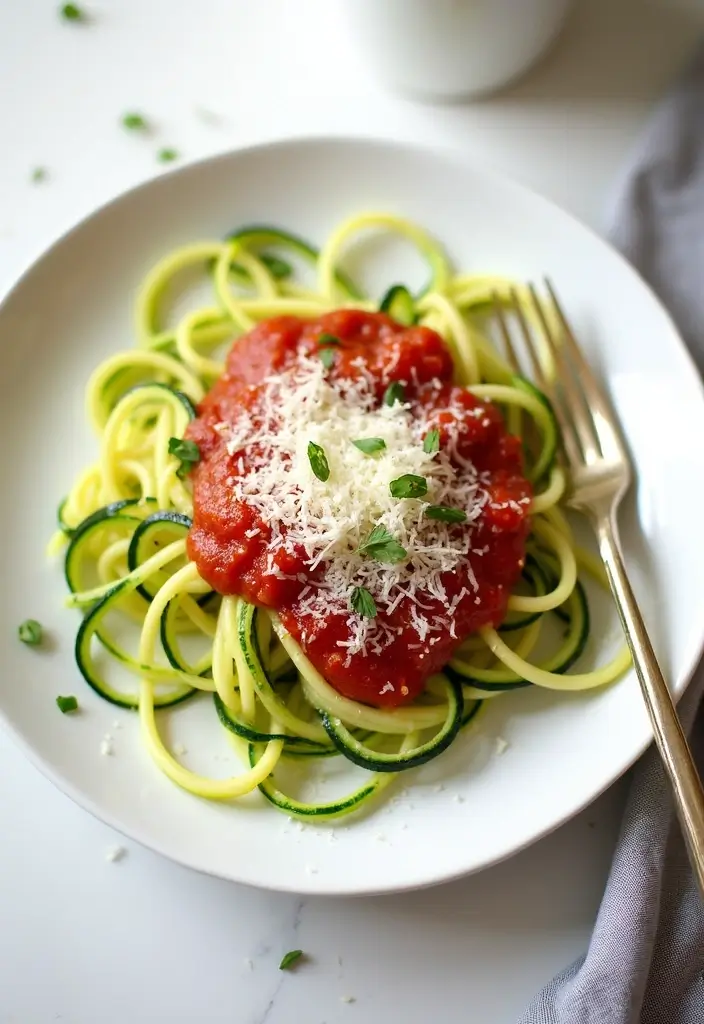
Craving a healthy meal that feels indulgent? Try Zucchini Noodles with Marinara! This delicious dish is not only trendy but also low in carbs. It’s a fantastic way to enjoy vegetables while satisfying your pasta cravings. Imagine twirling those vibrant green noodles around your fork, topped with a rich marinara sauce and a sprinkle of Parmesan. It’s a lunch that feels like a treat without the guilt!
To make this dish, you’ll need a spiralizer to turn a simple zucchini into noodles. A quick sauté brings out their flavor, and you can finish it off with store-bought or homemade marinara. This meal is perfect for busy students looking for something nutritious and easy to prepare.
Recipe Overview
– Servings: 1
– Prep Time: 10 minutes
– Cook Time: 5 minutes
– Total Time: 15 minutes
– Calories: Approximately 200
Nutrition Information
– Protein: 7g
– Carbs: 18g
– Fat: 10g
Ingredients
– 1 medium zucchini
– 1 cup marinara sauce
– 1/4 cup Parmesan cheese
– Olive oil for sautéing
Step-by-Step Instructions
1. Use a spiralizer to create zucchini noodles.
2. Heat olive oil in a pan and sauté the noodles for 2-3 minutes until slightly tender.
3. Add the marinara sauce and stir until it’s warm.
4. Sprinkle with Parmesan cheese before serving.
Want to boost the protein? Add ground turkey or chicken for a heartier meal!
Frequently Asked Questions
Q: Can I use other vegetables?
A: Absolutely! Carrots or yellow squash make great alternatives. Get creative with your veggies!
Enjoy this simple, nutritious lunch that’s sure to impress your friends and keep you energized throughout the day. Happy cooking!
Zucchini Noodles with Marinara
Editor’s Choice

Brieftons 5-Blade Vegetable Spiralizer: Strongest-Heaviest Spiral Slicer…
 Amazon$31.99
365 by Whole Foods Market, Organic Marinara Pasta Sauce, 25 Ounce
 Amazon$3.69
25. Cilantro Lime Rice Bowl
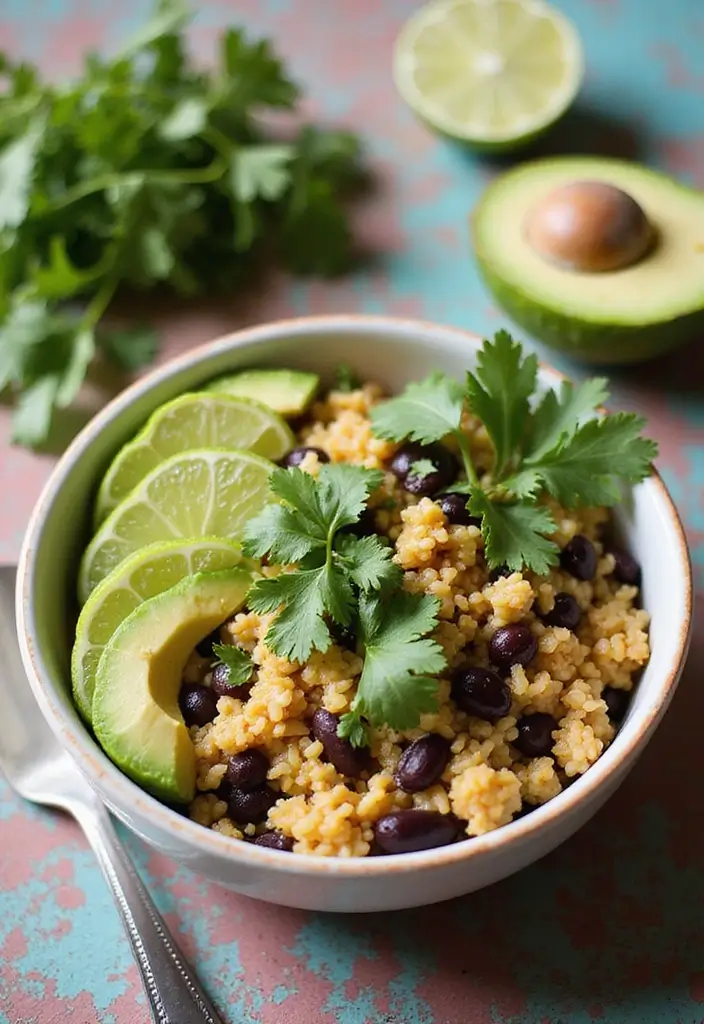
Looking for a lunch that’s both cool and tasty? Try a Cilantro Lime Rice Bowl! This dish bursts with fresh flavors and is super easy to make. It’s perfect for high schoolers who want a nutritious meal without the fuss. Plus, you can customize it with whatever ingredients you have at home!
Start by cooking some rice. Once it’s ready, mix in zesty lime juice and fresh cilantro for that refreshing kick. Add protein with black beans, and top it all off with creamy avocado and crunchy veggies. This bowl is not just filling; it’s a delightful mix of textures and tastes!
Here’s a quick recipe overview to get you started:
– Servings: 1
– Prep Time: 10 minutes
– Cook Time: 20 minutes
– Total Time: 30 minutes
– Calories: Approximately 400
Nutrition Information:
– Protein: 12g
– Carbs: 60g
– Fat: 10g
Ingredients:
– 1 cup cooked rice (your choice of variety)
– Juice of 1 lime
– 1/4 cup chopped cilantro
– 1/2 cup black beans, rinsed
– 1/2 avocado, diced
– Optional: Fresh veggies like bell peppers, corn, or tomatoes
Step-by-Step Instructions:
1. Cook rice according to package instructions and allow it to cool.
2. In a bowl, combine the rice with lime juice and chopped cilantro.
3. Stir in the black beans for protein.
4. Top with diced avocado and any fresh veggies you like.
5. Pack it up and enjoy your delicious lunch!
Want to boost protein even more? Add grilled chicken or shrimp for extra flavor and nutrition!
Frequently Asked Questions:
Q: Can I use different grains?
A: Absolutely! Quinoa or farro are great alternatives that work well.
This bowl not only satisfies your hunger but also keeps your energy up for the day ahead. Enjoy a lunch that’s as cool as you are!
Cilantro Lime Rice Bowl
Editor’s Choice

Aroma Housewares Aroma 6-cup (cooked) 1.5 Qt. One Touch Rice Cooker, Whi…
 Amazon$19.86
50 Pack (100-Piece) 32 oz Meal Prep Containers Reusable with Lids 3-Comp…
 Amazon$21.99
26. Baked Falafel with Tzatziki
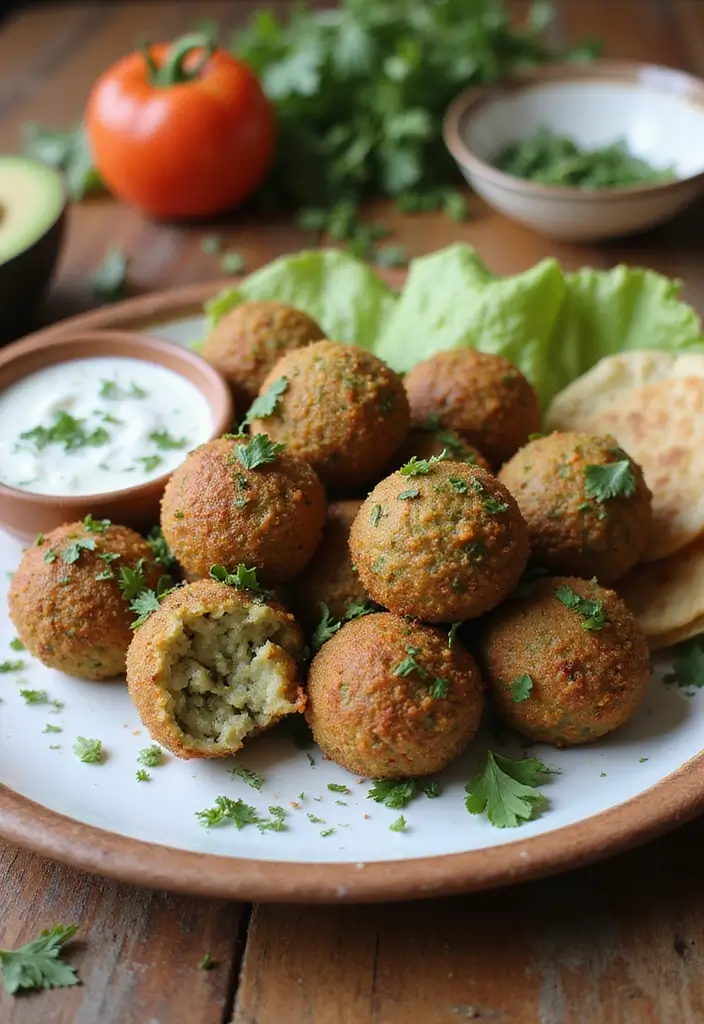
Baked Falafel with Tzatziki is a fun and healthy way to dive into Mediterranean cuisine! Not only are these little bites baked instead of fried, but they pack a punch of flavor and nutrition too. You’ll love how crispy they get while still being light. Pair them with a creamy tzatziki sauce made from yogurt and fresh cucumbers for a delicious, refreshing touch. This lunch idea is perfect for school and will keep you feeling full and satisfied throughout the day.
Let’s get cooking! Here’s how you can whip up this tasty dish at home.
Recipe Overview
– Servings: 2
– Prep Time: 15 minutes
– Cook Time: 30 minutes
– Total Time: 45 minutes
– Calories: Approximately 300 per serving
Nutrition Information
– Protein: 14g
– Carbs: 35g
– Fat: 12g
Ingredients
– 1 can chickpeas, drained
– 1/4 cup fresh parsley
– 1/4 cup chopped onion
– 2 cloves garlic
– 1 teaspoon cumin
– 1/2 cup plain yogurt
– 1/2 cucumber, diced
Step-by-Step Instructions
1. Preheat your oven to 375°F (190°C).
2. In a food processor, combine the chickpeas, parsley, onion, garlic, and cumin. Blend until smooth and creamy.
3. Form the mixture into small balls and place them on a baking sheet lined with parchment paper.
4. Bake for about 30 minutes or until they turn golden brown and crispy.
5. While the falafel is baking, mix the yogurt with the diced cucumber and minced garlic to make your tzatziki sauce.
Serve your baked falafel with warm pita bread or fresh veggies for a complete meal! This dish is not only delicious but also easy to make and great for meal prep.
Frequently Asked Questions
Q: Can I freeze the falafel?
A: Absolutely! They freeze well and make for a quick lunch option later on.
Try this recipe for a lunch that’s not just about filling your stomach but also about enjoying vibrant flavors. You’ll impress your friends and feel good about what you eat!
Baked Falafel with Tzatziki
Editor’s Choice

Hamilton Beach Food Processor & Vegetable Chopper for Slicing, Shredding…
 Amazon$46.98
200Pcs Parchment Paper,12×16 Inches Non-Stick Precut Parchment Paper She…
 Amazon$9.89
50 Pack (100-Piece) 24 oz Meal Prep Containers Reusable with Lids, Sturd…
 Amazon$23.99
27. Sweet and Savory Trail Mix
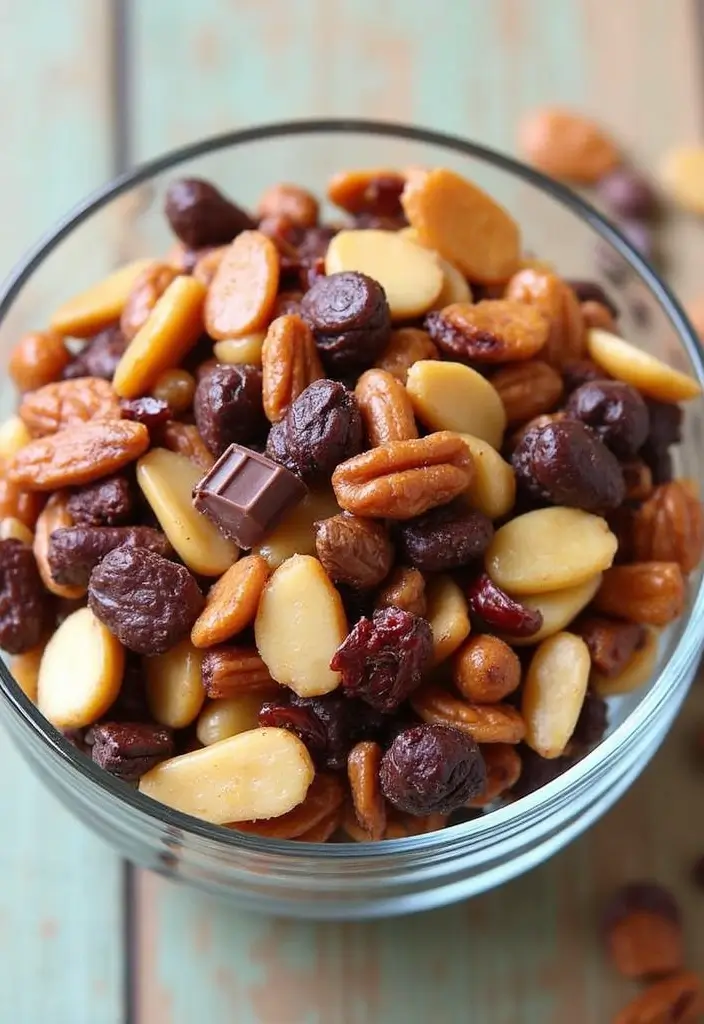
Sweet and Savory Trail Mix is not just a snack; it’s a powerhouse of energy, perfect for busy high schoolers. It’s simple to whip up and fits easily in your backpack. Plus, the blend of flavors makes it a treat you’ll actually look forward to!
Imagine biting into crunchy nuts, chewy dried fruits, and a hint of dark chocolate. This mix keeps your energy high and your taste buds happy. You can make it in just five minutes, allowing you to focus on more important things—like studying or hanging out with friends!
Here’s how to create your own delicious trail mix:
Ingredients:
– 1/4 cup mixed nuts (like almonds and cashews)
– 1/4 cup seeds (such as pumpkin and sunflower)
– 1/4 cup dried fruit (try cranberries or raisins)
– 2 tablespoons dark chocolate chips
Instructions:
1. Grab a bowl and toss in all the ingredients.
2. Mix everything together until well combined.
3. Divide the mix into small containers or bags for easy snacking.
Feel free to adjust the sweetness by adding more or fewer chocolate chips. This flexibility means you can make it just the way you like!
Frequently Asked Questions
Q: How long will it stay fresh?
A: When stored in an airtight container, your trail mix can last for weeks!
With this Sweet and Savory Trail Mix, you have a nutritious, budget-friendly lunch option that’s as cool as it is delicious. It’s perfect for keeping you fueled and focused throughout your school day, making every bite count!
• Mix nuts and seeds for a crunchy base
• Add dried fruits for sweetness and chew
• Toss in dark chocolate for a tasty twist
• Pack in small bags for on-the-go convenience
Sweet and Savory Trail Mix
Editor’s Choice

Bumkins Reusable Snack Bags, for Kids School Lunch and for Adults Portio…
 Amazon$8.95
Blue Diamond Almonds, Mixed Nuts Roasted Sea Salt Deluxe Snack Nuts, Alm…
 AmazonCheck Price
365 by Whole Foods Market, Dark Chocolate Baking Chunks, 12 Ounce
 Amazon$6.69
28. Veggie Quesadillas
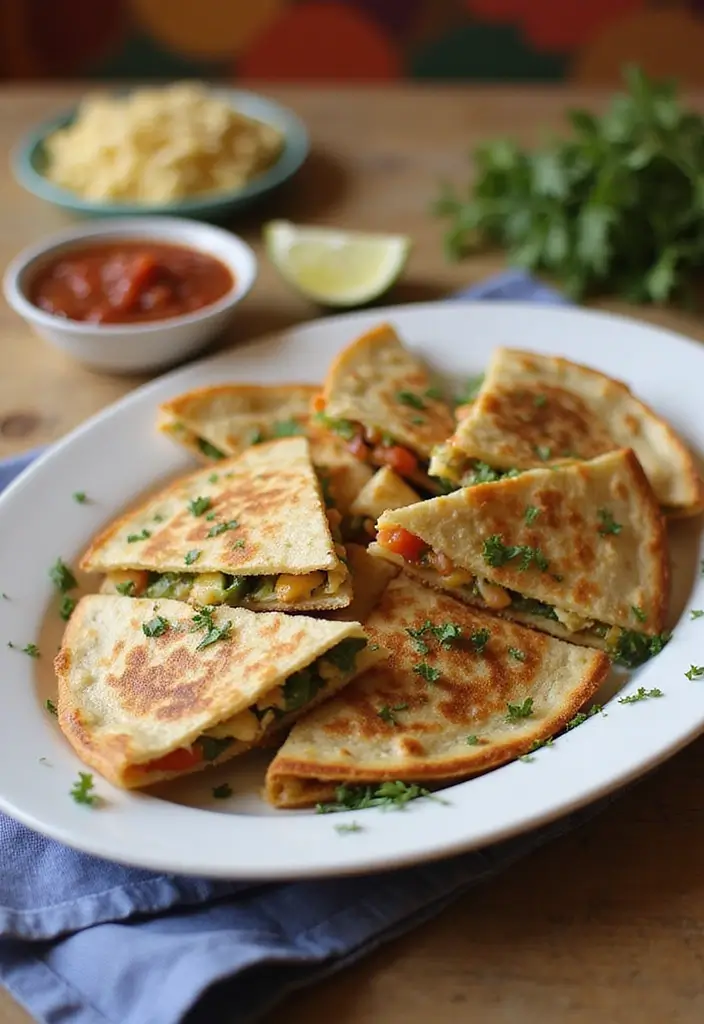
Veggie Quesadillas are a delicious and easy lunch choice that high schoolers adore! These cheesy treats are packed with colorful vegetables, and you can customize them with whatever ingredients you have on hand. Picture this: you bite into a crispy quesadilla, and the melted cheese mingles perfectly with fresh veggies. It’s a flavor explosion you won’t want to miss!
To make your quesadillas, start with whole wheat tortillas. These add a nutty flavor and extra fiber. Load them up with cheese and a fun mix of veggies like bell peppers, spinach, and mushrooms. Grill them in a skillet until they’re golden and crispy. Then, cut them into wedges for easy munching. Serve with tasty salsa or creamy guacamole for that extra zing!
Recipe Overview
– Servings: 1
– Prep Time: 10 minutes
– Cook Time: 10 minutes
– Total Time: 20 minutes
– Calories: Approximately 350
Nutrition Information
– Protein: 12g
– Carbs: 40g
– Fat: 15g
Ingredients
– 1 whole wheat tortilla
– 1 cup shredded cheese (try cheddar or mozzarella)
– 1/2 cup assorted vegetables (bell peppers, spinach, mushrooms)
– Salsa or guacamole for dipping
Step-by-Step Instructions
1. Heat a skillet over medium heat.
2. Place the tortilla in the skillet and sprinkle cheese and veggies on one half.
3. Fold the tortilla over and cook until the cheese is melted and both sides are golden brown.
4. Cut into wedges and pack with salsa or guacamole.
Want to boost the protein? Add cooked chicken to your filling!
Frequently Asked Questions
Q: Can I make these ahead of time?
A: Yes! You can prepare them in advance and just reheat before enjoying. This makes lunch prep super easy!
Veggie quesadillas are not just a meal; they’re a chance to get creative in the kitchen. Enjoy making them your own!
Veggie Quesadillas
Editor’s Choice

Mission 10 Inch Carb Balance Whole Wheat Tortillas LARGE Burrito 8 ct 20…
 Amazon$27.67
Amazon Grocery, Mexican-Style Four Cheese Blend, Finely Shredded, 16 Oz …
 Amazon$2.08
Conclusion
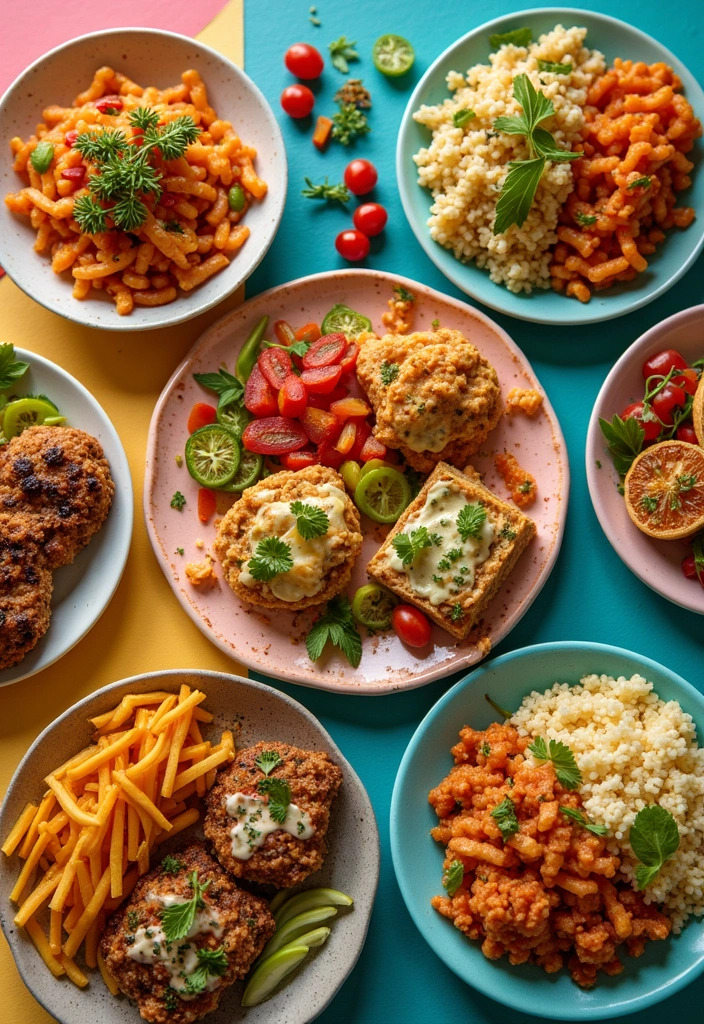
Lunchtime should be enjoyable, not a chore, and these 28 lunch ideas for high schoolers prove just that! With a variety of flavors and nutrition-packed options, there’s something for every teen to love.
Experimenting with these recipes will not only make packing lunch more exciting but also help develop healthy eating habits that can last a lifetime. So grab your lunchbox, pick a recipe, and get ready to impress your friends at school!
Note: We aim to provide accurate product links, but some may occasionally expire or become unavailable. If this happens, please search directly on Amazon for the product or a suitable alternative.
This post contains Amazon affiliate links, meaning I may earn a small commission if you purchase through my links, at no extra cost to you.
Frequently Asked Questions
What are some quick and easy lunch ideas for high schoolers?
When time is tight, quick and easy lunch ideas for high schoolers can save the day! Consider options like wraps filled with lean proteins and veggies, or simple pasta salads that can be made in advance. Think about packing nut butter and banana sandwiches or hummus with veggie sticks for a nutritious touch. These meals are not only easy to prepare but also packed with the nutrients teens need!
How can I make nutritious meals for teens fun and appealing?
Making nutritious meals for teens fun is all about creativity! Try using colorful ingredients to make the food visually appealing. You can also let them customize their meals with toppings or dips. Interactive lunches like taco bars or DIY sushi rolls can engage their interest. Add some fun shapes with cookie cutters to fruits and sandwiches, or create themed lunches based on their favorite foods!
What are some healthy lunch options that can be prepped in advance?
Prepping lunches in advance is a fantastic way to ensure healthy options are always available! Some great options include quinoa salad with vegetables, chicken stir-fry portions, or vegetable soup in jars. You can also make overnight oats for a nutritious breakfast or lunch. Just pack them in containers and grab them on the go for quick meals throughout the week!
What should I consider when packing a lunch for my high schooler?
Packing a lunch for your high schooler? Keep in mind their taste preferences and nutritional needs! Include a mix of protein, whole grains, and plenty of fruits and veggies to keep them energized. Make sure to pack items that can hold up well in a lunchbox, like bento-style boxes or insulated containers to keep items fresh. Don’t forget to include a fun note or treat to brighten their day!
Are there any lunch ideas for high schoolers that are budget-friendly?
Absolutely! Budget-friendly lunch ideas for high schoolers can be delicious and nutritious! Think about making vegetable stir-fries with rice or bean and cheese quesadillas. Bulk ingredients like pasta, rice, and canned beans can stretch your budget. You can also prepare homemade snacks like popcorn or trail mix to save money while keeping your teen satisfied and healthy!
Related Topics
lunch ideas for high schoolers
healthy lunch options
easy lunch recipes
quick lunch ideas
nutritious meals for teens
packed lunch suggestions
meal prep for teens
school lunch ideas
balanced meals
on-the-go lunches
kid-friendly recipes
easy healthy meals
