Getting kids to eat their lunches can feel like a high-stakes game. You pack the same sandwiches, and by Wednesday, all you hear is, “Not that again!” This struggle is real for many parents trying to balance nutrition with their kids’ preferences. That’s why I created this list of 25 Non-Sandwich School Lunch Ideas for Kids That They’ll Actually Eat.
If you’re a parent or caregiver who worries about lunchtime boredom, you’re in the right place. You want meals that are not only tasty but also easy to prepare and pack. You’re probably looking for ideas that will excite your kids and keep their energy up throughout the day.
In this post, you’ll find a variety of creative lunch options that are fun, tasty, and packed with nutrition. From wraps and bento boxes to salads and snack plates, each idea is designed to appeal to kids’ tastes while making your life a little easier. You’ll discover meals that your little ones will actually look forward to, making lunchtime a win for everyone.
So, let’s dive in and explore these delicious alternatives together!
1. Mini Quinoa & Veggie Bowls
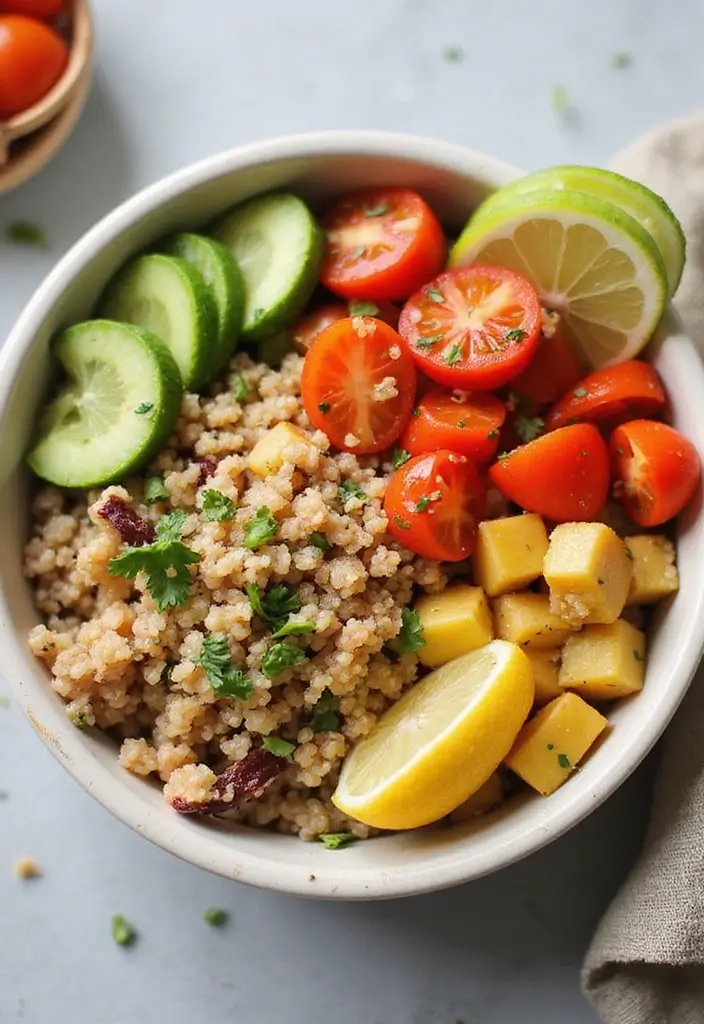
Mini quinoa and veggie bowls are a fantastic school lunch idea that kids will love. These bowls are colorful and fun, making lunchtime exciting! You can fill them with your child’s favorite vegetables, like roasted carrots, sweet cherry tomatoes, or fresh spinach. Quinoa is a great base for these bowls. It’s packed with protein and fiber, helping keep kids energized and ready to learn.
You can also add creamy toppings like hummus or Greek yogurt. Not only do they enhance the flavor, but they also add a delicious texture. Plus, you can prepare these bowls ahead of time, making them perfect for busy mornings. They can easily be vegan or gluten-free, catering to various dietary needs.
Here’s how to make them:
Servings: 4
Prep Time: 15 minutes
Cook Time: 20 minutes
Total Time: 35 minutes
Calories: Approximately 250 per serving
Ingredients:
– 1 cup quinoa
– 2 cups vegetable broth or water
– 1 cup diced vegetables (carrots, bell peppers, or zucchini)
– 1 cup spinach (fresh or sautéed)
– 1/2 cup hummus or Greek yogurt
Instructions:
1. Rinse the quinoa under cold water. In a medium pot, combine the quinoa and vegetable broth. Bring it to a boil.
2. Lower the heat, cover, and let it simmer for about 15 minutes until the quinoa is fluffy.
3. While the quinoa cooks, roast or sauté your chosen vegetables in a pan until they’re tender.
4. Assemble the bowls by layering the fluffy quinoa, colorful veggies, and topping with hummus or yogurt.
5. Serve warm or allow to cool for a refreshing cold lunch option.
Make a big batch and store it in the fridge for quick lunches throughout the week.
Frequently Asked Questions:
– Can I use brown rice instead of quinoa? Yes, just adjust the cooking time accordingly.
– How long can these bowls last in the fridge? They can last up to 4 days if stored in an airtight container.
Mini Quinoa & Veggie Bowls
Editor’s Choice

Bento Box Adult Lunch Box, Containers for Adults Men Women with 4 Compar…
 Amazon$9.99
Pride Of India – Natural Three Color Bolivian Royal Quinoa – Protein Ric…
 AmazonCheck Price
Brieftons 5-Blade Vegetable Spiralizer: Strongest-Heaviest Spiral Slicer…
 Amazon$31.99
2. Turkey and Cheese Roll-Ups
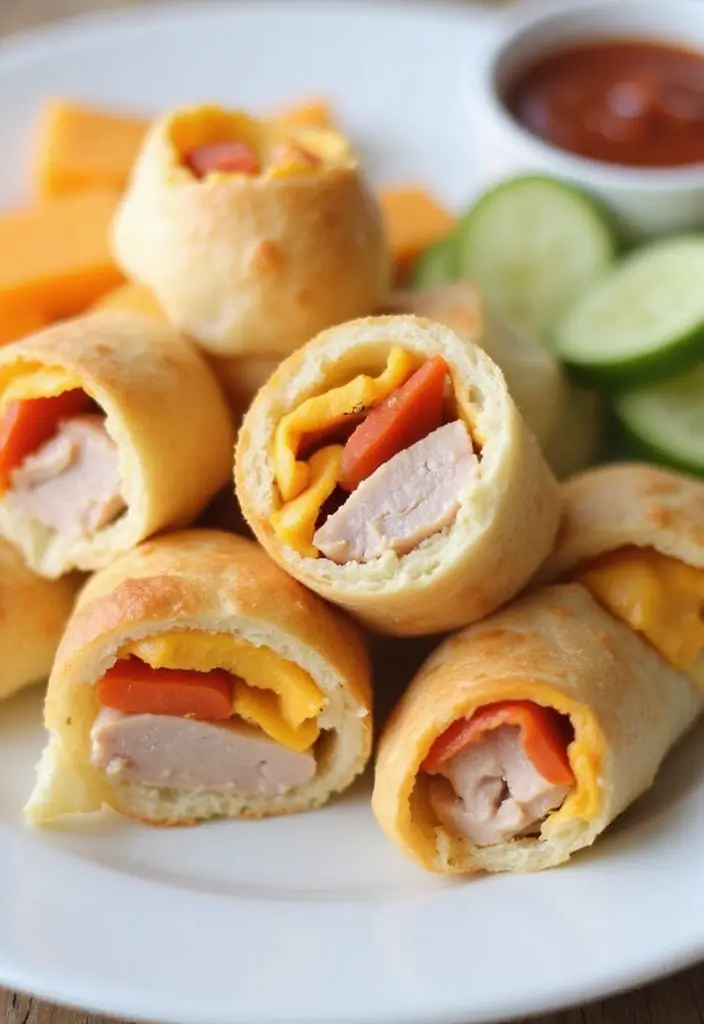
Transform lunchtime with these fun and tasty turkey and cheese roll-ups! Say goodbye to boring sandwiches and hello to a creative, nutritious option that your kids will adore. Just take a slice of turkey, add a slice of cheese, and roll it up tight. It’s that simple! These roll-ups are easy to pack and great for lunchboxes, ensuring your child has a meal they’ll actually eat.
Want to kick up the flavor? You can spread a dab of mustard or tuck in a pickle slice before rolling. Pair these delightful bites with whole-grain crackers and some fresh fruit, and you’ve got a well-rounded meal that even picky eaters will enjoy. Plus, they’re low in carbs, making them suitable for kids with dietary restrictions.
Here’s how to make your turkey and cheese roll-ups:
Servings: 1
Prep Time: 5 minutes
Cook Time: 0 minutes
Total Time: 5 minutes
Calories: Approximately 150 per serving
Ingredients:
– 2 slices of turkey breast
– 1 slice of cheese (cheddar or Swiss)
– Optional: mustard or a pickle
Instructions:
1. Lay the turkey slices flat on a clean surface.
2. Place the cheese slice on top of the turkey.
3. Roll them tightly, securing with a toothpick if needed.
4. Serve with whole-grain crackers and fresh fruit for a complete meal.
This recipe is perfect for busy parents looking to make lunch exciting. You can even switch up the deli meats and cheeses to keep things fresh. Try ham and cream cheese, or chicken with pepper jack for a spicy twist. These roll-ups are versatile, simple, and sure to be a hit at lunchtime!
Tips:
– Make them ahead of time and store them in the fridge.
– Cut them into bite-sized pieces for younger kids.
– Use different wraps like lettuce or tortillas for variety.
– Add veggies like spinach or bell peppers for extra crunch.
Turkey and Cheese Roll-Ups
Editor’s Choice

4 Pack Bento Lunch Box Set 3 Compartment Food Storage Containers Wheat S…
 Amazon$13.98
Reusable Food Bags, 12 Pack 100% Silicone Food Storage Bags Stand Up Zip…
 Amazon$39.99
Bentgo Kids Stainless Steel Utensil Set – Reusable Fork, Spoon & Storage…
 Amazon$16.99
3. Veggie & Hummus Snack Packs
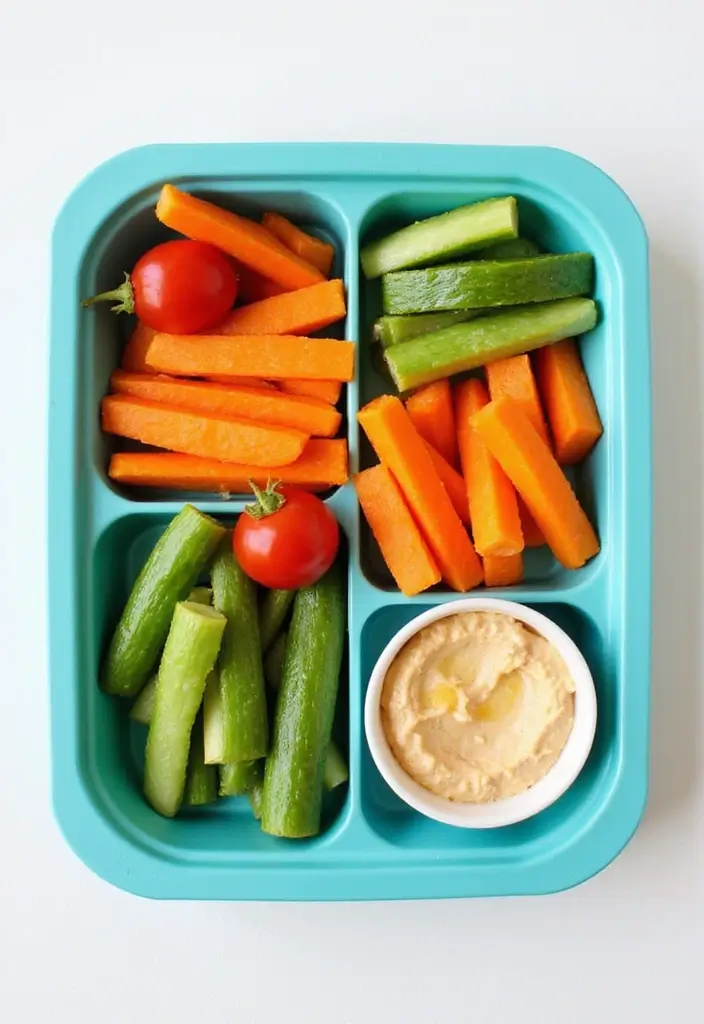
Imagine your kids diving into a colorful lunch that’s as fun to eat as it is healthy! Veggie and hummus snack packs are the perfect solution. They combine crunchy, fresh vegetables like bright orange carrots, cool cucumbers, and sweet bell pepper strips with creamy hummus that kids adore. Not only does this meal look appealing, but it also packs a nutritious punch. Kids can snack happily while getting essential vitamins and minerals.
To keep things exciting, try different hummus flavors like zesty garlic or smoky roasted red pepper. You can even add whole-grain pita chips for an extra crunch. Pinterest is buzzing with these trendy snacks, making them a hit for both lunches and after-school munchies.
Ready to whip up these delicious packs? They are budget-friendly and can be made in just 10 minutes! Grab seasonal vegetables for the freshest taste. This makes a snack that not only fills little tummies but also makes parents feel good about what their kids are eating.
Ingredients:
– 1 cup assorted vegetable sticks (carrots, cucumbers, bell peppers)
– 1/2 cup hummus (choose any flavor your kids enjoy)
– Optional: whole-grain pita chips
Instructions:
1. Start by washing and slicing the vegetables into sticks or bite-sized pieces.
2. Pack them in a container with a small cup or compartment for the hummus.
3. If your kids love crunch, add pita chips for a tasty side.
This snack is perfect for lunch boxes or quick after-school bites. Kids get to enjoy their food while you feel good knowing they are eating healthy!
Frequently Asked Questions:
– Can I use store-bought hummus? Absolutely! Store-bought is super convenient, but making your own is fun too!
Veggie & Hummus Snack Packs
Editor’s Choice

Bento Box Adult Lunch Box, Containers for Adults Men Women with 4 Compar…
 Amazon$9.99
Stacy’s Pita Chips, Parmesan Garlic & Herb Baked Chips, 16 Oz Snack Bag …
 AmazonCheck Price
4. Pasta Salad Jars
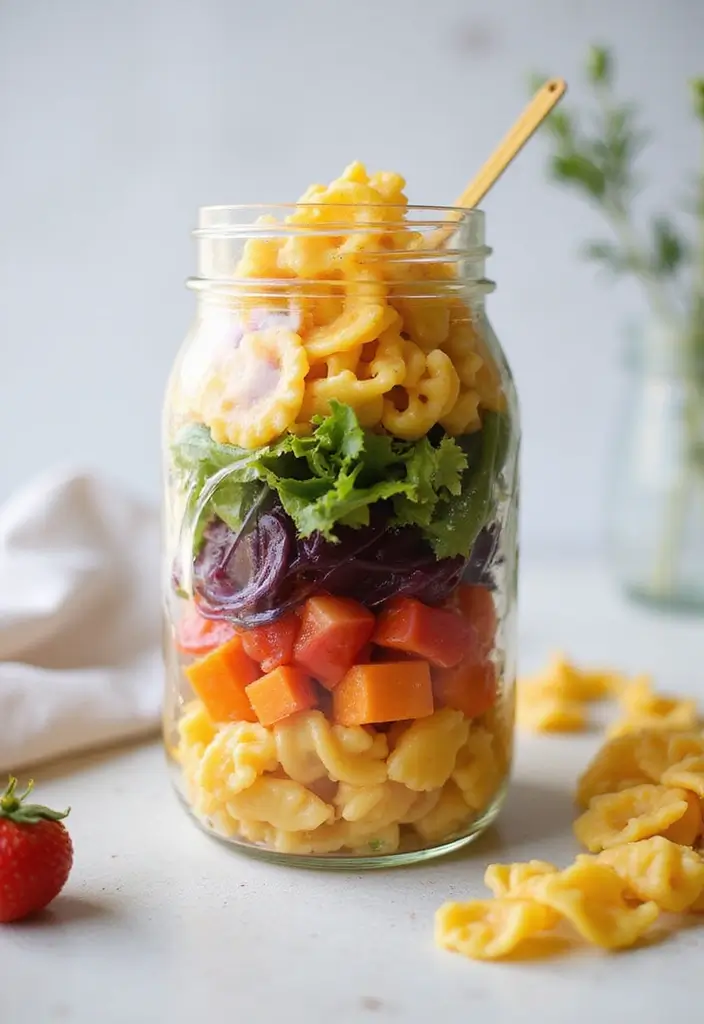
Pasta salad jars are a fun and colorful way to make lunchtime exciting for your kids! These layered delights not only look great but also taste delicious and keep them full. You can easily prepare these jars ahead of time, personalizing them with your child’s favorite ingredients. Start with whole wheat pasta as a nutritious base, then add diced veggies like bell peppers and cucumbers, some cubed cheese, and a protein like chicken or chickpeas.
When it’s time to eat, simply add dressing to keep everything fresh. This dish is perfect for kids who love vibrant colors on their plate. Plus, pasta salad jars can be served cold, making them a refreshing choice on hot days. They’re easy to pack for school and loaded with healthy nutrients!
Servings: 2
Prep Time: 15 minutes
Cook Time: 10 minutes
Total Time: 25 minutes
Calories: Approximately 300 per serving
Ingredients:
– 1 cup whole wheat pasta
– 1/2 cup diced vegetables (like cherry tomatoes or bell peppers)
– 1/2 cup cubed cheese (mozzarella or cheddar)
– 1/2 cup protein (chicken, chickpeas, or tofu)
– 1/4 cup dressing (Italian or vinaigrette)
Instructions:
1. Cook the pasta according to package instructions, then rinse it under cold water.
2. In a mason jar, start layering with pasta, followed by diced veggies, cheese, and your chosen protein.
3. When ready to eat, pour the dressing on top, seal the jar, and it’s ready to go!
Using mason jars not only makes for an eye-catching presentation but also ensures easy transport.
Tips for Success:
– Choose whole wheat pasta for added fiber
– Pick colorful veggies to make it visually appealing
– Add protein sources like beans or tofu for extra nutrition
– Place dressing in a separate container to keep it fresh until lunchtime
Pasta Salad Jars
Editor’s Choice
![25 Non-Sandwich School Lunch Ideas for Kids That They’ll Actually Eat 21 Wide Mouth Mason Jars 16 oz with Lids [6 Pack], Canning Jars with Metal ...](https://m.media-amazon.com/images/I/815tipUxlyL._AC_UL320_.jpg)
Wide Mouth Mason Jars 16 oz with Lids [6 Pack], Canning Jars with Metal …
 Amazon$20.99
365 by Whole Foods Market, Organic Whole Wheat Penne Rigate, 16 Ounce
 Amazon$2.49
![25 Non-Sandwich School Lunch Ideas for Kids That They’ll Actually Eat 25 VITEVER [6 Pack] Salad Dressing Container To Go, 1.6 oz Small Condiment ...](https://m.media-amazon.com/images/I/61e4L8ouG2L._AC_UL320_.jpg)
VITEVER [6 Pack] Salad Dressing Container To Go, 1.6 oz Small Condiment …
 Amazon$9.99
5. Egg Muffins

Egg muffins are a delightful solution for busy parents looking to pack protein and veggies into their kids’ lunches. These bite-sized treats are not only fun to eat but also easy to customize. You can whip them up ahead of time and serve them warm or cold, making them perfect for any lunchbox. Imagine fluffy muffins filled with colorful veggies and cheese that even picky eaters will love!
To make your egg muffins, just grab a muffin tin and get creative! You can mix in ingredients like spinach, bell peppers, or even diced ham for added flavor. Bake them until they rise and turn golden brown. The result? A nutritious snack that’s portable and perfect for on-the-go meals. Plus, they help you use up leftover vegetables, turning them into a delicious bite-sized treat!
Here’s how to make these tasty muffins:
Ingredients:
– 6 large eggs
– 1/2 cup diced vegetables (like spinach or bell peppers)
– 1/2 cup shredded cheese (your choice)
– Salt and pepper to taste
Instructions:
1. Preheat your oven to 350°F (175°C) and grease a muffin tin.
2. In a bowl, whisk the eggs until they’re fluffy. Then stir in the diced vegetables and cheese.
3. Pour the mixture into the muffin cups, filling them halfway.
4. Bake for about 20 minutes or until the muffins are puffed up and slightly golden.
5. Let them cool before transferring to an airtight container.
These muffins store well in the fridge or freezer, making them a great option for busy weekdays. Reheat them in the microwave for a quick meal!
Now you have a tasty, nutritious option for your kids’ lunches that they will actually enjoy!
• Use any leftover veggies for unique flavors
• Choose cheese types to mix things up
• Pick a muffin tin for fun shapes
• Add spices for an extra kick!
Egg Muffins
Editor’s Choice

Amazon Basics Nonstick Round Muffin Baking Pan, 12 Cups, Set of 2, Gray,…
 Amazon$14.97
Airtight Food Storage Containers with Lids, Vtopmart 24 pcs Plastic Kitc…
 Amazon$35.99
NileHome Stainless Steel Whisk Set 8″ 10″ 12″ Kitchen Whisk Balloon Whis…
 Amazon$7.59
6. Fruit and Yogurt Parfaits
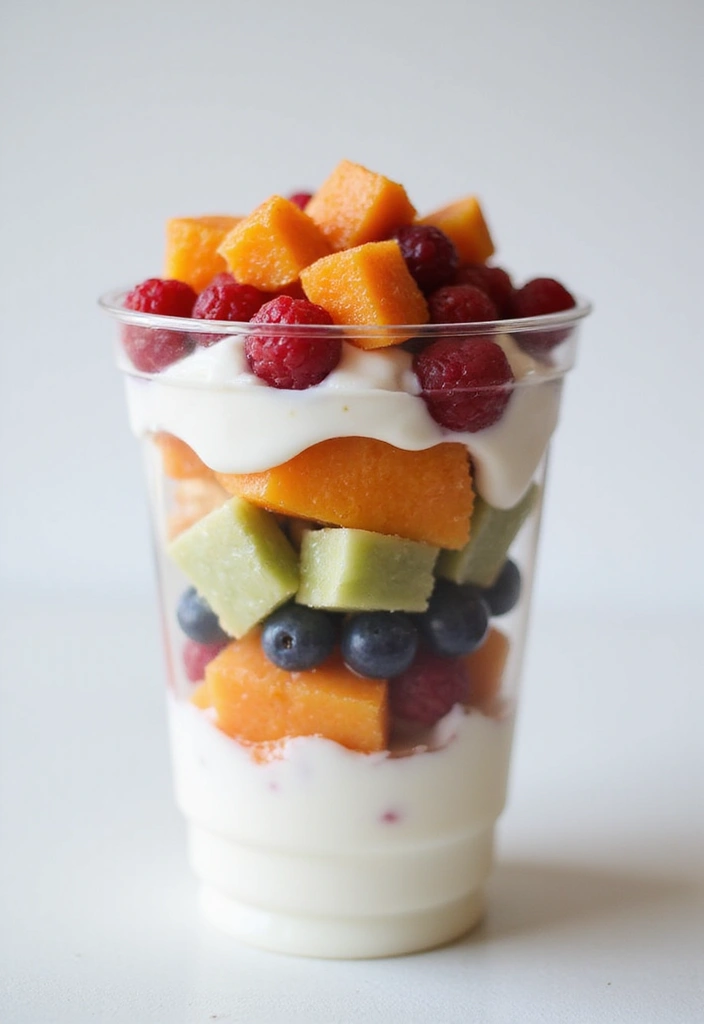
Looking for a tasty and healthy lunch your kids will actually enjoy? Fruit and yogurt parfaits are a fantastic option! They combine creamy yogurt with colorful, fresh fruits like strawberries, blueberries, and bananas. This dish is not just a feast for the eyes; it’s packed with calcium and essential vitamins that help keep your little ones energized throughout the day.
For an extra crunch, top your parfaits with granola or nuts. You can mix and match different types of yogurt too. Greek yogurt gives a protein boost, while dairy-free options cater to various dietary needs. These parfaits are perfect for kids who love variety in their meals, offering a delightful mix of flavors and textures.
Ready to make your own? Here’s how:
Servings: 1
Prep Time: 10 minutes
Cook Time: 0 minutes
Total Time: 10 minutes
Calories: Approximately 200 per serving
Ingredients:
– 1 cup yogurt (any flavor or type)
– 1 cup mixed fresh fruits (strawberries, blueberries, bananas)
– 1/4 cup granola or nuts (optional)
Instructions:
1. Begin by adding a layer of yogurt at the bottom of a cup or jar.
2. Next, pile on a layer of mixed fruits over the yogurt.
3. Repeat the layers until you reach the top. Finish with a sprinkle of granola or nuts for added texture.
4. Cover and refrigerate until it’s time for lunch.
Using seasonal fruits not only enhances the flavor but also makes the parfait look even more colorful!
Frequently Asked Questions:
– Can I use frozen fruits? Yes, just let them thaw a bit before layering. This keeps the parfait fresh and delicious!
With just a few simple steps, you can create a delightful lunch that your kids will love. Enjoy making these parfaits as a fun activity together, too!
Fruit and Yogurt Parfaits
Editor’s Choice

Ball Regular Mouth 16-Ounces Mason Jar with Lids and Bands (12-Units)
 Amazon$13.44
Oatsome Granola Variety Pack – Berry Coconut (6g Protein), Vanilla Almon…
 AmazonCheck Price
Belle + Bella Non-Dairy Vegan Yogurt Starter – Gluten Free, No Added Sug…
 Amazon$12.70
7. Sweet Potato & Black Bean Tacos
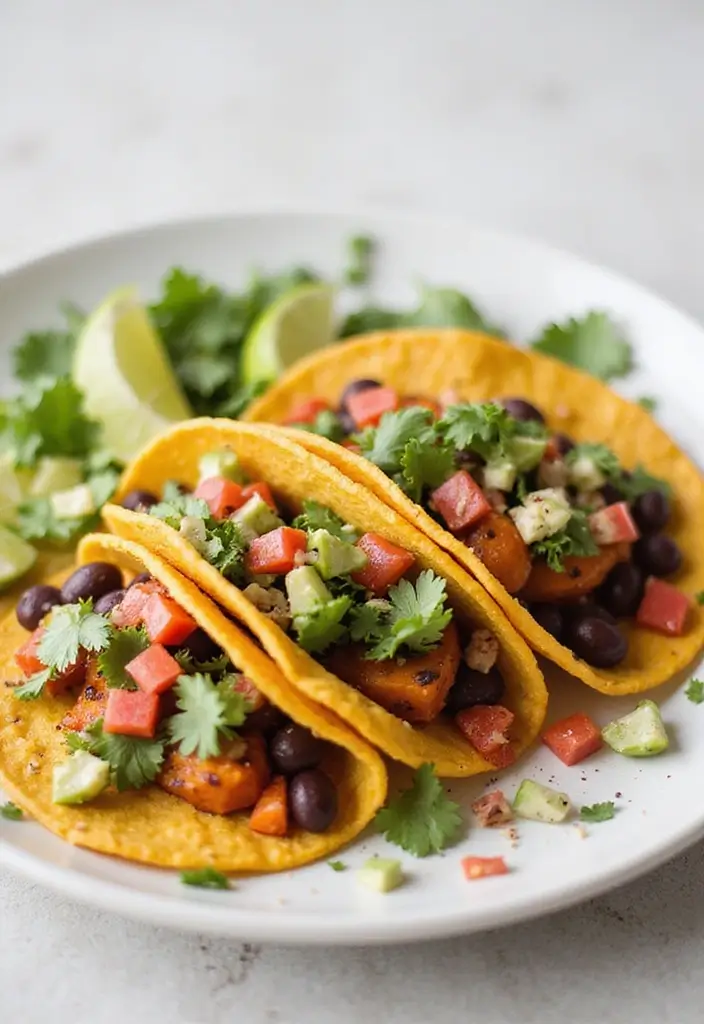
Brighten up your child’s lunch with delicious sweet potato and black bean tacos! These vibrant tacos not only look appealing but also pack a flavorful punch. The creamy sweet potatoes and hearty black beans combine to create a filling that’s sure to satisfy even the pickiest eaters. Wrap this delightful mixture in soft tortillas and top it with fresh guacamole or zesty salsa for a lunch that’s both fun and nutritious!
These tacos are perfect for busy school days. They’re vegan-friendly, rich in fiber, and loaded with essential vitamins, making them a smart choice for kids. Plus, they taste great cold, so you can prep them in advance and save time in the morning. Let’s dive into how to make this easy and delicious meal!
Ingredients:
– 2 medium sweet potatoes, diced
– 1 can black beans, drained and rinsed
– 8 small tortillas (corn or flour)
– Optional toppings: guacamole, salsa, or cheese
Instructions:
1. Preheat your oven to 400°F (200°C).
2. Toss the diced sweet potatoes with olive oil, salt, and pepper. Spread them on a baking sheet and roast for about 25 minutes until they’re soft and slightly caramelized.
3. In a mixing bowl, combine the roasted sweet potatoes and black beans until well mixed.
4. Take your tortillas and fill each with the sweet potato and bean mix, adding guacamole or salsa on top as desired.
5. Pack them up for lunch or enjoy them right away! You can even make the filling in advance and assemble the tacos in the morning for a quick meal.
Frequently Asked Questions:
– Can I use other types of beans? Yes! Pinto or kidney beans are great substitutes.
– How can I make these tacos kid-friendly? Let your kids choose their favorite toppings for a fun, personalized meal!
These tacos are not just a meal; they’re a tasty adventure that your kids will love. Enjoy making them!
Sweet Potato & Black Bean Tacos
Editor’s Choice
Bentgo Prep – 20-Piece 1-Compartment Reusable Meal Prep Containers with …
 Amazon$12.53
ProKeeper Fresh Guacamole Plastic Kitchen Storage Container with Airtigh…
 Amazon$15.95
8. Savory Oatmeal Bowls
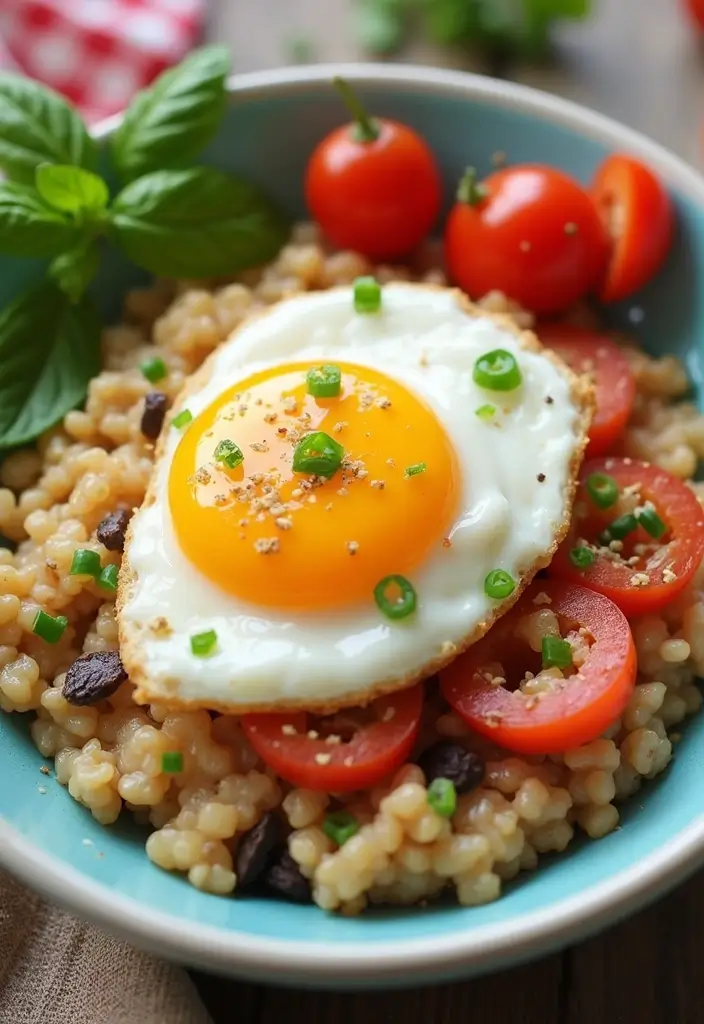
Imagine a lunch that warms your child’s belly and fuels their learning. Savory oatmeal bowls are just that! Start with a base of steel-cut or instant oats cooked in vegetable broth instead of plain water. This simple switch adds a burst of flavor that your kids will love. Then comes the fun part—toppings! Let your kids get creative with their choices. Think sautéed spinach, a perfectly poached egg, shredded cheese, or creamy avocado slices.
These bowls are a cozy option for lunch. They provide lasting energy, helping kids stay focused during their classes. Plus, they’re super easy to prepare ahead of time. Just make a big batch, store it in the fridge, and reheat when you need a quick meal. You’ll find that this hearty twist on oatmeal is a delightful surprise that kids will actually eat!
Servings: 2
Prep Time: 5 minutes
Cook Time: 10 minutes
Total Time: 15 minutes
Calories: Approximately 250 per serving
Ingredients:
– 1 cup steel-cut oats or instant oats
– 2 cups vegetable broth
– Optional toppings: sautéed spinach, poached egg, shredded cheese, avocado slices
Instructions:
1. Bring the vegetable broth to a simmer in a pot.
2. Add the oats and cook according to package directions (about 20 minutes for steel-cut oats and 5 minutes for instant oats).
3. Once cooked, divide the oatmeal into bowls.
4. Top with your kids’ favorite toppings.
5. Serve warm and enjoy a cozy lunch together!
Feel free to mix and match toppings to keep lunchtime interesting. Not only will your child enjoy this meal, but you’ll also love how easy it is to prepare!
Frequently Asked Questions:
– Can I make this gluten-free? Yes, just ensure you are using gluten-free oats.
Savory Oatmeal Bowls
Editor’s Choice

Bob’s Red Mill Steel Cut Oats, 24oz (Pack of 4) – Non GMO, Whole Grain, …
 Amazon$13.64
365 by Whole Foods Market, Organic Low Sodium Vegetable Broth, 32 Fl Oz
 Amazon$3.69
50 Pack (100-Piece) 32 oz Meal Prep Containers Reusable with Lids 3-Comp…
 Amazon$21.99
9. Caprese Skewers
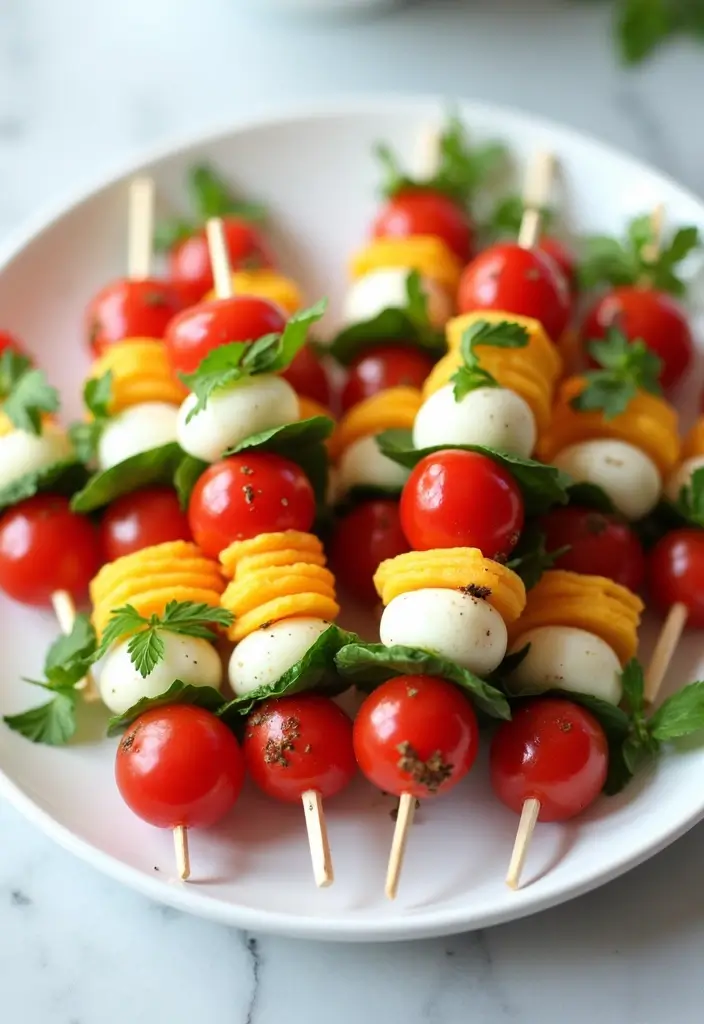
Imagine making lunch fun and fancy with Caprese skewers! These colorful bites are not only visually appealing but super simple to whip up. You can easily alternate juicy cherry tomatoes, creamy mozzarella balls, and fragrant basil leaves on a skewer. This combination creates a fresh and tasty option your kids will love. Plus, they’re packed with vitamins and minerals, making them a great choice for school lunches.
To take these skewers to the next level, drizzle a bit of balsamic glaze on top. This adds a sweet tang that makes every bite exciting. You can prepare them the night before, meaning less stress for you in the morning. Kids will enjoy the hands-on experience of eating off a stick, turning a regular lunch into a delightful adventure!
Ingredients:
– 1 cup cherry tomatoes
– 1 cup mini mozzarella balls
– Fresh basil leaves
– Optional: balsamic glaze for drizzling
Instructions:
1. Start by threading a cherry tomato onto a skewer.
2. Add a fresh basil leaf next, followed by a mozzarella ball.
3. Repeat this process until the skewer is filled.
4. If you like, drizzle balsamic glaze over the skewers before packing them up.
Tip: For younger kids, use toothpicks for smaller portions that are easier to handle.
Frequently Asked Questions:
– How long do these skewers last? Store them in the fridge for up to 2-3 days for the best taste.
This simple recipe not only encourages kids to eat healthier but also sparks their creativity at lunchtime.
Caprese Skewers
Editor’s Choice

HOPELF 12″ Natural Bamboo Skewers for BBQ,Appetiser,Fruit,Cocktail,Kabob…
 Amazon$6.99
Filippo Berio Glaze with Balsamic Vinegar of Modena, 8.4 Ounce Plastic B…
 Amazon$5.79
Bentgo® Modern Tray with Matte Lid – Reusable, BPA-Free, Meal Prep Conta…
 AmazonCheck Price
10. Chicken & Veggie Stir-Fry
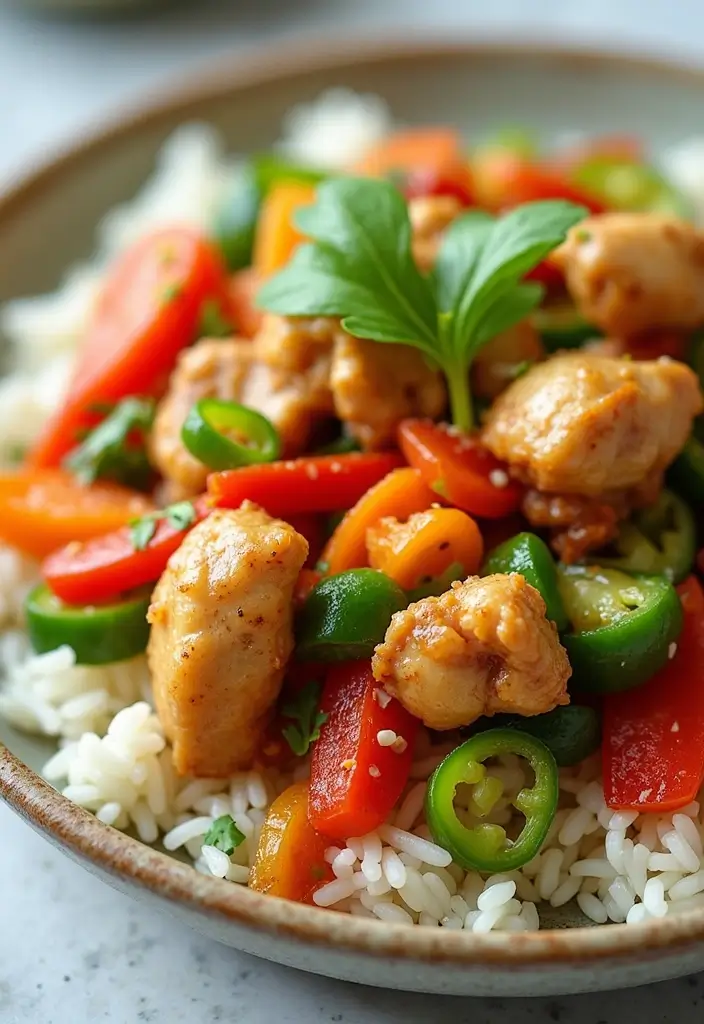
Chicken and veggie stir-fry is a fantastic solution for busy parents looking to pack healthy meals into their kids’ lunchboxes. This vibrant dish combines tender chicken pieces with a rainbow of veggies like bright bell peppers, crisp broccoli, and sweet carrots. Not only does it look appealing, but it also offers a balance of nutrients that your active kids need to thrive. Serve it over fluffy brown rice or whole-wheat noodles for a hearty meal that keeps them energized throughout the day.
You can whip this up in under 30 minutes, making it a go-to recipe for school lunches. The best part? You can tailor the stir-fry sauce to match your child’s taste—whether they love savory teriyaki, classic soy sauce, or a tangy sweet-and-sour flavor. This dish is a powerhouse of protein and essential vitamins, perfect for refueling those little bodies after a long day.
Here’s how to make it:
Servings: 4
Prep Time: 10 minutes
Cook Time: 20 minutes
Total Time: 30 minutes
Calories: Approximately 350 per serving
Ingredients:
– 1 lb chicken breast, diced
– 2 cups mixed vegetables (broccoli, bell peppers, carrots)
– 2 tablespoons soy sauce
– 1 tablespoon olive oil
– Optional: brown rice or whole-wheat noodles
Instructions:
1. Heat olive oil in a pan over medium heat. Add the diced chicken.
2. Cook the chicken until it’s browned and cooked through, about 5-7 minutes.
3. Toss in the mixed vegetables and stir-fry for another 5-7 minutes.
4. Pour the soy sauce over the chicken and veggies, stirring to coat everything evenly.
5. Serve it on a bed of brown rice or whole-wheat noodles if you like.
Don’t forget to save any leftovers! They’ll make for a delicious and satisfying lunch the next day.
Frequently Asked Questions:
– Can I use frozen vegetables? Absolutely! Frozen veggies work great for this recipe and save you prep time.
Chicken & Veggie Stir-Fry
Editor’s Choice

CAROTE Nonstick Frying Pan Skillet,Non Stick Granite Fry Pan Egg Pan Ome…
 Amazon$14.99
Bento Box Adult Lunch Box, Containers for Adults Men Women with 4 Compar…
 Amazon$9.99
11. Homemade Lunchables
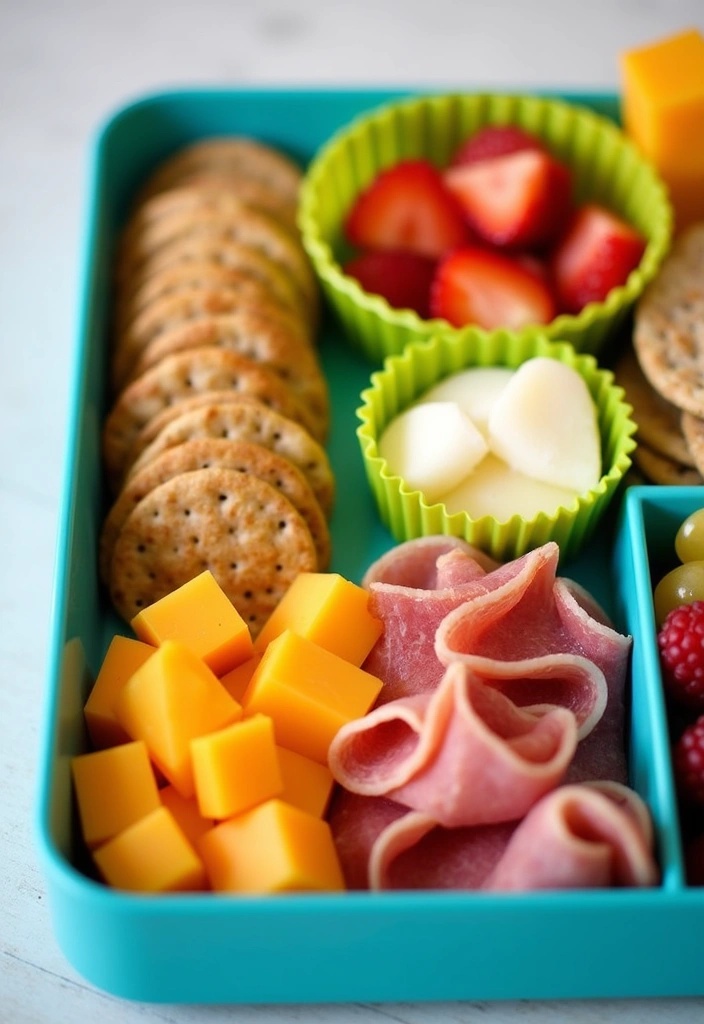
Make lunchtime exciting with your very own Homemade Lunchables! This fun and portable idea allows your kids to create their own meals, giving them a sense of control and creativity. Fill a bento box or a sectioned container with delightful choices like sliced deli meats, various cheeses, whole grain crackers, and fresh fruits. Kids enjoy assembling their lunches, and you can ensure they’re packed with healthy ingredients.
You can tailor this lunch to different themes each week. Try an Italian vibe with salami and mozzarella or go for a Mexican twist with tortilla chips and guacamole. This approach is perfect for picky eaters, making mealtime interactive and enjoyable!
Here’s how to put it all together. It takes just 15 minutes, and you can keep costs low by buying ingredients in bulk. This customizable option lets you mix it up weekly, ensuring your little ones never get bored. Plus, it’s a great way to sneak in some nutrition without them even noticing!
Ingredients:
– 4 slices of deli meat (like turkey or ham)
– 4 slices of cheese (cheddar or mozzarella)
– Whole grain crackers
– Fresh fruits (grapes, apple slices)
– Optional: a small container of mustard or hummus for dipping
Instructions:
1. In a compartmentalized container, layer the deli meat and cheese slices.
2. Fill one section with whole grain crackers.
3. Add fresh fruits like grapes or apple slices in another compartment.
4. If desired, pack a small container of mustard or hummus for dipping.
Mix and match ingredients to keep things fresh and exciting! This lunch idea is not only appealing to kids but also easy for you to prepare.
Frequently Asked Questions:
– Are these suitable for older kids? Yes! Adjust portion sizes based on their appetite.
Take the stress out of lunch prep with this fun option that kids will love!
Homemade Lunchables
Editor’s Choice

Bento Box Adult Lunch Box, Containers for Adults Men Women with 4 Compar…
 Amazon$9.99
12. Zucchini Pizza Bites
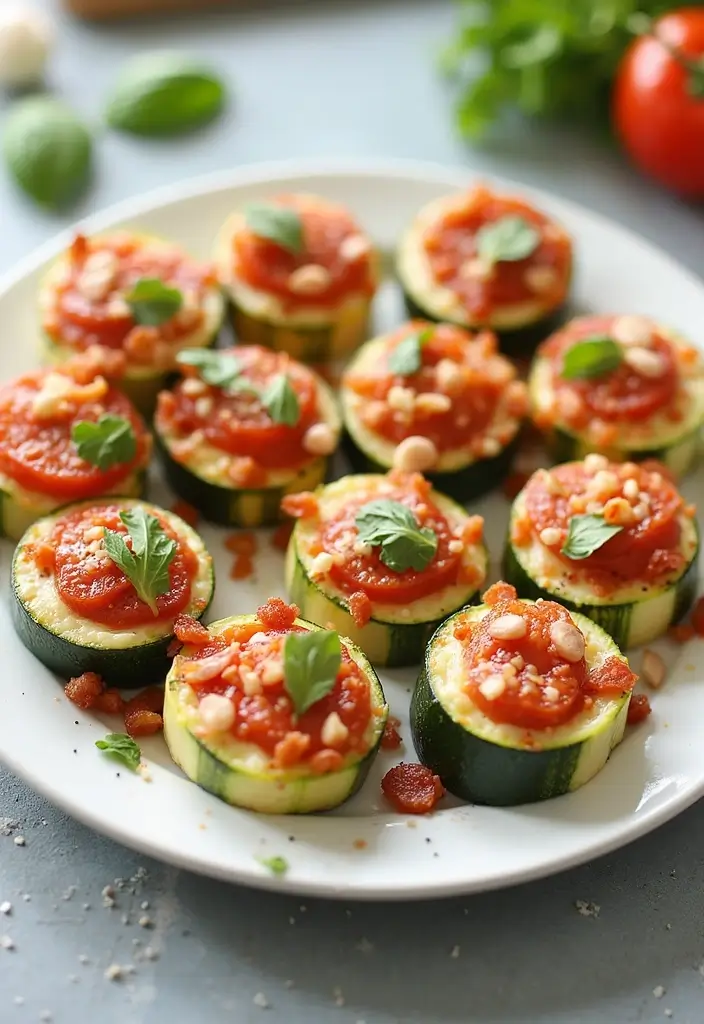
Imagine serving up a delicious treat that your kids will actually love, while also sneaking in some healthy veggies. Zucchini pizza bites are a fantastic, gluten-free twist on classic pizza that will make lunchtime fun. Simply slice zucchini into thick rounds and let your kids customize their own mini pizzas with marinara sauce, gooey cheese, and their favorite toppings. Bake them until they’re bubbly and golden, and watch your kids devour these tasty bites with glee!
These little delights not only satisfy cravings but also pack in nutrients. They’re perfect for busy parents looking to keep lunch exciting and nutritious. Plus, they’re easy to prepare in advance and can be reheated for a quick meal the next day. Your kids will be asking for these again and again!
Here’s how to make zucchini pizza bites:
Servings: 4
Prep Time: 10 minutes
Cook Time: 15 minutes
Total Time: 25 minutes
Calories: Approximately 180 per serving
Ingredients:
– 2 medium zucchinis, sliced
– 1 cup marinara sauce
– 1 cup shredded mozzarella cheese
– Optional toppings: pepperoni, bell peppers, olives
Instructions:
1. Preheat your oven to 400°F (200°C) and line a baking sheet with parchment paper.
2. Arrange the zucchini slices on the baking sheet. Spread marinara sauce on each slice.
3. Sprinkle cheese generously on top, adding any extra toppings your kids love.
4. Bake for about 15 minutes, or until the cheese is melted and bubbly.
5. Allow them to cool slightly before packing them up for lunch.
You can even make these bites a day ahead. Just store them in the fridge and reheat for a quick, healthy lunch option. If your kids enjoy different veggies, feel free to experiment. Try mushrooms or cauliflower for a change!
• Slice zucchini into thick rounds for the best texture.
• Pack in marinara sauce for a tasty flavor boost.
• Add different toppings to keep it interesting.
• Reheat leftovers for a quick meal the next day.
With zucchini pizza bites, lunchtime becomes a fun and delicious adventure! Your kids will love making their own creations, and you’ll feel good knowing they’re eating healthy.
Zucchini Pizza Bites
Editor’s Choice


360 Count 12″x 16″ Heavy Duty Parchment Paper Sheets for Baking, No-Stic…
 Amazon$24.99
Bento Snack Box Containers for Adults Kids, 4 Pack Lunchable Meal Prep C…
 Amazon$9.99
13. Pita Pockets with Falafel
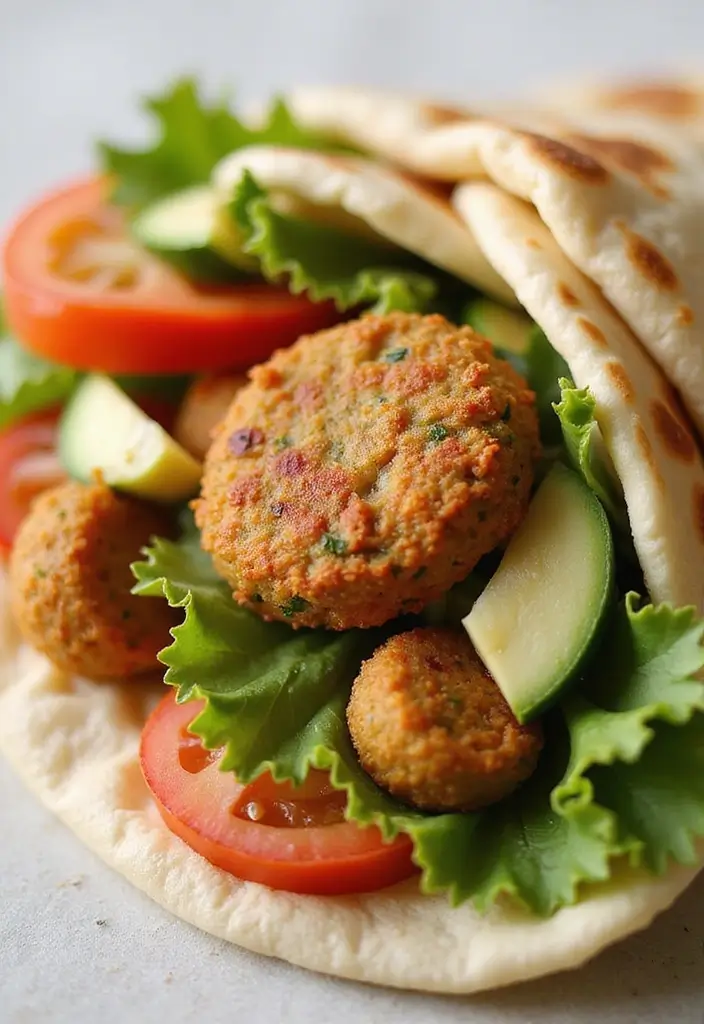
Craving a fun and tasty lunch for your kids? Try pita pockets filled with falafel! These Middle Eastern delights are not just delicious; they’re also a healthy option packed with flavor. The crispy falafel balls fit perfectly into soft pita bread, and when you add fresh veggies like lettuce, tomatoes, and cucumbers, you get a colorful and nutritious meal. A drizzle of tahini or yogurt sauce adds extra zing that kids will love.
These pita pockets are great for active kids. They provide a solid dose of protein and fiber, keeping them full and energized. Plus, they’re super easy to customize! You can make them vegetarian or vegan-friendly based on your family’s preferences. Encourage your kids to get creative with their fillings for a lunch they’ll actually eat!
Here’s how to make these yummy pita pockets:
Ingredients:
– 1 package of frozen or homemade falafel (about 12 balls)
– 4 pita breads
– 1 cup mixed salad (lettuce, tomatoes, cucumbers)
– Optional: tahini or yogurt sauce for drizzling
Instructions:
1. Cook the falafel: Follow the package instructions for baking or frying the falafel.
2. Warm the pita: Heat the pita breads in the oven for a few minutes until soft.
3. Stuff the pockets: Fill each pita with cooked falafel and top with mixed salad.
4. Add sauce: Drizzle tahini or yogurt sauce on top before closing.
Pack the falafel separately until lunchtime to keep them crispy.
Frequently Asked Questions:
– Can I make my own falafels? Yes! Making falafel from scratch can be a fun cooking project with your kids.
With this simple and exciting recipe, you can ensure your kids have a lunch they love and look forward to. Enjoy these delightful pita pockets as a go-to meal for school days or any time!
Pita Pockets with Falafel
Editor’s Choice

Flax Pita 3 Pack – Joseph’s Pita Bread Value 3-Pack, Flax Oat Bran and W…
 Amazon$26.49
14. Sweet and Savory Apple Sandwiches
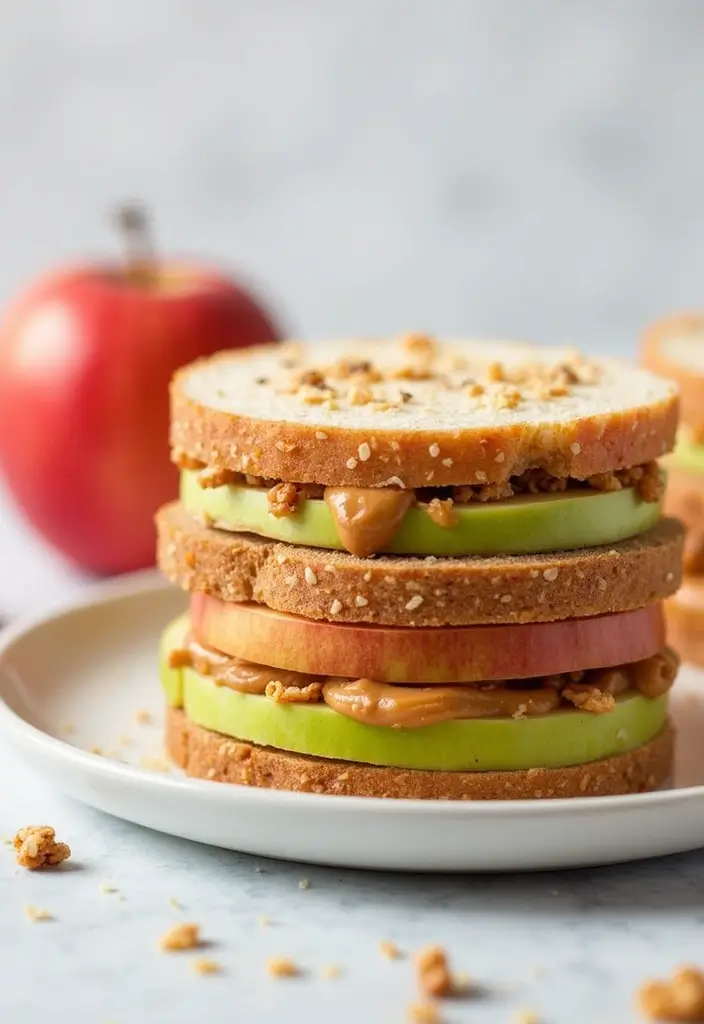
Sweet and savory apple sandwiches are a fun and healthy lunch option your kids will love! Picture this: crisp apple slices standing in for bread, filled with gooey nut butter, crunchy granola, and a hint of sweetness from honey or cinnamon. It’s a treat that combines flavors and textures in a way that excites young taste buds.
These sandwiches are not only tasty but also packed with fiber and healthy fats. They keep your kids feeling full and energized throughout the day. Plus, they’re super easy to whip up, making them a great choice for busy mornings or after-school snacks. You’ll find them disappearing quickly from lunchboxes!
Here’s how to make these delightful apple sandwiches:
Ingredients:
– 1 large apple (any variety you prefer)
– 2 tablespoons nut butter (peanut or almond work great)
– 1/4 cup granola (your favorite kind)
– Optional: honey and cinnamon for extra sweetness
Instructions:
1. Start by coring the apple and slicing it into thick rounds. Aim for about half an inch thick.
2. Spread a generous layer of nut butter on one apple slice.
3. Sprinkle granola over the nut butter for that satisfying crunch.
4. Top with another apple slice to create your sandwich.
5. Drizzle honey and sprinkle cinnamon on top if you like a little extra sweetness.
It’s best to choose firm apples, like Honeycrisp or Fuji, to prevent them from getting mushy.
Top Tips:
– Use different nut butters for variety; try sunflower seed butter for a nut-free option.
– Choose fun toppings like mini chocolate chips or dried fruit for added flavor.
– Pack them carefully in lunchboxes to keep them fresh and intact.
– Involve your kids in making these sandwiches to boost their interest in healthy eating.
Your kids will not only enjoy eating these apple sandwiches—they’ll also love helping to make them. It’s a win-win for healthy lunches!
Sweet and Savory Apple Sandwiches
Editor’s Choice
Barney Butter Almond Butter, Smooth, 10 Ounce Jar, Skin-Free Almonds, No…
 Amazon$6.98
Red Bell Pepper Corer – Pepper, Pineapple, Pear, Apple Corer – 304 Stain…
 Amazon$6.99
15. Rice Paper Rolls
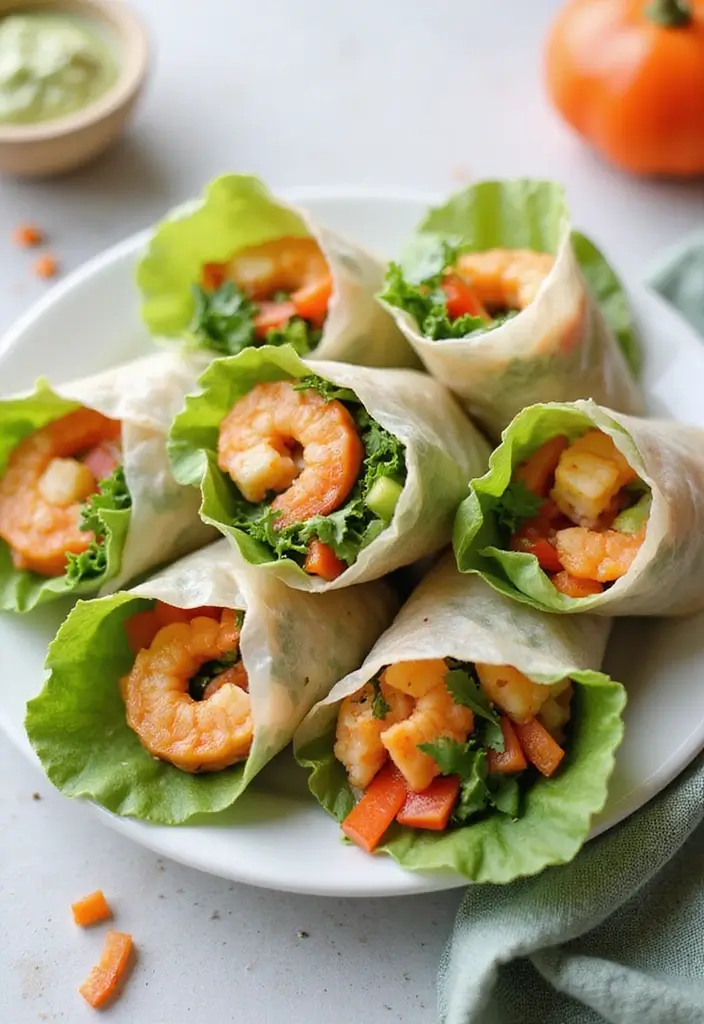
Rice paper rolls are a delightful and interactive lunch choice that your kids will adore! Imagine them crafting their own rolls filled with colorful ingredients. You can include shrimp, chicken, or fresh veggies like crispy carrots and crunchy lettuce. The best part? Kids love being hands-on, so let them personalize their rolls at lunchtime!
Pair these rolls with a tasty dipping sauce, like peanut or soy sauce, to elevate the flavors. They’re light yet satisfying, packed with nutrients. Plus, they can be prepped ahead of time, making your mornings easier.
Here’s a simple recipe to get you started:
Ingredients:
– 8 rice paper wrappers
– 1 cup cooked shrimp or chicken (optional)
– Assorted vegetables (like carrots, lettuce, and cucumber)
– Optional: dipping sauce (try peanut sauce or soy sauce)
Instructions:
1. Soak the rice paper wrappers in warm water for about 30 seconds until they soften.
2. Lay the wrappers flat and fill them with your chosen ingredients.
3. Roll them tightly and place seam-side down on a plate.
4. Serve with your favorite dipping sauce.
You can switch up the fillings to keep it exciting. Get creative with fresh herbs or other veggies too!
How to Store:
– Keep the rolls in an airtight container in the fridge for up to 2 days.
These rice paper rolls make lunchtime fun and nutritious—perfect for picky eaters and adventurous taste buds alike!
• Use fresh ingredients for vibrant flavors
• Choose a variety of fillings to keep it interesting
• Pick colorful veggies for a visual treat
• Add a fun dipping sauce to enhance taste
Fun fact: When kids make their own rice paper rolls, veggie-packed lunches see a 30% boost in liking the meal. Pair with a dip and let them customize, turning non sandwich school lunch ideas for kids into a tasty, hands-on win.
Rice Paper Rolls
Editor’s Choice

Soeos Rice Paper, White Rice Paper Wrappers, 1 Pack, 34 Sheets-Fresh Spr…
 Amazon$4.59
2 Set Dipping Sauce Plate and Holder, Plastic Dipping Dish, Soy Sauce Di…
 AmazonEUR 12.96
Bento Box Adult Lunch Box, Containers for Adults Men Women with 4 Compar…
 Amazon$9.99
16. Chia Seed Pudding
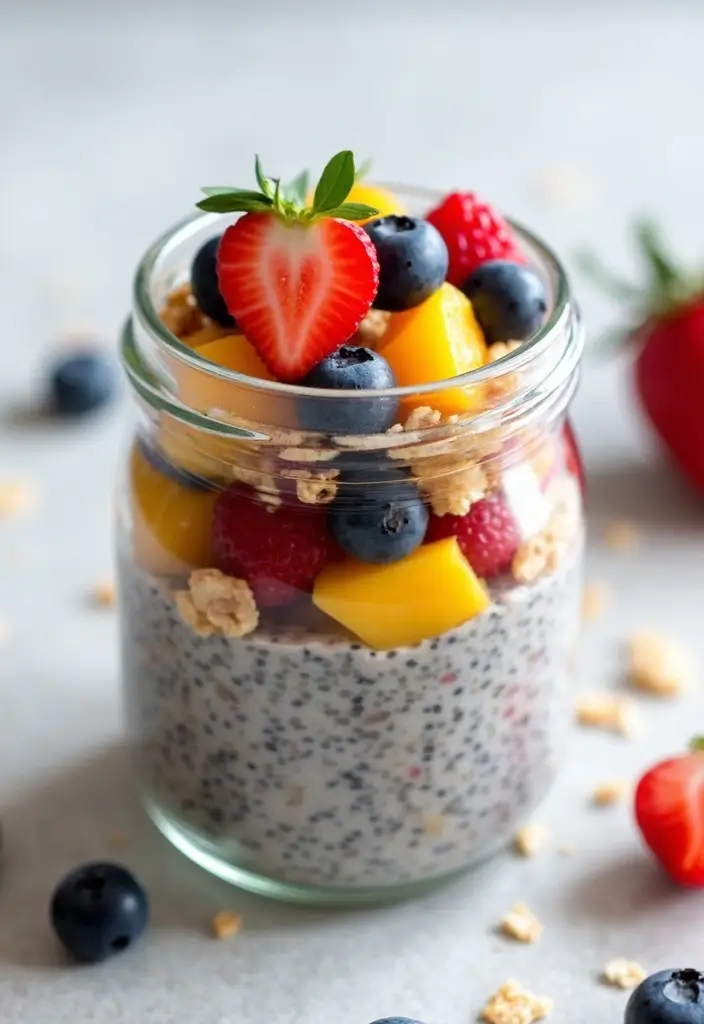
Give your kids a delicious twist on lunch with chia seed pudding! This nutritious treat is not only packed with omega-3 fatty acids and fiber, but it also offers a fun, creamy texture that kids love. Just mix chia seeds with almond milk or yogurt and let them soak overnight. The next day, you’ll have a delightful pudding that can be flavored with vanilla or cocoa powder.
Get your little ones involved by letting them choose their toppings. Fresh fruits, crunchy granola, or a drizzle of honey can make this dish even more exciting. Chia pudding is a filling option that keeps kids happy and engaged.
Recipe for Chia Seed Pudding
Servings: 2
Prep Time: 5 minutes
Cook Time: 0 minutes
Total Time: 5 minutes + overnight chilling
Calories: Approximately 150 per serving
Ingredients:
– 1/2 cup chia seeds
– 2 cups almond milk or yogurt
– 1 tablespoon honey or maple syrup (optional)
– Optional toppings: fresh berries, granola
Instructions:
1. In a bowl, combine the chia seeds and almond milk or yogurt. Add honey or maple syrup if you like it sweet.
2. Stir the mixture well and let it sit for about 5 minutes. Stir again to avoid clumping.
3. Cover the bowl and refrigerate overnight. The seeds will absorb the liquid and turn into a pudding.
4. Serve chilled, topped with fresh fruits and granola for added flavor and texture.
Make a large batch and store it in jars for easy grab-and-go lunches throughout the week!
Frequently Asked Questions:
– How long can this pudding last? It can be stored in the fridge for up to 5 days, making it perfect for meal prep.
This chia seed pudding is an easy, healthy lunch option that kids will actually enjoy. Try it out and watch them ask for more!
Did you know chia seeds absorb up to 12x their weight in liquid, turning almond milk into a creamy pudding? For non sandwich school lunch ideas for kids, this chia pudding makes fiber, omega-3s, and fun flavors easy to pack—let them choose toppings.
Chia Seed Pudding
Editor’s Choice

BetterBody Foods Organic Chia Seeds 2 lbs, 32 Oz, with Omega-3, Non-GMO,…
 Amazon$11.97
Silk Shelf-Stable Almond Milk, Unsweetened Vanilla, Dairy-Free, Vegan, N…
 Amazon$11.27
17. Homemade Granola Bars
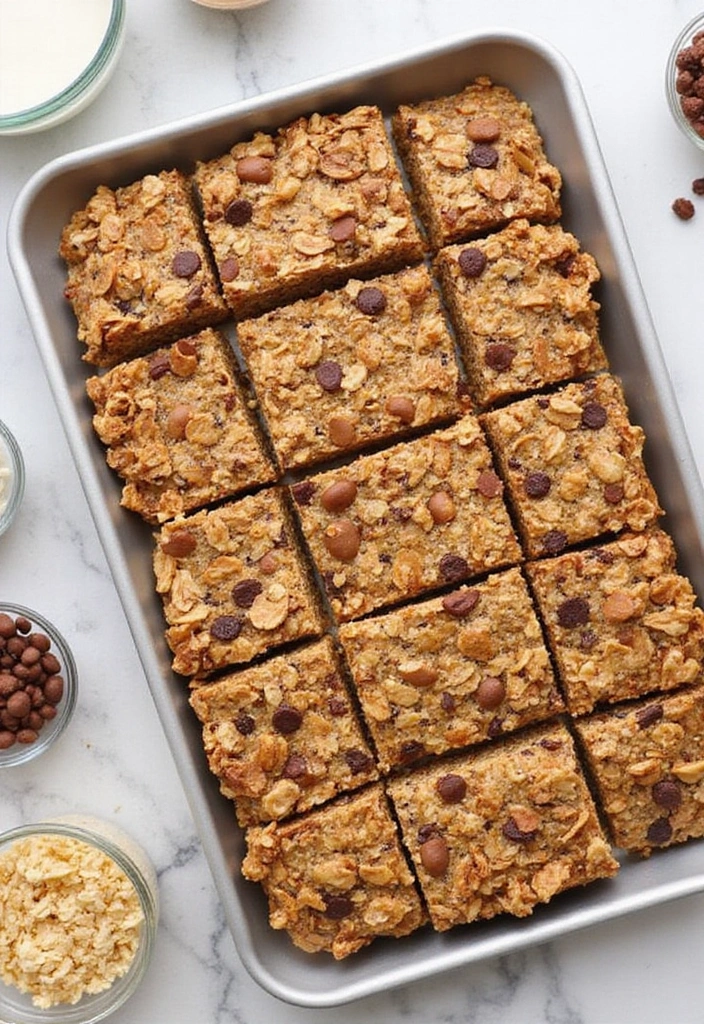
Imagine a snack that is both delicious and healthy. Homemade granola bars fit the bill perfectly! These bars are not only a great addition to lunchboxes but also a fantastic way to keep your kids energized throughout the day. Packed with wholesome ingredients like oats, nuts, seeds, and dried fruits, they offer a satisfying crunch that kids love. And the best part? You can easily customize them! Want to add chocolate chips for sweetness or sprinkle in some coconut for a tropical twist? Go for it!
Making these bars is a breeze. Just mix your ingredients, bake, and cut them into convenient portions. They’re perfect for an after-school snack or a quick breakfast on the go. Plus, you can sneak in some extra nutrition by adding flaxseed or protein powder. Your kids won’t even notice!
Here’s how to make your own homemade granola bars:
Ingredients:
– 2 cups rolled oats
– 1/2 cup honey or maple syrup
– 1/2 cup nut butter (like almond or peanut)
– 1 cup mixed nuts and seeds (your choice!)
– 1/2 cup dried fruit (like raisins or cranberries)
Instructions:
1. Preheat your oven to 350°F (175°C). Line a baking dish with parchment paper.
2. In a large bowl, combine the oats, honey, nut butter, mixed nuts, and dried fruits. Stir until everything is well mixed.
3. Press the mixture firmly into the prepared baking dish, spreading it evenly.
4. Bake for about 25 minutes or until it turns golden brown. Let it cool completely before cutting into bars.
These bars store well, too. Wrap them in parchment paper for easy grab-and-go lunches!
Common Questions:
Can I freeze these bars? Yes! They freeze well for up to 3 months.
How can I customize them? Feel free to add different nuts, seeds, or even spices like cinnamon for extra flavor.
With homemade granola bars, you can provide a healthier snack option that your kids will actually enjoy. Enjoy making them together, and watch as they become a family favorite!
Homemade Granola Bars
Editor’s Choice

Silicone Baking Mat, 3 Pack Reusable Baking Mat, Non-Stick, Food Safe Si…
 Amazon$9.99
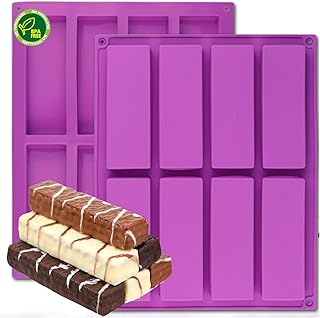
Premium Nonstick Silicone Mold for Granola Bars – Set of 2 | Easy Releas…
 Amazon$7.99
18. Cucumber Sandwiches
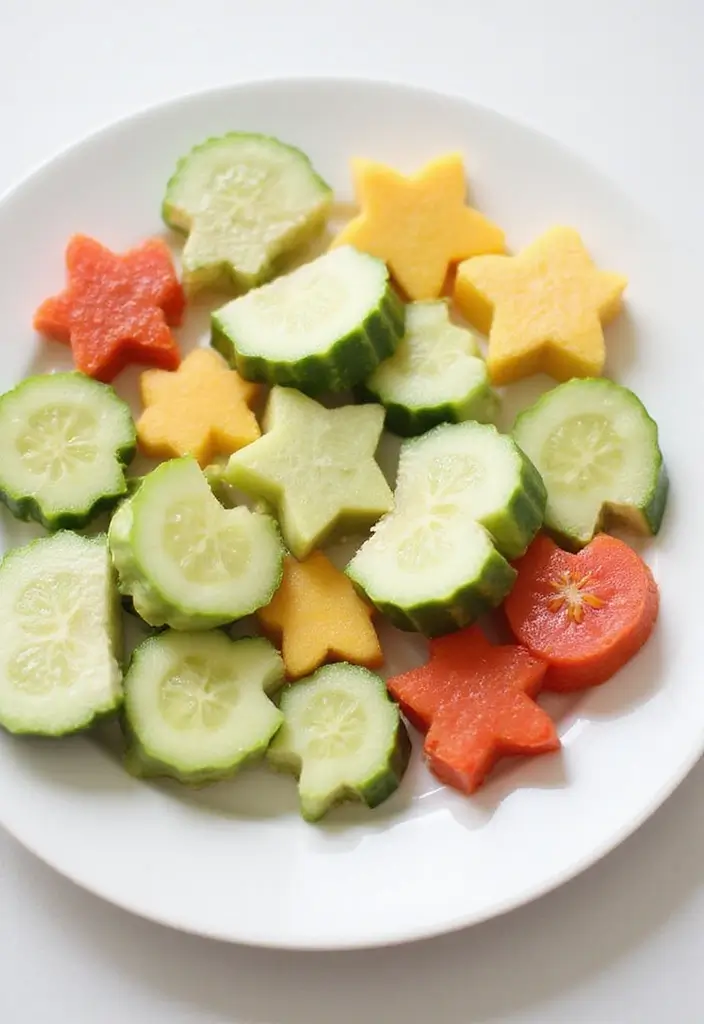
Cucumber sandwiches are a fantastic choice for a light school lunch! They offer a refreshing crunch and are super easy to make. Picture this: soft whole grain bread, creamy cheese, and crisp cucumber slices all coming together in a delightful bite. You can even sprinkle some dill or chives to add a burst of flavor that kids will love. Plus, these sandwiches are not just tasty; they’re low in calories and packed with nutrients, making them a healthy option as well.
Making these sandwiches can be a fun activity for you and your kids. Let them help by spreading the cream cheese and arranging the cucumber slices. This way, lunch becomes a fun, interactive experience!
Here’s how you can whip up these tasty treats in no time.
Servings: 2
Prep Time: 10 minutes
Cook Time: 0 minutes
Total Time: 10 minutes
Calories: Approximately 120 per serving
Ingredients:
– 4 slices whole grain bread
– 4 ounces cream cheese
– 1 small cucumber, thinly sliced
– Optional: dill or chives for garnish
Instructions:
1. Start by spreading cream cheese on one side of each slice of bread.
2. Layer the cucumber slices on top of the cream cheese.
3. Place another slice of bread on top to form a sandwich.
4. Cut the sandwich into quarters or fun shapes using cookie cutters.
This simple recipe is a great way to get your kids involved in the kitchen while serving up a delicious lunch!
If you’re wondering about storage, these sandwiches are best enjoyed fresh. However, they can stay in the fridge for a few hours without losing their crunch. Just remember to keep them covered to maintain that fresh taste!
• Use whole grain bread for added health benefits
• Choose cream cheese for a creamy texture
• Pick fresh cucumbers for the best crunch
• Add fun shapes to spark kids’ interest
Cucumber Sandwiches
Editor’s Choice

Dave’s Killer Bread 21 Whole Grains & Seeds Thin-Sliced, Whole Grain Org…
 Amazon$5.99
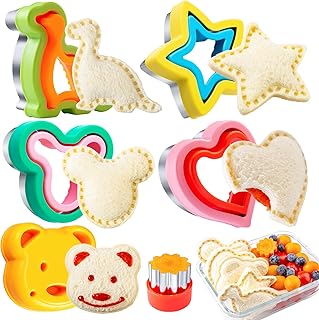
Sandwich Cutters for Kids Lunch LARGE 6 Pcs, Kimfead Sandwich Maker, Coo…
 Amazon$8.98
19. Baked Potato with Toppings

Imagine serving your child a warm, fluffy baked potato for lunch. It’s a simple yet delightful meal that kids adore! You can bake the potato until it’s tender and let your little one personalize it with their favorite toppings. Think steamed broccoli, melted cheese, or a splash of zesty salsa. This not only makes lunchtime exciting but also encourages creativity in their meals!
Baked potatoes are more than just comfort food. They are nutritious, filled with vitamins and minerals that support growing bodies. This meal will keep your child full and energized, perfect for tackling the afternoon activities. Plus, it’s easy to prepare and can be made in advance.
Here’s how to make a delicious baked potato lunch:
Ingredients:
– 1 large baking potato
– Optional toppings: steamed broccoli, shredded cheese, salsa, sour cream, or any favorite ingredients
Instructions:
1. Preheat your oven to 425°F (220°C).
2. Wash the potato thoroughly and poke it with a fork several times to let steam escape.
3. Bake the potato for about 45 minutes or until it feels soft when squeezed gently.
4. Let it cool for a few minutes, then pack it with your child’s favorite toppings.
If you have leftover baked potatoes, they make a quick and easy lunch for the next day! You can easily reheat them in the microwave for about 10-12 minutes if you’re in a hurry.
Quick Tips:
– Load up: Choose toppings that your child loves for a personalized meal.
– Mix it up: Try different combinations each week to keep it exciting.
– Pack it right: Use a thermos to keep the potato warm until lunchtime.
– Get creative: Encourage your child to invent new topping combinations!
Baked potatoes are not just a meal; they’re a canvas for creativity and healthy eating. Enjoy making this fun lunch together!
Baked Potato with Toppings
Editor’s Choice

THERMOS Stainless King Vacuum-Insulated Food Jar with Spoon, 16 Ounce, M…
 Amazon$29.49
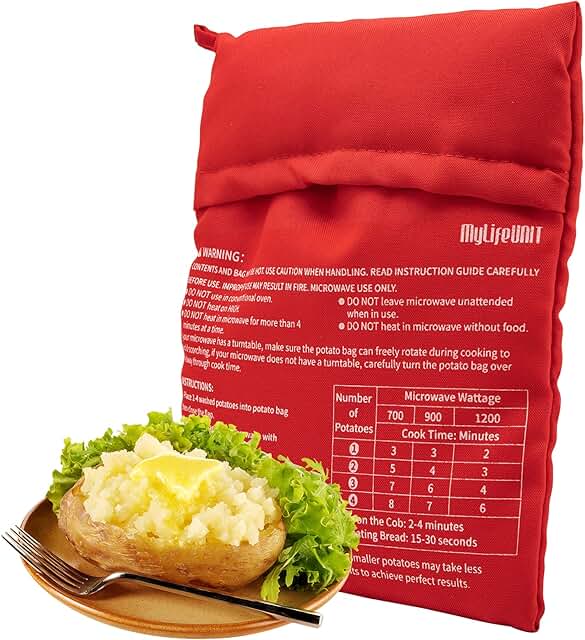
MyLifeUNIT Microwave Potato Bag, Baked Potato Microwave Baking Bag, Red
 Amazon$9.99
OBTANIM 2 Pack Microwave Potato Bag Reusable Baked Potato Pouch Bag, Red
 Amazon$8.99
20. Trail Mix
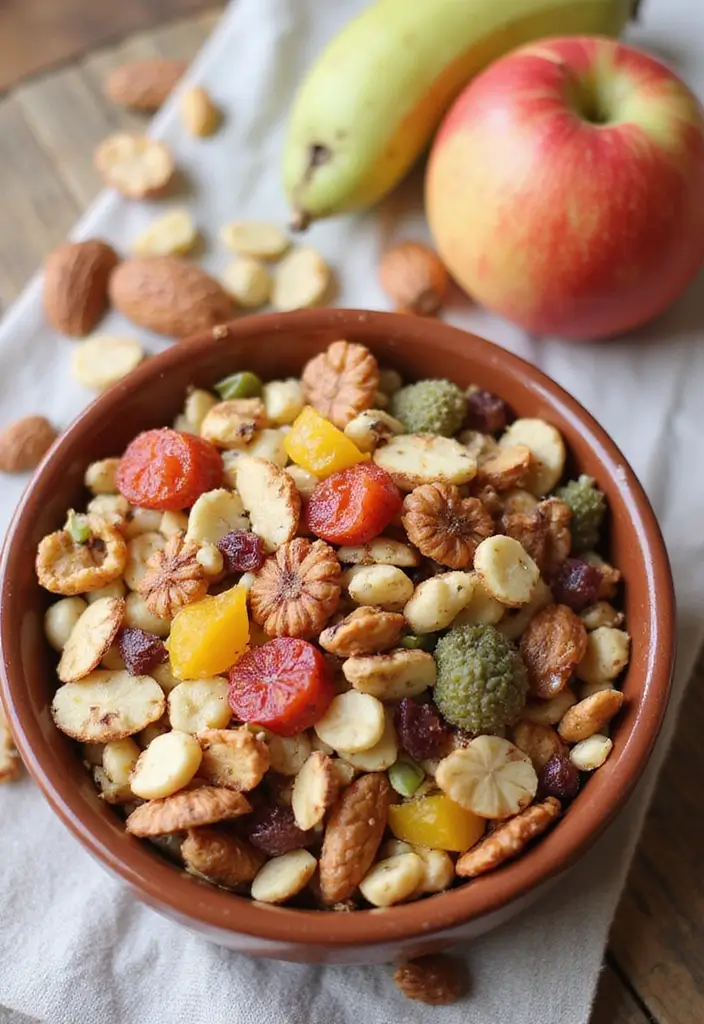
Trail Mix: A Fun and Nutritious Lunch Option
Trail mix isn’t just a snack; it can be the star of your child’s lunch! This mix of nuts, seeds, and dried fruits packs a powerful punch of energy. Imagine crunchy almonds, chewy apricots, and a sprinkle of chocolate chips coming together in one colorful container. Kids will love the variety, and you can get creative with flavors! Popular on Pinterest, trail mix is not only delicious but also a great way to keep lunchtime exciting.
Making trail mix together is a fun activity for you and your kids. Let them choose their favorite ingredients! You can keep it budget-friendly by buying in bulk. Plus, it’s easy to pack and perfect for busy school days. When your child opens their lunchbox, they’ll find a nutritious treat that makes them smile, fueling them for their afternoon adventures.
Here’s how you can whip up a delicious trail mix in no time!
Ingredients:
– 1 cup nuts (try almonds, cashews, or walnuts)
– 1 cup seeds (pumpkin or sunflower seeds work well)
– 1 cup dried fruits (raisins, cranberries, or apricots)
– Optional: 1/2 cup chocolate chips or yogurt-covered raisins
Instructions:
1. In a large bowl, toss together all the nuts, seeds, dried fruits, and chocolate chips until well mixed.
2. Divide the mixture into small snack bags or containers for easy grabbing.
3. Store in a cool, dry place until ready to pack in lunchboxes.
Customize your trail mix based on what your child loves! Add popcorn for extra crunch, or throw in some pretzels for a salty twist. Not only is trail mix versatile, but it also encourages healthy snacking habits. Your kids will enjoy creating their own mixes, making lunchtime a little more special!
Quick Tips:
– Use dried fruits like mango or banana for a tropical twist.
– Choose nuts like pecans for a buttery flavor.
– Pick seeds such as chia for added nutrition.
– Add a sprinkle of cinnamon for a sweet touch.
Now you’re ready to make a trail mix that fits your child’s taste! Enjoy packing this fun, nutrient-rich lunch.
Trail Mix
Editor’s Choice
10 Pack Dishwasher Safe Reusable Bags, Leakproof Reusable Freezer Bags, …
 Amazon$9.99
Kar’s Nuts Trail Mix Variety Pack, Pack of 24 – Yogurt Apple Nut, Mango …
 AmazonCheck Price
4Pack 6oz Reusable Stainless Steel Snack Containers for Kids, Easy Open …
 Amazon$9.99
21. Vegetable Fritters

Vegetable fritters are a sneaky and delicious way to boost your child’s veggie intake! Kids won’t even realize they’re munching on healthy ingredients. You can use grated zucchini, carrots, or any of their favorite vegetables. Just mix these veggies with eggs and flour, then pan-fry them until golden and crispy. These fritters are fun to eat and can be dipped in their favorite sauces, making lunchtime exciting! Whether served warm or cold, they fit perfectly in a lunchbox and are packed with nutrition.
Here’s how to make them. Gather your ingredients and get ready to create a meal that kids will love. Plus, this recipe is simple enough for your little ones to help out in the kitchen! They’ll enjoy mixing and shaping the fritters, making it a fun family activity.
Ingredients:
– 2 cups grated vegetables (like zucchini and carrots)
– 1/2 cup all-purpose flour
– 2 eggs
– Salt and pepper to taste
– Optional: dipping sauce (try yogurt or salsa)
Instructions:
1. In a large bowl, mix the grated vegetables, flour, and eggs until everything is well combined.
2. Season the mixture with salt and pepper to your liking.
3. Heat olive oil in a pan over medium heat. Drop spoonfuls of the mixture into the pan, flattening them slightly.
4. Cook until they turn golden brown on both sides, about 3-4 minutes per side.
5. Drain the fritters on paper towels before serving.
These fritters are not just tasty; they’re also a great way to introduce more veggies into your child’s diet without any fuss. You can even make a batch ahead of time and store them in the fridge for quick lunches throughout the week.
Frequently Asked Questions:
– Can I use frozen vegetables? Yes! Just thaw them and drain any excess water before mixing.
– How do I store leftovers? Place them in an airtight container in the fridge. They’ll stay fresh for up to three days.
Fun fact: Kids gobble up veggie fritters up to 40% more than plain veggies, thanks to the crispy texture. Grated zucchini and carrots sneak in nutrients, turning non sandwich school lunch ideas for kids into a lunchbox win. Serve warm with a dip for extra crunch and joy.
Vegetable Fritters
Editor’s Choice

CAROTE Nonstick Frying Pan Skillet,Non Stick Granite Fry Pan Egg Pan Ome…
 Amazon$14.99

Ankou Airtight Food Storage Container Sets with Lids 6Pcs Pop Containers…
 Amazon$35.99
22. Colorful Vegetable Sushi Rolls
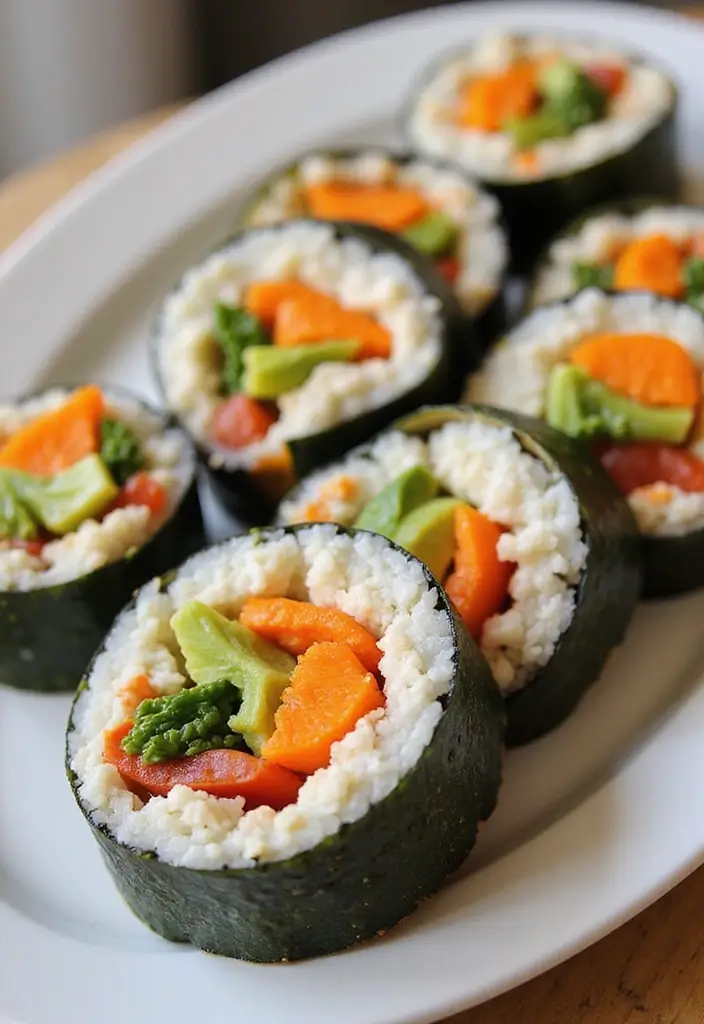
Encourage your little chefs to customize their rolls. They can pick their favorite vegetables and even choose dipping sauces like soy sauce or a tangy ponzu. This hands-on approach not only promotes healthy eating habits but also makes lunchtime something they look forward to. Plus, these rolls are super easy to pack for school lunches!
Here’s how to make these delightful sushi rolls:
Servings: 4
Prep Time: 20 minutes
Cook Time: 15 minutes
Total Time: 35 minutes
Calories: Approximately 200 per serving
Ingredients:
– 2 cups sushi rice
– 4 nori sheets
– 1 cucumber, thinly sliced
– 1 avocado, sliced
– 1 large carrot, julienned
– Optional: soy sauce or ponzu for dipping
Instructions:
1. Rinse the sushi rice under cold water until the water runs clear, then cook according to package instructions. Once cooked, let the rice cool.
2. Lay a nori sheet on a bamboo mat or a clean surface.
3. Spread a thin layer of sushi rice over the nori, leaving a border at the top.
4. Arrange a line of your chosen vegetables across the rice.
5. Roll the nori tightly from the bottom, using the mat to help. Seal the edge with a bit of water.
6. Slice the roll into bite-sized pieces. Serve with soy sauce or ponzu for dipping.
Use a sharp knife for cleaner cuts!
Got questions? You might wonder if you can add protein. Absolutely! Cooked shrimp or chicken pieces can easily enhance these rolls. Try it out and watch your kids enjoy their sushi creations!
Colorful Vegetable Sushi Rolls
Editor’s Choice

2 Pack Bamboo Sushi Rolling Mat, Sushi roll maker,Sushi making kit, Bamb…
 Amazon$4.99
Soeos Premium Sushi Rice, 4 lb (2 Pack), Calrose Rice, Medium Grain, Whi…
 AmazonCheck Price
Gimme Seaweed Sushi Nori Premium Organic Roasted Seaweed Sheets, Keto, V…
 Amazon$4.29
23. Popcorn & Fruit Snack Mix
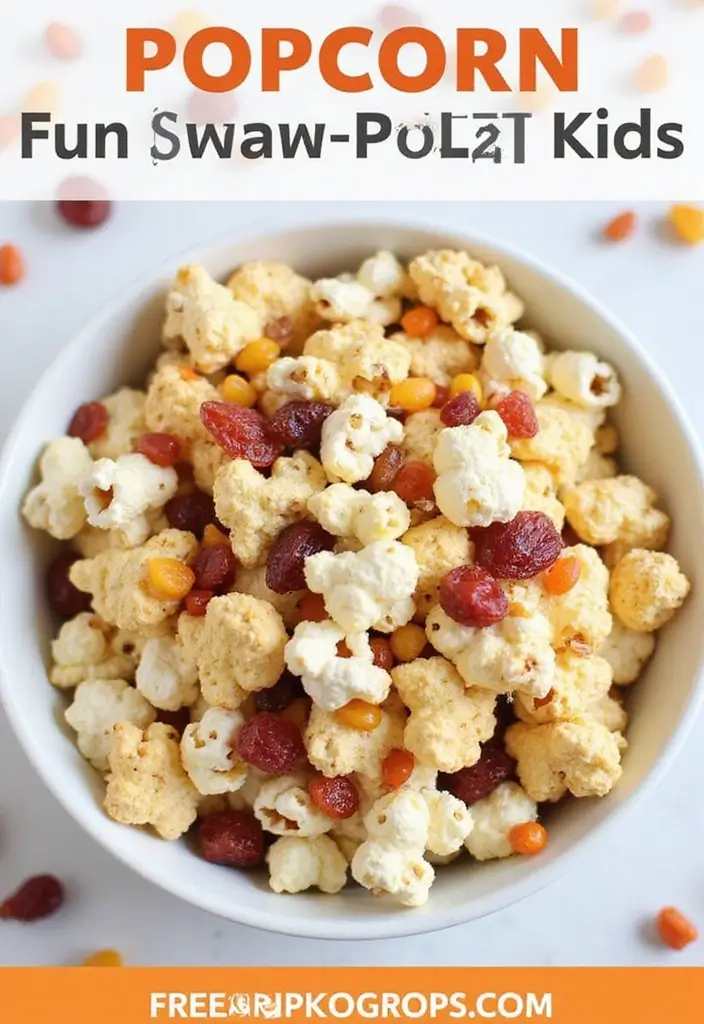
Looking for a fun and healthy snack for your kids’ lunch? Try a delicious popcorn and fruit snack mix! This crunchy treat combines air-popped popcorn with sweet dried fruits like cranberries and apricots. The result is a delightful mix that kids can munch on throughout the day. It’s not just tasty; it also packs in fiber and essential vitamins to keep them energized.
You can easily prepare this mix in just five minutes! Ideal for busy mornings, simply portion it into small bags or containers for a grab-and-go lunch. This snack encourages kids to enjoy healthier options while still having a blast munching away.
Here’s how to make it:
Servings: 4
Prep Time: 5 minutes
Cook Time: 0 minutes
Total Time: 5 minutes
Calories: Approximately 150 per serving
Ingredients:
– 4 cups air-popped popcorn
– 1/2 cup dried fruits (like cranberries or apricots)
– Optional: 1/4 cup nuts or seeds for extra crunch
Instructions:
1. In a large bowl, mix the air-popped popcorn with the dried fruits.
2. Toss everything together until well combined.
3. Divide the mix into individual bags or containers for easy packing.
Feel free to experiment with different flavors of popcorn or add nuts for a little extra crunch!
Quick Tips:
– Choose a mix of sweet and tart dried fruits.
– Use different popcorn flavors for variety.
– Pack in a reusable container to reduce waste.
– Make a big batch for multiple lunches throughout the week.
This snack is perfect for school, road trips, or after-school munching. Enjoy the crunch and the smiles it brings!
Popcorn & Fruit Snack Mix
Editor’s Choice

DASH Hot Air Popcorn Popper Maker with Measuring Cup to Portion Popping …
 Amazon$24.99
10 Pack Dishwasher Safe Reusable Bags, Leakproof Reusable Freezer Bags, …
 Amazon$9.99
Sunbest Natural Tropical Dried Fruit Mix – 3 lb Bulk Bag (48 oz) – Mango…
 AmazonCheck Price
24. Cabbage Rolls
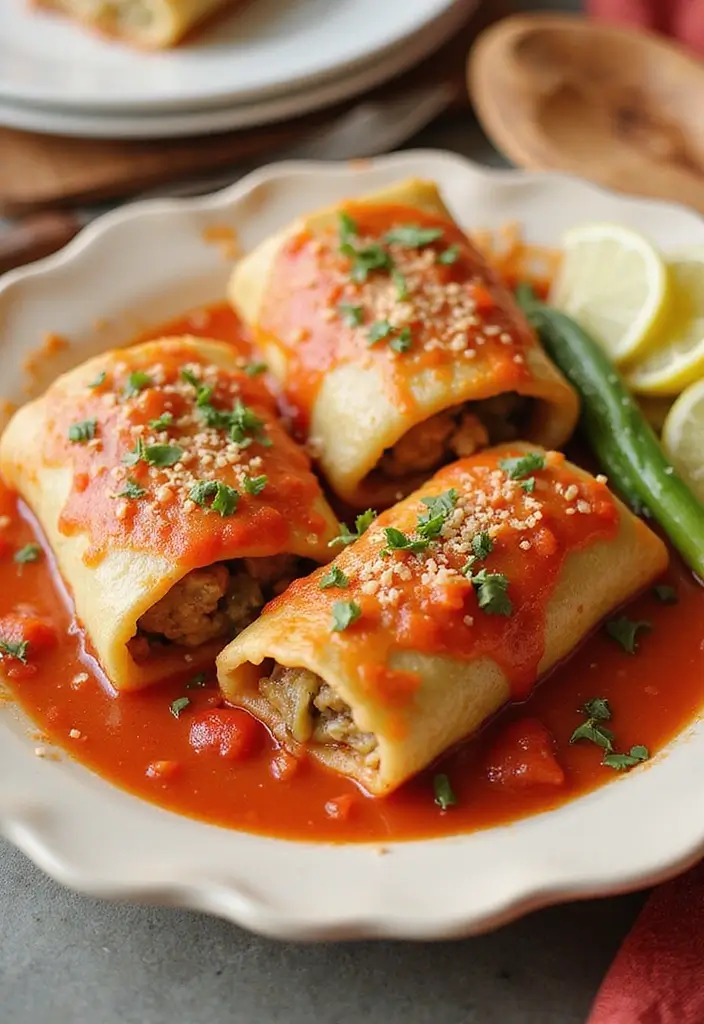
Cabbage rolls are a delightful, cozy lunch option your kids will love! These tasty bundles are filled with a scrumptious mix of ground meat, rice, and spices, then baked in a rich tomato sauce. They pack a nutritious punch and are easy to prepare ahead of time, making them perfect for busy school days. The soft cabbage leaves embrace the savory filling, creating a mouthwatering bite that’s both satisfying and portable. Whether served warm or cold, these rolls are sure to become a lunch favorite!
Imagine the aroma of freshly baked cabbage rolls wafting through your kitchen. They are not only delicious but also versatile. You can easily customize the filling to suit your family’s tastes. Plus, they freeze well, so you can make a big batch and have ready-to-eat lunches in no time!
Here’s how to whip up a batch of these tasty cabbage rolls:
Ingredients:
– 1 head of cabbage (about 12 leaves)
– 1 lb ground turkey or beef
– 1 cup cooked rice
– 1 cup tomato sauce
– Salt and pepper to taste
Instructions:
1. Preheat your oven to 375°F (190°C).
2. Carefully remove the cabbage leaves and blanch them in boiling water until soft, about 2-3 minutes.
3. In a mixing bowl, combine the ground meat, cooked rice, salt, and pepper. Mix well.
4. Take a cabbage leaf, place a spoonful of the filling at the base, and roll it tightly, tucking in the sides.
5. Arrange the rolls in a baking dish and pour tomato sauce over the top, ensuring each roll is coated.
6. Bake for 40 minutes or until the meat is fully cooked and the sauce is bubbling.
Feel free to change up the meat for a vegetarian option if you prefer!
Quick Tips:
– Use ground chicken or lentils for a different twist.
– Mix in chopped veggies like carrots or celery for extra crunch.
– Prep these on the weekend to save time during the week.
– Store leftovers in the fridge for up to three days.
With these cabbage rolls, lunchtime will be exciting and nutritious!
Cabbage Rolls
Editor’s Choice

HOMBERKING 10 Pack Borosilicate Glass Meal Prep Containers with Locking …
 Amazon$30.99
Zenport K113 Row Crop Harvest Knife, Hops and Cabbage, 6.75-Inch Stainle…
 Amazon$13.95
8-Piece Deep Glass Baking Dish Set with Plastic lids,Rectangular Glass B…
 Amazon$35.99
25. Smoothie Bowls
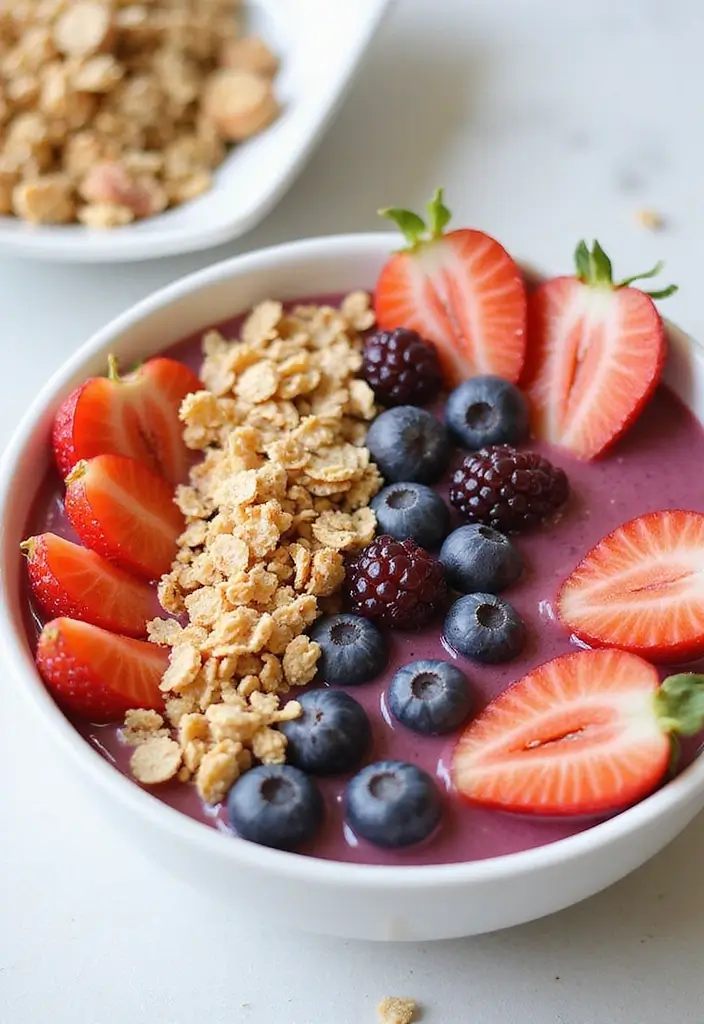
Smoothie bowls are a fun and delicious way to spice up your child’s lunch! They’re not just for breakfast anymore. These bowls pack a punch of nutrients and look gorgeous, making lunchtime exciting. You can blend your child’s favorite fruits with a handful of spinach or some creamy yogurt. Once you pour that colorful mixture into a bowl, let your kids unleash their creativity by choosing their own toppings. Think granola, nuts, and fresh fruits. Your kids will love the colors and textures, and you’ll love how healthy they are!
These bowls are quick to prepare, and you can make them in advance for those busy school mornings. Plus, they’re loaded with vitamins and minerals that will keep your little ones fueled for their day.
Here’s how to make a smoothie bowl:
Ingredients:
– 1 cup frozen fruits (like bananas and berries)
– 1 cup spinach or yogurt
– 1/2 cup almond milk or juice
– Toppings: granola, nuts, fresh fruits
Instructions:
1. Start by placing frozen fruits, spinach, and almond milk or juice in a blender.
2. Blend until smooth and creamy.
3. Pour the smoothie mixture into bowls.
4. Let your kids choose their favorite toppings and add them on top.
5. Serve immediately for a refreshing and nutritious lunch!
Encourage your kids to experiment with different colors and flavors. They can even choose seasonal fruits for a fresh twist.
• Choose colorful fruits for a vibrant bowl
• Add greens like spinach for extra nutrients
• Pick fun toppings to make it personal
• Make them in advance for quick lunches
With these tips, you can turn lunchtime into a fun and healthy experience for your kids. Smoothie bowls are not just nutritious; they’re a canvas for creativity that your children will enjoy!
Smoothie Bowls
Editor’s Choice

Ninja BL660 Professional Compact Smoothie & Food Processing Blender, 110…
 Amazon$99.99
Bento Box Adult Lunch Box, Containers for Adults Men Women with 4 Compar…
 Amazon$9.99
Oatsome Granola Variety Pack – Berry Coconut (6g Protein), Vanilla Almon…
 AmazonCheck Price
Conclusion

Finding fun and healthy lunch ideas for kids doesn’t have to be a chore! With these 25 non-sandwich school lunch ideas, you can say goodbye to boring lunches and hello to tasty, nutritious options that your kids will actually enjoy.
Get creative and mix and match these ideas, making lunchtime an exciting experience every day. Keep experimenting to cater to their preferences and watch them develop a love for healthy eating!
Note: We aim to provide accurate product links, but some may occasionally expire or become unavailable. If this happens, please search directly on Amazon for the product or a suitable alternative.
This post contains Amazon affiliate links, meaning I may earn a small commission if you purchase through my links, at no extra cost to you.
Frequently Asked Questions
What Are Some Healthy Non-Sandwich School Lunch Ideas for Kids?
If you’re looking for healthy non-sandwich school lunch ideas for kids, consider options like wraps with turkey and veggies, pasta salads, or rice bowls with lean proteins and colorful veggies. You can also include homemade sushi rolls or mini quiches for a fun twist! These options are not only nutritious but also appealing to picky eaters.
How Can I Make Easy Lunch Recipes for School That My Kids Will Enjoy?
Creating easy lunch recipes for school that kids will enjoy can be a breeze! Focus on incorporating their favorite flavors and textures. For instance, try bento boxes filled with bite-sized fruits, veggies, and proteins. You can also make muffin tin meals with various small portions, like cheese, crackers, and fruits, to keep lunchtime fun and exciting.
What Are Some Kid-Friendly Meal Ideas That Are Nutritious?
Kid-friendly meal ideas that are nutritious include yogurt parfaits with granola and fruit, vegetable stir-fry with chicken, and healthy smoothies packed with spinach and bananas. These meals are not only delicious but also provide essential nutrients that growing kids need for energy and development!
How Can I Include Nutritious Snacks for Children in Their Lunchboxes?
Including nutritious snacks for children in their lunchboxes can be simple and creative! Pack items like hummus with carrot sticks, cheese cubes with whole grain crackers, or fruit skewers. These snacks are not only healthy but also fun to eat, helping to keep your kids energized throughout the school day.
What Are Some Creative Lunchbox Ideas for Picky Eaters?
For picky eaters, creative lunchbox ideas can make all the difference! Try using cookie cutters to create fun shapes from sandwiches or fruits. You can also create a build-your-own taco kit with tortillas, fillings, and toppings. This interactive approach encourages kids to try new things while having fun with their food!
Related Topics
non sandwich lunch
healthy kids meals
easy lunch recipes
picky eaters
creative lunchboxes
nutritious snacks
school lunch ideas
kid-friendly recipes
meal prep
balanced nutrition
quick meals
fun lunch options
