Life gets busy, doesn’t it? Between work, family, and everything in between, finding time to prepare a decent lunch can feel like a monumental task. You’re not alone if you’ve ever found yourself staring blankly into the fridge, hoping that leftover pizza will somehow transform into a gourmet meal. That’s why I created this post. I wanted to help you ditch the lunch struggle once and for all.
If you’re someone who’s always on the move, juggling a packed schedule, this one’s for you. You might be a student rushing between classes or a professional sprinting from one meeting to another. Regardless of your pace, you deserve something more satisfying than a sad sandwich or a bag of chips. You want quick, nutritious options that won’t derail your day and will keep you fueled for whatever comes next.
That’s where these 30+ grab and go lunch ideas come in. They are not only easy to make but also delicious and filling. You’ll find a variety of meals that fit your lifestyle and dietary needs, whether you’re a meat lover, vegetarian, or somewhere in between. These ideas are perfect for tossing in a lunch bag or grabbing right before you head out the door.
Imagine having a stash of tasty lunches ready to go, freeing up your time and energy for the things that matter most. No more stressing over what to eat or settling for unhealthy snacks. With these ideas, you can stay nourished while keeping up with your busy life.
So, let’s dive in and explore some simple yet satisfying lunch options that will make your day a little brighter and a lot more delicious. Your future self will thank you!
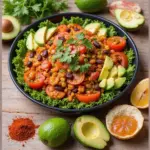
1. Quinoa & Black Bean Salad

Looking for a quick and healthy lunch option? Try this vibrant Quinoa & Black Bean Salad! It’s not just filling; it’s loaded with protein and fiber that will keep you energized throughout your busy day. The combination of nutty quinoa and earthy black beans gives this salad a delightful taste. Plus, it’s versatile enough to customize with your favorite veggies!
You can easily prepare this salad ahead of time. Store it in a mason jar for grab-and-go convenience. Just shake it up when you’re ready to eat, and you’re good to go!
Recipe Overview:
– Servings: 4
– Prep Time: 15 minutes
– Cook Time: 20 minutes
– Total Time: 35 minutes
– Calories: 320 per serving
Nutrition Information:
– Protein: 12g
– Carbohydrates: 50g
– Fat: 10g
– Fiber: 10g
Ingredients:
– 1 cup quinoa, rinsed
– 1 can black beans, drained and rinsed
– 1 red bell pepper, diced
– 1 cup corn (fresh or frozen)
– 1 avocado, diced
– Zest and juice of 2 limes
– 1/4 cup cilantro, chopped
– Salt and pepper to taste
Instructions:
1. Cook the quinoa according to package instructions. Let it cool completely.
2. In a large mixing bowl, combine the quinoa, black beans, bell pepper, corn, and avocado.
3. Squeeze lime juice over the mixture, add the zest, and sprinkle cilantro on top.
4. Season with salt and pepper to your liking, then mix everything gently.
5. Store the salad in mason jars for up to a week, ready for your busy days!
Tips:
– Add grilled chicken for an extra protein boost.
– Use lime juice as a dressing to keep it fresh longer.
FAQs:
– Is this salad vegan? Yes, it’s naturally vegan!
– How long can I keep it in the fridge? It lasts up to 5 days if sealed properly.
With this Quinoa & Black Bean Salad, you can enjoy a nutritious meal that fits perfectly into your hectic lifestyle. It’s colorful, satisfying, and easy to make ahead of time! Enjoy!
Quinoa & Black Bean Salad
Editor’s Choice

Ball Regular Mouth 16-Ounces Mason Jar with Lids and Bands (12-Units)

Viva Naturals Organic Quinoa, 4 lb – Pre-Washed Whole Grain, Plant Prote…

50 Pack (100-Piece) 24 oz Meal Prep Containers Reusable with Lids, Sturd…
2. Turkey and Spinach Wrap

The Turkey and Spinach Wrap is your go-to solution for a quick, nutritious meal. Picture this: a soft whole grain tortilla, filled with savory turkey slices, crisp spinach, and a smooth layer of hummus. It’s not just healthy; it’s satisfying and perfect for your busy lifestyle. Whether you’re racing to a meeting or heading out for errands, this wrap is an easy choice that keeps you energized.
This wrap is incredibly easy to prepare and portable. You can roll it up and take it anywhere. Plus, it’s customizable! Add your favorite ingredients to make it your own.
Recipe Overview:
– Servings: 1
– Prep Time: 10 minutes
– Total Time: 10 minutes
– Calories: 250
Nutrition Information:
– Protein: 20g
– Carbohydrates: 30g
– Fat: 8g
– Fiber: 5g
Ingredients:
– 1 whole grain tortilla
– 4 oz sliced turkey breast
– 1 cup fresh spinach
– 2 tbsp hummus
– 1 slice cheese (optional)
Instructions:
1. Spread the hummus evenly over the tortilla.
2. Layer the turkey slices, spinach, and cheese on top.
3. Roll the tortilla tightly from one end to the other and slice it in half.
4. Wrap it in foil or parchment for easy transport.
Tips:
– Experiment with different spreads like guacamole or tzatziki for variety.
– Keep your wrap fresh by adding veggies right before you eat.
FAQs:
– Can I use a gluten-free tortilla? Yes! It works great.
– What other veggies can I add? Think about adding crunchy bell peppers or cucumbers for extra texture.
This Turkey and Spinach Wrap offers balance and convenience, ensuring you stay nourished on the go. Enjoy making it your own!
Turkey and Spinach Wrap
Editor’s Choice

Mission Soft Taco Whole Wheat Tortillas, Medium Size, 10 Count, Whole Grain

4 Pack Bento Lunch Box Set 3 Compartment Food Storage Containers Wheat S…

Dip into Hummus: Discover 40 Must-Make Hummus Recipes Today!
3. Chickpea Salad Sandwich

Looking for a quick, tasty lunch that’s also packed with nutrition? Dive into a Chickpea Salad Sandwich! This delightful twist on the traditional sandwich swaps out meat for flavorful, mashed chickpeas. Mixed with crunchy celery, zesty onions, and creamy vegan mayo, it’s a satisfying choice for anyone on the go. Plus, it’s perfect for those who want a plant-based meal without sacrificing taste.
This sandwich is incredibly easy to whip up. You can enjoy it on whole grain bread, making it both filling and delicious. You’ll love how quickly you can prepare it, leaving you more time to tackle your busy day.
Recipe Overview:
– Servings: 2
– Prep Time: 10 minutes
– Total Time: 10 minutes
– Calories: 300 per sandwich
Nutrition Information:
– Protein: 15g
– Carbohydrates: 45g
– Fat: 9g
– Fiber: 12g
Ingredients:
– 1 can chickpeas, drained and rinsed
– 1/4 cup celery, diced
– 1/4 cup red onion, diced
– 2 tbsp vegan mayo
– 1 tsp Dijon mustard
– Salt and pepper to taste
– Whole grain bread
Instructions:
1. In a bowl, mash the chickpeas with a fork or potato masher until chunky.
2. Add the diced celery, red onion, vegan mayo, mustard, salt, and pepper. Mix well.
3. Spread the chickpea mixture on slices of whole grain bread to create your sandwich.
4. Cut the sandwich in half for easy eating, and you’re ready to go!
Tips:
– Add fresh herbs like dill or parsley for an extra burst of flavor.
– Serve with pickles or carrot sticks on the side for crunch.
FAQs:
– Can I make this gluten-free? Yes, just use gluten-free bread.
– How long does this last in the fridge? It’s best fresh but can last up to 3 days in the fridge.
This Chickpea Salad Sandwich is not just a meal; it’s a step towards a healthier lifestyle. Enjoy it at home or take it to work for a quick lunch that satisfies.
Chickpea Salad Sandwich
Editor’s Choice

OXO Good Grips Stainless Steel Smooth Potato Masher, Black/Silver

Hellmann’s Vegan Dressing and Spread Vegan 1 Ct for a Rich, Creamy Plant…

Dave’s Killer Bread 21 Whole Grains & Seeds Thin-Sliced, Whole Grain Org…
4. Greek Yogurt Parfait

Boost your midday energy with a delicious Greek Yogurt Parfait! This tasty treat combines creamy yogurt, crunchy granola, and vibrant fresh fruit for a delightful mix of textures. It’s quick to make and easy to pack, perfect for anyone on the go. You can whip it up in just minutes, making it an ideal choice for busy mornings or lunch breaks.
Imagine digging into a bowl layered with your favorite flavors. The rich yogurt provides a satisfying base, while the granola adds a satisfying crunch. The sweet, juicy berries pop with every bite, creating a refreshing experience. Plus, this parfait is packed with protein to keep you energized throughout the day!
Recipe Overview:
– Servings: 2
– Prep Time: 10 minutes
– Total Time: 10 minutes
– Calories: 220 per serving
Nutrition Information:
– Protein: 15g
– Carbohydrates: 30g
– Fat: 5g
– Fiber: 4g
Ingredients:
– 2 cups Greek yogurt
– 1 cup granola
– 1 cup mixed berries (strawberries, blueberries, raspberries)
– Honey or maple syrup (optional)
Instructions:
1. Begin by adding a layer of Greek yogurt to your portable container.
2. Next, sprinkle a layer of crunchy granola over the yogurt.
3. Add a layer of your mixed berries on top.
4. Repeat these layers until your container is full, finishing with a colorful layer of berries.
5. If you like, drizzle honey or maple syrup for a touch of sweetness.
Tips:
– Keep your granola separate until you’re ready to eat for extra crunch.
– Feel free to swap out the berries for seasonal fruits or favorites.
FAQs:
– Can I use non-dairy yogurt? Absolutely! Almond or coconut yogurt works wonderfully.
– How long does it last? Aim to enjoy it within 1-2 days for the best taste and freshness.
This Greek Yogurt Parfait is not just a snack; it’s a wholesome meal that fits your lifestyle. Whether you’re rushing to work or enjoying a picnic, it’s sure to satisfy your hunger and nourish your body. Enjoy it anytime you need a quick, healthy boost!
On busy days, a Greek yogurt parfait is a game changer—guaranteed to satisfy with creamy yogurt, crunchy granola, and fresh fruit. It’s one of the best grab and go lunch ideas for professionals who need real flavor in minutes.
Greek Yogurt Parfait
Editor’s Choice

Goodful Double Wall Insulated Yogurt Container, Leak Proof Food Storage,…

KIND Healthy Grains Clusters, Granola Variety Pack, Healthy Snacks, Good…

10 Pack Dishwasher Safe Reusable Bags, Leakproof Reusable Freezer Bags, …
5. Vegetable Sushi Rolls

Vegetable sushi rolls are a fantastic choice for a quick, healthy lunch. They look vibrant and taste fresh, making them a delightful option when you’re on the go. You can fill these rolls with your favorite veggies, like crunchy cucumbers, creamy avocados, and sweet bell peppers, tailoring them to your taste. Plus, they’re simple to prepare and perfect for lunchboxes.
Imagine biting into a cool, refreshing roll packed with colorful vegetables. It’s not just satisfying; it’s also a fun way to enjoy your greens. Whether you’re heading to work or enjoying a picnic, these rolls fit easily into your routine.
Recipe Overview:
– Servings: 2
– Prep Time: 30 minutes
– Total Time: 30 minutes
– Calories: 150 per roll
Nutrition Information:
– Protein: 4g
– Carbohydrates: 30g
– Fat: 2g
– Fiber: 5g
Ingredients:
– 2 cups sushi rice
– 4 sheets of nori
– 1 cucumber, julienned
– 1 avocado, sliced
– 1 carrot, julienned
– Soy sauce for dipping
Instructions:
1. Cook the sushi rice according to the package instructions and let it cool.
2. Lay one sheet of nori on a sushi mat.
3. Spread a layer of rice over the nori, leaving a 1-inch border at the top.
4. Arrange cucumber, avocado, and carrot across the rice.
5. Roll the sushi tightly from the bottom up and slice into bite-sized pieces.
6. Serve with soy sauce for dipping.
Tips:
– Add a splash of rice vinegar to the rice for extra flavor.
– Experiment with different vegetables like bell peppers or sprouts for variety.
FAQs:
– Can I make these ahead of time? Yes, but fresh is always best!
– What if I don’t have a sushi mat? You can use a clean kitchen towel instead.
These veggie rolls will bring a smile to your face and keep you fueled throughout your busy day. Enjoy your sushi adventure!
Vegetable Sushi Rolls
Editor’s Choice

2 Pack Bamboo Sushi Rolling Mat, Sushi roll maker,Sushi making kit, Bamb…


CHOI’s 1(Daechun) Roasted Seaweed, Gim, Sushi Nori /(50 full sheets) /Go…
6. Pita with Hummus and Veggies

Imagine a lunch that’s quick, tasty, and loaded with nutrients. The Pita with Hummus and Veggies is just that! You can whip it up in no time and customize it to fit your taste. Whole grain pita pockets are like little canvases waiting for your choice of hummus and fresh, crunchy veggies. Think vibrant bell peppers, crisp cucumbers, and sweet carrots. This meal isn’t just easy; it’s a fun way to sneak more veggies into your day!
Ready to make your own? Here’s a simple recipe to get started. It takes just five minutes to prepare, so you can enjoy a healthy lunch even on your busiest days. Plus, it’s perfect for dipping or stuffing, making it versatile for any mood.
Recipe Overview:
– Servings: 1
– Prep Time: 5 minutes
– Total Time: 5 minutes
– Calories: 180 per serving
Nutrition Information:
– Protein: 6g
– Carbohydrates: 30g
– Fat: 5g
– Fiber: 4g
Ingredients:
– 1 whole grain pita
– 1/2 cup hummus
– 1/2 cup assorted veggies (carrots, cucumber, bell peppers)
Instructions:
1. Spread the hummus generously inside the pita pocket.
2. Pack in your favorite chopped vegetables.
3. Cut the pita in half for easy eating on the go.
Tips:
– Keep the pita and hummus separate until you’re ready to eat to maintain freshness.
– Consider adding olives or feta cheese for an extra burst of flavor.
FAQs:
– Can I use store-bought hummus? Yes, it’s a great way to save time!
– What other dips can I use? Try baba ganoush for a different taste.
With this quick and nutritious meal, you can enjoy a satisfying lunch that fits right into your busy lifestyle. Grab a pita, fill it with your favorites, and you’re ready to go!
Pita with Hummus and Veggies
Editor’s Choice

Middle East Bakery Inc Whole Wheat Bread Pita, 17 Oz

Mezete Hummus Variety Pack | Authentic Middle Eastern | Free from Preser…

Fullstar The Original Pro Chopper – Vegetable Chopper and Spiralizer, Fo…
7. Lentil Soup in a Jar

Lentil Soup in a Jar is your go-to solution for a delicious, hearty lunch when you’re short on time. Packed with protein, fiber, and spices, this soup is not just filling; it’s a flavor explosion you can enjoy anywhere. Picture yourself grabbing a jar from the fridge, heating it up, and relishing a warm meal in minutes. It’s a simple yet satisfying option that fits perfectly into your busy lifestyle.
To make your life easier, prepare this soup over the weekend. You can portion it into jars for quick access throughout the week. Simply warm it up when you’re ready to eat, and you have a nutritious meal at your fingertips. This method saves time and ensures you always have something healthy on hand.
Recipe Overview:
– Servings: 4
– Prep Time: 10 minutes
– Cook Time: 30 minutes
– Total Time: 40 minutes
– Calories: 150 per serving
Nutrition Information:
– Protein: 9g
– Carbohydrates: 25g
– Fat: 3g
– Fiber: 8g
Ingredients:
– 1 cup lentils, rinsed
– 4 cups vegetable broth
– 1 carrot, diced
– 1 celery stalk, diced
– 1 onion, chopped
– 2 garlic cloves, minced
– 1 tsp cumin
– Salt and pepper to taste
Instructions:
1. In a pot, sauté the onion and garlic until they turn translucent.
2. Add the diced carrots and celery, cooking for a few minutes until softened.
3. Mix in the lentils, vegetable broth, cumin, salt, and pepper.
4. Bring the mixture to a boil, then lower the heat and simmer for 25-30 minutes until the lentils are tender.
5. Allow the soup to cool before transferring it into jars for easy lunches.
Tips:
– Add fresh spinach for a burst of nutrients.
– Pair with whole grain crackers for a complete meal.
– Consider adding a splash of lemon juice for a zesty kick.
FAQs:
– Can I freeze this soup? Yes, it freezes beautifully!
– How long does it last in the fridge? Enjoy it within 5 days for the best flavor.
By preparing Lentil Soup in a Jar, you make lunchtime easy and healthy. This soup is not only a meal but a moment of comfort, ready whenever you need it. Enjoy your lunch without the hassle!
Lentil Soup in a Jar
Editor’s Choice

Soup Containers with Lids Glass 32 oz, 4 Cup Borosilicate Glass Food Sto…

THERMOS Stainless King Vacuum-Insulated Food Jar, 24 Ounce, Matte Steel

Orrington Farms Vegan Chicken Flavored Broth Base, Bring Flavor to Your …
8. Egg Muffins

Egg muffins are the ultimate solution for busy mornings or lunches on the go. They’re easy to whip up, customizable, and filled with protein to keep you energized. Imagine opening your fridge to find a batch of fluffy, savory muffins just waiting for you. You can make them with your favorite ingredients—think spinach, cheese, or even spicy peppers.
These muffins are not only delicious but also incredibly convenient. Bake a batch ahead of time, and you’ll have ready-to-eat meals that are perfect for your hectic schedule. Plus, they’re portable! Just grab one as you head out the door, and you have a satisfying meal in minutes.
Recipe Overview:
– Servings: 6 muffins
– Prep Time: 10 minutes
– Cook Time: 20 minutes
– Total Time: 30 minutes
– Calories: 90 per muffin
Nutrition Information:
– Protein: 7g
– Carbohydrates: 2g
– Fat: 6g
– Fiber: 1g
Ingredients:
– 6 eggs
– 1/2 cup shredded cheese
– 1/2 cup chopped spinach
– 1/2 diced bell pepper
– Salt and pepper to taste
Instructions:
1. Preheat your oven to 350°F (175°C).
2. In a bowl, whisk the eggs and season with salt and pepper.
3. Grease a muffin tin and pour the egg mixture in, filling each cup halfway.
4. Add cheese, spinach, and bell pepper into each cup.
5. Bake for about 20 minutes, or until the eggs are set.
6. Allow them to cool and then store in the fridge.
Tips:
– Add cooked bacon or sausage for extra flavor.
– Mix in different veggies to keep meals exciting.
FAQs:
– Can I freeze these? Yes! Just pop them in the microwave to reheat.
– How long do they last in the fridge? Enjoy them for up to 5 days.
With these egg muffins, you can enjoy a nutritious meal anytime without the fuss. They’re a perfect match for your busy lifestyle, making healthy eating easy and enjoyable.
Egg Muffins
Editor’s Choice

2Pack Silicone Muffin Pan for Baking with Metal Reinforced Frame, 12 Cup…
50 Pack (100-Piece) 24 oz Meal Prep Containers Reusable with Lids, Sturd…

Stainless Steel Egg Whisk, Hand Push Rotary Whisk Blender, Versatile Mil…
9. Roasted Sweet Potato Salad

The Roasted Sweet Potato Salad is the perfect solution for those busy days when you need a quick, satisfying meal. With its mix of sweet, tender potatoes and fresh greens, this salad is both delicious and nourishing. The zesty dressing adds a kick that balances the natural sweetness of the potatoes, making every bite a treat. You can enjoy this salad warm or chilled, which makes it a fantastic choice for meal prep.
Ready to whip up this tasty dish? Here’s a simple breakdown of the recipe:
Recipe Overview:
– Servings: 4
– Prep Time: 15 minutes
– Cook Time: 25 minutes
– Total Time: 40 minutes
– Calories: 250 per serving
Ingredients:
– 2 sweet potatoes, cubed
– 4 cups mixed greens (spinach, arugula)
– 1/4 cup feta cheese, crumbled
– 1/4 cup walnuts, chopped
– Olive oil, salt, and pepper to taste
– Dressing: 2 tbsp olive oil, 1 tbsp balsamic vinegar
Instructions:
1. Preheat your oven to 400°F (200°C).
2. Toss the sweet potatoes with olive oil, salt, and pepper. Roast them for 25 minutes until golden and tender.
3. In a large bowl, combine the mixed greens, roasted sweet potatoes, feta, and walnuts.
4. Drizzle with your dressing and toss everything together.
5. Serve immediately or pack it up for lunch!
Tips:
– Add grilled chicken for a protein boost.
– Try using a lemon vinaigrette for a fresh twist.
FAQs:
– How long does this salad last? Enjoy it fresh or store it in the fridge for up to 3 days.
– Can I use canned sweet potatoes? For the best flavor, fresh is your best bet!
This Roasted Sweet Potato Salad is not just a meal; it’s a delightful way to fuel your day. Perfect for busy people like you, it’s tasty, healthy, and easy to make!
Roasted Sweet Potato Salad
Editor’s Choice
50 Pack (100-Piece) 24 oz Meal Prep Containers Reusable with Lids, Sturd…

AOZITA 17oz Glass Olive Oil Bottle Dispenser – 500ml Green Oil and Vineg…

OXO Good Grips Salad Spinner | Lettuce Spinner | Fruit Washer | Fruit Wa…
10. Zucchini Noodles with Pesto

Craving a light and fresh lunch that fits into your busy schedule? Zucchini Noodles with Pesto, or “zoodles,” are your answer! This delightful dish offers a healthy twist on classic pasta, allowing you to indulge your cravings while sneaking in extra veggies. Plus, it’s incredibly easy to make and can be enjoyed either cold or warm. Perfect for those on the go!
Imagine twirling those vibrant green noodles around your fork, coated in rich, aromatic pesto. With just a handful of ingredients, you can whip up this meal in no time. Whether you’re at home or at the office, it’s a lunch that brings a burst of flavor and freshness to your day.
Ready to make your own Zucchini Noodles with Pesto? Here’s how:
Ingredients:
– 2 medium zucchinis, spiralized
– 1/2 cup pesto (store-bought or homemade)
– 1/4 cup cherry tomatoes, halved
– Parmesan cheese for topping (optional)
Instructions:
1. Begin by spiralizing the zucchinis into noodle shapes.
2. Heat a pan over medium heat and sauté the zoodles for about 2-3 minutes until they soften slightly.
3. Remove the pan from the heat and toss in the pesto, ensuring every noodle is coated.
4. Add the halved cherry tomatoes for a pop of color and flavor.
5. If desired, sprinkle Parmesan cheese on top before serving. Enjoy immediately or pack it up for lunch!
Tips:
– Add variety: Consider using asparagus or bell peppers for added crunch.
– Make it your own: Whip up homemade pesto for a fresher taste.
FAQs:
– How do I store leftovers? Keep them in an airtight container in the fridge for 1-2 days.
– Can I swap the noodles? Absolutely! Spiralized carrots also make a great alternative.
Zucchini Noodles with Pesto not only taste amazing but are also a fantastic way to add more vegetables to your diet. They are quick to prepare, budget-friendly, and sure to satisfy your hunger without weighing you down. Enjoy your healthy lunch!
Zucchini Noodles with Pesto
Editor’s Choice

Veggetti Veggie Slicer, Dual Stainless Steel Blade Vegetable Cutter for …

Filippo Berio Pesto, Organic Classic Basil, 6.7 Ounce Glass Jar, Gluten …

Rubbermaid Brilliance Food Storage Containers BPA Free Airtight Lids Ide…
11. Cucumber and Avocado Sushi

Cucumber and Avocado Sushi is your go-to option for a quick, healthy lunch. This delightful dish combines creamy avocado with crunchy cucumber, making every bite refreshing. It’s not just easy to prepare; it’s also a perfect choice when you’re on the move. Plus, it’s light enough to keep you energized without feeling weighed down.
Dipping these rolls in soy sauce or a drizzle of sesame oil adds a burst of flavor. If you want to elevate your sushi experience, try adding some pickled ginger on the side for an extra zing.
Recipe Overview:
– Servings: 2
– Prep Time: 15 minutes
– Total Time: 15 minutes
– Calories: 180 per serving
Nutrition Information:
– Protein: 3g
– Carbohydrates: 28g
– Fat: 8g
– Fiber: 4g
Ingredients:
– 1 cup sushi rice
– 2 sheets of nori
– 1 cucumber, julienned
– 1 avocado, sliced
– Soy sauce for dipping
Instructions:
1. Begin by cooking the sushi rice according to the package instructions. Allow it to cool to room temperature.
2. Lay one sheet of nori on a sushi mat or a clean surface.
3. Spread a thin layer of rice over the nori, leaving a 1-inch border at the top.
4. Place the sliced avocado and julienned cucumber in a line across the rice.
5. Roll the nori tightly from the bottom, using the mat to help shape it. Seal the edge with a little water.
6. Slice the roll into bite-sized pieces and serve with soy sauce.
Tips:
– Add fillings just before rolling to keep them fresh and crisp.
– Use a sharp knife for clean cuts, making your sushi look professional.
FAQs:
– Can I use brown rice instead? Yes, but the texture will change.
– How do I store leftovers? Keep in an airtight container and eat within a day for the best taste.
This cucumber and avocado sushi is not just convenient; it’s also a fun way to enjoy a nutritious meal. Whip it up for lunch, and you’ll be back on the go in no time!
Cucumber and Avocado Sushi
Editor’s Choice

Sushi Making Kit, Premium Silicone Sushi Mat Sushi Rolling Mat for Begin…

EIKS Excelity Cruet Dispenser Set for Olive Oil Vinegar Soy Sauce with E…
12. Spicy Tuna Salad Lettuce Wraps

Spicy Tuna Salad Lettuce Wraps are your new go-to meal when you need something quick, tasty, and low-carb. Imagine biting into crunchy lettuce filled with zesty tuna salad that has just the right kick. This dish combines canned tuna with sriracha, creamy mayo, and fresh green onions, giving you a refreshing and flavorful punch. Perfect for busy days, these wraps are light yet satisfying, making them an ideal choice for lunch on the go.
Ready to whip up this easy meal? Let’s break it down into simple steps. You’ll have a delicious lunch in just 10 minutes, so you can spend less time cooking and more time enjoying your day. Plus, with only 200 calories per serving, they fit perfectly into any healthy eating plan.
Recipe Overview:
– Servings: 2
– Prep Time: 10 minutes
– Total Time: 10 minutes
– Calories: 200 per serving
Nutrition Information:
– Protein: 20g
– Carbohydrates: 5g
– Fat: 10g
– Fiber: 2g
Ingredients:
– 1 can tuna, drained
– 2 tbsp mayonnaise
– 1 tbsp sriracha
– 2 green onions, chopped
– Lettuce leaves for wrapping
Instructions:
1. In a bowl, mix together the tuna, mayonnaise, sriracha, and green onions until everything is well combined.
2. Take a lettuce leaf and spoon in some of the tuna salad mixture.
3. Roll it up like a wrap and enjoy a burst of flavors!
Tips:
– Adjust the sriracha to match your spice level.
– Add shredded carrots for a nice crunch and extra nutrition.
FAQs:
– Can I use fresh tuna? Absolutely! Just cook and flake it.
– How long will these last? They taste best fresh but can stay in the fridge for a day.
These Spicy Tuna Salad Lettuce Wraps are also easy to customize. Want more flavor? Toss in some diced cucumbers or bell peppers. Need something heartier? Pair them with a side of fruit or whole grain crackers for a balanced meal. Enjoy your delicious creation!
Spicy Tuna Salad Lettuce Wraps
Editor’s Choice

SPLF 10 Pack Reusable Sandwich Bags Dishwasher Safe, Reusable Quart Free…

50 Pack (100-Piece) 32 oz Meal Prep Containers Reusable with Lids 3-Comp…

365 by Whole Foods Market, Organic Sweet Chili Sauce, 9 Fl Oz (Pack of 2)
13. Caprese Skewers

Caprese Skewers are a fun and tasty twist on the classic Caprese salad. Imagine juicy cherry tomatoes, creamy mozzarella balls, and fresh basil, all combined on a skewer and drizzled with tangy balsamic glaze. These colorful bites not only taste great but also look fantastic on any plate, making them a perfect choice for a quick snack or light lunch. Plus, they’re super easy to whip up and take with you wherever you go!
Making Caprese Skewers is a breeze. You can have them ready in just 10 minutes, making them ideal for your busy lifestyle. They’re budget-friendly too, so you won’t break the bank while enjoying a delicious meal. Serve them at picnics, lunch breaks, or even as appetizers at your next gathering. The fresh ingredients make every bite feel special, and you’ll love how simple they are to prepare.
Recipe Overview:
– Servings: 4
– Prep Time: 10 minutes
– Total Time: 10 minutes
– Calories: 150 per serving
Nutrition Information:
– Protein: 8g
– Carbohydrates: 8g
– Fat: 10g
– Fiber: 1g
Ingredients:
– 1 pint cherry tomatoes
– 1 cup mozzarella balls
– Fresh basil leaves
– Balsamic glaze for drizzling
Instructions:
1. Take skewers and thread on cherry tomatoes, mozzarella balls, and basil leaves, alternating as you go.
2. Drizzle the assembled skewers with balsamic glaze right before serving. This adds a lovely sweetness.
3. To keep them fresh while you’re on the move, store them in a cooler or insulated bag.
Tips:
– Use toothpicks for smaller bites, making them even more portable.
– Sprinkle a little salt or pepper on top for an extra burst of flavor.
FAQs:
– Can I prepare these ahead of time? Yes, but they taste best when fresh.
– How long can I store them? They last for up to a day in the fridge, but keep in mind the texture may change.
Caprese Skewers
Editor’s Choice

8 Inch Stainless Steel BBQ Skewers, Shish Kebab Kabob Skewers 12 pcs

HOTOR Insulated Lunch Box for Men & Women – Leak-Proof Cooler Lunch Bag …

Filippo Berio Glaze with Balsamic Vinegar of Modena, 8.4 Ounce Plastic B…
14. Smoothie Packs

Smoothie packs are your secret weapon for quick, healthy meals. If you’re always on the go, these frozen treasures save you time and keep you nourished. Just grab a bag from the freezer, blend it up, and you’re ready to tackle your day!
Imagine a mix of bright spinach, sweet bananas, and tart berries blended with creamy Greek yogurt. This combination not only tastes great but packs a nutritional punch. Plus, you can customize your packs with seasonal fruits for extra flavor. Pinterest is buzzing with smoothie pack ideas, making them a trendy choice for busy folks like you.
Preparing smoothie packs is easy and budget-friendly. Buy fruits in bulk when they’re in season to save money. Portion your ingredients into freezer bags, and you’ll have a delicious breakfast or snack waiting for you. It’s perfect for those hectic mornings when you barely have time to eat.
Recipe Overview:
– Servings: 4
– Prep Time: 10 minutes
– Total Time: 10 minutes
– Calories: 200 per serving
Nutrition Information:
– Protein: 10g
– Carbohydrates: 35g
– Fat: 3g
– Fiber: 6g
Ingredients:
– 1 banana, sliced
– 1 cup spinach
– 1/2 cup mixed berries (strawberries, blueberries, raspberries)
– 1/2 cup Greek yogurt
– 1 cup almond milk (or your choice of liquid)
Instructions:
1. In freezer bags, portion out the banana, spinach, berries, and yogurt.
2. When you’re ready to make your smoothie, pour the contents into a blender with almond milk.
3. Blend until smooth, and enjoy your nutritious treat right away!
Tips:
– Use ripe bananas for natural sweetness.
– Choose fruits that are in season for the best taste and value.
FAQs:
– How long do the packs last in the freezer? They stay fresh for up to 3 months.
– Can I skip the yogurt? Absolutely! Just add your favorite protein powder for a boost.
Smoothie Packs
Editor’s Choice

Quart Food Storage Freezer Bags, Stay Open Design, Easy to Fill, 60 coun…

Ninja BL660 Professional Compact Smoothie & Food Processing Blender, 110…

Orgain Organic Vegan Protein + 50 Superfoods Powder, Creamy Chocolate Fu…
15. Chicken and Veggie Stir-Fry

Are you constantly on the go and struggling to find healthy lunch options? A Chicken and Veggie Stir-Fry can be your answer! This dish is not only quick to prepare but also packed with vibrant vegetables and lean protein. It’s a satisfying meal that fuels your day without weighing you down.
Imagine sautéing tender chicken breast with bell peppers, crisp broccoli, and sweet snap peas, all tossed in a flavorful stir-fry sauce. It’s a feast for the eyes and the taste buds! Plus, you can serve it over brown rice or quinoa to make it even heartier. This stir-fry is perfect for meal prep. You can whip it up in advance and have a nutritious lunch ready to grab when you’re in a hurry.
Recipe Overview:
– Servings: 2
– Prep Time: 15 minutes
– Cook Time: 15 minutes
– Total Time: 30 minutes
– Calories: 300 per serving
Nutrition Information:
– Protein: 30g
– Carbohydrates: 20g
– Fat: 10g
– Fiber: 5g
Ingredients:
– 1 lb chicken breast, diced
– 2 cups mixed vegetables (bell peppers, broccoli, snap peas)
– 2 tbsp soy sauce
– 1 tbsp olive oil
– Garlic and ginger for flavor (optional)
Instructions:
1. Heat the olive oil in a large pan over medium-high heat.
2. If using, sauté garlic and ginger for about a minute until fragrant.
3. Add the diced chicken to the pan and cook until it’s nicely browned.
4. Stir in the mixed vegetables and continue to cook for another 5-7 minutes until tender.
5. Pour in the soy sauce, stirring well to combine all the flavors.
6. Serve right away or pack it up for an easy lunch on the go.
Tips:
– Use leftover chicken to save time.
– Add a splash of sesame oil for an extra flavor boost.
FAQs:
– Can I freeze leftovers? Yes, they can last up to 3 months in the freezer.
– What other veggies can I use? Try carrots, zucchini, or asparagus for variety.
This Chicken and Veggie Stir-Fry is not just a meal; it’s a delicious solution for your busy schedule. Enjoy the balance of flavors and the energy it brings!
Chicken and Veggie Stir-Fry
Editor’s Choice
50 Pack (100-Piece) 24 oz Meal Prep Containers Reusable with Lids, Sturd…

CAROTE Nonstick Frying Pan Skillet,Non Stick Granite Fry Pan Egg Pan Ome…

12 Pack 8 oz Plastic Squeeze Bottles Multipurpose Squirt Bottles for Ket…
16. Overnight Oats

Overnight oats are a quick and healthy option for breakfast or lunch. They’re perfect for busy mornings when you need something nutritious on the go. All you have to do is mix rolled oats with your favorite milk or yogurt and a few tasty toppings. Let them soak overnight in the fridge, and you’ll have a creamy, satisfying meal waiting for you the next day!
Imagine waking up to a jar of creamy oats topped with fresh fruits and crunchy nuts. You can customize it with whatever flavors you love. Pinterest is buzzing with creative overnight oat combinations, so feel free to experiment!
Here’s how to make them easily:
Recipe Overview:
– Servings: 1
– Prep Time: 5 minutes
– Total Time: 5 minutes
– Calories: 250 per serving
Nutrition Information:
– Protein: 8g
– Carbohydrates: 40g
– Fat: 9g
– Fiber: 6g
Ingredients:
– 1/2 cup rolled oats
– 1 cup almond milk (or any milk you prefer)
– 1/2 banana, sliced
– 1 tbsp peanut butter
– Optional toppings (like nuts, seeds, or honey)
Instructions:
1. In a jar, combine the rolled oats and almond milk.
2. Stir in the peanut butter and add banana slices on top.
3. Cover the jar and refrigerate overnight.
4. In the morning, grab it and go!
Here are some helpful tips to make your overnight oats even better:
Tips:
– Add chia seeds for extra fiber and a thicker texture.
– Prepare multiple jars at once to make mornings easier.
FAQs:
– How long do they last? They can stay fresh for up to 3 days in the fridge.
– Can I use quick oats? Yes, but they might change the texture a bit.
Now you’re ready to enjoy delicious overnight oats anytime! Grab your ingredients and start your day off right!
Overnight Oats
Editor’s Choice
Ball Regular Mouth 16-Ounces Mason Jar with Lids and Bands (12-Units)

Quaker Old Fashioned Rolled Oats, Non GMO Project Verified, Two 64oz Bag…

BetterBody Foods Organic Chia Seeds 2 lbs, 32 Oz, with Omega-3, Non-GMO,…
17. Falafel Balls with Tzatziki

Falafel Balls are not just a meal; they’re a delightful experience packed with flavor and nutrition. These golden, crispy chickpea bites are a fantastic option for your busy lunch routine. You can prepare them in advance, making them perfect for grabbing on the go. Pair them with a refreshing tzatziki sauce, and you’ve got a meal that satisfies both your taste buds and your health goals. Imagine enjoying these tasty morsels alongside a fresh salad or stuffed inside a warm pita.
Ready to dive into making your own? Here’s a quick overview of the recipe:
Recipe Overview:
– Servings: 4
– Prep Time: 15 minutes
– Cook Time: 30 minutes
– Total Time: 45 minutes
– Calories: 200 per 4 pieces
Nutrition Information:
– Protein: 10g
– Carbohydrates: 30g
– Fat: 5g
– Fiber: 8g
Ingredients:
– 1 can chickpeas, drained
– 1/4 cup parsley, chopped
– 1/4 cup onion, chopped
– 2 garlic cloves
– 1 tsp cumin
– Salt and pepper to taste
– Olive oil for frying
Instructions:
1. Combine chickpeas, parsley, onion, garlic, cumin, salt, and pepper in a food processor.
2. Process until the mixture forms a thick dough.
3. Shape the dough into small balls.
4. Heat olive oil in a pan and fry the falafel until they’re golden brown on all sides.
5. Serve warm with tzatziki sauce for dipping.
Tips:
– Consider baking instead of frying for a lighter version.
– Store leftovers in the fridge for up to 4 days.
FAQs:
– Can I freeze falafels? Yes! They freeze well for up to 3 months.
– How do I make tzatziki? Simply mix yogurt with diced cucumber, minced garlic, and fresh dill.
These falafel balls are not only easy to make but are also a smart choice for meal prep. You can whip up a batch on the weekend and enjoy them all week long. Perfect for your busy lifestyle, these tasty bites will keep you fueled and satisfied. Enjoy your cooking adventure!
Falafel Balls with Tzatziki
Editor’s Choice

Hamilton Beach Food Processor & Vegetable Chopper for Slicing, Shredding…
50 Pack (100-Piece) 24 oz Meal Prep Containers Reusable with Lids, Sturd…
18. Apple and Nut Butter Snack Packs

Looking for a quick and healthy lunch that fits into your busy day? Try Apple and Nut Butter Snack Packs! This simple idea combines crunchy apple slices with creamy almond or peanut butter, creating a delightful mix of sweet and savory flavors. Not only are these snack packs tasty, but they also give you a boost of energy to power through your afternoon.
You can whip these up in just five minutes, making them ideal for those hectic mornings. Plus, they’re easy to pack and take along wherever you go. You can even customize them with toppings for an extra twist!
Recipe Overview:
– Servings: 2
– Prep Time: 5 minutes
– Total Time: 5 minutes
– Calories: 250 per serving
Nutrition Information:
– Protein: 6g
– Carbohydrates: 25g
– Fat: 15g
– Fiber: 4g
Ingredients:
– 2 apples, sliced
– 1/4 cup almond or peanut butter
– Optional toppings: cinnamon or granola
Instructions:
1. Slice the apples and place them in a portable container.
2. Portion out the nut butter in a small jar or container.
3. If you want, sprinkle cinnamon or granola on the apples for added flavor.
Tips:
– Use crisp apples like Honeycrisp or Fuji to keep them fresh longer.
– If you’re worried about browning, drizzle a little lemon juice over the apple slices.
FAQs:
– Can I swap out the apples? Yes! Pears are a fantastic alternative.
– How long do they stay fresh? Enjoy them right away, but they can last for up to a day in the fridge.
These Apple and Nut Butter Snack Packs are not just a meal; they’re a delicious way to keep your energy levels up throughout the day. They’re perfect for busy individuals who still want to eat healthily without sacrificing taste or convenience!
Apple and Nut Butter Snack Packs
Editor’s Choice

Snackle Box Container,Portable Snack Box 8 Compartment Divided Serving T…

Justin’s Honey and Maple Almond Butter Squeeze Packs (10 Pack)

Amazon Grocery, Ground Cinnamon, 2.5 Oz (Previously Happy Belly, Packagi…
19. Tomato Basil Soup in a Jar

Craving a warm, hearty meal while you’re on the go? Look no further than Tomato Basil Soup in a Jar. This delightful soup offers comforting flavors that warm you up on chilly days. Packed with fresh tomatoes and aromatic basil, it’s a nourishing choice that satisfies your hunger and delights your taste buds.
You can easily prepare this creamy soup in advance. Store it in jars for quick access whenever you need a meal. Just heat it up, and you’re ready to enjoy a cozy lunch at your desk or during a picnic in the park.
Recipe Overview:
– Servings: 4
– Prep Time: 10 minutes
– Cook Time: 20 minutes
– Total Time: 30 minutes
– Calories: 180 per serving
Nutrition Information:
– Protein: 5g
– Carbohydrates: 25g
– Fat: 7g
– Fiber: 3g
Ingredients:
– 1 can crushed tomatoes
– 1 cup vegetable broth
– 1/2 cup heavy cream (or substitute with coconut milk)
– 1/4 cup fresh basil, chopped
– Salt and pepper to taste
Instructions:
1. In a pot, pour in the crushed tomatoes and vegetable broth.
2. Let it simmer for about 10 minutes.
3. Add in the heavy cream and chopped basil. Season with salt and pepper.
4. Allow the soup to cool before transferring it into jars for storage.
Tips:
– Pair with whole grain bread for a flavorful dip.
– Add a sprinkle of red pepper flakes if you enjoy a bit of heat.
FAQs:
– Can I freeze this soup? Yes, it freezes beautifully!
– How long does it last in the fridge? Up to 5 days.
This Tomato Basil Soup is not just a meal; it’s a hug in a jar. Perfect for busy days when you need something warm and satisfying. Enjoy it anytime, anywhere!
On hectic days, Tomato Basil Soup in a Jar is your quiet victory. Prep a batch and heat it in minutes—perfect for busy pros chasing flavor and efficiency. It’s one of your grab and go lunch ideas that actually nourishes you.
Tomato Basil Soup in a Jar
Editor’s Choice
Ball Regular Mouth 16-Ounces Mason Jar with Lids and Bands (12-Units)

THERMOS Stainless King Vacuum-Insulated Food Jar with Spoon, 16 Ounce, M…
Dave’s Killer Bread 21 Whole Grains & Seeds Thin-Sliced, Whole Grain Org…
20. Grilled Chicken Caesar Salad Wrap

The Grilled Chicken Caesar Salad Wrap is your answer to a tasty, quick meal on the go. Imagine biting into a soft, whole grain tortilla filled with tender grilled chicken, crisp romaine lettuce, and a creamy Caesar dressing. Toss in some crunchy croutons, and you have a delightful lunch that captures the flavors of a classic Caesar salad—all wrapped up and ready for your busy day.
This wrap isn’t just delicious; it’s also packed with nutrients, making it an ideal choice when you’re short on time. In just five minutes, you can whip up this satisfying meal, perfect for those hectic afternoons.
Recipe Overview:
– Servings: 1
– Prep Time: 5 minutes
– Total Time: 5 minutes
– Calories: 350 per wrap
Nutrition Information:
– Protein: 28g
– Carbohydrates: 30g
– Fat: 15g
– Fiber: 4g
Ingredients:
– 1 whole grain tortilla
– 4 oz grilled chicken, sliced
– 1 cup romaine lettuce, chopped
– 2 tbsp Caesar dressing
– 1/4 cup croutons
Instructions:
1. In a bowl, combine the sliced grilled chicken, chopped lettuce, Caesar dressing, and croutons. Mix thoroughly.
2. Place the mixture in the center of the tortilla.
3. Fold the sides in and roll tightly to form a wrap. Slice it in half for easy eating.
Tips:
– Use leftover grilled chicken for a quicker prep time.
– Add some grated Parmesan cheese for an extra burst of flavor.
FAQs:
– Can I swap the dressing? Yes, ranch dressing is a tasty alternative!
– How long can I store this wrap? It’s best enjoyed fresh, but it can last in the fridge for 1-2 days.
With this quick and nutritious Grilled Chicken Caesar Salad Wrap, you can enjoy a restaurant-quality meal without the wait. Grab one for your next lunch and savor the convenience!
Grilled Chicken Caesar Salad Wrap
Editor’s Choice
Mission Soft Taco Whole Wheat Tortillas, Medium Size, 10 Count, Whole Grain

BRIANNAS – Home Style Asiago Caesar Dressing – Fine Salad Dressing made …

Oscar Mayer Carving Board Flame Grilled Chicken Breast Strips Sliced Del…
21. Peanut Butter Banana Rice Cakes

Peanut Butter Banana Rice Cakes are your go-to solution for a quick, energizing lunch. If you’re racing against the clock, these tasty treats combine the richness of peanut butter with the sweetness of banana, offering a delightful balance. In just five minutes, you can whip up a satisfying meal that not only fills you up but also gives you the energy boost you need for your busy day.
Here’s how to make them:
Recipe Overview:
– Servings: 2
– Prep Time: 5 minutes
– Total Time: 5 minutes
– Calories: 200 per serving
Nutrition Information:
– Protein: 7g
– Carbohydrates: 30g
– Fat: 8g
– Fiber: 2g
Ingredients:
– 2 rice cakes
– 2 tbsp peanut butter
– 1 banana, sliced
Instructions:
1. Spread peanut butter generously over each rice cake.
2. Top with fresh banana slices.
3. Enjoy right away, or pack them for a tasty snack later.
To elevate this simple dish, try drizzling honey over the banana slices for an extra touch of sweetness. If you’re feeling adventurous, swap peanut butter for almond butter for a different flavor profile.
FAQs:
– Can I use other fruits? Yes! Apples or strawberries are great alternatives.
– How long do they stay fresh? For the best taste, enjoy them immediately after making.
With these Peanut Butter Banana Rice Cakes, you can enjoy a quick meal that’s delicious, nutritious, and perfect for your on-the-go lifestyle. Give them a try today!
Peanut Butter Banana Rice Cakes
Editor’s Choice

Drizzilicious Mini Rice Cakes – Rice Crisps, Healthy Snack for Adults an…

Amazon Grocery, Crunchy Peanut Butter, 40 Oz, Pack of 2 (Previously Amaz…
10 Pack Dishwasher Safe Reusable Bags, Leakproof Reusable Freezer Bags, …
22. Shrimp Tacos with Mango Salsa

Tired of the same old lunch routine? Shrimp Tacos with Mango Salsa offer a burst of flavor that’s perfect for your busy day. Imagine juicy grilled shrimp, paired with sweet mango salsa, all wrapped in soft tortillas. It’s a meal that’s not just tasty but also fun to eat!
These delightful tacos are quick and easy to whip up, making them ideal for meal prepping. You can have a fresh, satisfying lunch ready in just 20 minutes. Plus, they’re light and packed with protein, filling you up without weighing you down.
Recipe Overview:
– Servings: 2
– Prep Time: 10 minutes
– Cook Time: 10 minutes
– Total Time: 20 minutes
– Calories: 300 per serving
Nutrition Information:
– Protein: 25g
– Carbohydrates: 35g
– Fat: 8g
– Fiber: 4g
Ingredients:
– 8 oz shrimp, peeled and deveined
– 1 ripe mango, diced
– 1/4 red onion, diced
– 1 lime, juiced
– Corn tortillas for wrapping
Instructions:
1. Combine the diced mango, red onion, and lime juice in a bowl to create a zesty salsa.
2. Sauté the shrimp in a pan until they turn pink and are cooked through.
3. Warm the corn tortillas in another pan until they’re soft.
4. Assemble your tacos by placing shrimp and mango salsa inside the tortillas.
5. Serve your tacos immediately, or pack them for a delicious on-the-go lunch!
Tips:
– Add slices of avocado for a creamy touch.
– Sprinkle shrimp with your favorite seasoning for extra flavor.
FAQs:
– Can I use cooked shrimp? Yes, just warm it before assembling.
– How long do they last? Best enjoyed fresh, but you can store them in the fridge for a day.
With this easy recipe, you can enjoy vibrant flavors and healthy ingredients, making lunch a highlight of your day!
Shrimp Tacos with Mango Salsa
Editor’s Choice
50 Pack (100-Piece) 32 oz Meal Prep Containers Reusable with Lids 3-Comp…

365 by Whole Foods Market, Organic White Corn Tortilla Chips Thin and Cr…

Chef Paul Magic Seasoning Blends Shrimp Magic Seasoning | Bold Flavor fo…
23. Buckwheat Salad with Roasted Veggies

Get ready for a lunch that’s as satisfying as it is healthy! A Buckwheat Salad with Roasted Veggies is your go-to choice when you’re busy but still want a nutritious meal. This salad combines the nutty flavor of buckwheat with sweet, roasted vegetables for a delightful dish you can enjoy at home or on the go. Plus, it’s great for meal prepping since it stays fresh in the fridge for days!
Here’s what you need to whip up this easy salad:
Recipe Overview:
– Servings: 4
– Prep Time: 15 minutes
– Cook Time: 20 minutes
– Total Time: 35 minutes
– Calories: 350 per serving
Nutrition Information:
– Protein: 10g
– Carbohydrates: 60g
– Fat: 10g
– Fiber: 8g
Ingredients:
– 1 cup buckwheat, cooked
– 2 cups mixed vegetables (like zucchini, bell peppers, and onions)
– 2 tbsp olive oil
– Salt and pepper to taste
Instructions:
1. Preheat your oven to 400°F (200°C).
2. Toss the mixed vegetables in olive oil, adding salt and pepper. Spread them on a baking pan.
3. Roast the vegetables for about 20 minutes until they’re tender and slightly caramelized.
4. In a large bowl, combine the cooked buckwheat and roasted veggies. Stir well to mix everything together.
5. Serve it warm or pack it in a container for lunch later.
Tips:
– Add crumbled feta cheese for a tangy twist.
– Feel free to swap in any veggies you have on hand; this recipe is super flexible!
FAQs:
– Can I use quinoa instead of buckwheat? Yes, quinoa is a fantastic alternative!
– How long will this salad last? It can stay fresh for up to 4 days in the fridge.
This Buckwheat Salad with Roasted Veggies is not only delicious but also packed with nutrients. It’s perfect for busy days when you need something quick and filling. Enjoy the flavors, and feel free to get creative with your veggie choices!
Buckwheat Salad with Roasted Veggies
Editor’s Choice

Bento Box Adult Lunch Box, Containers for Adults Men Women with 4 Compar…
![VITEVER [6 Pack] Salad Dressing Container To Go, 1.6 oz Small Condiment ...](https://m.media-amazon.com/images/I/61e4L8ouG2L._AC_UL320_.jpg "30+ Grab and Go Lunch Ideas for Busy People on the Move 154")
VITEVER [6 Pack] Salad Dressing Container To Go, 1.6 oz Small Condiment …
Fullstar The Original Pro Chopper – Vegetable Chopper and Spiralizer, Fo…
24. Veggie Burger Patties

When you’re pressed for time but still want a tasty and nutritious meal, Veggie Burger Patties are your go-to solution. These flavorful patties combine black beans and quinoa, seasoned to perfection. They not only satisfy your hunger but also offer a healthy alternative to traditional burgers. Plus, you can whip them up in just 30 minutes!
Imagine biting into a warm, savory veggie burger packed with protein and fiber. They’re perfect for meal prep: make a big batch and freeze some for those hectic days ahead. You can easily grab one from the freezer, pop it in a skillet, and enjoy a delicious meal in no time.
Recipe Overview:
– Servings: 4
– Prep Time: 10 minutes
– Cook Time: 20 minutes
– Total Time: 30 minutes
– Calories: 250 per patty
Nutrition Information:
– Protein: 15g
– Carbohydrates: 35g
– Fat: 8g
– Fiber: 10g
Ingredients:
– 1 can black beans, drained
– 1 cup cooked quinoa
– 1/4 cup breadcrumbs
– 1 tsp cumin
– Salt and pepper to taste
Instructions:
1. In a bowl, mash the black beans until smooth.
2. Combine the mashed beans with quinoa, breadcrumbs, cumin, salt, and pepper.
3. Shape the mixture into patties.
4. Heat a skillet over medium heat and cook the patties for 5-6 minutes on each side until golden brown.
5. Serve on whole grain buns or over a fresh salad.
Tips:
– Top your patties with avocado or salsa for a flavor boost.
– Freeze uncooked patties for quick meals later.
FAQs:
– Can I bake these instead? Yes, bake them at 375°F (190°C) for about 25 minutes.
– How long do they last? Store in the fridge for up to four days.
With these Veggie Burger Patties, you can enjoy a quick, satisfying meal that fits your busy lifestyle. They are delicious, easy to make, and perfect for any day of the week!
Veggie Burger Patties
Editor’s Choice

BetterBody Foods Organic Quinoa, Vegan, Gluten Free, Low Glycemic Rice R…

Aleia’s Gluten Free Plain Bread Crumbs – 13oz (1 Pack) – Breading for Ch…
25. Corn and Black Bean Salad

Corn and Black Bean Salad is your go-to solution for a quick, tasty lunch that won’t slow you down. This vibrant dish combines sweet corn, hearty black beans, and crunchy bell peppers, all tossed in a zesty lime dressing. Each bite bursts with flavor and nutrients, thanks to the protein and fiber packed into this colorful salad. Whether you enjoy it by itself or as a side, it’s a meal that satisfies and energizes you on the move.
Making this salad ahead of time is a breeze. You can whip it up in just 10 minutes and store it in your fridge for several days. It’s perfect for busy weeks when you need a healthy option at your fingertips. Plus, it’s budget-friendly and uses ingredients you might already have at home!
Recipe Overview:
– Servings: 4
– Prep Time: 10 minutes
– Total Time: 10 minutes
– Calories: 210 per serving
Nutrition Information:
– Protein: 8g
– Carbohydrates: 35g
– Fat: 3g
– Fiber: 7g
Ingredients:
– 1 can black beans, drained
– 1 cup corn (fresh or frozen)
– 1 bell pepper, diced
– Juice of 1 lime
– Salt and pepper to taste
Instructions:
1. In a large bowl, mix together the black beans, corn, and diced bell pepper.
2. Drizzle the mixture with lime juice and season with salt and pepper.
3. Toss everything together until well combined. Serve immediately or refrigerate for later.
Tips:
– Add diced avocado for extra creaminess and healthy fats.
– Use this salad as a topping for tacos to amp up the flavor.
FAQs:
– How long does it last? This salad stays fresh in the fridge for up to 4 days.
– Can I use canned corn? Absolutely! Canned corn is a great shortcut for this recipe.
With its fresh flavors and simple prep, the Corn and Black Bean Salad is a delicious way to keep your lunch routine exciting. Enjoy it as a main dish or a sidekick to your favorite meals!
Corn and Black Bean Salad
Editor’s Choice
50 Pack (100-Piece) 24 oz Meal Prep Containers Reusable with Lids, Sturd…

Zulay Kitchen Metal Lemon Squeezer – Sturdy & Easy-to-Use Handheld Citru…

26. Baked Falafel Salad

Imagine a lunch that’s not only satisfying but also packed with flavor and nutrients. The Baked Falafel Salad is just that! This dish combines crispy baked falafel, vibrant greens, and a creamy tahini dressing, making it a delightful Mediterranean experience right on your plate. It’s quick to prepare, perfect for your busy schedule, and will keep you energized throughout the day.
Recipe Overview:
– Servings: 4
– Prep Time: 15 minutes
– Cook Time: 25 minutes
– Total Time: 40 minutes
– Calories: 300 per serving
Nutrition Information:
– Protein: 12g
– Carbohydrates: 40g
– Fat: 15g
– Fiber: 10g
Ingredients:
– 1 can chickpeas, drained
– 1/4 cup parsley, chopped
– 1/4 cup onion, chopped
– 2 garlic cloves
– 1 tsp cumin
– Salt and pepper to taste
– Olive oil for baking
– Mixed greens for serving
– Tahini dressing for drizzling
Instructions:
1. Preheat your oven to 400°F (200°C).
2. In a food processor, mix chickpeas, parsley, onion, garlic, cumin, salt, and pepper until a dough forms.
3. Shape the mixture into small balls.
4. Place the falafel balls on a baking sheet and drizzle with olive oil. Bake for about 25 minutes or until they’re golden and crispy.
5. Serve your falafel over a bed of mixed greens and drizzle with tahini dressing for added flavor.
Tips:
– Add sliced cucumbers and cherry tomatoes for a refreshing crunch.
– Pair with pita chips for a delightful side.
FAQs:
– Can I fry these instead? Absolutely! Frying gives them a different texture.
– How long do they last? Store leftovers in the fridge for up to 4 days.
Enjoy your delicious and nutritious Baked Falafel Salad. It’s a meal that fits perfectly into your busy lifestyle while satisfying your taste buds!
Baked Falafel Salad
Editor’s Choice
Hamilton Beach Food Processor & Vegetable Chopper for Slicing, Shredding…

50 Pack (100-Piece) 24 oz Meal Prep Containers Reusable with Lids, Sturd…
27. Broccoli and Cheese Quinoa Bake

Imagine coming home after a long day, tired and hungry. You want something comforting but don’t have time to cook. Enter the Broccoli and Cheese Quinoa Bake—a delightful casserole that’s not only easy to make but also perfect for meal prep. This dish combines nutty quinoa, vibrant broccoli, and melty cheese into a creamy, satisfying meal. It’s a nutritious choice that packs a punch with protein and fiber, making it an excellent grab-and-go lunch option.
Recipe Overview:
– Servings: 6
– Prep Time: 10 minutes
– Cook Time: 30 minutes
– Total Time: 40 minutes
– Calories: 300 per serving
Nutrition Information:
– Protein: 12g
– Carbohydrates: 40g
– Fat: 10g
– Fiber: 6g
Ingredients:
– 1 cup cooked quinoa
– 2 cups broccoli florets
– 1 cup shredded cheddar cheese
– 1/2 cup milk
– Salt and pepper to taste
Instructions:
1. Preheat your oven to 350°F (175°C).
2. In a large bowl, mix the cooked quinoa, broccoli, cheese, milk, salt, and pepper until well combined.
3. Transfer the mixture into a greased baking dish.
4. Bake for 30 minutes, or until the top is golden and bubbly.
5. Let it cool slightly before portioning it out for easy lunches.
Tips:
– Add cooked chicken for an extra protein boost.
– Swap cheeses based on what you have—any cheese will work!
FAQs:
– Can I freeze this dish? Absolutely! It freezes well for up to three months.
– How long does it last in the fridge? Enjoy it for up to four days.
This casserole not only feeds your hunger but also makes your life easier. With its simple ingredients and quick prep time, you can whip it up and have ready meals for the week. Enjoy the comforting flavors without the fuss!
Broccoli and Cheese Quinoa Bake
Editor’s Choice

HOMBERKING 10 Pack Borosilicate Glass Meal Prep Containers with Locking …

Pride Of India – Natural Royal Red Bolivian Quinoa – Protein Rich Whole …

Rotary Cheese Grater with Handle Kitchen Shredder Slicer Grater Slicer I…
28. Sardine Salad Cups

Sardine Salad Cups are a fantastic choice for a quick, protein-packed lunch. If you’re always on the go, this meal is perfect. Just imagine fresh, flavorful sardines paired with crisp veggies and a zesty lemon kick, all wrapped in crunchy lettuce. This delicious combo not only satisfies your hunger but also fuels your body with heart-healthy omega-3 fatty acids. You’ll love how easy it is to prepare these cups in just a few minutes!
Ready to make your own? Here’s a simple recipe to follow. You’ll need just a few ingredients that you can find at any grocery store. It’s budget-friendly too, making it a smart option for busy individuals. Enjoy the freshness of this dish, especially when you can prepare it in under 10 minutes. It’s perfect for meal prepping or taking to work, ensuring that you have a nutritious option at hand.
Ingredients:
– 1 can sardines, drained
– 1/4 cup cucumber, diced
– 1/4 cup bell pepper, diced
– 1 tbsp olive oil
– Juice of 1 lemon
– Lettuce leaves for wrapping
Instructions:
1. In a mixing bowl, combine sardines, cucumber, bell pepper, olive oil, and lemon juice.
2. Gently stir until everything is well mixed.
3. Spoon the mixture onto the center of each lettuce leaf.
4. Wrap the leaves around the filling to create cups.
5. Serve immediately or package them up for a tasty lunch on the move.
Tips:
– Add whole grain crackers on the side for extra crunch.
– Sprinkle fresh herbs like dill for a delightful flavor boost.
FAQs:
– Are sardines healthy? Yes! They are loaded with nutrients and healthy fats.
– Can I substitute fresh fish? Absolutely! Just cook and flake it to use in the recipe.
Now you have a quick, nutritious meal that’s easy to make and even easier to enjoy on busy days. Give it a try and see how Sardine Salad Cups can change your lunch game!
Sardine Salad Cups
Editor’s Choice
50 Pack (100-Piece) 32 oz Meal Prep Containers Reusable with Lids 3-Comp…

Pompeian USDA Certified Organic Extra Virgin Olive Oil Non-Stick Cooking…

Wheat Thins Original Snacks, Whole Grain Wheat Crackers, Snack Crackers,…
29. Spinach and Feta Stuffed Peppers

Imagine a lunch that’s not only healthy but also bursting with color and flavor. Spinach and Feta Stuffed Peppers are just that! These bright, bell peppers are a perfect grab-and-go meal. Filled with sautéed spinach, creamy feta cheese, and quinoa, they offer a satisfying and nutritious option for your busy day. Plus, they’re easy to prepare and even easier to pack.
Here’s how to make them:
Recipe Overview:
– Servings: 4
– Prep Time: 15 minutes
– Cook Time: 30 minutes
– Total Time: 45 minutes
– Calories: 220 per stuffed pepper
Nutrition Information:
– Protein: 10g
– Carbohydrates: 30g
– Fat: 8g
– Fiber: 5g
Ingredients:
– 4 bell peppers, halved
– 1 cup cooked quinoa
– 2 cups spinach, cooked and chopped
– 1/2 cup feta cheese, crumbled
– Olive oil for drizzling
Instructions:
1. Preheat your oven to 375°F (190°C).
2. In a bowl, mix together the cooked quinoa, spinach, and feta cheese.
3. Stuff the halved peppers with this delicious mixture.
4. Drizzle with a little olive oil and place them in the oven.
5. Bake for 30 minutes, then let them cool before packing for lunch.
Here are some tips to enhance your stuffed peppers:
Tips:
– Add nuts or seeds for an extra crunch.
– Top with salsa or your favorite sauce for a flavor boost.
FAQs:
– How long do these last? They stay fresh in the fridge for up to 4 days.
– Can I freeze them? Absolutely! They freeze well for a quick future meal.
These stuffed peppers are not just a meal; they’re a convenient way to fuel your day. Enjoy them at home or take them with you for a satisfying lunch on the go!
Spinach and Feta Stuffed Peppers
Editor’s Choice
50 Pack (100-Piece) 24 oz Meal Prep Containers Reusable with Lids, Sturd…

Viva Naturals Organic Quinoa, 4 lb – Pre-Washed Whole Grain, Plant Prote…
Pompeian USDA Certified Organic Extra Virgin Olive Oil Non-Stick Cooking…
30. Chocolate Chia Seed Pudding

Want a sweet treat that fits perfectly into your busy lifestyle? Try Chocolate Chia Seed Pudding! This delightful dessert doubles as a snack and packs a nutritional punch. Just mix chia seeds with almond milk, cocoa powder, and your favorite sweetener. Let it sit, and you’ll have a creamy pudding that’s ready to go when you are.
Chia seeds are tiny but mighty. They’re loaded with omega-3 fatty acids and fiber, making them great for your heart and digestion. This pudding is not just tasty; it’s a smart choice for those on the move.
Recipe Overview:
– Servings: 2
– Prep Time: 5 minutes
– Total Time: 5 minutes + 4 hours to set
– Calories: 150 per serving
Nutrition Information:
– Protein: 5g
– Carbohydrates: 18g
– Fat: 7g
– Fiber: 10g
Ingredients:
– 1/4 cup chia seeds
– 1 cup almond milk
– 2 tbsp cocoa powder
– 2 tbsp maple syrup (or sweetener of your choice)
Instructions:
1. In a medium bowl, combine chia seeds, almond milk, cocoa powder, and maple syrup.
2. Stir everything until well mixed. Let it sit for about 10 minutes to thicken.
3. After 10 minutes, give it another stir and cover. Refrigerate for at least 4 hours or overnight for best results.
4. Serve cold. You can add fresh berries or nuts on top for extra flavor and texture.
Tips:
– Add a splash of vanilla for a warm flavor.
– Top with sliced bananas or a sprinkle of coconut for variety.
FAQs:
– How long does it last? This pudding stays fresh for up to 5 days in the fridge.
– Can I use regular milk? Absolutely! Any milk works well.
Now you have a delicious and healthy option to grab on your way out the door. Enjoy your Chocolate Chia Seed Pudding and feel good about your snack choice!
❝ Fun fact: Chia seeds absorb up to 12x their weight in liquid, turning almond milk into a creamy pudding in minutes. That simple texture upgrade makes grab and go lunch ideas feel indulgent without guilt. Easy, nutritious, and ready when you are.
Chocolate Chia Seed Pudding
Editor’s Choice
BetterBody Foods Organic Chia Seeds 2 lbs, 32 Oz, with Omega-3, Non-GMO,…

Silk Shelf-Stable Almond Milk, Unsweetened Vanilla, Dairy-Free, Vegan, N…

HERSHEY’S Natural Unsweetened Cocoa Powder Can, 8 oz
Conclusion

Finding healthy grab-and-go lunch ideas doesn’t have to be a chore. With these 30+ options, you can fuel your busy days with delicious, nutritious meals that keep you energized and satisfied.
These ideas are designed not only for convenience but also for variety, ensuring you never get bored with your meals. Explore your options and get creative with these recipes to make your lunchtime enjoyable!
Note: We aim to provide accurate product links, but some may occasionally expire or become unavailable. If this happens, please search directly on Amazon for the product or a suitable alternative.
This post contains Amazon affiliate links, meaning I may earn a small commission if you purchase through my links, at no extra cost to you.
Frequently Asked Questions
What Are Some Quick and Easy Grab and Go Lunch Ideas for Busy Professionals?
If you’re in need of some quick and easy grab and go lunch ideas, consider options like wraps filled with lean proteins and veggies, or salad jars that you can prep ahead of time. You might also enjoy hummus and veggie packs or overnight oats for a nutritious, satisfying meal on the move! These meals are not only portable but also packed with nutrients to keep you energized throughout the day.
How Can I Make Meal Prep Lunches More Exciting?
Meal prep doesn’t have to be boring! You can make your meal prep lunches more exciting by incorporating a variety of flavors and textures. Try different marinades for your proteins or add new grains like quinoa or farro. Also, consider using seasonal veggies for freshness and color. Mixing up your ingredients weekly can keep your lunches interesting and something to look forward to!
What Are Some Healthy On-the-Go Meals That Don’t Require Cooking?
For those super busy days when cooking feels impossible, there are plenty of healthy on-the-go meals that require no cooking at all! Think about pre-packaged salads with lean proteins, Greek yogurt with fruits, or nut butter and apple slices. These options are nutritious, easy to prepare, and perfect for anyone looking for a quick lunch solution!
How Do I Choose the Best Portable Meal Options for Work?
When selecting the best portable meal options for work, consider meals that are easy to pack and won’t spoil quickly. Look for foods that are rich in protein and fiber, like chicken salads or bean wraps, to keep you full longer. Don’t forget to pack them in reusable containers to minimize waste and make transport easier. A little planning goes a long way in ensuring you have healthy meals ready to go!
What Are Some Budget-Friendly Grab and Go Lunch Ideas?
Eating healthy on a budget is totally possible with grab and go lunch ideas. Some budget-friendly options include rice and beans, peanut butter sandwiches with banana, or pasta salads made with seasonal veggies. Preparing meals in bulk is a great way to save money while ensuring you have delicious, nutritious options ready for those busy days!
Related Topics
grab and go lunch ideas
quick lunch recipes
healthy meals
portable meal options
easy lunch ideas
meal prep lunches
busy professionals
on-the-go eating
nutritious snacks
easy meal prep
fast healthy lunches
work lunch solutions