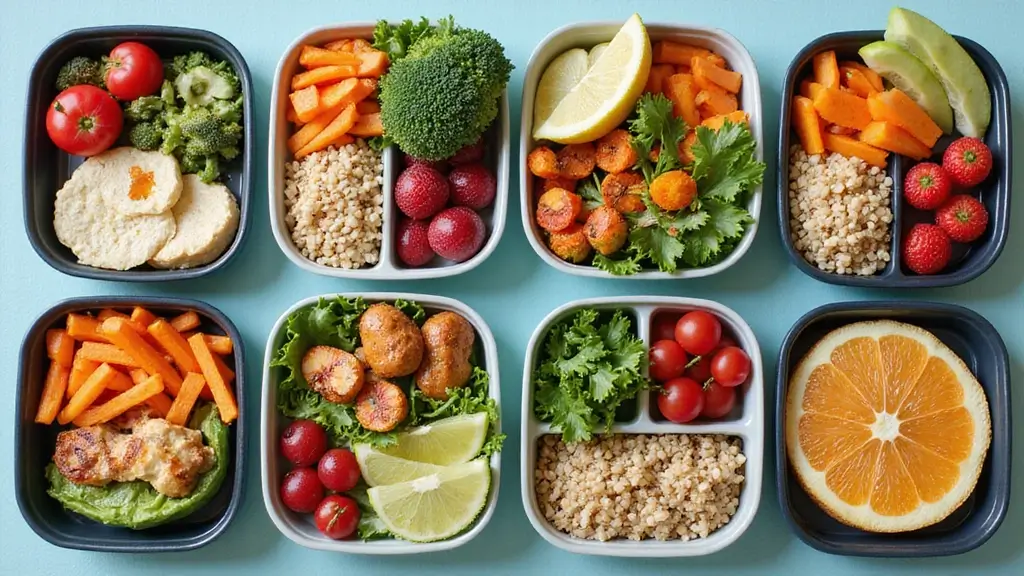
Do you ever find yourself staring blankly at the fridge, wondering what to pack for lunch? You’re not alone! If you’re trying to eat gluten-free, packing a tasty and satisfying lunch can feel like a real challenge. That’s why I put together this post. I want to help you break free from the same old sandwich routine and discover new, exciting options.
This collection is for everyone—busy parents packing lunches for their kids or professionals trying to eat healthier at work. If you care about nutritious meals that keep your energy up and your taste buds happy, you’re in the right place. Whether you’re gluten-intolerant or just looking to explore more gluten-free meals, you’ll find something here.
In this guide, you’ll discover 25 gluten-free lunch box ideas that are not only delicious but also easy to prepare. Each idea is designed to be packed up and taken on the go, making them perfect for hectic mornings. You’ll learn about vibrant salads, hearty wraps, and creative snack options that will keep lunchtime exciting. Get ready to impress your coworkers or classmates with meals that are both healthy and fun!
1. Quinoa Salad with Cherry Tomatoes and Cucumbers
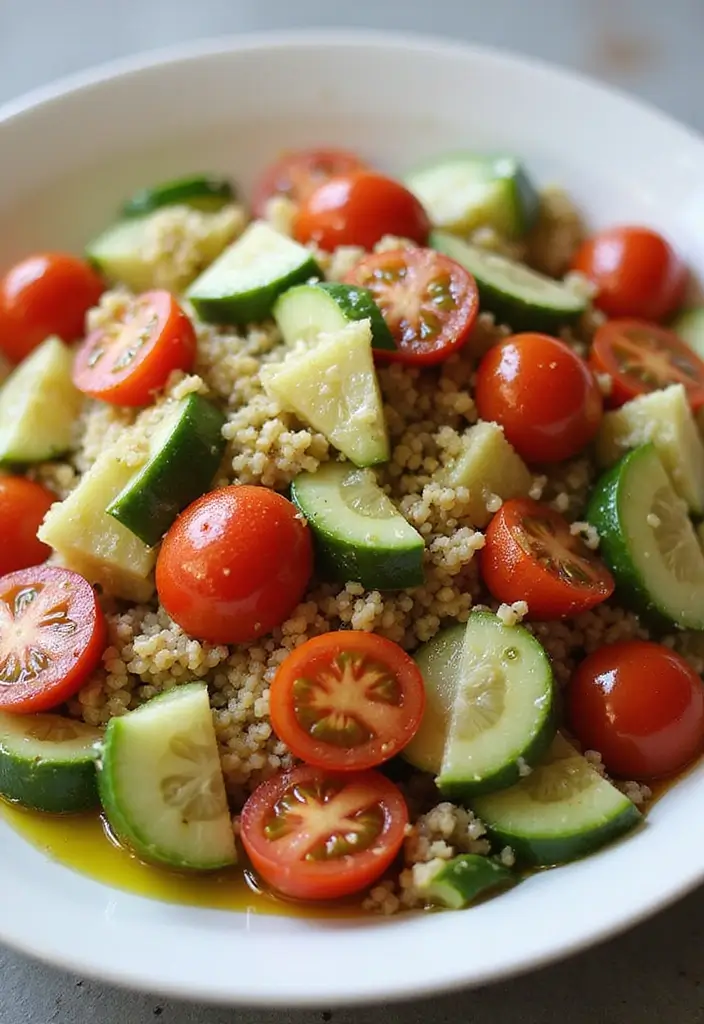
Quinoa salad is an excellent choice for your lunch box. It’s not only delicious but also loaded with protein and fiber to keep you energized. Picture this: fluffy quinoa, bright cherry tomatoes, and crunchy cucumbers all mixed together. Add a drizzle of olive oil and a sprinkle of salt and pepper, and you have a refreshing meal that’s as pleasing to the eyes as it is to the palate.
You can prepare this salad ahead of time, making it a fantastic grab-and-go option. Pair it with gluten-free crackers or some fresh veggies for an extra crunch. This combo not only fills you up but also satisfies your cravings with its colorful presentation.
Ready to make your quinoa salad? Here’s what you need:
Ingredients:
– 1 cup cooked quinoa
– 1 cup halved cherry tomatoes
– 1 cup diced cucumbers
– 2 tablespoons olive oil
– Salt and pepper to taste
Instructions:
1. In a large bowl, combine the cooked quinoa, cherry tomatoes, and diced cucumbers.
2. Drizzle with olive oil and season with salt and pepper.
3. Toss everything gently to mix well.
4. Pack it into your lunch box or serve immediately.
5. Store in the fridge until you’re ready to enjoy it.
Want to switch it up? Try adding feta cheese or olives for a Mediterranean twist.
FAQs:
Can I use other grains? Yes, feel free to substitute with farro or brown rice if you prefer!
This quinoa salad isn’t just a meal; it’s a simple way to bring freshness to your lunch routine. Enjoy every bite!
Quinoa Salad with Cherry Tomatoes and Cucumbers
Editor’s Choice

4 Pack Bento Lunch Box Set 3 Compartment Food Storage Containers Wheat S…
 Amazon$13.98
Milton’s Gluten Free Crackers, Crispy Sea Salt – Non-GMO Project Verifie…
 Amazon$3.48
Amazon Grocery, Vegetable Oil, 48 Fl Oz (Previously Happy Belly, Packagi…
 Amazon$4.17
2. Turkey and Cheese Roll-Ups

Looking for a quick, tasty lunch that’s gluten-free? Turkey and cheese roll-ups are your answer! They’re easy to make and packed with flavor. Just take slices of turkey, wrap them around your favorite cheese, and you have a satisfying meal. For a little crunch, toss in some fresh spinach. This not only boosts nutrition but also adds a pop of color.
Pair these roll-ups with fresh fruit like apple slices or sweet grapes for a well-rounded lunch. It’s a meal that’s ready in just five minutes, making it perfect for those busy mornings. Imagine biting into the savory turkey and creamy cheese—it’s a delightful combo!
Nutritional Overview:
– Servings: 2
– Prep Time: 5 minutes
– Total Time: 5 minutes
– Calories: 250
Ingredients:
– 4 slices of turkey breast
– 2 slices of cheese (cheddar or Swiss)
– Fresh spinach leaves
Instructions:
1. Start by laying a slice of turkey flat on your cutting board.
2. Place a slice of cheese and a few spinach leaves on top of the turkey.
3. Roll it up tightly. If needed, secure it with a toothpick.
4. Repeat the process with the remaining ingredients.
Feel free to mix it up! Try different types of cheese for new flavors. Want a twist? You can swap turkey for chicken if you prefer.
Quick Tips:
– Use a variety of cheeses for diverse tastes.
– Pack with veggies or nuts for extra nutrition.
– Make a batch ahead for easy lunches all week.
– Pair with gluten-free crackers for a crunchy side.
These roll-ups are not just quick and easy; they bring a burst of flavor and fun to your lunch routine! Enjoy your meals without the gluten worries.
Turkey and Cheese Roll-Ups
Editor’s Choice

Absolutely Gluten Free Original Flatbread, 5.25oz (6 Pack) | Grain Free …
 AmazonCheck Price
Bento Box Adult Lunch Box, Containers for Adults Men Women with 4 Compar…
 Amazon$9.99
500PCS Cocktail Picks Kit, 4 Styles Fancy Toothpicks for Appetizers, 3 S…
 Amazon$7.99
3. Veggie-Stuffed Bell Peppers
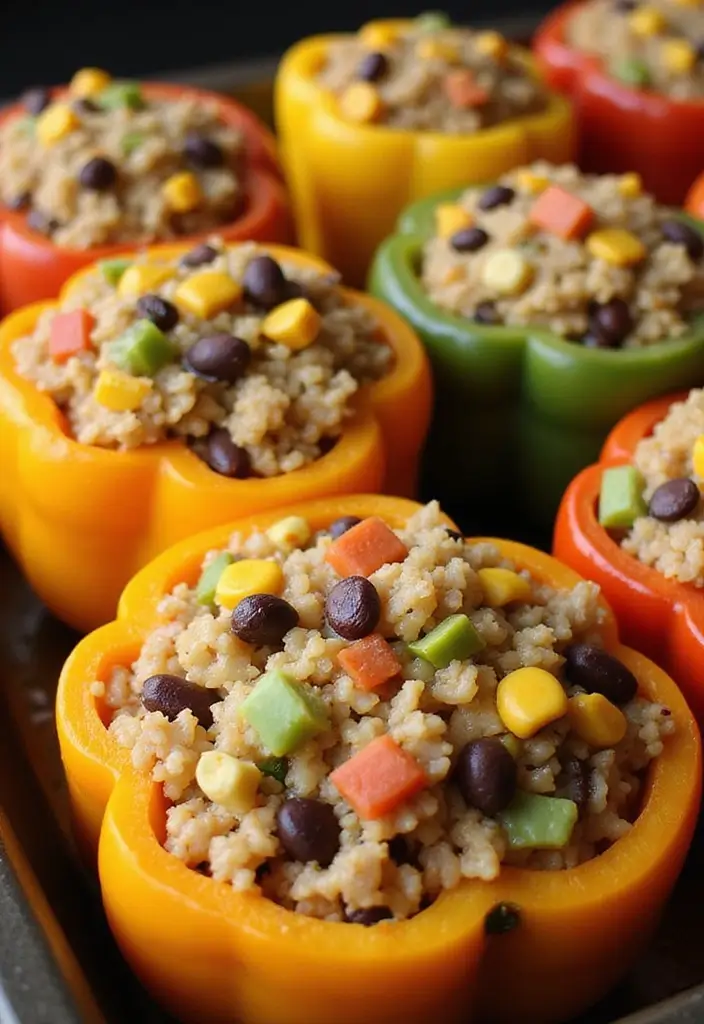
Imagine opening your lunch box to find a colorful, warm meal that not only looks good but also tastes fantastic. Veggie-Stuffed Bell Peppers are a delightful option that checks all the boxes for a gluten-free lunch. The sweet crunch of bell peppers pairs perfectly with a savory filling, making every bite satisfying. Plus, they’re visually appealing, showcasing a rainbow of colors that can brighten up your day.
To prepare these tasty peppers, you can fill them with a mixture of brown rice, black beans, corn, and spices. Bake the peppers until they’re tender, and you’ll have a hearty meal you can enjoy at work or school. This dish is not only easy to make but also allows for creativity. You can customize the filling by adding your favorite veggies or spices, making it a versatile choice.
Here’s how to make your own Veggie-Stuffed Bell Peppers:
Ingredients:
– 4 bell peppers (any color)
– 1 cup cooked brown rice
– 1 cup black beans, rinsed and drained
– 1 cup corn (fresh or frozen)
– 1 teaspoon cumin
– Salt and pepper to taste
Instructions:
1. Preheat your oven to 375°F (190°C).
2. Slice the tops off the bell peppers and remove the seeds.
3. In a mixing bowl, combine the cooked rice, black beans, corn, cumin, salt, and pepper.
4. Stuff the mixture into each pepper until full.
5. Arrange the stuffed peppers in a baking dish and cover with foil. Bake for about 30 minutes, or until the peppers are tender.
6. Let them cool slightly before packing them in your lunch box.
For an extra creamy finish, add some avocado slices on top before you dig in!
FAQs:
– How do I store leftovers? Refrigerate in an airtight container for up to 3 days.
– Can I freeze them? Yes, these stuffed peppers freeze well. Just reheat when you’re ready to eat!
Enjoy your meal prep, and get ready to impress your coworkers or classmates with this delicious, gluten-free option!
Veggie-Stuffed Bell Peppers
Editor’s Choice

HOMBERKING 10 Pack Borosilicate Glass Meal Prep Containers with Locking …
 AmazonEUR 26.79
Fullstar The Original Pro Chopper – Vegetable Chopper and Spiralizer, Fo…
 Amazon$29.99
8-Piece Deep Glass Baking Dish Set with Plastic lids,Rectangular Glass B…
 Amazon$35.99
4. Sweet Potato Hummus with Veggie Sticks
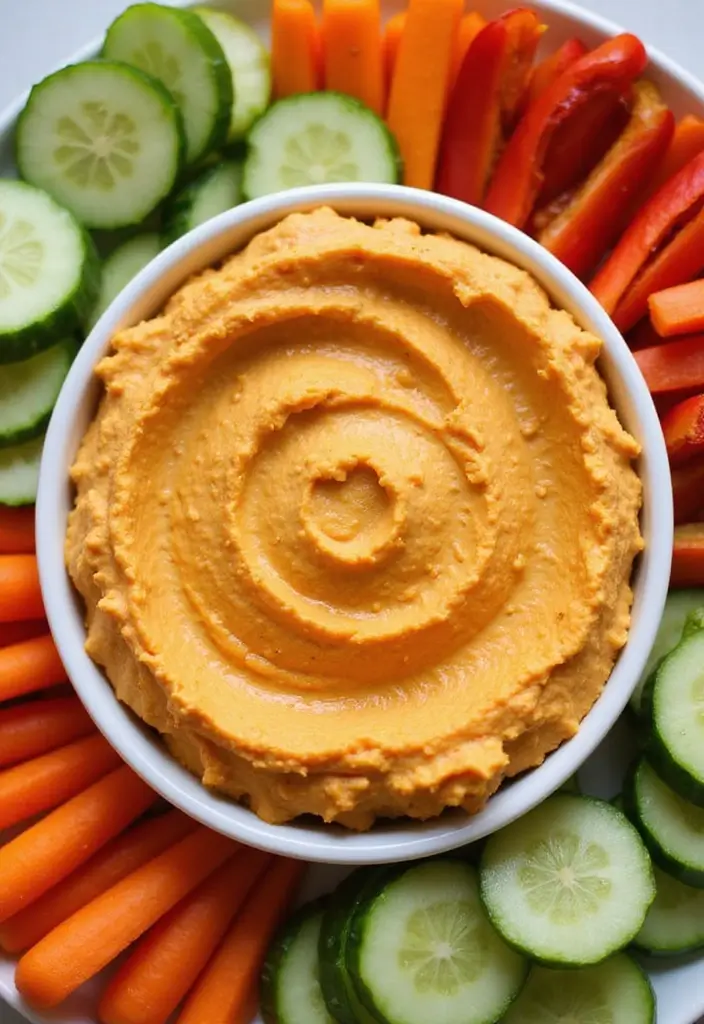
Looking for a tasty and nutritious option to brighten up your lunch box? Sweet potato hummus is a delightful twist on traditional hummus. It’s creamy, packed with flavor, and a great way to sneak in some veggies. Blend cooked sweet potatoes with tahini, garlic, and a splash of lemon juice for a dip that’s sure to impress. Pair it with vibrant veggie sticks like crunchy carrots, refreshing cucumbers, and colorful bell peppers for a fun, nutritious meal. Perfect for both adults and picky kids, this combo makes lunchtime something to look forward to!
Making sweet potato hummus is easy and budget-friendly. You can whip it up in just 10 minutes, which is a lifesaver on busy mornings. Serve it in a container with assorted veggie sticks for a portable snack that’s perfect for work or school. Plus, you can customize it! Add spices like cumin or paprika for an extra kick.
Ingredients:
– 1 cup cooked sweet potatoes
– 1/4 cup tahini
– 2 tablespoons lemon juice
– 1 garlic clove, minced
– Salt to taste
– Crunchy veggie sticks for dipping
Instructions:
1. In a blender, combine the cooked sweet potatoes, tahini, lemon juice, garlic, and salt.
2. Blend until the mixture is smooth and creamy.
3. Transfer to a container and pack with your favorite veggie sticks.
Tips for Extra Flavor:
– Mix in spices like cumin or paprika for a unique taste.
– Try different veggies such as celery or cherry tomatoes for variety.
– Use canned sweet potatoes if you’re in a hurry, but fresh is always best!
Enjoy this delicious snack that fuels your day while keeping you gluten-free! It’s not just a meal; it’s a celebration of flavors and health in every bite.
Sweet Potato Hummus with Veggie Sticks
Editor’s Choice

Ninja SS151 TWISTi Blender DUO, High-Speed 1600 WP Smoothie Maker & Nutr…
 Amazon$118.95
5. Chicken and Avocado Wraps
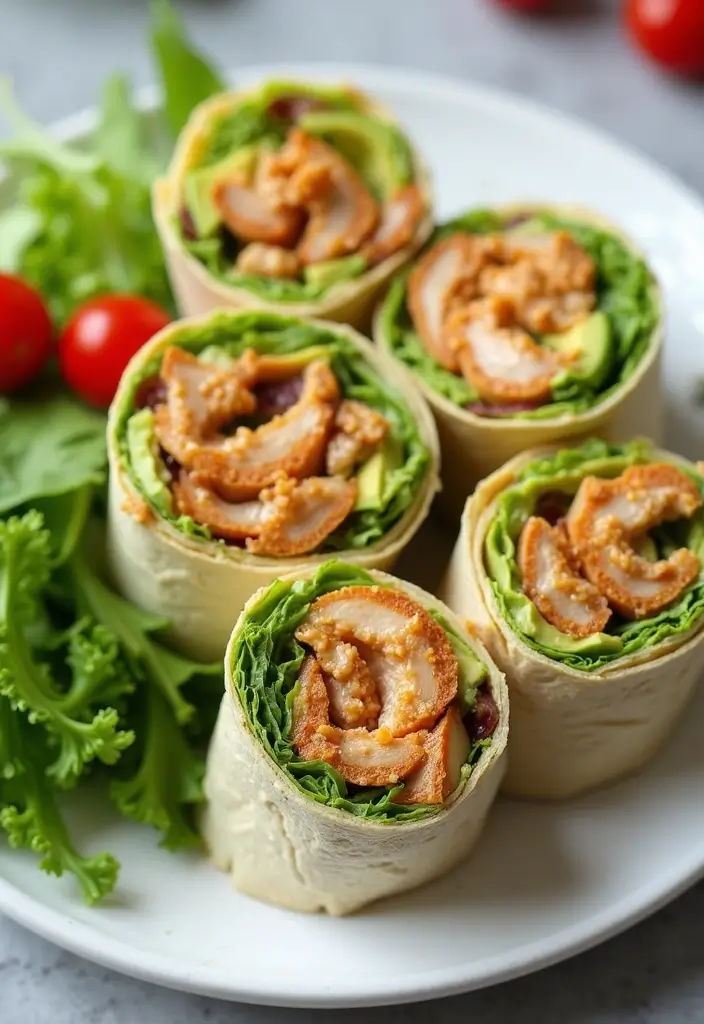
Looking for a simple and satisfying lunch option? Chicken and avocado wraps are your answer! These gluten-free wraps are not only easy to make, but they’re also packed with flavor and nutrition. Imagine biting into a soft tortilla filled with juicy chicken, creamy avocado, and crunchy lettuce, all brightened up with a splash of lime. They make for a delightful lunch that keeps your energy up throughout the day.
To prepare these wraps, you’ll need just a few ingredients. The best part? You can whip them up in under 10 minutes! Perfect for busy mornings or last-minute meal prep. These wraps are a fantastic choice for work or school lunches, and they can be sliced into pinwheels for a fun finger food experience.
Here’s how to make your chicken and avocado wraps:
Ingredients:
– 2 gluten-free tortillas
– 1 cup cooked chicken, sliced
– 1 ripe avocado, sliced
– 1 cup fresh lettuce
– Juice of 1 lime (or to taste)
Instructions:
1. Start by laying a gluten-free tortilla flat on a clean surface.
2. Layer the sliced chicken, avocado, and lettuce in the center of the tortilla.
3. Squeeze lime juice over the ingredients for a zesty flavor.
4. Carefully roll the tortilla tightly, then slice it into pinwheels for easy eating.
5. Pack your wraps in a lunch box alongside gluten-free chips for a satisfying crunch.
Want to spice things up? Add salsa for an extra kick!
FAQs:
Can I use deli meat? Absolutely! Pre-sliced deli meat is a quick and tasty alternative.
These wraps are not just quick; they’re also a delightful way to enjoy a gluten-free meal that satisfies your hunger and taste buds. Give them a try, and watch them become your go-to lunch option!
Chicken and Avocado Wraps
Editor’s Choice
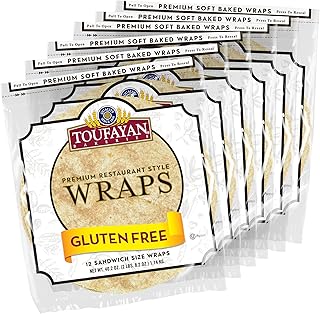
Toufayan Gluten Free 12″ Sandwich Wraps – Bulk Wholesale Case, Premium F…
 Amazon$79.99
Rubbermaid Brilliance Meal Prep Containers, 2-Compartment Food Storage C…
 Amazon$23.49
6. Mini Zucchini Quiches
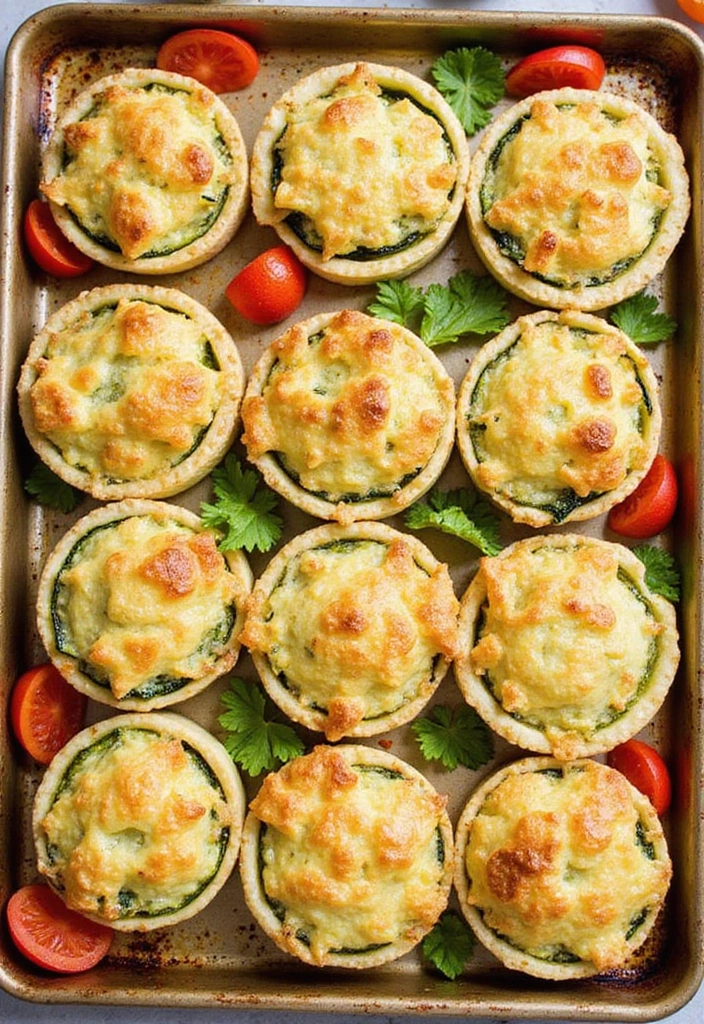
Get ready to delight your taste buds with these Mini Zucchini Quiches. They are not just cute; they’re a smart way to sneak in some healthy veggies into your lunch. Made with shredded zucchini, eggs, and cheese, these bite-sized wonders are perfect for busy workdays or school lunches. You can serve them warm or cold, making them a flexible option that pairs beautifully with a side of fresh fruit for a well-rounded meal.
To make these quiches, gather your ingredients and follow these simple steps. They are budget-friendly and quick to prepare—ideal for anyone on a tight schedule. Plus, you can customize them with your favorite veggies, ensuring you never get bored. Imagine opening your lunch box to find these delightful quiches, ready to impress your friends or coworkers.
Ingredients:
– 2 cups shredded zucchini
– 6 large eggs
– 1 cup shredded cheese (cheddar or mozzarella works well)
– 1 cup mixed vegetables (like diced peppers and onions)
– Salt and pepper to taste
Instructions:
1. Preheat your oven to 350°F (175°C).
2. In a mixing bowl, combine the shredded zucchini, eggs, cheese, and mixed vegetables.
3. Season your mixture with salt and pepper to enhance the flavors.
4. Grease a muffin tin to prevent sticking, then pour the mixture evenly into each cup.
5. Bake for about 20 minutes, or until the quiches are set and golden brown on top.
6. Let them cool for a few minutes before removing them from the tin. Pack them up for lunch or enjoy them right away!
Feel free to experiment with different vegetables like spinach or mushrooms for a unique twist. These quiches also freeze well; just reheat when you’re ready to enjoy.
FAQs:
– Can I freeze these quiches? Absolutely! They freeze wonderfully and can be reheated quickly in the microwave or oven.
– What can I serve with them? Pair with a colorful salad or some fresh fruit for a complete meal on the go!
Mini Zucchini Quiches
Editor’s Choice

2Pack Silicone Muffin Pan for Baking with Metal Reinforced Frame, 12 Cup…
 Amazon$19.99
HOMBERKING 10 Pack Borosilicate Glass Meal Prep Containers with Locking …
 Amazon$30.99
7. Pesto Pasta Salad
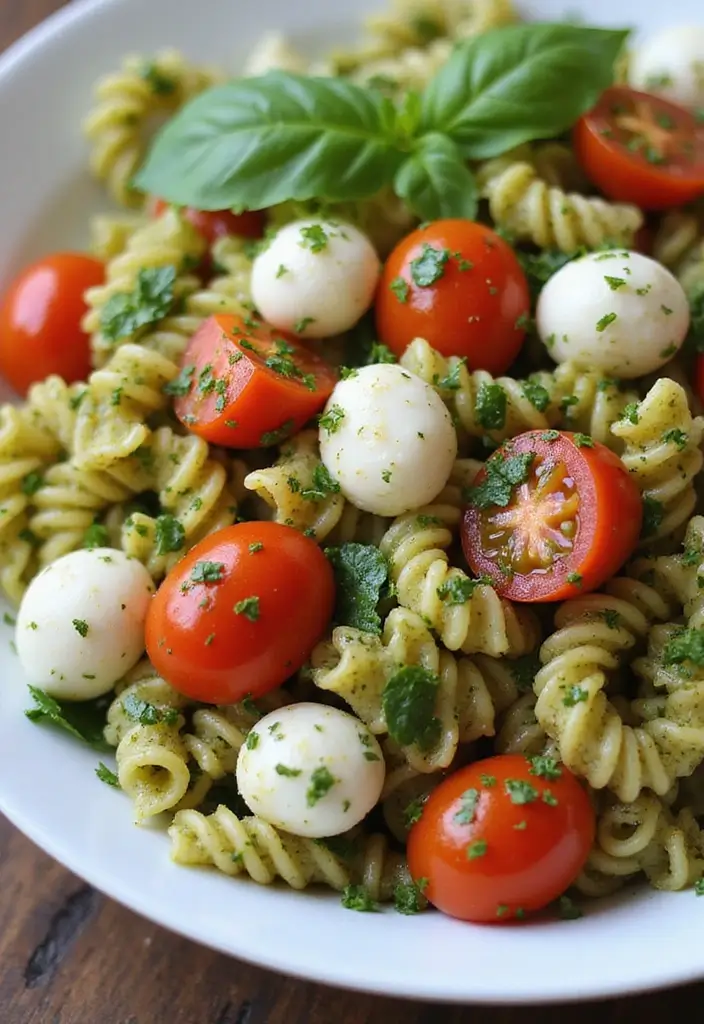
Looking for a quick and satisfying lunch that’s gluten-free? Try a Pesto Pasta Salad! This dish is not only easy to make, but it also bursts with flavor, making it perfect for your work or school lunch. Start with your favorite gluten-free pasta, then mix in fresh and tasty ingredients like pesto, cherry tomatoes, mozzarella balls, and aromatic basil. You can make it ahead of time and enjoy it chilled, giving you a refreshing meal to look forward to.
Here’s how you can whip it up in just 20 minutes:
Ingredients:
– 2 cups gluten-free pasta, cooked
– 1/2 cup pesto (store-bought or homemade)
– 1 cup cherry tomatoes, halved
– 1 cup mozzarella balls
– Fresh basil leaves for garnish
Instructions:
1. In a large bowl, combine the cooked gluten-free pasta and pesto.
2. Add the halved cherry tomatoes and mozzarella balls.
3. Toss everything together until well mixed.
4. Garnish with fresh basil before serving.
5. Let it cool down, then pack into lunch boxes.
Want to add some protein? Just toss in grilled chicken or chickpeas for a heartier dish!
FAQs:
– Can I use store-bought pesto? Yes! It saves time and still tastes great.
– How long can I store this? Keep it in the fridge for up to 3 days.
This Pesto Pasta Salad is a simple yet delightful choice for lunch, ensuring you stay energized and satisfied throughout your day!
Finally, a gluten free lunch that feels fun. Pesto Pasta Salad checks all the boxes for easy prep and real flavor—perfect for busy days. It’s one of those gluten free lunch box ideas that your future self will thank you for.
Pesto Pasta Salad
Editor’s Choice

BARILLA Gluten Free Spaghetti, 12 Ounce – Non-GMO Gluten Free Pasta Made…
 Amazon$2.48
4 Pack Bento Lunch Box Set 3 Compartment Food Storage Containers Wheat S…
 Amazon$13.98
8. Fruit and Yogurt Parfait
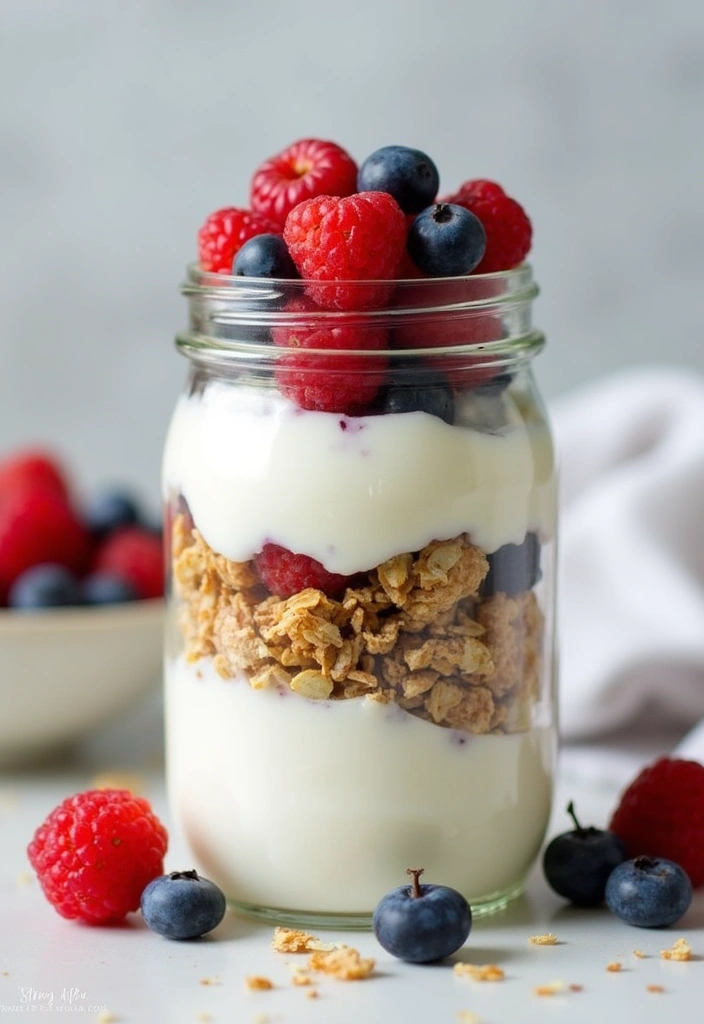
Looking for a tasty, gluten-free lunch option? Try a fruit and yogurt parfait! This delightful treat combines creamy yogurt, crunchy gluten-free granola, and fresh fruits. You can use strawberries, blueberries, or whatever seasonal fruits you love. Not only does it taste great, but it also looks fantastic in a jar. Kids will enjoy the fun layers, and it’s perfect for school or work lunches!
Making a fruit and yogurt parfait is quick and easy. You can prepare it in just 10 minutes, making it a great choice for busy mornings. It’s also budget-friendly—just grab some yogurt and your favorite fruits. This parfait is a wonderful way to sneak in healthy nutrients while satisfying a sweet tooth. Plus, it can brighten your lunch break!
Ingredients:
– 1 cup gluten-free granola
– 2 cups yogurt (choose dairy or dairy-free)
– 1 cup mixed berries (like strawberries and blueberries)
Instructions:
1. Take a jar or bowl and start layering. Begin with a layer of granola.
2. Add a layer of yogurt next.
3. Top it off with a layer of mixed berries.
4. Repeat the layers until you run out of ingredients.
5. Cover your jar or bowl and pack it for lunch.
Tips for Making the Best Parfait:
– Use seasonal fruits for the freshest flavors.
– Add granola right before eating to keep it crunchy.
– Experiment with flavors! Try different fruits or yogurt types.
This parfait is not just a meal; it’s a delightful experience that brings joy to lunchtime. Enjoy your healthy and delicious creation!
Fruit and Yogurt Parfait
Editor’s Choice

Purely Elizabeth, Organic Original, Ancient Grain Granola, Gluten-Free, …
 Amazon$5.99
So Delicious Dairy Free Coconut Milk Yogurt Alternative, Raspberry, Vega…
 Amazon$1.72
Ball Regular Mouth 16-Ounces Mason Jar with Lids and Bands (12-Units)
 Amazon$13.44
9. Tuna Salad Lettuce Wraps
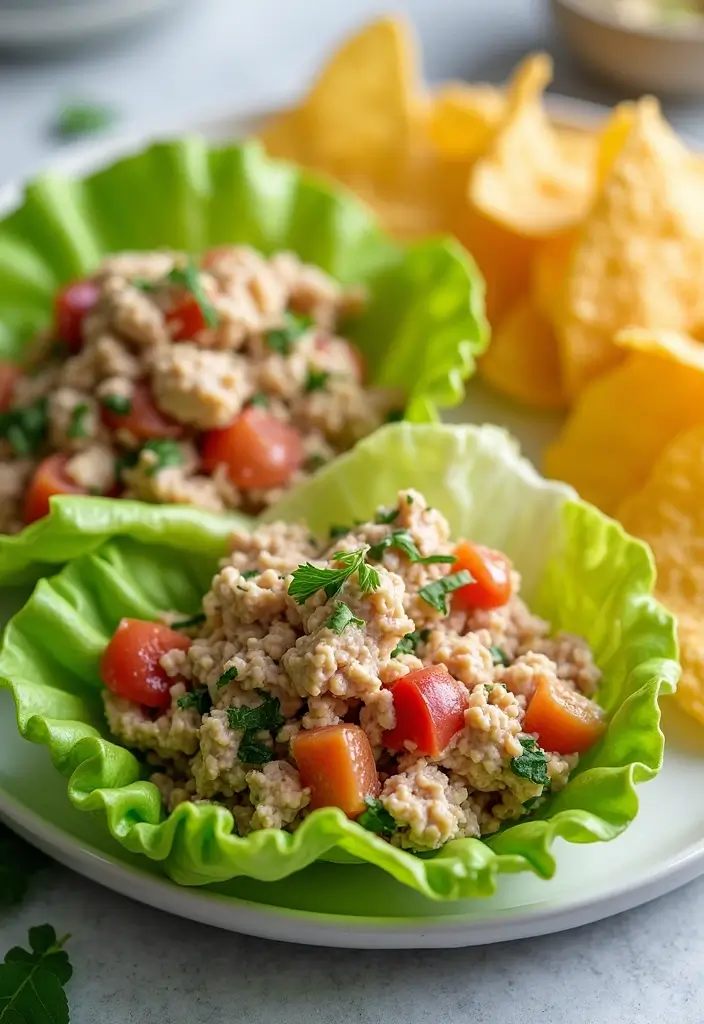
Tuna salad lettuce wraps are a delicious and healthy choice for your lunch box. They are low-carb and packed with flavor! Imagine biting into crisp lettuce leaves filled with creamy tuna salad. It’s a fun way to enjoy a classic dish without the bread. Plus, it’s super easy to make, taking only minutes to prepare. You can even make it ahead of time for a quick grab-and-go option.
Start by mixing canned tuna with mayonnaise, crunchy diced celery, and a splash of fresh lemon juice. This simple combination creates a tasty filling. Spoon it into large lettuce leaves, and you’ve got a meal that’s both refreshing and satisfying. Pair it with gluten-free chips for an extra crunch, making it perfect for work or school lunches.
Ready to make your own? Follow this easy recipe!
Ingredients:
– 1 can tuna, drained
– 2 tablespoons mayonnaise
– 1/4 cup diced celery
– Lemon juice to taste
– Large lettuce leaves
Instructions:
1. In a bowl, combine the drained tuna, mayonnaise, diced celery, and lemon juice.
2. Stir until everything is mixed well.
3. Spoon the tuna salad into the large lettuce leaves.
4. Wrap them up and pack them in your lunch box.
5. Don’t forget to add a side of gluten-free chips for crunch!
Feeling adventurous? Try adding some diced pickles or chopped onions for extra flavor and crunch!
FAQs:
– Can I use chicken instead of tuna? Yes, chicken salad works just as well!
These wraps are not just tasty; they also bring a fun twist to your lunch routine. Enjoy your healthy, portable meal!
Tuna Salad Lettuce Wraps
Editor’s Choice

SkinnyPop Popcorn Variety Pack (Original & Dairy Free White Cheddar) | H…
 AmazonCheck Price
Bento Box for Kids and Adults – Reusable Lunch Box Meal Prep Containers …
 Amazon$19.99
5 PCS Large Fruit Containers for Fridge – Leakproof Food Storage Contain…
 Amazon$21.99
10. Chickpea Salad Sandwich
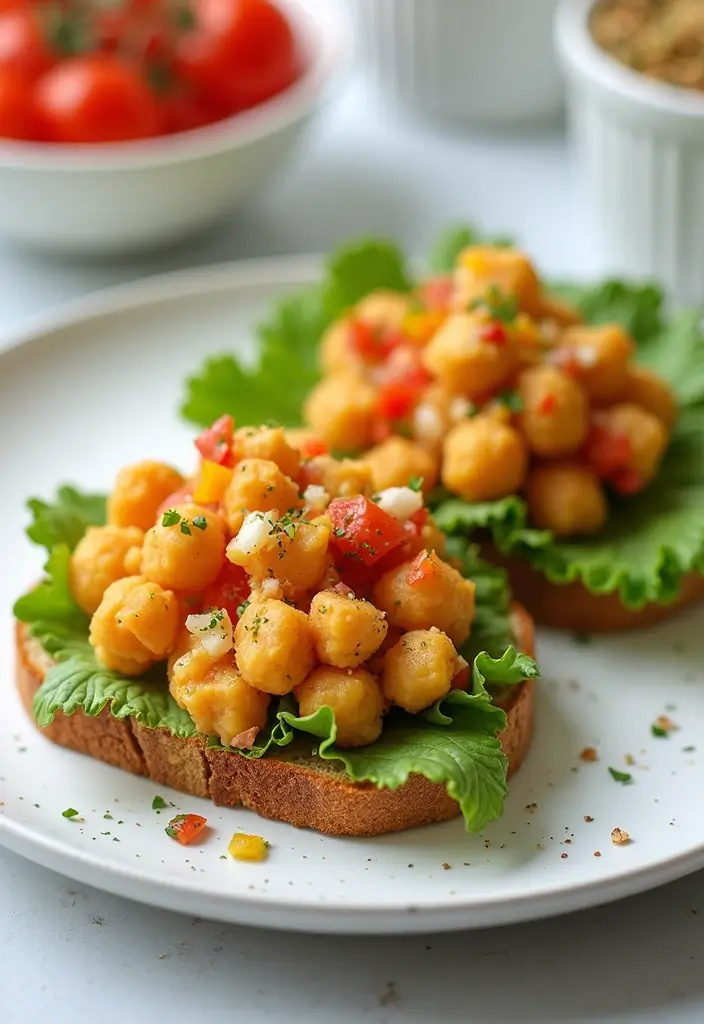
Looking for a delicious, gluten-free lunch option that keeps you full and satisfied? Try a Chickpea Salad Sandwich! This tasty twist on the classic tuna salad is not only simple to make but also packed with protein and fiber. Chickpeas are creamy and satisfying, making them perfect for a hearty sandwich. You can whip it up in just 10 minutes!
Start by mashing cooked chickpeas in a bowl. Mix them with creamy mayonnaise, crunchy diced onions, and fresh celery. Season with salt and pepper to taste. Spread this delightful mixture on gluten-free bread or wraps, and you’ve got a winning lunch. Want to take it up a notch? Add a dollop of mustard for a zesty kick!
Nutritional Overview:
– Servings: 2
– Prep Time: 10 minutes
– Total Time: 10 minutes
– Calories: 300
Ingredients:
– 1 can chickpeas, drained
– 2 tablespoons mayonnaise
– 1/4 cup diced onion
– 1/4 cup diced celery
– Salt and pepper to taste
– Gluten-free bread or wraps
Instructions:
1. In a bowl, mash the chickpeas with a fork until they’re mostly smooth.
2. Stir in the mayonnaise, diced onion, diced celery, salt, and pepper until well combined.
3. Spread the chickpea salad onto slices of gluten-free bread or inside wraps.
4. Put the sandwiches together, slice if desired, and pack them in your lunch box.
Tips:
– Add veggies: Toss in some diced bell peppers for extra crunch.
– Experiment with spices: A dash of paprika or garlic powder can add great flavor.
– Make it ahead: This salad keeps well in the fridge for a couple of days, making it perfect for meal prep.
This Chickpea Salad Sandwich is not just filling; it’s also a great way to enjoy a plant-based meal while sticking to your gluten-free diet. Enjoy your lunch!
Chickpea Salad Sandwich
Editor’s Choice

Canyon Bakehouse, Mountain White Bread, Gluten-Free, 18 oz (Frozen)
 Amazon$6.99
365 by Whole Foods Market, Unsalted Garbanzo Beans, 15.5 Ounce (Pack of 4)
 AmazonCheck Price
Best Foods Plant Based Dressing and Spread Vegan 1 ct for a Rich, Creamy…
 Amazon$3.94
11. Spinach and Feta Stuffed Chicken Breast
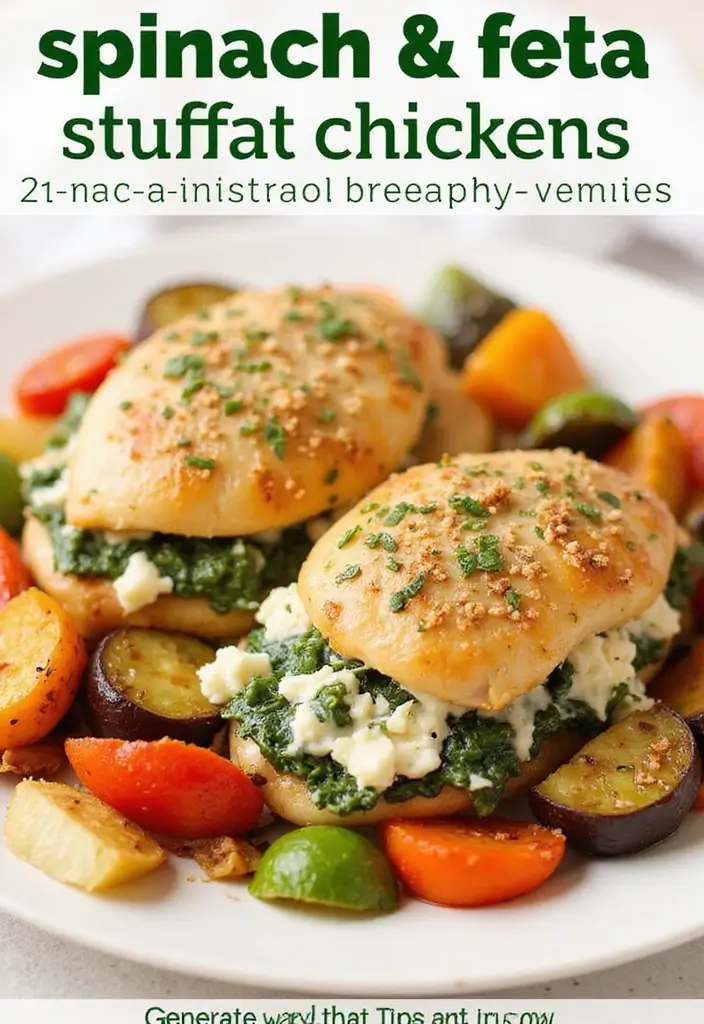
Elevate your lunch game with delicious Spinach and Feta Stuffed Chicken Breasts! This dish not only satisfies your hunger but also packs a punch of flavor and nutrition. Imagine juicy chicken filled with fresh spinach and creamy feta cheese, perfectly baked to golden perfection. Pair it with roasted veggies for a colorful and balanced meal that’s sure to impress at work or school.
Ready to make this delightful dish? Here’s how you can prepare it:
Ingredients:
– 2 chicken breasts
– 1 cup fresh spinach
– 1/2 cup crumbled feta cheese
– Olive oil, salt, and pepper to taste
Instructions:
1. Preheat your oven to 375°F (190°C).
2. Carefully slice each chicken breast to create a pocket.
3. Stuff the pocket with fresh spinach and crumbled feta, then season with salt and pepper.
4. Secure the pocket with toothpicks or kitchen twine if needed.
5. Place the chicken on a baking sheet and drizzle with a little olive oil.
6. Bake for about 25 minutes or until the chicken is fully cooked.
7. Let it rest for a few minutes, then slice and pack it into your lunch box with a side of roasted veggies.
This meal is not only filling but also rich in protein, making it an excellent choice for a midday boost. Plus, if you’re feeling adventurous, you can swap the feta with mozzarella or goat cheese for a different twist!
• Choose fresh spinach for maximum flavor
• Use different cheeses for variety
• Pack with a side of colorful veggies
• Make extra for meal prep convenience
Get ready to enjoy a lunch that’s both satisfying and good for you!
Spinach and Feta Stuffed Chicken Breast
Editor’s Choice

HOMBERKING 10 Pack Borosilicate Glass Meal Prep Containers with Locking …
 Amazon$30.99
YARRAMATE 16oz/470ml Glass Olive Oil Sprayer for Cooking with Stickers, …
 Amazon$8.99
Silicone Baking Mat, 3 Pack Reusable Baking Mat, Non-Stick, Food Safe Si…
 Amazon$9.99
12. Cauliflower Fried Rice
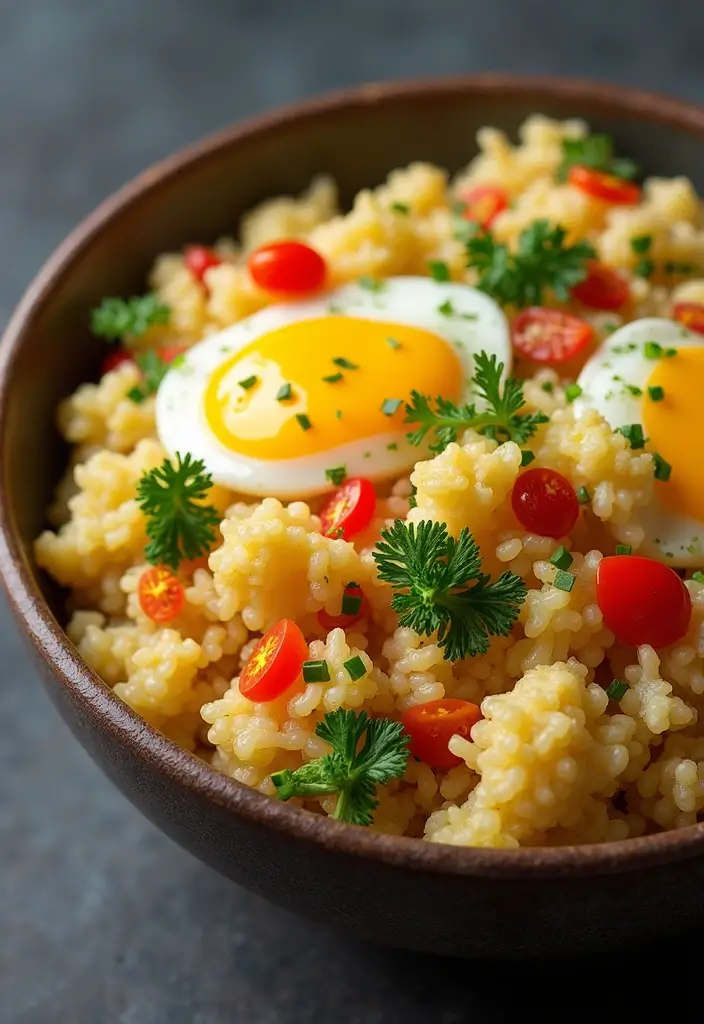
Craving a delicious and healthy lunch? Look no further than Cauliflower Fried Rice! This dish is not just a tasty alternative; it’s low in carbs and packed with nutrients. Plus, it’s a fantastic way to sneak in veggies for picky eaters. Imagine the satisfying crunch of fresh cauliflower mixed with colorful veggies and savory soy sauce. This is a lunch box winner for both adults and kids alike!
Making it is simple, and it comes together in just 20 minutes. You can whip it up in the morning or prepare it ahead of time for busy workdays. What’s even better? It stores well in the fridge for up to three days.
Here’s how to make your own Cauliflower Fried Rice:
Ingredients:
– 1 head of cauliflower
– 1 cup frozen mixed vegetables
– 2 eggs, lightly beaten
– 2 tablespoons gluten-free soy sauce
– 1 tablespoon olive oil
Instructions:
1. Start by pulsing the cauliflower florets in a food processor until they look like rice grains.
2. Heat the olive oil in a large pan over medium heat, then toss in the mixed vegetables. Sauté them for about 3 minutes.
3. Add the cauliflower rice and pour in the soy sauce. Stir everything together.
4. Push the mixture to one side of the pan. Pour in the beaten eggs and scramble them until cooked.
5. Mix everything together and cook for an additional 3-4 minutes until heated through.
6. Let it cool before packing it into lunch boxes.
Want to amp up the protein? Just add cooked chicken or shrimp for an extra filling meal!
Here are some quick tips:
– Prep ahead by making a big batch and store it in individual containers.
– Customize with your favorite veggies like bell peppers or peas.
– Spice it up by adding garlic or ginger for an extra kick.
– Pair it with a side of fresh fruit for a balanced meal.
With Cauliflower Fried Rice, you’ll have a satisfying lunch that keeps you energized throughout the day!
Cauliflower Fried Rice is a 20-minute miracle that keeps lunch gluten-free and kid-approved. I swap in veggies, add a splash of soy, and suddenly the lunch box is a win for busy adults and picky eaters alike. Easy, tasty, and totally shareable in our gluten free lunch box ideas.
Cauliflower Fried Rice
Editor’s Choice

Hamilton Beach Food Processor & Vegetable Chopper for Slicing, Shredding…
 Amazon$46.98
FIT Strong & Healthy Glass Meal Prep Containers, 2 & 3 Compartments – Po…
 Amazon$29.99
Aloha Shoyu – Gluten Free Soy Sauce – Smooth, Balanced Soy Sauce – Made …
 AmazonCheck Price
13. Greek Yogurt Chicken Salad
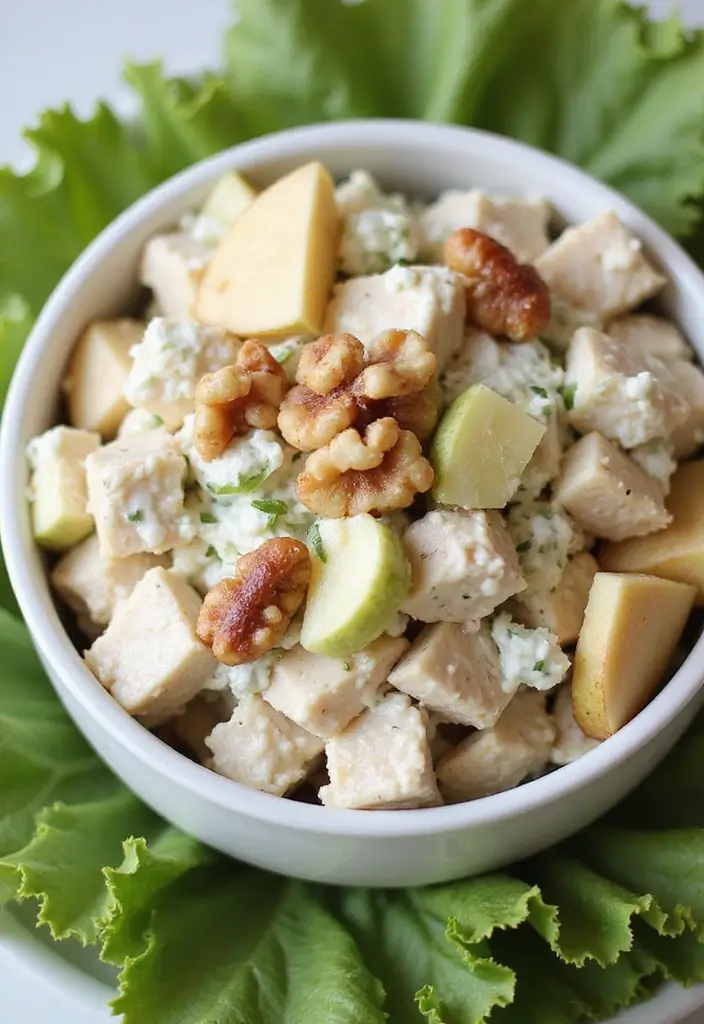
Looking for a delicious and healthy lunch option? This Greek Yogurt Chicken Salad is your answer! It’s a lighter take on the classic chicken salad, packed with flavor and crunch. You’ll love the creamy texture from the Greek yogurt, paired with the crispiness of celery and the sweetness of apples. Plus, it’s super easy to make!
You can enjoy this salad in a couple of ways. Serve it over a bed of fresh lettuce for a refreshing meal, or pile it between two slices of your favorite gluten-free bread for a satisfying sandwich. Either way, you’ll have a lunch that’s not just filling but also bursting with taste!
Nutritional Overview:
– Servings: 2
– Prep Time: 10 minutes
– Total Time: 10 minutes
– Calories: 320
Ingredients:
– 1 cup cooked shredded chicken
– 1/2 cup Greek yogurt
– 1/4 cup diced celery
– 1/4 cup diced apples
– 1/4 cup walnuts, chopped
– Lemon juice to taste
Instructions:
1. In a mixing bowl, combine the shredded chicken, Greek yogurt, diced celery, apples, walnuts, and lemon juice.
2. Stir everything together until it’s well mixed.
3. Serve it over lettuce, or spread it on gluten-free bread for a sandwich.
4. Pack it in your lunch box for a tasty meal on the go!
Want to add something special? Add some grapes for a burst of sweetness that complements the flavors perfectly!
FAQs:
– Can I use canned chicken? Yes, canned chicken is a great shortcut if you’re short on time!
This Greek Yogurt Chicken Salad is not only quick to make, but it also makes lunchtime something to look forward to. Enjoy!
Greek Yogurt Chicken Salad
Editor’s Choice

Canyon Bakehouse Gluten Free Burger Buns, 12 Ounce
 AmazonCheck Price
Bento Box Adult Lunch Box, Containers for Adults Men Women with 4 Compar…
 Amazon$9.99
14. Apple and Almond Butter Sandwiches
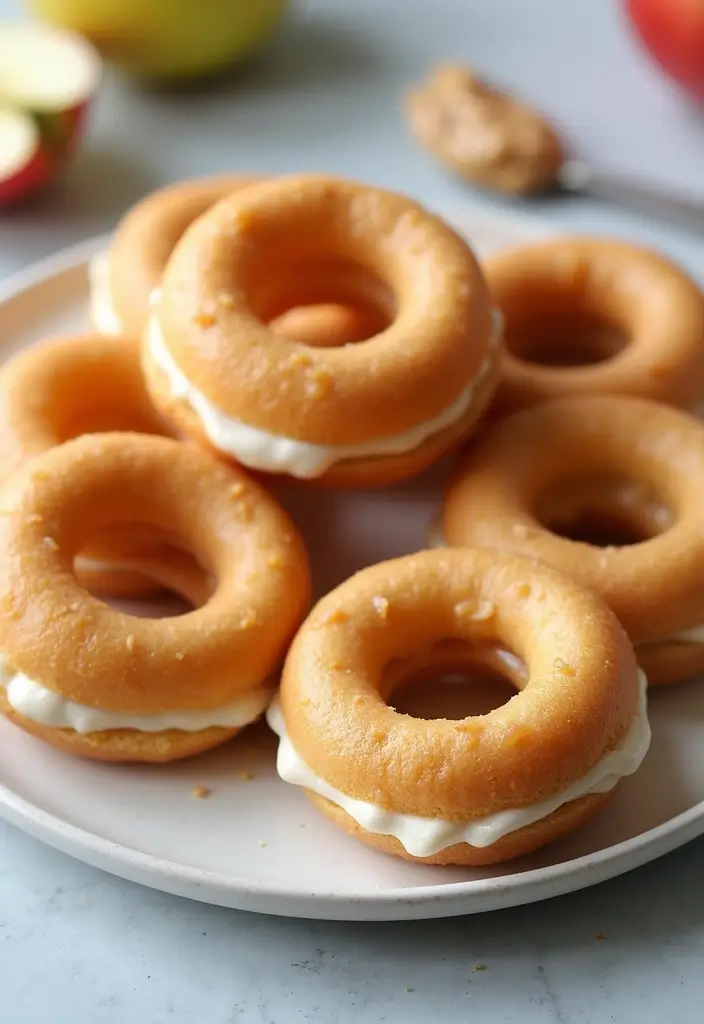
Looking for a fun and healthy lunch idea? Try making apple and almond butter sandwiches! This delicious twist on a classic sandwich is perfect for kids and adults alike. The crispness of fresh apples pairs wonderfully with the creamy richness of almond butter, creating a snack that’s both satisfying and gluten-free. Plus, it takes just minutes to whip up, making it an ideal choice for busy mornings.
Start by coring and slicing an apple into thick rings. Spread a generous layer of almond butter between two apple slices to form a tasty sandwich. You can even sprinkle a little cinnamon on top for an extra burst of flavor! This quick treat is not only nutritious but also a fun way to include more fruit in your diet.
Here’s how to make your own apple and almond butter sandwiches:
Ingredients:
– 1 medium apple
– 4 tablespoons almond butter
Instructions:
1. Core the apple and cut it into rings.
2. Spread almond butter on one slice of apple.
3. Top it with another apple slice to create a sandwich.
4. Repeat the process for additional sandwiches.
5. Pack them in your lunch box, and enjoy!
Want to switch things up? You can easily substitute almond butter with peanut butter if you prefer. This quick and wholesome option is perfect for school lunches or work breaks, making your day a little sweeter.
• Use fresh apples for crunch and sweetness.
• Choose almond butter for a nutty flavor boost.
• Add cinnamon for extra warmth and spice.
• Pack in lunch boxes for an easy grab-and-go meal.
Apple and Almond Butter Sandwiches
Editor’s Choice

365 by Whole Foods Market, Organic Creamy Almond Butter, 16 Ounce
 Amazon$13.99
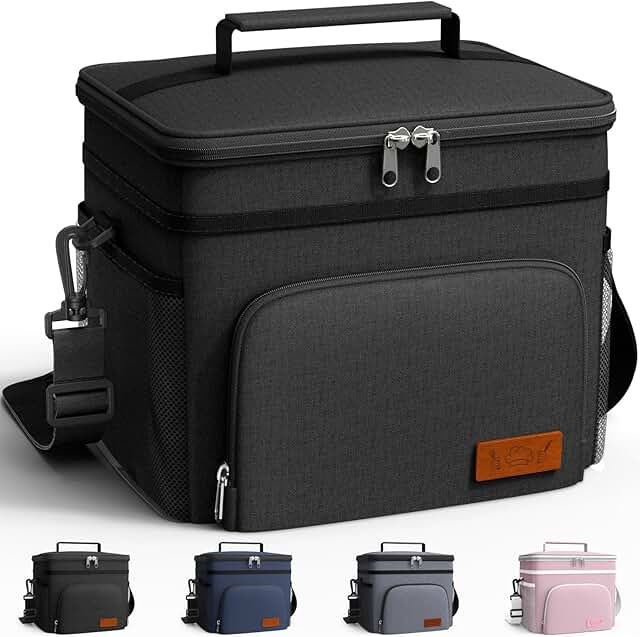
HOTOR Insulated Lunch Box for Men & Women – Leak-Proof Cooler Lunch Bag …
 Amazon$9.96
Simply Organic Ceylon Ground Cinnamon, 2.08 Ounce, Non-GMO Organic Cinna…
 Amazon$6.11
15. Broccoli and Cheese Rice Casserole
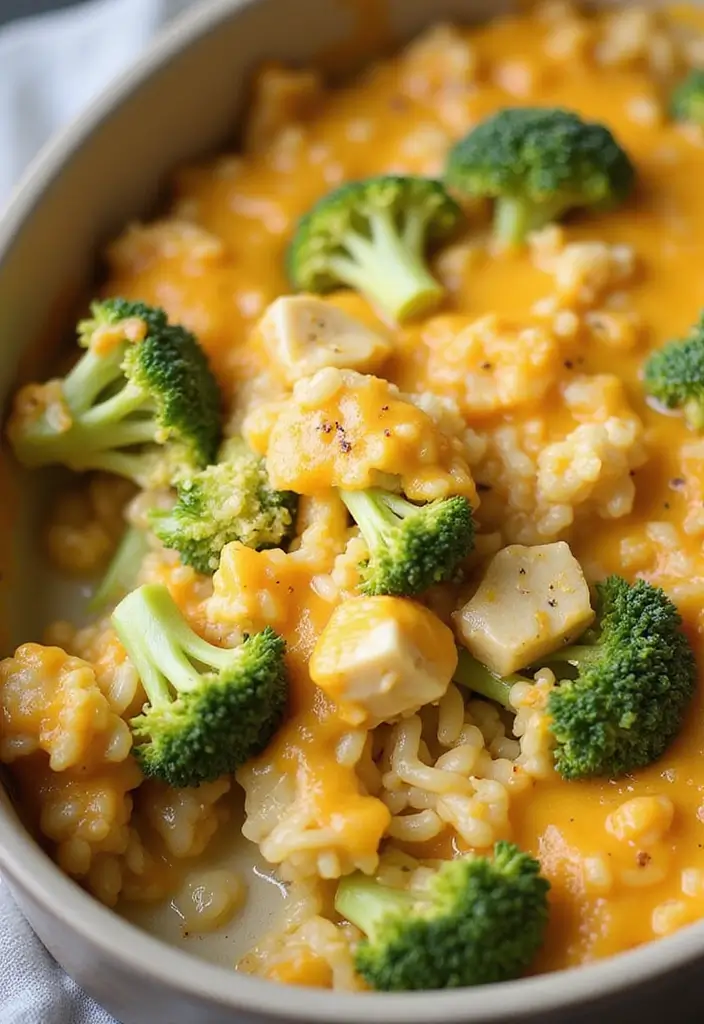
Looking for a warm, filling lunch that’s also gluten-free? This Broccoli and Cheese Rice Casserole is just what you need! It combines creamy cheese, tender broccoli, and fluffy rice into one delightful dish. You can prepare it ahead of time, making it a fantastic option for meal prep. Picture this: a comforting casserole that not only satisfies your hunger but also helps you sneak in some veggies. Perfect for those busy workdays or school lunches!
Here’s how to make it. You’ll need simple ingredients that you likely have on hand. Plus, this dish is easy to customize. Want a sharper taste? Mix different cheeses! You can even throw in some cooked chicken or additional veggies for extra nutrition.
Nutritional Overview:
– Servings: 4
– Prep Time: 15 minutes
– Cook Time: 30 minutes
– Total Time: 45 minutes
– Calories: 350
Ingredients:
– 2 cups cooked rice
– 1 cup steamed broccoli
– 1 cup shredded cheese (try cheddar or mozzarella)
– 1/2 cup milk
Instructions:
1. Preheat your oven to 375°F (190°C).
2. In a large bowl, mix the cooked rice, steamed broccoli, shredded cheese, and milk until everything is well combined.
3. Pour the mixture into a greased baking dish, spreading it evenly.
4. Bake for 30 minutes, or until the cheese is melted and bubbly.
5. Let it cool for a few minutes before packing it into lunch boxes.
Tip: This casserole freezes beautifully! Just cut it into portions and store them in airtight containers. Reheat in the microwave for a quick meal anytime.
By packing this delicious casserole, you ensure your lunch is both tasty and nourishing. Enjoy the blend of flavors while keeping your gluten-free diet on track!
Broccoli and Cheese Rice Casserole
Editor’s Choice

50 Pack (100-Piece) 24 oz Meal Prep Containers Reusable with Lids, Sturd…
 Amazon$23.99
16. Almond Flour Pancakes
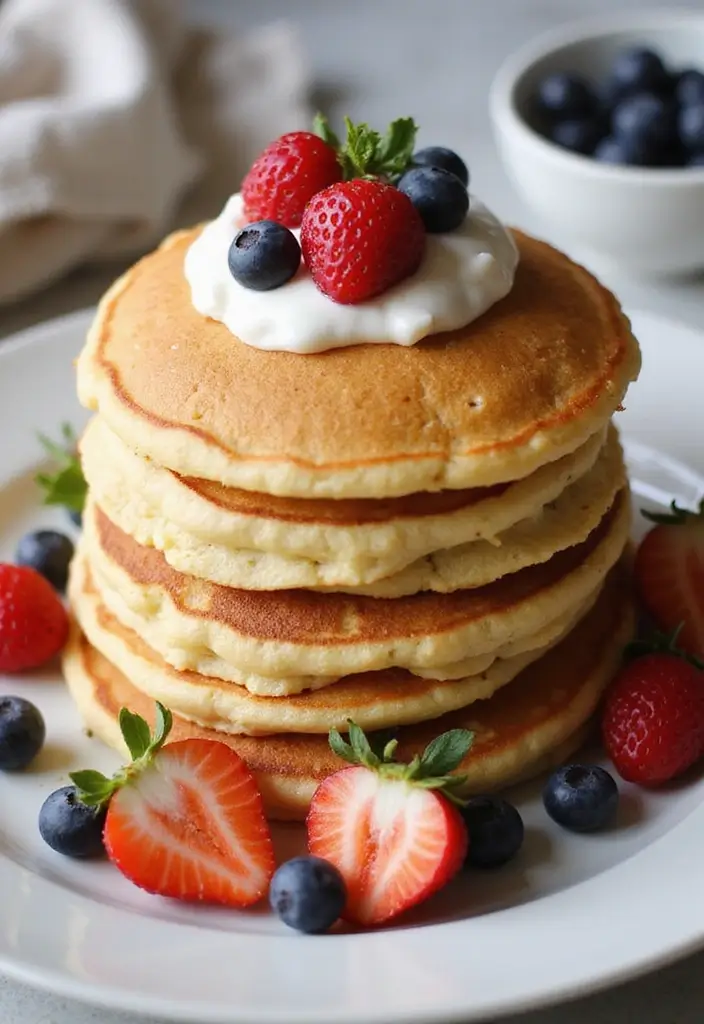
Mix together simple ingredients like almond flour, eggs, milk, and a dash of salt. Cook them on a skillet until they’re golden brown, and you have a tasty meal ready in no time. You can even add a dash of vanilla or cinnamon for an extra flavor boost. These pancakes are sure to become a favorite in your lunch box!
Here’s how to make your almond flour pancakes:
Ingredients:
– 1 cup almond flour
– 2 eggs
– 1/2 cup milk (dairy or non-dairy)
– Pinch of salt
Instructions:
1. In a mixing bowl, whisk together almond flour, eggs, milk, and salt until the mixture is smooth.
2. Heat a skillet over medium heat and lightly grease it with oil or butter.
3. Pour about 1/4 cup of the batter onto the skillet for each pancake. Cook for 2-3 minutes until bubbles form on the surface.
4. Flip and cook for another 2-3 minutes until golden brown.
5. Serve warm with your favorite toppings or pack with yogurt for a filling lunch.
Tips for Enjoyment:
– Top with yogurt or nut butter for added protein.
– Sprinkle with fresh fruits like bananas or strawberries.
– Make a batch ahead of time and freeze for quick lunches.
These pancakes are not just a meal; they are a delightful experience. Enjoy them warm, and watch as they brighten your lunch break with a bit of sweetness and satisfaction.
Almond Flour Pancakes
Editor’s Choice

Blue Diamond Almonds Almond Flour, Gluten Free, Blanched, Finely Sifted,…
 Amazon$9.91
T-fal Ultimate Hard Anodized Nonstick Fry Pan Set 2 Piece, 10, 12 Inch, …
 Amazon$58.51
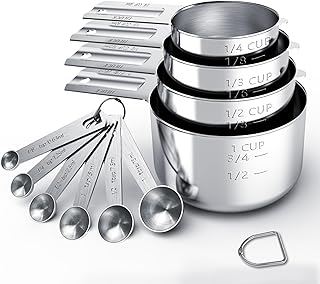
TILUCK Stainless Steel Measuring Cups & Spoons Set, Cups and Spoons,Kitc…
 Amazon$15.99
17. Cucumber and Hummus Sandwiches
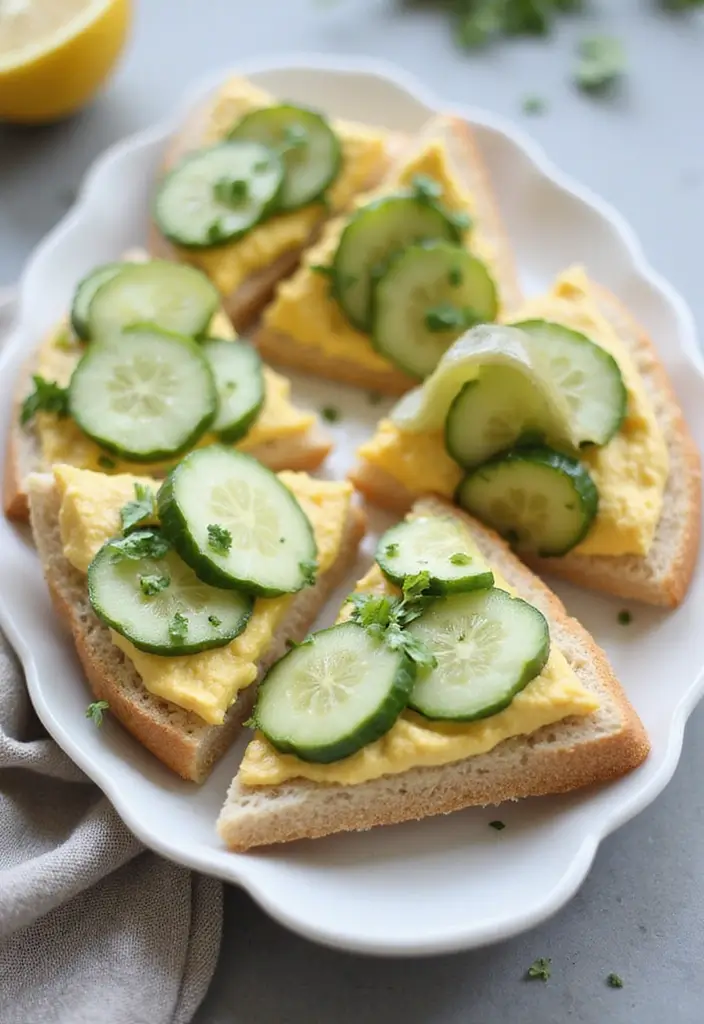
Imagine biting into a light, crunchy cucumber and hummus sandwich. It’s refreshing, satisfying, and perfect for your lunch box! These sandwiches are a fantastic choice for a quick meal at work or school. You’ll love how easy they are to make. Just spread creamy hummus on gluten-free bread and layer it with crisp cucumber slices.
You can cut them into fun shapes like squares or triangles for a delightful presentation. Not only are these sandwiches gluten-free, but they also come in at just 150 calories per serving. That means you can enjoy a tasty meal without feeling weighed down.
Here’s how to make your own cucumber and hummus sandwiches:
Ingredients:
– 4 slices of gluten-free bread
– 1/2 cup of hummus
– 1 cucumber, thinly sliced
Instructions:
1. Start by spreading a generous layer of hummus on each slice of gluten-free bread.
2. Next, place cucumber slices on two of the bread slices.
3. Top with the other slices to create your sandwiches.
4. Cut them into your desired shapes, and they are ready to pack for lunch!
Feeling adventurous? Try using flavored hummus to mix things up! Garlic or roasted red pepper hummus can add a delicious twist.
FAQs:
– How long do these sandwiches last? They taste best the same day but can be stored in the fridge for up to one day.
These sandwiches are not just a meal; they are a quick, nutritious option that will keep you energized throughout the day. Enjoy your lunch without the fuss!
• Spread hummus generously on the bread for flavor
• Layer cucumbers thinly for the best crunch
• Use assorted hummus flavors for variety
• Cut sandwiches into fun shapes for easy eating
Cucumber and Hummus Sandwiches
Editor’s Choice

Canyon Bakehouse Gluten Free Burger Buns, 12 Ounce
 AmazonCheck Price
Mezete Hummus Snack Pack with Breadsticks | Traditional Classic Hummus |…
 AmazonCheck Price
OXO Good Grips Handheld Mandoline Slicer for Kitchen, Adjustable Vegetab…
 Amazon$18.50
18. Savory Oatmeal
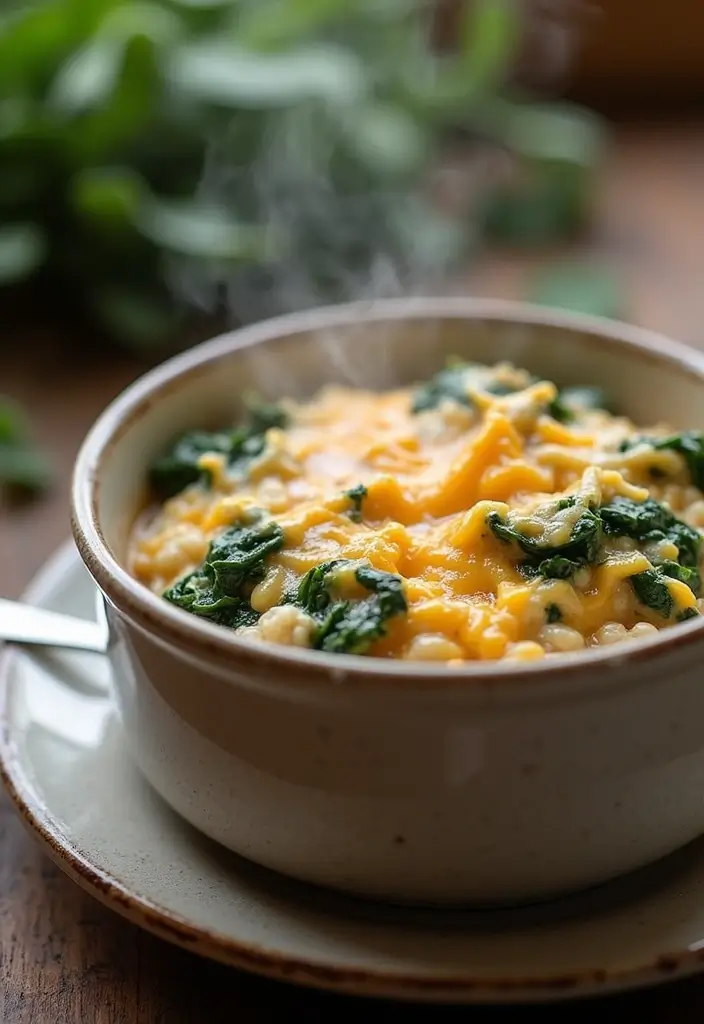
Savory oatmeal is a delightful twist on the traditional breakfast dish. You can enjoy it for lunch, making it a warm and comforting choice for your work or school day. Picture creamy gluten-free oats blended with melted cheese, fresh spinach, and a hint of spices. Every spoonful is nutritious and satisfying, perfect for keeping you energized throughout the day.
Pack it in a thermos to keep it warm and ready when lunchtime rolls around. This dish is not only filling but also allows you to experience oats in a deliciously new way!
Recipe for Savory Oatmeal
Nutritional Overview:
– Servings: 2
– Prep Time: 5 minutes
– Cook Time: 10 minutes
– Total Time: 15 minutes
– Calories: 250
Ingredients:
– 1 cup gluten-free oats
– 2 cups water or broth
– 1/2 cup shredded cheese (like cheddar or mozzarella)
– 1 cup fresh spinach
– Optional: poached egg for extra protein
Instructions:
1. In a medium pot, bring the water or broth to a boil.
2. Stir in the gluten-free oats and cook for about 5 minutes, stirring occasionally, until the mixture thickens.
3. Add the cheese and spinach, mixing until the cheese melts and the spinach wilts.
4. Pour the oatmeal into a thermos to keep it warm for lunch.
Finish it off with a poached egg on top for an extra protein boost!
FAQs
Can I make this ahead of time?
Yes! You can prepare it in advance and simply reheat it before serving. This makes it a convenient option for busy mornings.
With savory oatmeal, you can transform a simple ingredient into something extraordinary. This dish is perfect for those looking to spice up their lunch routine while staying gluten-free. Enjoy the comfort and flavor in every bite!
Savory Oatmeal
Editor’s Choice

THERMOS Stainless King Vacuum-Insulated Food Jar, 24 Ounce, Matte Steel
 Amazon$25.99
One Degree Organic Foods, Gluten Free Sprouted Rolled Oats, 2.27kg/5 lbs…
 Amazon$14.99
19. Egg Muffins with Veggies

Egg muffins are a delightful way to bring breakfast flavors into your lunch routine! Imagine biting into a warm, fluffy muffin packed with your favorite veggies. They’re easy to prepare, portable, and perfect for busy days. Plus, you can customize them to your taste, whether you prefer bell peppers, spinach, or even cheese for that extra zing.
These muffins are also a great source of protein, making them a satisfying meal. You can whip up a batch at the start of the week and enjoy quick lunches throughout. They store well in the fridge or freezer, so you can grab one anytime you need a nutritious boost!
Nutritional Overview:
– Servings: 12
– Prep Time: 10 minutes
– Cook Time: 20 minutes
– Total Time: 30 minutes
– Calories: 80 per muffin
Ingredients:
– 6 large eggs
– 1 cup mixed vegetables (like bell peppers, spinach, or zucchini)
– Salt and pepper to taste
Instructions:
1. Preheat your oven to 350°F (175°C).
2. In a mixing bowl, whisk the eggs with salt and pepper until combined.
3. Distribute the chopped vegetables evenly in a greased muffin tin.
4. Pour the egg mixture over the veggies, filling each cup about three-quarters full.
5. Bake for 20 minutes, or until the muffins are firm to the touch.
6. Let them cool for a few minutes before removing from the tin.
These muffins are freezer-friendly too! Just pop them in the microwave for a quick lunch when you’re in a rush.
Quick Tips:
– Add cheese for a creamy texture and extra flavor.
– Mix in herbs like basil or parsley for a fresh twist.
– Experiment with different veggies to keep things exciting.
– Pack them with a side of hummus or guacamole for a tasty dip!
These egg muffins will not only keep you full but also add variety to your lunchbox. Enjoy your meals without the gluten—it’s a win-win!
Egg Muffins with Veggies
Editor’s Choice

Amazon Basics Nonstick Round Muffin Baking Pan, 12 Cups, Set of 2, Gray,…
 Amazon$14.97
50 Pack (100-Piece) 32 oz Meal Prep Containers Reusable with Lids 3-Comp…
 Amazon$21.99
NileHome Stainless Steel Whisk Set 8″ 10″ 12″ Kitchen Whisk Balloon Whis…
 Amazon$7.59
20. Mason Jar Salad
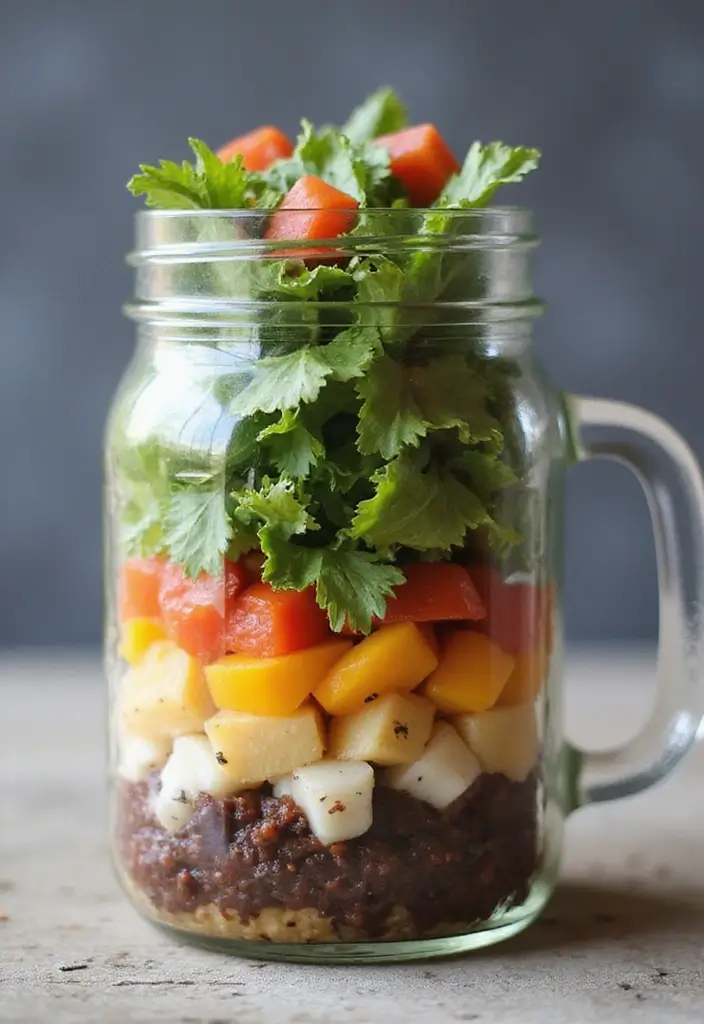
Mason jar salads are a fantastic way to enjoy a fresh and healthy lunch. They combine convenience and creativity, allowing you to mix your favorite ingredients in a colorful and portable way. Start with your dressing at the bottom to keep everything crunchy. Layer in hearty vegetables like cucumbers, then top with lighter greens. As you shake the jar before eating, the flavors blend beautifully, making every bite delicious.
These salads are not only pretty but also practical. You can make them ahead of time, and they stay fresh in the fridge for up to three days. Perfect for work or school, they help you avoid unhealthy takeout options. Plus, you can customize them based on what you have at home or what you crave.
Let’s break down how to make one!
Ingredients:
– 1/2 cup dressing (your choice!)
– 1 cup diced cucumbers
– 1 cup cherry tomatoes, halved
– 2 cups mixed greens (spinach, arugula, or lettuce)
Instructions:
1. Begin by pouring the dressing into the bottom of the mason jar.
2. Next, layer in the diced cucumbers.
3. Add the cherry tomatoes on top of the cucumbers.
4. Finally, pile on the mixed greens.
5. Seal the jar tightly to keep it fresh.
6. When you’re ready to eat, shake the jar well to mix everything together.
Want to boost the protein? Add quinoa or chickpeas for an extra kick!
By making mason jar salads, you not only save time but also enjoy a nutritious meal that’s easy to grab and go. Keep it colorful and fun with different ingredients to keep your lunch exciting!
Tips for Your Mason Jar Salad:
– Use seasonal veggies for freshness and flavor.
– Choose a variety of colors for a visually appealing jar.
– Add nuts or seeds for extra crunch and nutrition.
– Experiment with different dressings to keep it interesting.
Bring some joy to your lunch hour with a mason jar salad that’s easy, tasty, and gluten-free!
❝ Fun fact: Mason jar salads can keep greens crisp for gluten free lunch box ideas when you dress at the bottom and layer ingredients in, then seal tight. Shake gently before eating to blend flavors—portable, practical, and surprisingly pretty.
Mason Jar Salad
Editor’s Choice
![25 Gluten Free Lunch Box Ideas for Work or School 121 Wide Mouth Mason Jars 16 oz with Lids [6 Pack], Canning Jars with Metal ...](https://m.media-amazon.com/images/I/815tipUxlyL._AC_UL320_.jpg)
Wide Mouth Mason Jars 16 oz with Lids [6 Pack], Canning Jars with Metal …
 AmazonEUR 18.15
![25 Gluten Free Lunch Box Ideas for Work or School 123 VITEVER [6 Pack] Salad Dressing Container To Go, 1.6 oz Small Condiment ...](https://m.media-amazon.com/images/I/61e4L8ouG2L._AC_UL320_.jpg)
VITEVER [6 Pack] Salad Dressing Container To Go, 1.6 oz Small Condiment …
 AmazonEUR 8.64
Bentgo Salad Container – 54 oz Bowl with 4-Compartment Toppings Tray, Le…
 Amazon$16.99
21. Baked Falafel with Tahini Sauce
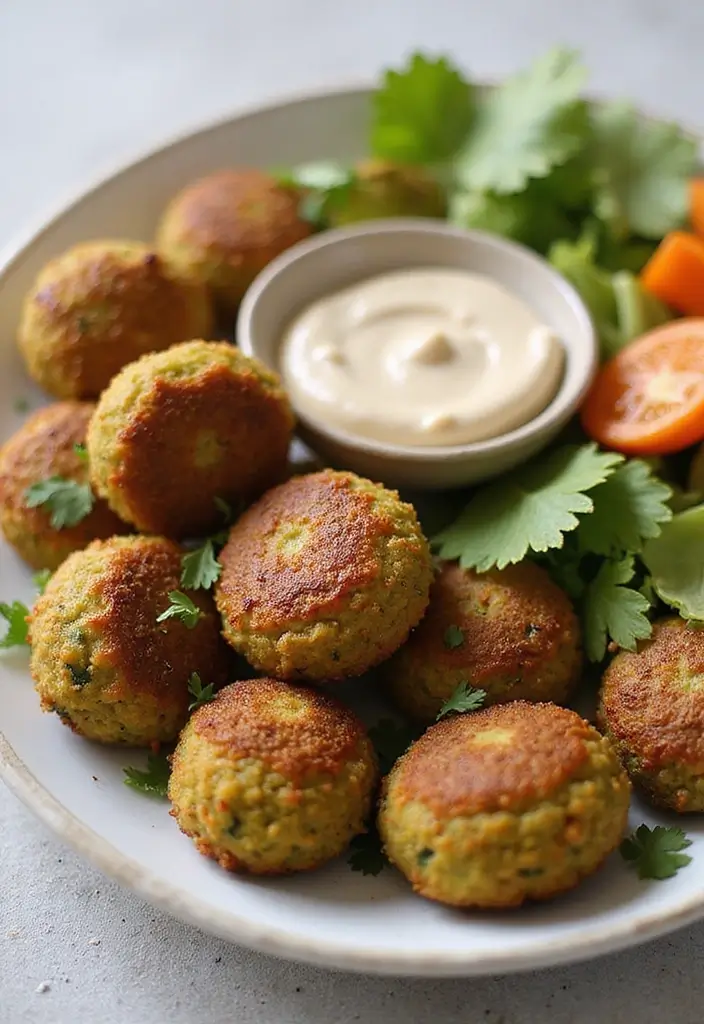
Baked falafel is a delightful twist on a classic favorite! These crispy, golden bites are made from wholesome chickpeas and fresh herbs, offering a nutritious option for your lunch box. Pair them with a smooth tahini sauce for a creamy dip that enhances their flavor. You’ll love how easy they are to prepare, and they satisfy your cravings without gluten.
These falafel balls are not just tasty; they pack a protein punch, making them a great meal choice. They are super versatile! You can enjoy them with a side of crunchy veggies or tuck them into a gluten-free pita. Plus, they’re perfect for meal prep. Make a large batch and freeze some for quick lunches later!
Here’s how to whip them up:
Nutritional Overview:
– Servings: 4
– Prep Time: 15 minutes
– Cook Time: 25 minutes
– Total Time: 40 minutes
– Calories: 200 per serving
Ingredients:
– 1 can chickpeas, drained
– 1/4 cup fresh parsley, chopped
– 1 teaspoon garlic powder
– 1/2 teaspoon cumin
– Olive oil for brushing
– 1/4 cup tahini for sauce
Instructions:
1. Preheat your oven to 375°F (190°C).
2. In a food processor, combine the chickpeas, parsley, garlic powder, cumin, and a pinch of salt. Blend until the mixture is well combined but still has some texture.
3. Shape the mixture into small balls and place them on a baking sheet lined with parchment paper. Brush each ball lightly with olive oil.
4. Bake for about 25 minutes or until they turn a beautiful golden brown.
5. Serve warm with tahini sauce and your favorite veggies. Don’t forget to pack extras for lunch!
Feel free to fry the falafel if you prefer a different texture, but baking keeps them lighter. Enjoy your healthy, gluten-free lunch!
• Pack with fresh veggies for a crunchy side
• Freeze extras for quick meals later
• Drizzle with extra tahini for rich flavor
• Serve with gluten-free pita for a filling meal
Baked Falafel with Tahini Sauce
Editor’s Choice

Electric Salt and Pepper Grinder Set Automatic Battery Pepper Mill Shake…
 Amazon$20.69
200Pcs Parchment Paper,12×16 Inches Non-Stick Precut Parchment Paper She…
 Amazon$9.89
Absolutely Gluten Free Flatbread, Original, 5.29-Ounce
 Amazon$6.99
22. Chocolate Chia Pudding
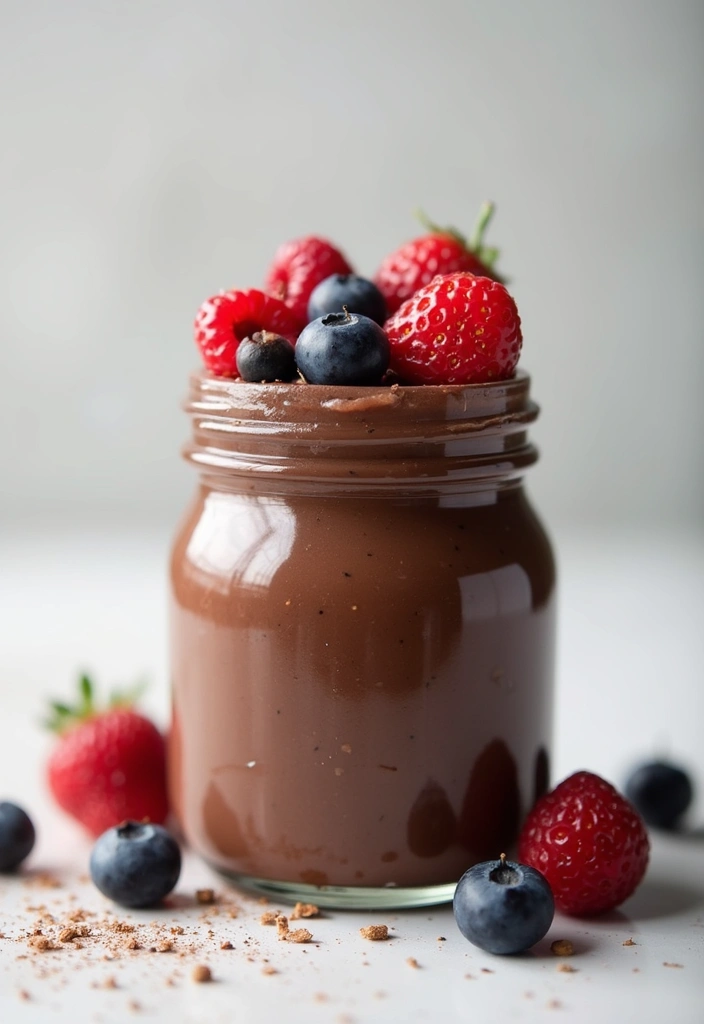
Craving a sweet treat that’s both delicious and nutritious? Look no further than chocolate chia pudding! This delightful dessert is not only gluten-free but also packed with healthy nutrients. You mix chia seeds with almond milk, cocoa powder, and a touch of sweetener. Allow it to thicken and transform into a creamy pudding. For a burst of flavor, pack it in jars topped with fresh berries. You’ll find this treat is perfect for lunch boxes, whether you’re heading to work or school!
Want to whip up this easy dessert? Here’s how to do it! Gather your ingredients and dedicate just 10 minutes for prep. Refrigerate it for an hour or more to let those chia seeds work their magic. It’s a fantastic way to satisfy your sweet tooth without guilt. Plus, you can easily switch it up with different milk, like coconut, for an even creamier texture.
Here’s the complete recipe:
Ingredients:
– 1/4 cup chia seeds
– 1 cup almond milk
– 2 tablespoons cocoa powder
– Sweetener to taste
Instructions:
1. In a bowl, combine chia seeds, almond milk, cocoa powder, and your preferred sweetener.
2. Stir the mixture well, then let it sit for 10 minutes. Stir again to prevent clumping.
3. Cover and refrigerate for at least 1 hour. This helps the pudding thicken properly.
4. When ready to serve, top with fresh berries for an extra pop of flavor.
Want to try something different? Use coconut milk for a richer taste! This pudding is a great way to enjoy dessert guilt-free, making it an ideal choice for your lunch box.
FAQs:
– Can I use regular milk? Yes, any type of milk works great!
– How long does it last? It stays fresh in the fridge for up to 5 days.
Now you have a delicious and healthy dessert to brighten up your lunch! Enjoy your chocolate chia pudding!
Chocolate Chia Pudding
Editor’s Choice

BetterBody Foods Organic Chia Seeds 2 lbs, 32 Oz, with Omega-3, Non-GMO,…
 Amazon$11.97
Silk Shelf-Stable Almond Milk, Unsweetened Vanilla, Dairy-Free, Vegan, N…
 Amazon$11.27
365 by Whole Foods Market, Organic Cocoa Powder, Unsweetened, 8 Ounce
 AmazonCheck Price
23. Creamy Tomato Soup
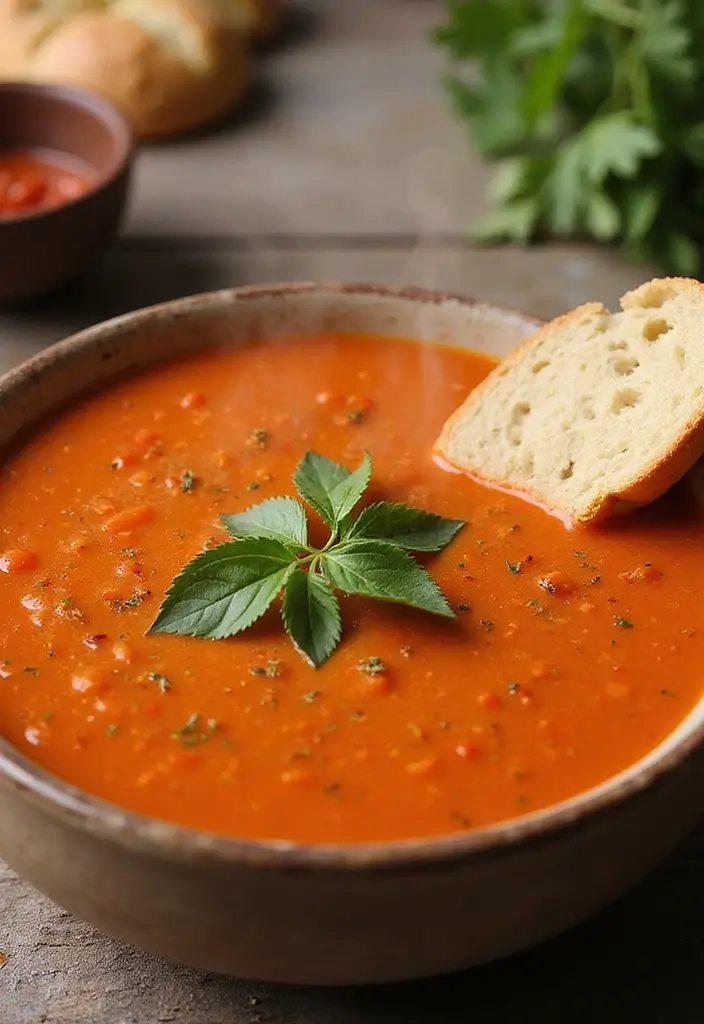
Imagine wrapping your hands around a warm bowl of creamy tomato soup. This classic dish is not only comforting but also effortlessly gluten-free! To whip up this delicious soup, you’ll start by simmering canned tomatoes with aromatic onions, savory garlic, and fragrant basil. Once everything melds together, blend it until velvety smooth, then enrich it with a splash of cream.
For lunch, pour it into a thermos and pair it with crunchy gluten-free bread for dipping. It’s perfect for work or school, and you can even make a big batch to enjoy throughout the week!
Nutritional Overview:
– Servings: 4
– Prep Time: 10 minutes
– Cook Time: 20 minutes
– Total Time: 30 minutes
– Calories: 200
Ingredients:
– 2 cans diced tomatoes
– 1 onion, chopped
– 2 garlic cloves, minced
– 1 teaspoon dried basil
– 1/2 cup cream
– Salt and pepper to taste
Instructions:
1. In a pot, sauté the chopped onion and minced garlic until they are soft and fragrant.
2. Add the diced tomatoes and dried basil. Let the mixture simmer for about 15 minutes.
3. Blend the soup until it’s smooth, then return it to the heat. Stir in the cream and season with salt and pepper.
4. Pour the soup into a thermos for an easy lunch.
Enjoy it with a grilled cheese sandwich made from gluten-free bread for that classic combo!
FAQs:
– Can I use fresh tomatoes? Absolutely! Just chop them up and adjust the cooking time to ensure they soften nicely.
This creamy tomato soup is your go-to comfort food, ideal for busy days. Plus, it’s a fantastic way to enjoy a wholesome meal that warms the soul!
Creamy Tomato Soup
Editor’s Choice

THERMOS Stainless King Vacuum-Insulated Food Jar with Spoon, 16 Ounce, M…
 AmazonCheck Price
Canyon Bakehouse, Mountain White Bread, Gluten-Free, 18 oz (Frozen)
 Amazon$8.79
24. Veggie Quesadillas
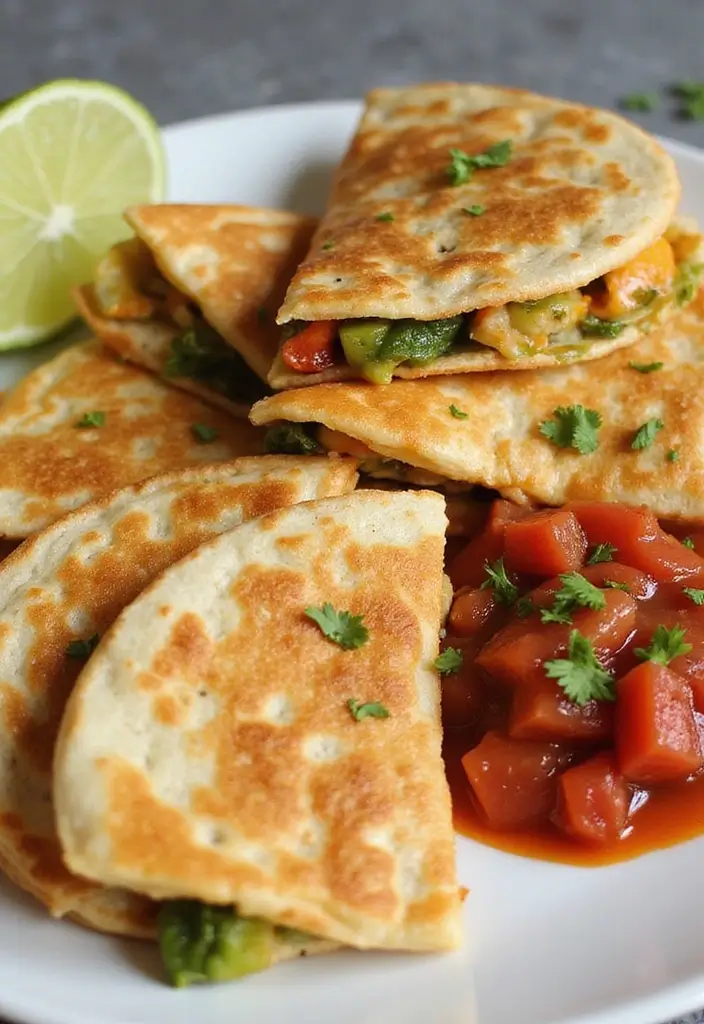
Veggie quesadillas are a fantastic lunch option that’s not only quick to prepare but also packed with flavor. Imagine biting into a crispy tortilla filled with gooey cheese and vibrant veggies like spinach and bell peppers. These quesadillas are perfect for both work and school lunches, and they’re easy to customize to your taste. Serve them with a side of zesty salsa for an extra kick!
To get started, gather these simple ingredients:
– 2 gluten-free tortillas
– 1 cup shredded cheese (cheddar, mozzarella, or your favorite)
– 1 cup mixed veggies (spinach, bell peppers, onions)
– Olive oil for grilling
Now, follow these easy steps to make your quesadillas:
1. Heat a skillet over medium heat and drizzle in some olive oil.
2. Place one tortilla in the skillet and sprinkle half of the cheese on one side.
3. Layer your veggies on top of the cheese. Don’t be shy; add as much as you like!
4. Fold the tortilla over the filling.
5. Cook for about 3-4 minutes on each side, until it’s golden and crispy.
6. Once done, cut your quesadilla into wedges for easy eating.
These quesadillas not only taste great but are also budget-friendly and quick to make. You can even prepare them the night before and reheat them in the microwave for a hot lunch.
Tips for Customizing:
– Use different cheeses for unique flavors.
– Add beans or corn for extra protein and crunch.
– Experiment with spices like cumin or chili powder for a flavorful twist.
– Pack with guacamole or sour cream for a creamy dip.
Veggie quesadillas are a fun and versatile option that can brighten up your lunch routine. Try making a batch this week, and enjoy the smiles they bring at lunchtime!
Veggie Quesadillas
Editor’s Choice

Mission Gluten Free Soft Taco Tortillas 10.5 Oz. / 6ct (Pack of 1)
 Amazon$13.95
Amazon Grocery, Mexican-Style Four Cheese Blend, Finely Shredded, 16 Oz …
 Amazon$3.33
Pompeian USDA Certified Organic Extra Virgin Olive Oil Non-Stick Cooking…
 Amazon$4.24
25. Chocolate Energy Bites
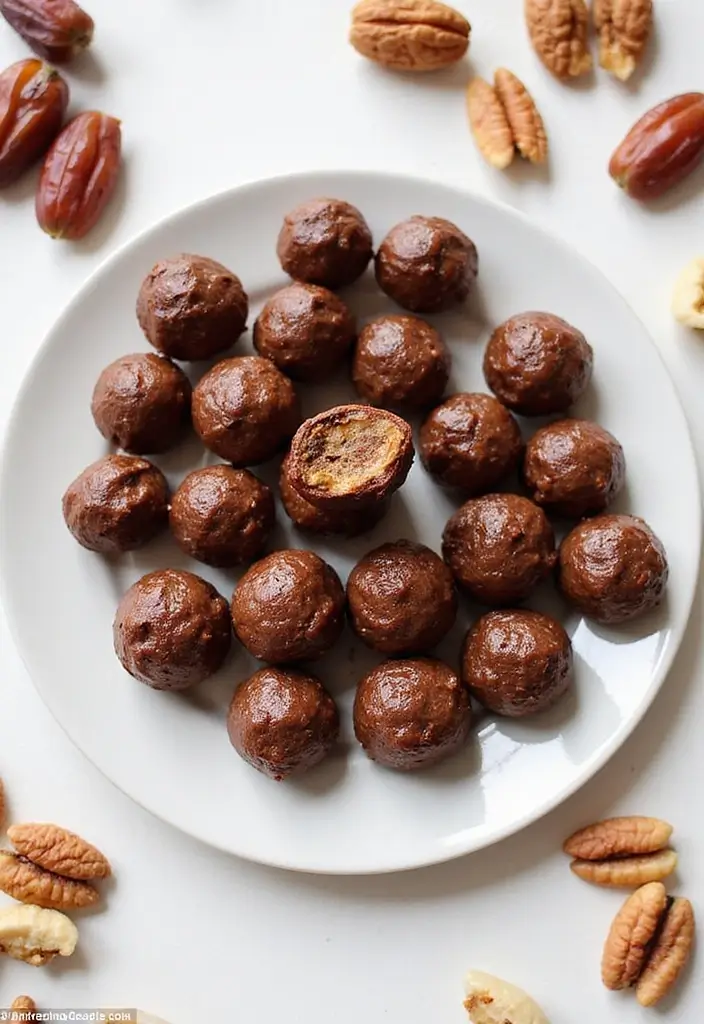
Wrap up your lunch box with a delightful treat that’s both sweet and healthy! These Chocolate Energy Bites are not just delicious; they also pack a punch of nutrition. Made from dates, nuts, and cocoa powder, they offer a perfect balance of flavor and energy. Simply blend the ingredients, roll them into bite-sized balls, and chill. It’s that easy!
These little bites are fantastic for a quick energy boost. They’re especially loved by kids who crave something sweet but need a healthy option. Plus, you can customize them by adding coconut flakes or your favorite nut butter for extra flavor!
Here’s how to make your own Chocolate Energy Bites:
Ingredients:
– 1 cup pitted dates
– 1 cup nuts (almonds or walnuts work great)
– 2 tablespoons cocoa powder
– A pinch of salt
Instructions:
1. In a food processor, combine the dates, nuts, cocoa powder, and salt. Blend until everything is well mixed.
2. Roll the mixture into small balls, about the size of a tablespoon.
3. Place the balls on a plate and refrigerate until they firm up, usually about 30 minutes.
4. Pack them in your lunch box for a sweet treat to enjoy after lunch!
These energy bites can last up to a week in the fridge, making them a perfect make-ahead snack. Enjoy them as a quick pick-me-up anytime you need an energy boost!
• Blend for a smooth consistency
• Roll into bite-sized balls for easy eating
• Chill for a firmer texture
• Store in the fridge for up to a week
Make your lunch box a little sweeter with these Chocolate Energy Bites!
Chocolate Energy Bites
Editor’s Choice

Electric Salt and Pepper Grinder Set Automatic Battery Pepper Mill Shake…
 Amazon$20.69
Conclusion
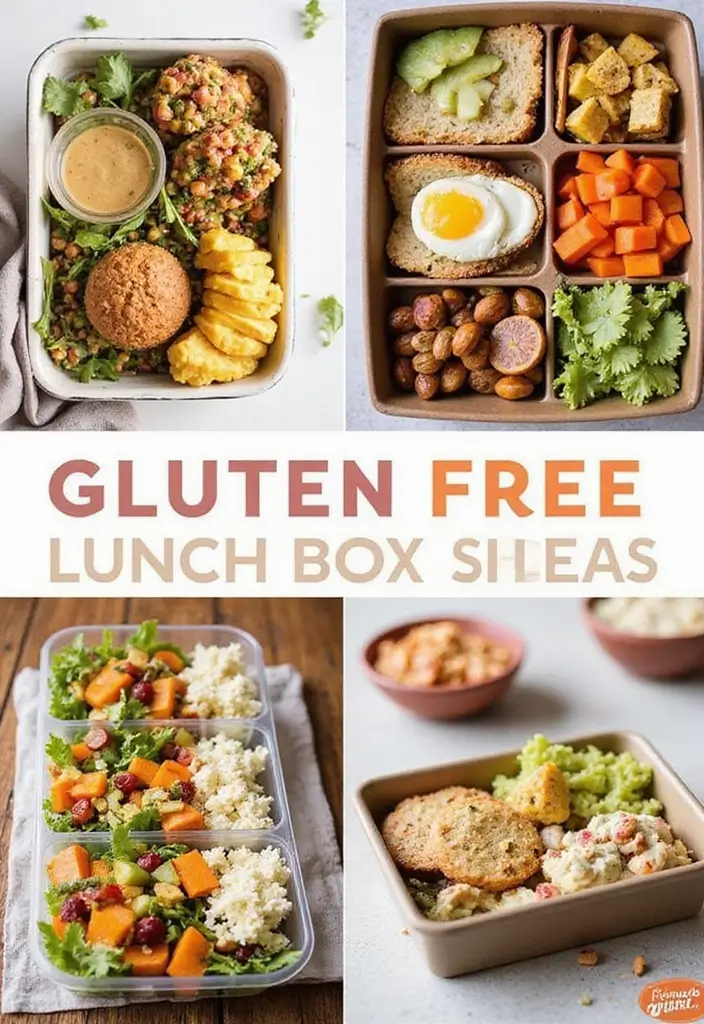
These 25 gluten free lunch box ideas are not just practical but also delicious, making lunchtime exciting for kids with allergies.
With a mix of flavors, textures, and nutrients, these meals ensure that parents can provide healthy options while keeping kids satisfied and happy. It’s all about creativity and making the most of gluten free ingredients! Feel free to mix and match these ideas for a delightful week of lunches.
Note: We aim to provide accurate product links, but some may occasionally expire or become unavailable. If this happens, please search directly on Amazon for the product or a suitable alternative.
This post contains Amazon affiliate links, meaning I may earn a small commission if you purchase through my links, at no extra cost to you.
Frequently Asked Questions
What Are Some Easy Gluten Free Lunch Box Ideas for Kids?
Looking for simple yet delicious gluten free lunch box ideas for your kids? Think of wraps made with gluten free tortillas filled with turkey and veggies, or try quinoa salad with colorful veggies and a zesty dressing.
Don’t forget about protein-packed snacks like cheese cubes, yogurt, or even nut butter with apple slices. These options are not only kid-friendly but also easy to prepare ahead of time!
How Can I Ensure My Child’s Lunch is Nutritious and Gluten Free?
To pack a nutritious and gluten free lunch for your child, focus on including a variety of food groups. Add whole fruits, raw veggies, lean proteins, and whole grains like brown rice or quinoa.
Experiment with healthy lunch ideas that are colorful and appealing, making lunchtime fun! Always check labels to ensure everything is certified gluten free, especially snacks.
What Are Some Gluten Free Snack Options for School Lunches?
When it comes to gluten free snacks for school lunches, you have plenty of tasty options! Think of trail mix with nuts and dried fruits, popcorn, or gluten free granola bars.
Fruit slices with nut butter or yogurt dips can also be a hit. These snacks are not only delicious but also great for keeping energy levels up throughout the day.
How Can Meal Prep Simplify My Child’s Gluten Free Lunches?
Meal prep can be a game changer for managing your child’s gluten free lunches. By dedicating a little time each week, you can prepare large batches of gluten free meals or snacks, ensuring you always have something on hand.
Portion meals into containers for easy grab-and-go options, and mix up different recipes to keep it exciting. This way, you’ll save time during busy mornings and ensure your child enjoys a variety of gluten free recipes!
Are There Any Tips for Making Gluten Free Lunches More Appealing to Kids?
Absolutely! Making gluten free lunches appealing to kids can be fun. Use colorful fruits and veggies to create a rainbow effect in their lunch box. Try cutting sandwiches into fun shapes with cookie cutters or using creative bento boxes for variety.
Involve your kids in choosing their lunch items, and experiment with dips and spreads to make healthy eating more enjoyable. Remember, the key is to keep it fun and flavorful!
Related Topics
gluten free
healthy lunch ideas
meal prep
kid-friendly lunches
gluten free snacks
easy recipes
school lunches
allergy-friendly
quick meals
lunch box ideas
work lunches
nut-free options
