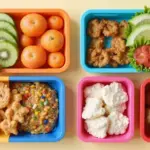
School mornings can be a whirlwind, can’t they? Between getting everyone dressed, finding lost shoes, and wrangling breakfast, packing a cold lunch can feel like just one more thing on a long to-do list. I created this post because I know how hectic it can get. You want to send your kids off with a meal they’ll actually eat, but time is not always on your side.
If you’re a busy parent juggling school drop-offs, work schedules, and maybe a bit of your own chaos, this one’s for you. You care about your kids’ nutrition but don’t want to spend hours preparing gourmet lunches. You want simple, tasty, and satisfying options that can be prepped in advance and easily packed.
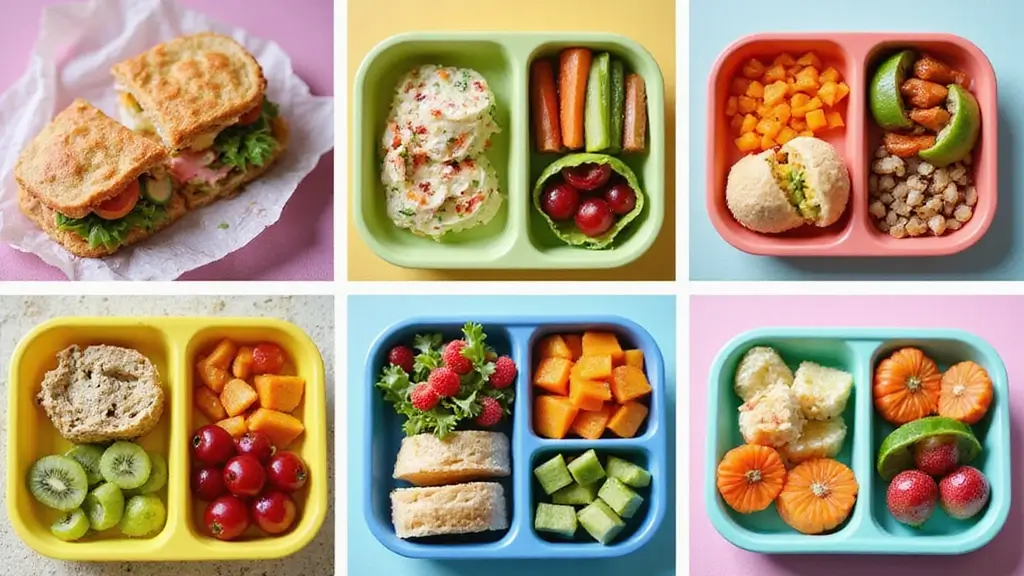
That’s why I’ve gathered over 30 cold lunch ideas that are not only quick to prepare but also fun for kids to eat. These ideas are packed with flavor and nutrition, ensuring your little ones have the energy they need for their busy school day. You’ll find meals that are colorful, appealing, and easy to make, allowing you to kick off those busy mornings with confidence.
Let’s dive into these delicious cold lunch ideas that will save you time and keep your kids happy. With a little planning, you can turn lunch packing into a breeze!
1. Rainbow Veggie Wraps

Brighten up your child’s lunch with Rainbow Veggie Wraps. These wraps not only look stunning but also pack a healthy punch! Stuffed with colorful veggies like crunchy bell peppers, sweet carrots, and fresh spinach, they deliver essential vitamins that help your kids grow strong and stay energized. Plus, their vibrant colors make lunchtime fun and exciting!
Feeling inspired? You can easily customize these wraps with your favorite ingredients. Want to add some protein? Toss in some sliced turkey or cheese. Want to keep it vegan? Swap out the hummus for avocado! The options are endless, and your kids will love creating their own combinations.
Here’s how to whip up these delightful wraps in no time:
Recipe Overview:
– Servings: 4
– Prep Time: 15 minutes
– Total Time: 15 minutes
– Calories: 180 per wrap
Nutritional Information:
– Protein: 6g
– Carbohydrates: 25g
– Fiber: 4g
– Fat: 5g
Ingredients:
– 4 large whole grain tortillas
– 1 cup hummus
– 1 cup shredded carrots
– 1 cup sliced bell peppers (red, yellow, green)
– 1 cup spinach leaves
– 1 cup cucumber slices
Instructions:
1. Spread a generous layer of hummus on each tortilla.
2. Layer the shredded carrots, sliced bell peppers, spinach, and cucumber evenly.
3. Roll each tortilla tightly and slice in half for easy eating.
These wraps are perfect for busy mornings. You can even make them the night before! Just wrap them tightly in foil or plastic wrap to keep them fresh until lunchtime.
Your kids will love the fun of eating a rainbow, and you’ll love how easy they are to prepare. Go ahead and give these wraps a try; they’re sure to be a hit at the lunch table!
• Customize with your child’s favorite veggies or proteins
• Wrap tightly for freshness if made the night before
• Experiment with different spreads like cream cheese or guacamole
• Make it fun by letting kids assemble their own wraps
Rainbow Veggie Wraps
Editor’s Choice

365 by Whole Foods Market Flour Tortillas, 10.7 OZ

Mezete Traditional Middle Eastern Hummus | 100% All Natural Dips and Spr…

OXO Good Grips Handheld Mandoline Slicer for Kitchen, Adjustable Vegetab…
2. Turkey and Cheese Pinwheels

Make lunchtime exciting with Turkey and Cheese Pinwheels! These tasty treats are a hit with kids, offering a delightful blend of flavors in a fun, easy-to-eat format. You can prepare them in advance, making them perfect for hectic school mornings. The combination of lean turkey, creamy cheese, and your choice of spread adds a burst of flavor without weighing your child down. Plus, they’re visually appealing, making lunchtime more enjoyable!
Let’s dive into how to make these pinwheels a staple in your lunchbox rotation. Here’s what you need:
Ingredients:
– 4 whole wheat tortillas
– 8 slices of turkey breast
– 4 slices of cheese (cheddar or Swiss, your choice!)
– 4 tablespoons of cream cheese or mustard (or try pesto for a twist!)
Instructions:
1. Start by spreading the cream cheese or mustard evenly over each tortilla. This adds flavor and helps hold your fillings in place.
2. Layer two slices of turkey and one slice of cheese on top of each tortilla.
3. Roll each tortilla tightly to secure the filling, then slice them into bite-sized pinwheels.
These pinwheels are versatile! You can switch up the spreads to keep things interesting. Try ranch dressing or hummus for a different taste.
Storage Tip:
Wrap the pinwheels tightly in plastic wrap. They’ll stay fresh in the fridge for about 2-3 days, making them a convenient option for busy weeks.
Now, you’ve got a lunch that’s not only delicious but also nutritious! Perfect for keeping your kids energized throughout the day.
• Prepare ahead for quick lunches
• Experiment with different spreads
• Use whole wheat tortillas for added fiber
• Store wrapped in the fridge for freshness
Turkey and Cheese Pinwheels
Editor’s Choice

Mission Soft Taco Whole Wheat Tortillas, Medium Size, 10 Count, Whole Grain


4 Pack Bento Lunch Box Set 3 Compartment Food Storage Containers Wheat S…
3. Fruit and Yogurt Parfait

Imagine starting your day with colorful layers of vibrant berries and creamy yogurt. You can use strawberries, blueberries, or even raspberries—whatever your kids love most. It’s a fun way to enjoy breakfast without fuss. Pinterest is buzzing with parfait ideas, making this a trendy breakfast choice that kids will be excited about.
To make this parfait, gather your ingredients and follow these simple steps. You can prepare it the night before, but save the granola until morning for that perfect crunch. This option is budget-friendly, especially if you buy fruits that are in season. Your kids will appreciate a breakfast that’s not just good for them but also feels like a treat.
Ingredients:
– 2 cups of plain yogurt (Greek or dairy-free)
– 1 cup of mixed berries (strawberries, blueberries, raspberries)
– 1/2 cup of granola
– Honey or maple syrup (optional)
Instructions:
1. Start by adding 1/2 cup of yogurt to a cup or bowl.
2. Layer in some fresh berries for sweetness.
3. Sprinkle a layer of granola on top for that delightful crunch.
4. Repeat the layers until your cup is full.
5. Drizzle with honey or maple syrup if you’d like a touch of extra sweetness.
Use seasonal fruits for the freshest taste and nutrition. Kids can help make this parfait, making it a fun family activity.
Quick Tips:
– Choose berries that are vibrant and fresh.
– Add yogurt just before serving to keep it thick.
– Pick granola with no added sugars for a healthier option.
– Use a clear cup to show off those beautiful layers!
This Fruit and Yogurt Parfait is perfect for busy mornings and will keep your kids happy and energized all day long!
Fruit and Yogurt Parfait
Editor’s Choice

365 By Whole Foods Market, Greek Yogurt, Plain Nonfat, 32 Ounce

Nature Valley Protein Granola, Oats and Honey Granola, Resealable Snack …

ComSaf 4 Pcs 8oz Overnight Oats Containers with Lids, Glass Yogurt Parfa…
4. Quinoa Salad with Chickpeas

Looking for a lunch that keeps your kids energized and satisfied? This Quinoa Salad with Chickpeas is a fantastic choice! Packed with protein and colorful veggies, it’s a delicious way to fuel their day. Quinoa is like a tiny superhero grain, full of nutrients. When you mix it with chickpeas and fresh vegetables, you create a vibrant salad that’s as tasty as it is nutritious.
Recipe Overview:
– Servings: 4
– Prep Time: 20 minutes
– Cook Time: 15 minutes
– Total Time: 35 minutes
– Calories: 250 per serving
Nutrition Information:
– Protein: 10g
– Carbohydrates: 40g
– Fiber: 7g
– Fat: 5g
Ingredients:
– 1 cup uncooked quinoa
– 1 can chickpeas, drained and rinsed
– 1 cup diced cucumber
– 1 cup halved cherry tomatoes
– 1/4 cup diced red onion
– 1/4 cup olive oil
– Juice of 1 lemon
– Salt and pepper to taste
Instructions:
1. Start by rinsing the quinoa under cold water. Then, cook it according to the package directions. This usually takes about 15 minutes.
2. In a large mixing bowl, combine the cooked quinoa, chickpeas, cucumber, cherry tomatoes, and red onion.
3. Drizzle the mixture with olive oil and lemon juice. Add salt and pepper to taste.
4. Toss everything together until well mixed. For the best flavor, chill it in the fridge for a bit before serving.
You can make this salad a day ahead. It tastes even better after the flavors meld overnight! Plus, feel free to switch up the veggies based on what your kids love. Carrots, bell peppers, or even avocado can make great additions.
FAQs:
– Can I add other veggies? Absolutely! Mix in any vegetables your kids enjoy for a customized meal.
– How can I pack this for lunch? Use a leak-proof container to keep it fresh and secure.
This salad is not just a meal; it’s an adventure for their taste buds. Enjoy this healthy, colorful lunch that’s perfect for busy school mornings!
Quinoa Salad with Chickpeas
Editor’s Choice

Rubbermaid Brilliance BPA-Free 3 Set Food Storage Containers with Lids, …

Kirecoo Stainless Steel Stock Pot – 8 Quart Heavy Duty Induction Cooking…

OXO Good Grips Little Salad Dressing Shaker – Black, Small
5. Mini Pita Pockets

Mini Pita Pockets are a delightful and interactive lunch option for your kids. They can become little chefs, choosing their favorite fillings. This hands-on approach makes lunchtime exciting. Fill them with shredded chicken, colorful veggies, or creamy hummus. Not only do they taste great, but they also pack in essential nutrients to keep your children energized throughout the day.
Let’s break down the recipe to create these tasty pockets!
Recipe Overview:
– Servings: 4
– Prep Time: 10 minutes
– Total Time: 10 minutes
– Calories: 150 per pocket
Nutrition Information:
– Protein: 10g
– Carbohydrates: 25g
– Fiber: 3g
– Fat: 5g
Ingredients:
– 8 mini pita pockets
– 1 cup cooked shredded chicken or tofu
– 1 cup lettuce, shredded
– 1/2 cup diced tomatoes
– 1/2 cup cucumber, diced
– 1/4 cup tzatziki or hummus
Instructions:
1. Begin by cutting each mini pita in half, creating pockets.
2. Let your kids fill each pocket with their choice of chicken, lettuce, tomatoes, and cucumber.
3. Add a generous spoonful of tzatziki or hummus for flavor.
This recipe is perfect for busy mornings. You can prepare them ahead of time and store them in the fridge for 2-3 days.
FAQs:
– Are these good for meal prep? Yes! They stay fresh in the fridge, making them a great option for busy school weeks.
– Can I change the fillings? Absolutely! Get creative with different proteins and veggies to keep it interesting.
With mini pita pockets, lunchtime becomes a fun adventure. Your kids will love being part of the process, and you’ll appreciate how easy they are to make.
Mini Pita Pockets
Editor’s Choice

Stonefire Tandoor Baked Mini Naan, 7.05 oz (Frozen)

Mezete Hummus Variety Pack | Authentic Middle Eastern | Free from Preser…

50 Pack (100-Piece) 24 oz Meal Prep Containers Reusable with Lids, Sturd…
6. Mediterranean Pasta Salad

Get ready to shake up lunchtime with a delicious Mediterranean Pasta Salad! This cold dish is not only bursting with flavor but also super easy to prepare. With olives, creamy feta cheese, and fresh, crunchy vegetables all drizzled in a light Italian dressing, this salad is a fantastic way to bring the tastes of the Mediterranean right to your lunchbox. Plus, it’s perfect for those busy school mornings when you need something quick and tasty.
You can whip this salad up ahead of time, making it a great option for meal prep. Just chill it in the fridge, and it’s ready to go when you are. Kids will love the colorful mix, and you’ll love how simple it is to make.
Here’s how to create this delightful dish:
Recipe Overview:
– Servings: 4
– Prep Time: 15 minutes
– Cook Time: 10 minutes
– Total Time: 25 minutes
– Calories: 220 per serving
Nutritional Highlights:
– Protein: 8g
– Carbohydrates: 30g
– Fiber: 4g
– Fat: 10g
Ingredients:
– 8 ounces rotini pasta
– 1/2 cup halved cherry tomatoes
– 1/2 cup diced cucumber
– 1/3 cup black olives, sliced
– 1/3 cup crumbled feta cheese
– 1/4 cup Italian dressing
Instructions:
1. Begin by cooking the rotini pasta according to the package instructions. Once done, drain and let it cool.
2. In a large bowl, combine the cooled pasta, cherry tomatoes, cucumber, black olives, and feta cheese.
3. Drizzle the Italian dressing over the salad and toss everything together until well mixed.
4. For the best flavor, let it chill in the refrigerator for at least 30 minutes before serving.
You can even add some grilled chicken to make it heartier. This Mediterranean Pasta Salad is not just a meal; it’s a colorful celebration of flavors that will keep lunchtime exciting!
Still curious about variations? Feel free to swap the veggies based on what your kids like or what you have on hand. This recipe is flexible and fun, encouraging kids to try new things. Plus, you can easily store leftovers for a quick snack or a side dish later in the week. Enjoy delicious, stress-free lunches!
Mediterranean Pasta Salad
Editor’s Choice

Rubbermaid Brilliance Meal Prep Containers, 2-Compartment Food Storage C…
OXO Good Grips Little Salad Dressing Shaker – Black, Small

Sonuimy Insulated Lunch Bag Women Girls, Reusable Cute Tote Lunch Box fo…
7. Nut-Free Energy Bites

Imagine a delicious snack that’s both quick to make and healthy for your kids. These Nut-Free Energy Bites are just the solution for busy school mornings! With a delightful mix of oats, sunflower seeds, and a hint of honey, these bites pack a nutritious punch without any nut allergies. Kids love their sweet, chewy texture, making them the perfect grab-and-go treat throughout the week.
They’re also super easy to prepare in bulk. You can whip up a batch in just 15 minutes, and they’ll be ready to fuel your little ones for days. Popular on Pinterest, these energy bites are a hit with parents looking for simple, healthy snacks.
To make these bites, gather your ingredients and follow these easy steps. They’re budget-friendly and use common pantry items. Plus, you can customize them by adding your kid’s favorite mix-ins, like dried fruit or seeds. Store them in the fridge, and you’ve got a tasty snack that feels special yet is so simple to prepare!
Ingredients:
– 1 cup rolled oats
– 1/4 cup sunflower seed butter
– 1/4 cup honey
– 1/4 cup mini chocolate chips
– 1/4 cup sunflower seeds
Instructions:
1. In a large mixing bowl, combine all the ingredients until well mixed.
2. Roll the mixture into small balls, about one inch in diameter.
3. Place the balls on a baking sheet lined with parchment paper.
4. Refrigerate for 30 minutes to let them set.
Keep these bites stored in an airtight container in the fridge. They’ll stay fresh for up to a week, ready to satisfy those mid-afternoon cravings!
Tips for Success:
– Add flavor: Use vanilla extract for extra taste.
– Make it fun: Let your kids help roll the bites for a fun activity.
– Experiment: Try different seeds or dried fruits for variety.
– Portion them: Pack them in small containers for easy lunchbox additions.
Nut-Free Energy Bites
Editor’s Choice

Quaker Old Fashioned Rolled Oats, Non GMO Project Verified, Two 64oz Bag…

Wowbutter Natural Peanut Free Crunchy 1.1lb Jar

365 by Whole Foods Market, Dark Chocolate Baking Chunks, 12 Ounce
8. Cold Veggie Sushi Rolls

Cold Veggie Sushi Rolls are not just fun; they’re a delightful way to get your kids excited about healthy eating! These colorful rolls are packed with fresh veggies and sushi rice, making them a nutritious choice for school lunches. Dip them in a little soy sauce, and you have a meal that’s both tasty and visually appealing. Kids love the hands-on experience of rolling their own sushi, and you’ll love how easy they are to make!
To create these rolls, you’ll need just a few ingredients. This recipe serves four, so it’s perfect for a family lunch or to pack for school. You can have fun experimenting with different veggies, making this a versatile dish. Plus, they’re a great way to introduce sushi to kids without overwhelming them.
Here’s how to make your Cold Veggie Sushi Rolls:
Ingredients:
– 2 cups sushi rice, cooked
– 4 sheets nori (seaweed)
– 1 cucumber, julienned
– 1 carrot, julienned
– 1 avocado, sliced
– Soy sauce for dipping
Instructions:
1. Begin by placing a bamboo mat on your counter. Lay a sheet of nori on the mat.
2. Spread a thin layer of sushi rice over the nori, leaving about an inch of space at the top.
3. Arrange the julienned cucumber, carrot, and sliced avocado along the bottom edge of the nori.
4. Roll the nori tightly, using the mat to help. Seal the edge with a little water.
5. Slice the roll into bite-sized pieces, perfect for little hands to grab.
These sushi rolls are not only simple but also a hit with kids. You can easily swap in other veggies like bell peppers or spinach for variety. And if you’re looking for a healthier option, feel free to use brown rice instead of white. Your kids will love this fun twist on lunch, making it a great addition to their meal rotation!
• Choose colorful veggies for a fun presentation
• Use brown rice for a healthier twist
• Pack in a bento box for easy transport
• Experiment with different dipping sauces for variety
Did you know kids eat 2x more veggies when they help roll their own veggie sushi? Cold lunch ideas for kids become a game when you hand them the rolling mat—fresh veggies, tasty sushi rice, and confident eaters all in one.
Cold Veggie Sushi Rolls
Editor’s Choice

Bentgo Chill Kids Leak-Proof Lunch Box – 4-Compartment Bento Box with Bu…
9. Cucumber Sandwiches

Are you searching for a quick and tasty lunch for your kids that won’t break the bank or take much time to prepare? Look no further than refreshing cucumber sandwiches! These light bites are not only easy to make but also pack a nutritious punch. With cream cheese and whole grain bread, they become a delightful meal perfect for busy school mornings. Plus, kids love them!
Imagine the crunch of fresh cucumber paired with creamy cheese, all nestled between slices of wholesome bread. This classic combo is a favorite among kids and parents alike. You can find inspiration for these sandwiches on Pinterest, where variations abound. They’re perfect for those days when you need a meal that’s satisfying yet light.
To whip up these delicious sandwiches, here’s what you’ll need:
Ingredients:
– 8 slices of whole grain bread
– 1 cup of cream cheese
– 1 cucumber, thinly sliced
– Salt and pepper to taste
Instructions:
1. Spread cream cheese generously on all slices of bread.
2. Layer cucumber slices on four of the bread pieces.
3. Season with salt and pepper to taste.
4. Top with the remaining bread slices and cut each sandwich into quarters.
For an extra zing, sprinkle some dill or garlic powder on the cucumbers before assembling. This not only boosts flavor but also gives them an extra touch of excitement!
You might wonder, can you customize these sandwiches? Absolutely! Add turkey slices for protein or toss in some sprouts for a crunchy surprise. These sandwiches are versatile, allowing you to mix and match based on your child’s preferences. They are an excellent way to introduce new tastes while keeping lunchtime fun and interesting!
• Use whole grain bread for added nutrition
• Choose cream cheese for creaminess and flavor
• Add turkey or sprouts for extra protein
• Sprinkle dill or garlic powder for a flavor boost
These cucumber sandwiches are sure to be a hit in your child’s lunchbox. Not only are they quick to prepare, but they also help keep lunchtime exciting and healthy!
Cucumber Sandwiches
Editor’s Choice

Nature’s Own Honey Wheat, Honey Wheat Sandwich Bread, 20 oz Loaf

Amazon Grocery, Plain Cream Cheese Spread, 12 Oz (Previously Amazon Fres…
10. Spinach and Feta Quiche Cups

Give your kids a delicious and nutritious treat with Spinach and Feta Quiche Cups! These little bites are perfect for busy school mornings. They pack a punch of protein from the eggs and cheese, making them not only tasty but also satisfying. Plus, they are easy to hold and eat, making lunchtime fun and hassle-free!
You can whip these up in just 35 minutes. Imagine your kids enjoying a healthy meal that you prepared in no time—what a win! These quiche cups are also a great way to sneak in veggies. You can make a batch ahead of time and store them in the fridge for quick grab-and-go lunches or snacks throughout the week.
Here’s how to make these delightful quiche cups:
Recipe Overview:
– Servings: 12 cups
– Prep Time: 15 minutes
– Cook Time: 20 minutes
– Total Time: 35 minutes
– Calories: 80 per cup
Nutrition Information:
– Protein: 6g
– Carbohydrates: 5g
– Fiber: 1g
– Fat: 5g
Ingredients:
– 6 large eggs
– 1 cup fresh spinach, chopped
– 1/2 cup crumbled feta cheese
– 1/2 cup milk
– Salt and pepper to taste
– 12 phyllo pastry cups
Instructions:
1. Preheat your oven to 375°F (190°C).
2. In a mixing bowl, whisk together the eggs, milk, salt, and pepper until well blended.
3. Stir in the chopped spinach and crumbled feta cheese until combined.
4. Carefully pour the mixture into the phyllo pastry cups, filling them about three-quarters full.
5. Bake for about 20 minutes, or until the filling is set and the tops are golden brown.
These tasty quiche cups can be made in advance and stored in an airtight container for up to 3 days. They’re not just a meal; they’re a way to show your kids that healthy food can be fun and delicious!
Now you have the perfect cold lunch option that kids will love! Enjoy these Spinach and Feta Quiche Cups, and watch your little ones ask for more!
Spinach and Feta Quiche Cups
Editor’s Choice

2Pack Silicone Muffin Pan for Baking with Metal Reinforced Frame, 12 Cup…

50 Pack (100-Piece) 32 oz Meal Prep Containers Reusable with Lids 3-Comp…

Premium 250 gr Roasted & Shredded Kadayif (Kataifi) Fillo Dough, Crunchy…
11. Apple Sandwiches with Nut Butter

Apple Sandwiches with Nut Butter are a delightful and easy way to add some fun to your child’s lunchbox. They’re not only tasty but also packed with nutrition. Imagine crisp apple slices meeting creamy nut butter, creating a satisfying snack that kids love. This combo brings together fiber from the apples and healthy fats from the nut butter, making it a perfect fuel for your little ones as they tackle their busy school day.
Here’s how to whip up these tasty sandwiches in just five minutes, leaving you more time for the morning rush. Grab your favorite apples—try different varieties for a mix of flavors! You can even switch up the nut butter for variety. If you prefer a nut-free option, sunflower butter works just as well. A sprinkle of granola can add an exciting crunch that kids will adore.
Recipe Overview:
– Servings: 2
– Prep Time: 5 minutes
– Total Time: 5 minutes
– Calories: 200 per serving
Nutrition Information:
– Protein: 4g
– Carbohydrates: 30g
– Fiber: 5g
– Fat: 9g
Ingredients:
– 2 apples (any variety)
– 1/4 cup nut butter (almond or sunflower butter for nut-free)
– Optional: granola for extra crunch
Instructions:
1. Core and slice the apples into thick rings.
2. Spread a generous layer of nut butter on one apple slice.
3. Top with another apple slice to create a sandwich.
4. If you like, sprinkle granola on the nut butter for added texture.
Feel free to experiment with different spreads! Yogurt or cream cheese can also be delightful alternatives. This recipe is quick, fun, and a great way to introduce more fruit into your child’s diet. Enjoy these delicious apple sandwiches, and watch your kids smile at lunchtime!
Quick Tips:
– Use a variety of apples for different flavors.
– Choose nut butters based on your kid’s preferences.
– Add a sprinkle of cinnamon for an extra kick.
– Place in a lunchbox with ice packs to keep cool.
Get creative and make lunchtime a little more exciting with these apple sandwiches!
Apple Sandwiches with Nut Butter
Editor’s Choice


PrepWorks Dishwasher Safe Apple Slicer and Corer – 16-Slice Thin Apple C…

HOTOR Insulated Lunch Box for Men & Women – Leak-Proof Cooler Lunch Bag …
12. Hummus and Veggie Dippers

Looking for a fun and nutritious lunch option for your kids? Hummus and Veggie Dippers are a fantastic choice! Not only do they make veggies more appealing, but they also provide a colorful and crunchy treat. Imagine your child happily dipping crisp carrot sticks, vibrant bell peppers, and refreshing cucumber slices into creamy hummus. It’s a lunch that’s as enjoyable to eat as it is healthy!
Recipe Overview:
– Servings: 4
– Prep Time: 10 minutes
– Total Time: 10 minutes
– Calories: 100 per serving
Nutrition Information:
– Protein: 3g
– Carbohydrates: 12g
– Fiber: 4g
– Fat: 5g
Ingredients:
– 1 cup hummus (store-bought or homemade)
– 1 carrot, cut into sticks
– 1 bell pepper, sliced
– 1 cucumber, sliced
Instructions:
1. Start by washing and cutting the vegetables into sticks or slices.
2. Scoop the hummus into a small container.
3. Arrange the veggie dippers around the hummus for a delightful presentation.
For extra crunch, consider adding whole grain crackers. They pair perfectly with the hummus and will keep your kids satisfied!
FAQs:
Is hummus healthy? Absolutely! It’s packed with protein and fiber, making it a smart choice for growing kids.
Give this simple yet effective lunch idea a try! Your kids will love the hands-on approach to eating their vegetables, and you’ll love knowing they’re enjoying a nutrient-rich meal.
Hummus and Veggie Dippers
Editor’s Choice

MACTANO 9 OZ Reusable Snack Containers with Lids, New Double Compartment…

Back to Nature Multigrain Flatbread Crackers, Non-GMO, Plant-Based Snack…

Fullstar The Original Pro Chopper – Vegetable Chopper and Spiralizer, Fo…
13. Egg Salad Lettuce Wraps

Looking for a quick and healthy lunch for your kids? Try Egg Salad Lettuce Wraps! These wraps are a crunchy, low-carb option that packs a protein punch. Perfect for busy school mornings, they come together in just minutes. Plus, they’re light and refreshing, making lunchtime something to look forward to!
Here’s how you can whip them up in no time:
Recipe Overview:
– Servings: 4
– Prep Time: 10 minutes
– Total Time: 10 minutes
– Calories: 150 per serving
Nutrition Information:
– Protein: 7g
– Carbohydrates: 4g
– Fiber: 1g
– Fat: 12g
Ingredients:
– 4 hard-boiled eggs, chopped
– 2 tablespoons mayonnaise (or Greek yogurt for a healthier twist)
– 1 tablespoon mustard
– Lettuce leaves (butter or romaine work great)
– Salt and pepper to taste
Instructions:
1. In a bowl, combine the chopped eggs, mayonnaise, mustard, salt, and pepper. Mix well.
2. Take a lettuce leaf, spoon in some of the egg salad, and wrap it up just like a burrito.
For an extra crunch, feel free to add diced celery or onions!
FAQs:
Want to know how long these wraps last? You can store the egg salad in the fridge for up to 3 days. This makes meal prep easy!
With just a few ingredients, Egg Salad Lettuce Wraps are not only simple but also versatile and fun. Kids love the crunch, and you’ll love how quickly they come together. Enjoy a tasty lunch that keeps everyone satisfied!
• Use Greek yogurt instead of mayonnaise for a lighter option
• Choose colorful lettuce for a fun presentation
• Pack extras like diced pickles for added flavor
• Wrap in foil for an easy, mess-free lunch
Egg Salad Lettuce Wraps
Editor’s Choice

60 Sets (120-Piece) Deli Containers with Lids, 32/16/8 oz X 20 Set Each,…

jawbush Professional Lettuce Knife, 11″ Serrated Salad Cutter for Veggie…

Egg Slicer for Hard Boiled Eggs, Stainless Steel Wire, Heavy Duty Alumin…
14. Cheese and Crackers Bento Box

A Cheese and Crackers Bento Box is a delightful and quick lunch solution for your busy mornings. Kids love the freedom to choose their favorite cheeses and whole grain crackers. Add in some fresh fruit, and you’ve got a well-rounded meal that satisfies both taste and nutrition. This option is not just easy to prepare; it’s also a fun way to get your kids involved in their lunch choices. Plus, it’s customizable to their preferences!
Recipe Overview:
– Servings: 1
– Prep Time: 5 minutes
– Total Time: 5 minutes
– Calories: 250 per bento box
Nutrition Information:
– Protein: 10g
– Carbohydrates: 30g
– Fiber: 3g
– Fat: 12g
Ingredients:
– 4 ounces of cheese (like cheddar, mozzarella, or dairy-free options)
– 8 whole grain crackers
– 1/2 cup grapes or apple slices
– Optional: Add some nuts or seeds for extra crunch
Instructions:
1. Start by slicing the cheese into fun shapes, using cookie cutters if you wish.
2. In a bento box, arrange the cheese slices, crackers, and fruit.
3. If you want, sprinkle in some nuts or seeds for added texture.
Packing this the night before is a great idea! Just remember to keep the fruit in an airtight container to keep it fresh. This lunch not only provides balanced nutrition but also encourages kids to enjoy their meal by mixing and matching flavors. It’s perfect for those hectic school mornings when you need something quick yet satisfying!
• Choose a variety of cheeses to keep things interesting.
• Pick whole grain crackers for added fiber and nutrition.
• Add seasonal fruits for freshness and taste.
• Involve your kids in the prep for a fun experience!
Enjoy making lunch fun and easy with this Cheese and Crackers Bento Box!
Busy mornings call for tasty, kid-approved options. A Cheese and Crackers Bento Box turns a quick prep into a mini lunch that kids customize with their favorites, plus fruit for balance—proof that cold lunch ideas for kids can be easy and fun.
Cheese and Crackers Bento Box
Editor’s Choice
4 Pack Bento Lunch Box Set 3 Compartment Food Storage Containers Wheat S…

Halloween Cookie Cutters Set – 12 Pieces Stainless Steel Halloween Cooki…

Lance Sandwich Crackers, Variety Pack, 3 Flavors, 20 Individually Wrappe…
15. Sweet Potato and Black Bean Salad

Looking for a nutritious and delicious lunch option for your kids? Look no further than this Sweet Potato and Black Bean Salad! This colorful dish is not only packed with fiber and protein, but it also bursts with flavor in every bite. The natural sweetness of roasted sweet potatoes pairs perfectly with the earthy taste of black beans, making for a satisfying meal that kids will love.
Preparing this salad is a breeze! In just a short time, you can whip up a vibrant dish that holds up well in the fridge. Serve it chilled or at room temperature—either way, it’s a winner for busy school mornings.
Here’s how to make it:
Ingredients:
– 2 sweet potatoes, diced
– 1 can black beans, drained and rinsed
– 1/2 red onion, diced
– 1 red bell pepper, diced
– Juice of 1 lime
– Olive oil, salt, and pepper to taste
Instructions:
1. Preheat your oven to 400°F (200°C).
2. On a baking sheet, toss the diced sweet potatoes with olive oil, salt, and pepper.
3. Roast for about 30 minutes or until they are tender and slightly caramelized.
4. In a large bowl, combine the roasted sweet potatoes, black beans, red onion, and bell pepper.
5. Squeeze lime juice over the salad and toss gently to mix everything together.
This salad not only tastes great, but it’s also versatile. You can add feta cheese for a creamy touch or even some avocado for extra richness. Plus, it’s budget-friendly and can be made ahead of time, making it perfect for meal prep.
Here are some quick tips to customize it:
– Add cheese for a creamy texture.
– Incorporate corn for a sweet crunch.
– Use different beans like kidney or chickpeas for variety.
– Top with avocado for healthy fats.
This Sweet Potato and Black Bean Salad is a delightful way to nourish your kids while keeping lunchtime interesting. It’s fun, filling, and a fantastic way to introduce them to new flavors!
Sweet Potato and Black Bean Salad
Editor’s Choice
50 Pack (100-Piece) 32 oz Meal Prep Containers Reusable with Lids 3-Comp…

Spring Chef Premium Swivel Vegetable Peeler, Soft Grip Handle and Ultra …

Zulay Kitchen Metal Lemon Squeezer – Sturdy & Easy-to-Use Handheld Citru…
16. Frozen Yogurt Bark

Want to treat your kids to something delicious and healthy? Try making Frozen Yogurt Bark! This fun snack is perfect for busy school mornings. It’s a refreshing option that combines yogurt, colorful fruits, and crunchy granola. Plus, you can easily customize it with seasonal toppings! Your kids will love it, and you’ll enjoy knowing it’s a nutritious choice.
Here’s how to whip up this tasty treat:
Recipe Overview:
– Servings: 4
– Prep Time: 10 minutes
– Total Time: 4 hours to freeze
– Calories: 150 per serving
Nutritional Information:
– Protein: 6g
– Carbohydrates: 20g
– Fiber: 2g
– Fat: 5g
Ingredients:
– 2 cups yogurt (pick your favorite flavor)
– 1 cup mixed berries (like strawberries, blueberries, or raspberries)
– 1/4 cup granola (for that crunchy finish)
Instructions:
1. Line a baking sheet with parchment paper.
2. Spread yogurt evenly across the sheet, creating a smooth layer.
3. Scatter mixed berries and granola over the yogurt.
4. Freeze for at least 4 hours, or until solid.
5. Once frozen, break the bark into pieces and store them in a container.
Feel free to experiment! You can add toppings like shredded coconut, nuts, or even chocolate chips for a little extra sweetness.
FAQs:
– How long does it last? Store it in the freezer for up to 2 weeks. Just grab a piece whenever your kids need a snack!
Frozen Yogurt Bark is not only easy to make but also a great way to get your kids excited about healthy eating. Enjoy cooling down with this simple, delightful treat!
Frozen Yogurt Bark
Editor’s Choice

Euro Cuisine YM80 Electric Yogurt Maker Machine- Promote Gut Health with…
MACTANO 9 OZ Reusable Snack Containers with Lids, New Double Compartment…
17. Oatmeal Cups

Oatmeal Cups are a fantastic solution for busy mornings when you need to get your kids out the door quickly. These little cups are not only fun to eat but also super nutritious. You can customize them with your children’s favorite ingredients, like ripe bananas, crunchy nuts, or sweet chocolate chips. Pinterest is buzzing with variations of these cups, making them a trendy choice for parents everywhere.
To make these Oatmeal Cups, you will need just a few simple ingredients. They are budget-friendly and can be prepared ahead of time, saving you precious minutes during hectic school mornings. Plus, they’re perfect for lunchboxes, so your kids have a wholesome treat to look forward to. With each bite, they’ll enjoy a delightful mix of flavors, making lunchtime exciting!
Here’s how to whip up these tasty Oatmeal Cups:
Ingredients:
– 2 cups rolled oats
– 1/2 cup milk or almond milk
– 2 eggs
– 1/4 cup honey or maple syrup
– 1 banana, mashed
– 1/2 cup mix-ins (choose from chocolate chips, nuts, or berries)
Instructions:
1. Preheat your oven to 350°F (175°C).
2. In a large mixing bowl, combine all the ingredients until well mixed.
3. Grease a muffin tin and pour the mixture into each cup, filling them about 3/4 full.
4. Bake for 20 minutes or until they turn golden and set.
5. Allow them to cool completely before storing in an airtight container.
If you want to make them in advance, these Oatmeal Cups freeze beautifully for up to a month. Just pop them in the microwave for a quick warm-up, and they’re ready to go!
• Mix in your kids’ favorites like peanut butter or yogurt.
• Make a double batch to have extras for the week.
• Experiment with spices like cinnamon or vanilla for added flavor.
• Serve them warm with a drizzle of honey for a special treat.
With these Oatmeal Cups, you’ll have a delicious and nutritious meal that your kids will love!
Oatmeal Cups
Editor’s Choice

Reusable Silicone Cupcake Baking Cups 24 Pack, 2.75 inch Silicone Baking…
50 Pack (100-Piece) 32 oz Meal Prep Containers Reusable with Lids 3-Comp…

Quaker Instant Oatmeal Express Cups, Maple & Brown Sugar, 1.69 Ounce (Pa…
18. Beet and Goat Cheese Salad

Discover a delicious way to brighten your child’s lunchbox with this colorful Beet and Goat Cheese Salad! Not only is it visually stunning, but it also packs a nutritious punch. The natural sweetness of roasted beets pairs beautifully with the creamy tang of goat cheese, creating a delightful balance. Toss in some fresh mixed greens, and you have a light yet satisfying meal that your kids will love!
Recipe Overview:
– Servings: 2
– Prep Time: 15 minutes
– Cook Time: 30 minutes
– Total Time: 45 minutes
– Calories: 200 per serving
Nutrition Information:
– Protein: 6g
– Carbohydrates: 18g
– Fiber: 4g
– Fat: 12g
Ingredients:
– 2 medium-sized beets, roasted and sliced
– 1 cup mixed greens
– 1/4 cup goat cheese, crumbled
– Olive oil and balsamic vinegar for dressing
Instructions:
1. Preheat your oven to 400°F (200°C). Roast the beets wrapped in foil for about 30 minutes, or until they are tender. Allow them to cool, then slice.
2. In a large bowl, combine the mixed greens with the sliced beets and crumbled goat cheese.
3. Drizzle olive oil and balsamic vinegar over the salad right before serving for fresh flavor.
This salad is fantastic for meal prep! You can make it ahead of time and store it in the fridge. Just keep the dressing separate until you’re ready to eat, ensuring everything stays crisp and fresh.
FAQs: Can I swap goat cheese for feta? Absolutely! Feta will add a salty twist that’s equally delicious.
Make lunchtime exciting with this stunning salad, and watch your kids enjoy a meal that’s as good for them as it is tasty!
Beet and Goat Cheese Salad
Editor’s Choice
50 Pack (100-Piece) 32 oz Meal Prep Containers Reusable with Lids 3-Comp…
OXO Good Grips Little Salad Dressing Shaker – Black, Small
Spring Chef Premium Swivel Vegetable Peeler, Soft Grip Handle and Ultra …
19. Chicken and Avocado Salad

Make lunchtime exciting with this delightful Chicken and Avocado Salad! It’s creamy, satisfying, and packed with nutrition. Your kids will love the rich flavor of avocado mixed with tender, protein-rich chicken. This salad is not just easy to prepare but also versatile. You can serve it in a wrap, on a bed of greens, or simply in a bowl. It’s a lunchtime winner that keeps them energized for the rest of the day!
Here’s how you can make it. The prep time is only 10 minutes, and it cooks in another 10, so you can whip it up quickly on busy mornings. With a total time of just 20 minutes, this salad offers four hearty servings, making it perfect for the whole family. Each serving contains about 300 calories, and the nutrition breakdown is impressive:
– Protein: 22g
– Carbohydrates: 10g
– Fiber: 7g
– Fat: 20g
Ingredients:
– 2 cups cooked chicken, shredded
– 1 avocado, diced
– 1/4 cup plain yogurt
– 1/4 cup lime juice
– Salt and pepper to taste
Instructions:
1. In a mixing bowl, combine the shredded chicken and diced avocado.
2. Stir in the plain yogurt and lime juice until well mixed.
3. Season with salt and pepper according to your taste.
4. Serve the salad in lettuce wraps or simply in a bowl.
Want to jazz it up? Add cherry tomatoes or sweet corn for an extra burst of flavor!
FAQs:
– How long does it keep? Store leftovers in the fridge for up to 3 days.
– Can I make it ahead? Absolutely! Prepare it the night before for a quick grab-and-go lunch.
This Chicken and Avocado Salad is a fun, tasty way to ensure your kids enjoy a nutritious meal that fuels their day. Enjoy the smiles at lunchtime!
Chicken and Avocado Salad
Editor’s Choice
50 Pack (100-Piece) 24 oz Meal Prep Containers Reusable with Lids, Sturd…

HOTOR Insulated Lunch Box for Men & Women – Leak-Proof Cooler Lunch Bag …
20. Caprese Skewers

Caprese Skewers are a playful and tasty twist on the classic salad. These colorful bites combine juicy cherry tomatoes, creamy mozzarella balls, and fragrant basil leaves all on a stick. Not only do they look amazing, but they also offer a fresh burst of flavor that kids will love. Plus, they’re simple to prepare, making them a perfect choice for busy school mornings or lunchboxes.
Recipe Overview:
– Servings: 4
– Prep Time: 10 minutes
– Total Time: 10 minutes
– Calories: 120 per serving
Nutrition Information:
– Protein: 6g
– Carbohydrates: 5g
– Fiber: 1g
– Fat: 9g
Ingredients:
– 1 pint cherry tomatoes
– 8 ounces mozzarella balls
– Fresh basil leaves
– Balsamic glaze for drizzling
Instructions:
1. Take your skewers and start threading the cherry tomatoes, mozzarella balls, and basil leaves in an alternating pattern.
2. Once assembled, drizzle a little balsamic glaze on top for that extra zing.
These skewers are not only fun to eat but also versatile. You can prepare them a day ahead and store them in the fridge. They make a great addition to lunchboxes, picnics, or even birthday parties!
Here are some tips to make the most of your Caprese skewers:
• Use fresh mozzarella for the best flavor.
• Choose colorful tomatoes for a vibrant look.
• Pick basil leaves that are bright and fragrant.
• Add a sprinkle of salt and pepper for extra taste.
Enjoy the ease of preparing these delightful skewers that will have your kids asking for more. They’re perfect for any occasion, making lunchtime exciting and nutritious!
Caprese Skewers
Editor’s Choice

HOPELF 12″ Natural Bamboo Skewers for BBQ,Appetiser,Fruit,Cocktail,Kabob…

Filippo Berio Glaze with Balsamic Vinegar of Modena, 8.4 Ounce Plastic B…
4 Pack Bento Lunch Box Set 3 Compartment Food Storage Containers Wheat S…
21. Smoothie Packs

Smoothie packs are a game-changer for busy mornings. They make it easy for your kids to enjoy a nutritious breakfast without the hassle. Just grab a pre-packed bag from the freezer, blend it with yogurt or milk, and voilà—breakfast is served! These colorful, fruity blends keep kids energized and ready to tackle their day.
Here’s how to create your own smoothie packs:
1. Choose your favorite fruits and veggies. You can mix and match to find what your kids love best.
2. Slice a banana, grab some spinach, and toss in a handful of frozen berries.
3. Pack everything into a freezer bag and pop it in the freezer.
In the morning, just blend the contents with yogurt or almond milk for a delicious drink that tastes great and is packed with nutrients.
Recipe Overview:
– Servings: 2
– Prep Time: 5 minutes
– Total Time: 5 minutes (plus freeze time)
– Calories: 180 per serving
Nutrition Information:
– Protein: 6g
– Carbohydrates: 35g
– Fiber: 4g
– Fat: 2g
Ingredients:
– 1 banana, sliced
– 1 cup spinach leaves
– 1/2 cup frozen berries
– 1 cup yogurt or almond milk
Instructions:
1. Pack banana, spinach, and berries into a freezer bag.
2. In the morning, blend with yogurt or almond milk until smooth.
Feel free to customize with any fruits your kids enjoy! You can add mango, kale, or even a scoop of peanut butter for an extra boost.
FAQs:
– How long do smoothie packs last? They can stay fresh in the freezer for up to a month.
These smoothie packs not only save time but also make mornings fun and nutritious. Your kids will love the flavors, and you’ll love knowing they’re starting their day with a healthy option!
Fun fact: Pre-made smoothie packs can cut morning prep time by up to 15 minutes, giving kids a nutritious start before school. Mix-and-match fruits and veggies keeps breakfasts exciting, and parents love the quick cleanup. Grab a pack, blend with yogurt or milk, and go!
Smoothie Packs
Editor’s Choice

Lerine 6 Pack Reusable Gallon Freezer Bags Dishwasher Safe, BPA Free Reu…

Ninja BL660 Professional Compact Smoothie & Food Processing Blender, 110…
22. Coconut Chia Pudding

Coconut Chia Pudding is a fantastic choice for kids’ lunches! This creamy, nutritious treat is bursting with flavor and packed with good-for-you ingredients. Chia seeds soak up coconut milk, transforming into a delightful pudding that kids can’t resist. Top it off with fresh fruit, and you’ve got a meal that’s both delicious and visually appealing.
Making this pudding is simple and quick. You only need a few ingredients and a little bit of patience while it sets. It’s not just tasty; it’s also a powerhouse of nutrients, making it an excellent start to the day or a refreshing lunch option. Plus, you can prepare it ahead of time, which is perfect for busy mornings!
Recipe Overview:
– Servings: 2
– Prep Time: 10 minutes
– Total Time: 4 hours to set
– Calories: 250 per serving
Nutritional Information:
– Protein: 5g
– Carbs: 30g
– Fiber: 10g
– Fat: 12g
Ingredients:
– 1/2 cup chia seeds
– 2 cups coconut milk
– 1 tablespoon honey or maple syrup
– Fresh fruits for topping (like berries, bananas, or mangoes)
Instructions:
1. In a bowl, combine chia seeds, coconut milk, and your choice of sweetener.
2. Mix well, ensuring no clumps remain.
3. Cover and refrigerate for at least 4 hours or overnight until it thickens.
4. Before serving, stir and top with fresh fruits for added flavor and crunch.
Feel free to experiment with different types of milk or sweeteners to find what your kids love best! This pudding can stay fresh in the fridge for up to 5 days, making it a great option for meal prep. Enjoy the deliciousness and watch your kids smile with every spoonful!
Coconut Chia Pudding
Editor’s Choice

Yupik Chia Seeds, Natural Black, 2.2 lb, Whole Raw Superfood, Neutral Fl…

365 by Whole Foods Market, Organic Coconut Milk, 13.5 Fl Oz
50 Pack (100-Piece) 32 oz Meal Prep Containers Reusable with Lids 3-Comp…
23. Pesto Pasta Salad

Pesto Pasta Salad is a delightful choice for busy school mornings. With its fresh basil pesto and colorful veggies, this meal excites the taste buds and makes lunchtime fun. You can whip it up in no time, and best of all, it tastes even better when made ahead!
Imagine your kids enjoying a bowl of this vibrant salad filled with cherry tomatoes and olives. It’s a visually appealing dish that not only nourishes but also satisfies. Pinterest is buzzing with similar ideas, showcasing how easy it is to make cold lunches that kids love.
To prepare this dish without breaking the bank, look for pasta on sale or use any shape you have at home. You can even add seasonal veggies for extra crunch. This salad is ideal for meal prepping, making busy mornings smoother and your kitchen organized.
Here’s how to make it:
Ingredients:
– 8 ounces pasta (any shape you like)
– 1/2 cup pesto sauce (store-bought or homemade)
– 1 cup cherry tomatoes, halved
– 1/2 cup black olives, sliced
– 1/4 cup grated Parmesan cheese
Instructions:
1. Cook the pasta according to the package instructions, then drain and let it cool.
2. In a large bowl, mix the cooled pasta, pesto, cherry tomatoes, black olives, and Parmesan cheese.
3. Toss everything together until well combined.
4. Serve chilled or pack it for lunch!
Want to boost the protein? Add grilled chicken or chickpeas for a heartier option. This salad is not just tasty; it’s also a great way to sneak in those essential nutrients your kids need.
• Choose any pasta shape for variety
• Use store-bought pesto for convenience
• Add grilled chicken or chickpeas for protein
• Mix in seasonal veggies for extra crunch
Pesto Pasta Salad
Editor’s Choice
50 Pack (100-Piece) 32 oz Meal Prep Containers Reusable with Lids 3-Comp…

Filippo Berio Pesto, Organic Classic Basil, 6.7 Ounce Glass Jar, Gluten …

365 by Whole Foods Market, Organic Tri-Color Pasta, Sea Shapes, 8.8 Ounce
24. Avocado Toast Bites

Imagine starting your busy school mornings with a delicious and healthy treat that your kids will actually want to eat! Avocado Toast Bites are not only trendy but also packed with nutrients. These bite-sized wonders can be easily customized with various toppings, making lunchtime exciting and fun. Plus, they take just minutes to whip up!
You can make these delightful bites in no time. They are perfect for packing in a lunchbox or serving as an after-school snack. Your kids can choose their favorite toppings, from crunchy veggies to flavorful spices. Pinterest is buzzing with creative avocado toast ideas, so you know you’re on the right track!
Here’s how to make these delicious bites at home, even on the busiest mornings. They are budget-friendly and use simple ingredients you likely have on hand. You can enjoy the satisfaction of knowing your kids are eating something healthy and tasty. These bites not only satisfy hunger but also make lunch feel special!
Ingredients:
– 4 slices whole grain bread
– 1 ripe avocado, mashed
– Salt and pepper to taste
– Optional toppings: cherry tomatoes, radishes, or everything bagel seasoning
Instructions:
1. Start by toasting the whole grain bread slices until golden brown.
2. Spread the creamy mashed avocado generously on each toast slice.
3. Sprinkle with salt and pepper for extra flavor.
4. Get creative! Top with your kids’ favorites, like sliced cherry tomatoes, radishes, or a sprinkle of everything bagel seasoning.
To make it even more fun, use a cookie cutter to create whimsical shapes from the bread! This simple touch can make lunchtime feel like a special occasion.
FAQs:
– How long do Avocado Toast Bites last? They are best enjoyed fresh, but you can store them in an airtight container for a few hours if needed.
– Can I prepare them ahead of time? Definitely! Just assemble everything the night before and store them in the fridge.
These Avocado Toast Bites are a fantastic addition to your lunch rotation. Your kids will love them, and you’ll love how easy they are to make!
Avocado Toast Bites
Editor’s Choice

Dave’s Killer Bread 21 Whole Grains & Seeds Thin-Sliced, Whole Grain Org…

12 Pieces Round Cookie Biscuit Cutter Set,Graduated Circle Pastry Cutter…
25. Grilled Cheese Roll-Ups

Grilled Cheese Roll-Ups are a delightful spin on a beloved classic! These cheesy bites are not only fun to eat, but they also make for a great lunch option for kids. Imagine your little ones enjoying crispy, gooey goodness they can dip into rich tomato soup or their favorite sauce. It’s a smart way to pack in some carbs and dairy without the fuss.
Here’s how to whip up these tasty treats in no time. You’ll need just a few ingredients, and the prep is quick enough to fit into those busy school mornings. Plus, these roll-ups are perfect for little hands to hold. Let’s dive into the recipe!
Recipe Overview:
– Servings: 4
– Prep Time: 10 minutes
– Cook Time: 10 minutes
– Total Time: 20 minutes
– Calories: 250 per serving
Nutritional Information:
– Protein: 10g
– Carbohydrates: 30g
– Fiber: 1g
– Fat: 12g
Ingredients:
– 4 slices of bread
– 4 slices of cheese (your favorite type)
– 1 tablespoon of butter
Instructions:
1. Start by flattening the bread slices with a rolling pin. This makes them easier to roll up.
2. Place a slice of cheese on each piece of flattened bread.
3. Roll the bread tightly around the cheese, and secure each roll with a toothpick.
4. Heat the butter in a pan over medium heat. Grill the roll-ups until they turn golden brown on all sides, about 3-4 minutes.
Serve these roll-ups warm with marinara sauce for dipping. They’re sure to be a hit!
FAQs:
– Can I use different cheeses? Yes! Feel free to mix and match your favorites for added flavor.
– Can I make these ahead of time? Absolutely! You can prepare them in advance and quickly heat them up in the morning.
Grilled Cheese Roll-Ups
Editor’s Choice


CAROTE Nonstick Frying Pan Skillet,Non Stick Granite Fry Pan Egg Pan Ome…

600 Count Bamboo Toothpicks for Teeth Cleaning, Appetizer, Olive, Barbec…
26. Black Bean and Corn Salad

Looking for a quick and tasty lunch idea for your kids? Try a Black Bean and Corn Salad. This colorful salad is not only delicious but also packed with protein and fiber. The black beans bring a hearty texture, while the corn adds a sweet crunch. Plus, it tastes fantastic even when chilled, making it a perfect choice for busy school mornings.
Recipe Overview:
– Servings: 4
– Prep Time: 10 minutes
– Total Time: 10 minutes
– Calories: 180 per serving
Nutrition Information:
– Protein: 8g
– Carbohydrates: 30g
– Fiber: 5g
– Fat: 3g
Ingredients:
– 1 can black beans, drained and rinsed
– 1 cup corn (canned or frozen)
– 1 red bell pepper, diced
– 1/4 cup red onion, diced
– Juice of 1 lime
– Olive oil, salt, and pepper to taste
Instructions:
1. In a bowl, mix the black beans, corn, diced bell pepper, and red onion.
2. Squeeze lime juice over the mixture.
3. Drizzle with olive oil, then sprinkle with salt and pepper.
4. Toss everything together until well combined.
5. Serve chilled or at room temperature.
This salad gets even better the next day, as the flavors mingle nicely. Store any leftovers in the fridge for up to three days. It’s a fantastic make-ahead option for those hectic mornings!
Tips:
– Use fresh ingredients for the best taste.
– Choose colorful veggies to make it visually appealing.
– Pack in a lunchbox with some tortilla chips for a crunchy side.
– Add avocado for extra creaminess.
With this Black Bean and Corn Salad, you can create a nutritious lunch that keeps your kids satisfied, all while saving you time in the morning. Enjoy the ease and deliciousness of this recipe!
Black Bean and Corn Salad
Editor’s Choice

Bento Box for Kids and Adults – Reusable Lunch Box Meal Prep Containers …

4Pcs Condiment Squeeze Bottles for Sauces, Leakproof Salad Dressing Cont…

Lunch Bag for Women/Men,Waterproof Reusable Portable Lunch Tote,Lunch Bo…
27. Mini Tacos

Are you searching for a fun and easy lunch option for your kids? Mini tacos can be a game-changer! These bite-sized delights are perfect for little hands and can spice up any lunchtime routine. Fill them with seasoned ground turkey, beans, or colorful veggies for a nutritious meal that your kids will enjoy. Plus, they can customize their tacos with toppings, making lunchtime interactive and exciting!
Recipe Overview:
– Servings: 4
– Prep Time: 15 minutes
– Cook Time: 10 minutes
– Total Time: 25 minutes
– Calories: 220 per serving
Nutrition Information:
– Protein: 15g
– Carbohydrates: 20g
– Fiber: 3g
– Fat: 10g
Ingredients:
– 8 mini taco shells
– 1 pound ground turkey or beef
– 1 packet taco seasoning
– 1 cup shredded lettuce
– 1/2 cup diced tomatoes
– 1/2 cup shredded cheese
Instructions:
1. Cook the ground turkey or beef in a skillet over medium heat, following package instructions. Mix in the taco seasoning for flavor.
2. Fill each mini taco shell with cooked meat, shredded lettuce, diced tomatoes, and cheese.
3. Serve with salsa or guacamole on the side for extra fun!
Let your kids build their own tacos and watch them get creative! If you’re looking for a meat-free option, simply swap the meat for beans. This adds protein and keeps it healthy too. These mini tacos are not only delicious but also a great way to encourage kids to eat more vegetables.
Tips for making Mini Tacos:
– Use beans for a veggie-packed meal
– Choose whole grain taco shells for added fiber
– Add avocado for creaminess and healthy fats
– Make a taco bar with toppings for family fun
With this easy recipe, you’ll have a lunch that’s quick to prepare and sure to please!
Mini Tacos
Editor’s Choice

Ortega Mini Taco Slider Shells, Yellow Corn, 4.4 Ounce, 18 Shells (Pack …

365 by Whole Foods Market, Organic Taco Seasoning, 1 Ounce (Pack of 2)
28. Peanut Butter Banana Roll-Ups

Peanut Butter Banana Roll-Ups are the perfect solution for busy mornings! They are a tasty treat that kids love, and they come together in just a few minutes. Imagine spreading creamy peanut butter on a soft tortilla, placing a sweet banana inside, and rolling it all up. This snack is not only fun to eat but also packs a nutritious punch, making it easier for you to ensure your child gets the protein and potassium they need. Plus, it’s a great way to add variety to their lunch options!
For a quick and easy meal prep, gather your ingredients and follow these simple steps. It’s budget-friendly too! With just a tortilla, peanut butter, and a banana, you can whip up this delightful snack without breaking the bank. This recipe is perfect for school lunches or an after-school snack, making your life simpler and your kids happier!
Ingredients:
– 1 tortilla
– 2 tablespoons peanut butter
– 1 banana
Instructions:
1. Spread the peanut butter evenly across the tortilla.
2. Place the banana at one edge of the tortilla.
3. Roll it up tightly, starting from the banana side.
4. Slice the roll into bite-sized pieces for easy eating.
Want a twist? Drizzle some honey or sprinkle a bit of cinnamon inside before rolling!
FAQs:
– Can I use almond butter? Absolutely! Almond butter works great if you’re looking for a nut-free alternative.
– Is it healthy? Yes! Each roll-up provides about 300 calories and a good balance of protein, carbs, and healthy fats, making it a smart choice for growing kids.
Now you have a quick, nutritious, and fun lunch idea that your kids will enjoy. Give it a try, and watch them devour it!
Peanut Butter Banana Roll-Ups
Editor’s Choice

365 Everyday Value Organic Whole Wheat Tortillas, 10.5 oz (Frozen)

Nate’s 100% Pure, Raw & Unfiltered Honey – Award-Winning Taste, 32oz. Sq…
29. Edamame and Corn Salad

Looking for a quick and nutritious lunch option for your kids? Try the Edamame and Corn Salad. This colorful dish combines crunchy textures and delightful flavors that kids love. The sweetness of corn pairs perfectly with the nutty taste of edamame. Plus, it’s easy to prepare in just ten minutes, making it ideal for busy school mornings. Serve it chilled for a refreshing meal that keeps your little ones energized!
Here’s how to make it:
Ingredients:
– 1 cup edamame (shelled)
– 1 cup corn (canned or frozen)
– 1 red bell pepper, diced
– 1/4 cup chopped cilantro
– Lime juice, salt, and pepper to taste
Instructions:
1. In a large bowl, mix together the edamame, corn, diced bell pepper, and cilantro.
2. Squeeze fresh lime juice over the mixture, then season with salt and pepper.
3. Toss everything together until well combined and serve it chilled.
This salad not only makes a great main dish but also works wonderfully as a side for parties or picnics.
How long can you keep it? Store your salad in the fridge for up to three days for the best flavor. It’s a fantastic meal prep option!
• Mix ingredients for a colorful presentation
• Use fresh lime juice for a zesty kick
• Serve chilled for a refreshing treat
• Make it a side dish for parties or barbecues
Edamame and Corn Salad
Editor’s Choice

Bentgo Prep – 20-Piece 1-Compartment Reusable Meal Prep Containers with …

365 by Whole Foods Market, Organic Green Peas No Salt Added, 16 Ounce, (…
30. Cabbage and Carrot Slaw

Cabbage and Carrot Slaw is a vibrant addition to your child’s lunchbox, bringing crunch and freshness to their meal. This colorful slaw is packed with vitamins from the cabbage and carrots, making it not just delicious but also nutritious. You can make it ahead of time and enjoy it cold, which is a big win for busy mornings. Plus, this dish is versatile enough to pair with sandwiches, tacos, or even as a standalone snack!
Recipe Overview:
– Servings: 4
– Prep Time: 10 minutes
– Total Time: 10 minutes
– Calories: 70 per serving
Nutrition Information:
– Protein: 2g
– Carbohydrates: 15g
– Fiber: 3g
– Fat: 3g
Ingredients:
– 2 cups shredded cabbage
– 1 cup shredded carrots
– 1/4 cup mayonnaise (or plain yogurt for a lighter option)
– 1 tablespoon apple cider vinegar
– Salt and pepper to taste
Instructions:
1. In a large mixing bowl, combine the shredded cabbage and carrots.
2. In a small bowl, whisk together the mayonnaise (or yogurt), apple cider vinegar, salt, and pepper.
3. Pour the dressing over the cabbage and carrots, mixing until everything is well coated.
4. Taste and adjust seasoning as needed.
This slaw is not only easy to prepare but also great for experimenting. Want to add more color? Chop up some bell peppers or radishes for extra crunch and flavor. Your kids will love the variety, and you’ll appreciate how simple it is to make!
Tips for Customization:
– Add extra veggies: Include bell peppers or radishes for a pop of color.
– Use different dressings: Try a vinaigrette or a splash of lemon juice for a zesty twist.
– Make it ahead: Prepare a batch on Sunday for quick lunches throughout the week.
– Pack it well: Use a sealed container to keep the slaw fresh and crunchy until lunchtime.
This Cabbage and Carrot Slaw is not just tasty; it’s a fun way to add some nutrition to your child’s day. Enjoy the crunch and the smiles at lunchtime!
Cabbage and Carrot Slaw
Editor’s Choice

Bento Box Adult Lunch Box, Containers for Adults Men Women with 4 Compar…

Spring Chef Professional Cheese Grater – Stainless Steel, XL Size, 4 Sid…
Conclusion

Incorporating a variety of cold lunch ideas for kids not only keeps lunchtime interesting but also ensures they get the nutrition they need. With these 30+ recipes, you can mix and match different flavors, keeping your little ones excited about their meals.
Don’t hesitate to get creative with ingredients and let your kids help with preparation. Happy lunch packing!
Note: We aim to provide accurate product links, but some may occasionally expire or become unavailable. If this happens, please search directly on Amazon for the product or a suitable alternative.
This post contains Amazon affiliate links, meaning I may earn a small commission if you purchase through my links, at no extra cost to you.
Frequently Asked Questions
What Are Some Easy Cold Lunch Ideas for Kids That Are Nut-Free?
Looking for tasty and safe options? Nut-free cold lunch ideas for kids can include hummus and veggie wraps, turkey and cheese roll-ups, or pasta salads with a variety of colorful veggies. These meals are not only nutritious but also fun for kids to eat, ensuring they’re satisfied during their school day.
Be sure to check labels and ingredients to keep allergies in mind!
How Can I Prepare Healthy Cold Lunches Ahead of Time?
Meal prepping is a fantastic way to ensure your kids have healthy cold lunches ready to go! Start by choosing easy lunch recipes for kids that can be made in batches, like quinoa salad or chicken wraps. Spend some time on the weekend assembling these meals in portable containers. Don’t forget to include a variety of fruits and veggies for added nutrients and flavor, making lunchtime exciting every day!
What Are Some Quick Lunch Ideas for Busy Mornings?
When mornings are hectic, quick lunch ideas are essential! Consider pre-packaged cheese and cracker sets, yogurt with granola, or wraps that can be made in minutes. You can also use leftovers from dinner to create a quick cold lunch. Remember, the key is to have everything prepped and ready to go, so your kids can grab and eat without any fuss!
Can Cold Lunches Be Healthy and Tasty at the Same Time?
Absolutely! Cold lunches can be both healthy and delicious! Focus on using fresh ingredients and incorporating a variety of food groups. Think about whole grain sandwiches filled with lean proteins and plenty of veggies, or colorful salads with a mix of grains, beans, and fruits. Your kids will love the flavors while benefiting from nutritious options that keep them energized throughout the day!
What Are Some Portable Lunch Options for Kids With Dietary Restrictions?
For kids with dietary restrictions, finding portable lunch options is key! You can create gluten-free wraps using lettuce leaves or rice paper, or make dairy-free pasta salads with olive oil and veggies. Always check labels for allergens and aim for variety with fruits, veggies, and proteins that fit their needs. With a little creativity, you can whip up meals that are both safe and scrumptious!
Related Topics
cold lunch ideas
healthy school lunches
easy lunch recipes
portable lunch options
kid-friendly meals
meal prep
dietary restrictions
quick lunch ideas
back-to-school meals
no-cook lunches
busy mornings
nut-free options