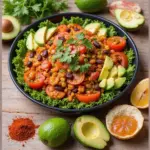
Are you feeling the pinch in your wallet? We’ve all been there, staring at the fridge trying to figure out what to eat for lunch. Budget-friendly meals can seem like a challenge, especially when you want something satisfying and tasty. That’s why I put together this post. I want to help you discover 25 easy and cheap lunch ideas that won’t break the bank but will still keep your taste buds happy.
If you’re a student, a busy parent, or just someone trying to make your grocery dollars stretch, this one’s for you. You care about saving money, but you also want to enjoy what you eat. You don’t want to settle for boring leftovers or bland sandwiches day after day. You deserve better!
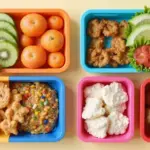
What you’ll find here are meals that are not only affordable but also simple to prepare. Each lunch idea is designed to be quick and hassle-free, perfect for when you’re short on time. Whether you’re at home, at work, or even on the go, these suggestions will suit your busy lifestyle.
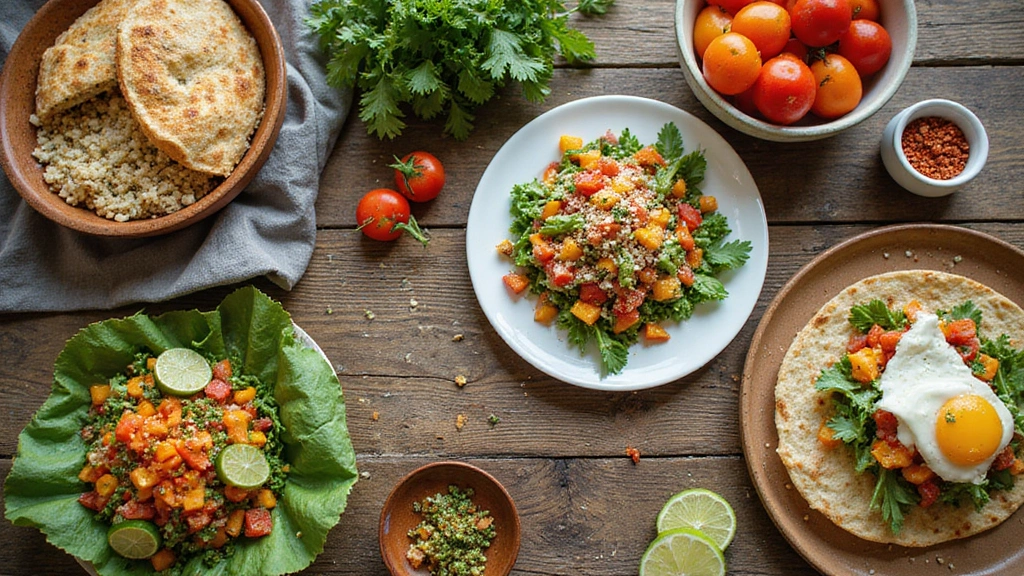
You can expect a mix of flavors and textures that will keep lunchtime exciting. From hearty salads to warm wraps, I’ve got you covered. These meals are nutritious, filling, and most importantly, easy on your budget. So, let’s dive in and make lunchtime something to look forward to!
1. Chickpea Salad Sandwich

Looking for a tasty, budget-friendly lunch option? This Chickpea Salad Sandwich is your answer! Packed with protein and bursting with flavor, it’s the perfect meal for busy days. The creamy filling combines crushed chickpeas, zesty mayo, and smooth avocado, creating a satisfying texture. Plus, you can whip it up in just 10 minutes. Customize it with your favorite spices or extra veggies to make it uniquely yours!
Recipe Overview:
– Servings: 2
– Prep Time: 10 minutes
– Cook Time: 0 minutes
– Total Time: 10 minutes
– Calories: 250 per sandwich
Nutrition Information:
– Protein: 12g
– Carbs: 32g
– Fat: 10g
– Fiber: 8g
Ingredients:
– 1 can chickpeas (15 oz), drained and rinsed
– 2 tbsp mayo (or vegan mayo)
– 1 tbsp mustard
– 1 avocado, mashed
– 1/4 cup diced celery
– Salt and pepper to taste
– Whole grain bread for serving
Instructions:
1. In a bowl, mash the chickpeas with a fork until they are partially smashed. You want some texture!
2. Mix in the mayo, mustard, avocado, and diced celery until everything is well combined.
3. Season your mixture with salt and pepper to taste.
4. Spread the chickpea salad generously on slices of whole grain bread.
5. Enjoy right away or store in the fridge for a quick meal later. It stays good for up to 3 days!
Tips:
– Add a sprinkle of garlic powder for an extra kick!
– For more crunch, toss in diced pickles or bell peppers.
Now you have a delicious, nutritious sandwich that’s easy to make and perfect for lunch at home or packed for work. Enjoy every bite!
Chickpea Salad Sandwich
Editor’s Choice

365 by Whole Foods Market, Unsalted Garbanzo Beans, 15.5 Ounce (Pack of 4)

Hellmann’s Vegan Dressing and Spread Vegan 1 Ct for a Rich, Creamy Plant…

Dave’s Killer Bread 21 Whole Grains & Seeds Thin-Sliced, Whole Grain Org…
2. Veggie Stir-Fry Wraps

Veggie Stir-Fry Wraps are your go-to solution for a quick, healthy meal that won’t break the bank. Perfect for using up leftover vegetables, these wraps are colorful and packed with flavor. Imagine the crunch of fresh bell peppers and carrots, complemented by tender broccoli, all wrapped in a warm whole wheat tortilla. It’s like a rainbow on your plate! You can tailor this dish with whatever veggies you have, making it both fun and budget-friendly.
Ready to make these delicious wraps? Here’s a simple recipe to follow. You’ll be enjoying your homemade lunch in just 20 minutes!
Recipe Overview:
– Servings: 4
– Prep Time: 10 minutes
– Cook Time: 10 minutes
– Total Time: 20 minutes
– Calories: 180 per wrap
Nutrition Information:
– Protein: 6g
– Carbs: 30g
– Fat: 4g
– Fiber: 5g
Ingredients:
– 1 tbsp vegetable oil
– 2 cups mixed veggies (carrots, bell peppers, broccoli)
– 1 tbsp soy sauce
– 4 whole wheat tortillas
– Optional: hot sauce, sesame seeds for garnish
Instructions:
1. Heat the vegetable oil in a skillet over medium heat.
2. Add the mixed veggies and stir-fry for 5–7 minutes until tender.
3. Pour in the soy sauce and stir for another minute.
4. Spoon the stir-fry mixture into each tortilla and roll it up tightly.
5. Slice in half and serve with your favorite hot sauce or sesame seeds on top!
Tips:
– Add tofu or tempeh for extra protein.
– Spice it up! Try adding ginger or garlic for added flavor.
FAQs:
– Want to use frozen vegetables? Go for it! Just remember to thaw them first.
– No tortillas? Serve the stir-fry over rice or quinoa instead.
Now you’ve got a tasty, easy lunch ready to go! Enjoy the crunch and flavor of these Veggie Stir-Fry Wraps while keeping your budget in check. They’re not just good for your wallet, but also great for your health!
Veggie Stir-Fry Wraps
Editor’s Choice

FOOD FOR LIFE Organic Whole Grain Tortillas, 12 OZ

Amazon Grocery, Vegetable Oil, 48 Fl Oz (Previously Happy Belly, Packagi…


Last update on 2026-02-10 / Affiliate links / Images from Amazon Product Advertising API
3. Quinoa and Black Bean Salad

Discover the deliciousness of a Quinoa and Black Bean Salad! This dish is not just healthy; it’s packed with nutrients that keep you satisfied throughout the day. With a medley of flavors from zesty lime and fresh cilantro, it’s a refreshing option that’s perfect for lunch or dinner. Plus, you can make it ahead of time, and it tastes even better the next day!
Recipe Overview:
– Servings: 4
– Prep Time: 15 minutes
– Cook Time: 15 minutes
– Total Time: 30 minutes
– Calories: 220 per serving
Nutrition Information:
– Protein: 10g
– Carbs: 35g
– Fat: 4g
– Fiber: 7g
Ingredients:
– 1 cup quinoa, rinsed
– 2 cups water
– 1 can black beans (15 oz), drained and rinsed
– 1 cup corn (fresh or frozen)
– 1 cup diced tomatoes
– Juice of 1 lime
– 1/4 cup chopped cilantro
– Salt and pepper to taste
Instructions:
1. Rinse the quinoa under cold water. In a pot, combine the quinoa and water, then bring to a boil.
2. Once boiling, reduce the heat, cover, and let it simmer for about 15 minutes until the water is absorbed.
3. In a large bowl, mix the cooked quinoa with black beans, corn, tomatoes, lime juice, and cilantro.
4. Stir everything together and season with salt and pepper to your liking.
5. For the best flavor, chill in the fridge before serving.
Tips:
– Add diced avocado for a creamy texture!
– Store leftovers in the fridge for up to 4 days, making it a great meal prep option.
FAQs:
– Can I swap the quinoa for another grain? Yes! Brown rice or bulgur works well too.
– Want some heat? Toss in chopped jalapeños or a splash of your favorite hot sauce for a spicy kick!
This salad is not only budget-friendly but also versatile and tasty. Enjoy your nutritious meal!
Quinoa and Black Bean Salad
Editor’s Choice

Viva Naturals Organic Quinoa, 24 oz (1.5 lb) – Pre-Washed Whole Grain, P…

50 Pack (100-Piece) 24 oz Meal Prep Containers Reusable with Lids, Sturd…


Last update on 2026-02-10 / Affiliate links / Images from Amazon Product Advertising API
4. Hummus and Veggie Platter

Looking for a quick and affordable lunch? A Hummus and Veggie Platter is your answer! This colorful spread not only satisfies your hunger but also packs a nutritional punch. Pair creamy hummus with crunchy veggies like carrots, cucumbers, and bell peppers. It’s perfect for those hectic days when you don’t have time to cook. You can either whip up homemade hummus or grab your favorite store-bought version. In just minutes, you’ll have a vibrant, healthy meal ready to enjoy!
Here’s how to make your own Hummus and Veggie Platter:
Recipe Overview:
– Servings: 2
– Prep Time: 10 minutes
– Cook Time: 0 minutes
– Total Time: 10 minutes
– Calories: 150 per serving
Nutrition Information:
– Protein: 5g
– Carbs: 18g
– Fat: 7g
– Fiber: 4g
Ingredients:
– 1 cup hummus (store-bought or homemade)
– 1 cup carrot sticks
– 1 cup cucumber slices
– 1 cup bell pepper strips
– Optional: pita bread for dipping
Instructions:
1. Place the hummus in the center of a plate or a nice platter.
2. Arrange the carrot sticks, cucumber slices, and bell pepper strips around the hummus.
3. If you like, add some pita bread for a fun dipping option.
4. Dig in and enjoy your light lunch or snack!
Tips:
– For an extra flavor kick, drizzle olive oil or sprinkle paprika on top of the hummus.
– Get creative with your veggies! Try adding cherry tomatoes or radishes for a different taste.
FAQs:
– Can I make hummus ahead of time? Yes! Hummus keeps well in the fridge for about a week.
– What can I use instead of hummus? Guacamole or tzatziki are great alternatives for a tasty twist.
This platter is not only budget-friendly but also a fantastic way to enjoy fresh produce. It’s ideal for a light lunch at home or a quick snack on the go. Set it up and share it with friends for a fun, healthy eating experience!
Hummus and Veggie Platter
Editor’s Choice

Ninja Food Processor, Professional Plus, 1000 Peak Watts, 4 Functions fo…


Last update on 2026-02-10 / Affiliate links / Images from Amazon Product Advertising API
5. Spinach and Feta Stuffed Peppers

Looking for a delicious and budget-friendly lunch? Spinach and Feta Stuffed Peppers might be your new go-to! These vibrant bell peppers are not only eye-catching but also packed with nutrients. The combination of sautéed spinach, creamy feta, and hearty brown rice creates a satisfying meal that is sure to please your taste buds. Plus, you can prepare them in advance, making lunchtime a breeze!
Recipe Overview:
– Servings: 4
– Prep Time: 15 minutes
– Cook Time: 30 minutes
– Total Time: 45 minutes
– Calories: 240 per stuffed pepper
Nutrition Information:
– Protein: 8g
– Carbs: 35g
– Fat: 10g
– Fiber: 5g
Ingredients:
– 4 bell peppers (any color you like)
– 2 cups fresh spinach
– 1 cup cooked brown rice
– 1/2 cup crumbled feta cheese
– 1 tbsp olive oil
– Salt and pepper to taste
Instructions:
1. Preheat your oven to 375°F (190°C).
2. Cut the tops off the bell peppers and scoop out the seeds.
3. In a skillet, heat the olive oil over medium heat. Add the spinach and sauté until it’s wilted.
4. In a mixing bowl, combine the cooked brown rice, sautéed spinach, and crumbled feta.
5. Fill each bell pepper with the mixture, packing it in well.
6. Place the stuffed peppers in a baking dish. Cover with foil and bake for 30 minutes.
Tips:
– Add chopped olives or sun-dried tomatoes for a flavor boost.
– You can make these ahead of time and keep them in the fridge for quick lunches!
FAQs:
– Can I freeze stuffed peppers? Yes! Just let them cool completely before freezing.
– What pairs well with them? A fresh salad makes a great side dish!
These stuffed peppers are a fantastic way to enjoy a wholesome meal without breaking the bank. Enjoy the ease of making a nutritious lunch that’s both colorful and filling!
Stock up on spinach and feta and you’ve got a week of easy and cheap lunch ideas. These stuffed peppers prove practical meals can taste amazing—prep once, eat twice, and stay budget-smart without sacrificing flavor.
Spinach and Feta Stuffed Peppers
Editor’s Choice
50 Pack (100-Piece) 24 oz Meal Prep Containers Reusable with Lids, Sturd…

Atlas 1 LT Cold Press Extra Virgin Olive Oil in Glass Bottle, Polyphenol…


Last update on 2026-02-10 / Affiliate links / Images from Amazon Product Advertising API
6. Caprese Pasta Salad

Picture this: a light, refreshing lunch that bursts with flavor and is super easy to make. That’s exactly what you get with a Caprese Pasta Salad! This delightful dish combines chewy pasta, creamy mozzarella, juicy cherry tomatoes, and fragrant basil, all drizzled with tangy balsamic glaze. It’s not just delicious; it’s perfect for meal prep. You can whip it up in about 20 minutes and store it in the fridge for busy days ahead.
Let’s get into the details! Preparing this salad is a breeze. Simply cook your pasta, toss in the fresh ingredients, and you’re set. Enjoy it chilled or at room temperature. This dish is versatile and can be a staple in your weekly meal rotation.
Recipe Overview:
– Servings: 4
– Prep Time: 10 minutes
– Cook Time: 10 minutes
– Total Time: 20 minutes
– Calories: 300 per serving
Nutrition Information:
– Protein: 12g
– Carbs: 40g
– Fat: 12g
– Fiber: 3g
Ingredients:
– 8 oz pasta (your choice)
– 1 cup cherry tomatoes, halved
– 1 cup fresh mozzarella balls
– 1/4 cup fresh basil leaves, torn
– 2 tbsp balsamic glaze
– Salt and pepper to taste
Instructions:
1. Cook the pasta according to the package directions. Drain and let it cool.
2. In a large mixing bowl, combine the pasta, cherry tomatoes, mozzarella, and basil.
3. Drizzle with balsamic glaze, then sprinkle salt and pepper over the top.
4. Toss everything gently until well mixed.
5. Serve chilled or let sit for a bit to enjoy at room temperature.
Tips:
– Add a splash of olive oil for extra flavor.
– This salad keeps well in the fridge for about 3 days, making it a great make-ahead option.
FAQs:
– Can I switch up the cheese? Absolutely! Goat cheese or feta can add a nice twist.
– Want it gluten-free? Just use gluten-free pasta and you’re good to go!
Enjoy crafting this simple yet satisfying Caprese Pasta Salad for your next lunch. It’s budget-friendly and a hit for any occasion!
For easy and cheap lunch ideas, Caprese Pasta Salad is a total win: ready in about 20 minutes, stores beautifully for the week, and you still get bright basil, juicy tomatoes, and creamy mozzarella. Plus, it’s perfect for meal prep on busy days.
Caprese Pasta Salad
Editor’s Choice
50 Pack (100-Piece) 24 oz Meal Prep Containers Reusable with Lids, Sturd…

365 by Whole Foods Market, Organic Balsamic Glaze, 8.45 Fl Oz (Pack of 2)

7. Lentil Soup

Lentil soup is a cozy and nutritious option that fits perfectly into your budget. This dish warms you up while providing a solid dose of protein and fiber. Lentils cook quickly, and the broth can be flavored with your favorite herbs and spices, making each bowl a delight. Plus, it freezes beautifully, so you can prepare a large batch and enjoy it all week long.
Here’s a simple recipe to get you started:
Recipe Overview:
– Servings: 6
– Prep Time: 10 minutes
– Cook Time: 30 minutes
– Total Time: 40 minutes
– Calories: 210 per serving
Nutrition Information:
– Protein: 15g
– Carbs: 36g
– Fat: 4g
– Fiber: 15g
Ingredients:
– 1 cup lentils, rinsed
– 1 onion, diced
– 2 carrots, diced
– 2 celery stalks, diced
– 4 cups vegetable broth
– 1 tsp cumin
– Salt and pepper to taste
Instructions:
1. In a large pot, sauté the onion, carrots, and celery until softened.
2. Add the rinsed lentils, vegetable broth, and cumin. Bring to a boil.
3. Lower the heat and let it simmer for about 30 minutes, or until the lentils are tender.
4. Season with salt and pepper to taste.
5. Serve hot, and enjoy with a slice of bread if you like!
Tips:
– Add a handful of spinach or kale for extra nutrients!
– Use an immersion blender to create a creamier texture if you prefer.
FAQs:
– Can I swap lentils for other legumes? Yes! Chickpeas or black beans work well too.
– How long does it last? You can keep the soup in the fridge for about a week, making it a great meal prep option.
This lentil soup is not just easy to make; it also brings comfort and satisfaction to your lunch table without breaking the bank. Enjoy this hearty meal any day of the week!
Lentil Soup
Editor’s Choice

Amazon Grocery, Lentils, Non GMO, Excellent Source of Fiber, 16 Oz (Prev…

KitchenAid Variable Speed Corded Hand Blender KHBV53, Contour Silver

COLLEGE INN 100% Natural Garden Vegetable Broth, 32 oz Carton (Pack of 6)


Last update on 2026-02-10 / Affiliate links / Images from Amazon Product Advertising API
8. Zucchini Noodles with Pesto

Zucchini Noodles with Pesto is the perfect lunch for those busy days when you want something quick and healthy. This dish combines fresh, spiralized zucchini with vibrant pesto, creating a colorful and flavorful meal. Whether you whip up your own pesto or grab a jar from the store, you’ll enjoy a delightful burst of taste in every bite. Plus, this low-carb option takes just about 10 minutes to prepare, making it a go-to for lunch breaks or dinner.
Recipe Overview:
– Servings: 2
– Prep Time: 5 minutes
– Cook Time: 5 minutes
– Total Time: 10 minutes
– Calories: 150 per serving
Nutrition Information:
– Protein: 5g
– Carbs: 8g
– Fat: 10g
– Fiber: 2g
Ingredients:
– 2 medium zucchinis, spiralized
– 1/2 cup pesto (store-bought or homemade)
– Salt and pepper to taste
– Optional: cherry tomatoes for garnish
Instructions:
1. Heat a skillet over medium heat. Add the spiralized zucchini and sauté for about 5 minutes, just until it softens slightly.
2. Remove the skillet from the heat and stir in the pesto, tossing to coat the noodles evenly.
3. Season with salt and pepper to taste.
4. Serve immediately, garnished with cherry tomatoes if you like.
Tips:
– Use fresh basil for a brighter flavor!
– Avoid overcooking the zucchini to keep it crunchy.
FAQs:
– Can I make this vegan? Yes! Most pestos are dairy-free, or you can blend your own using nuts and herbs.
– What if I don’t have a spiralizer? No worries! A vegetable peeler can work just fine for making thin strips.
This dish not only satisfies your hunger but also keeps your meal prep simple and affordable. If you’re looking for a fresh lunch idea without breaking the bank, Zucchini Noodles with Pesto is your answer! Enjoy this tasty meal that feels light yet fulfilling, and don’t be afraid to get creative with your toppings.
Zucchini Noodles with Pesto
Editor’s Choice

Brieftons 5-Blade Vegetable Spiralizer: Strongest-Heaviest Spiral Slicer…


CAROTE Nonstick Frying Pan Skillet,Non Stick Granite Fry Pan Egg Pan Ome…


Last update on 2026-02-10 / Affiliate links / Images from Amazon Product Advertising API
9. Vegetable Fried Rice

Vegetable Fried Rice is your go-to solution for a quick, tasty meal that won’t break the bank. It’s a perfect way to use leftover rice and clear out your fridge. With just a few fresh veggies and some soy sauce, you can whip up a comforting dish in no time. Imagine the delightful aroma of stir-fried vegetables filling your kitchen as you create a simple yet satisfying lunch!
Here’s a straightforward recipe to get you started:
Recipe Overview:
– Servings: 4
– Prep Time: 10 minutes
– Cook Time: 10 minutes
– Total Time: 20 minutes
– Calories: 250 per serving
Nutrition Information:
– Protein: 6g
– Carbs: 42g
– Fat: 5g
– Fiber: 3g
Ingredients:
– 4 cups cooked rice (day-old works best)
– 1 cup mixed vegetables (like peas, carrots, and corn)
– 2 eggs, lightly beaten (optional for non-vegans)
– 2 tbsp soy sauce
– 1 tbsp vegetable oil
– Chopped green onions for garnish
Instructions:
1. Heat the vegetable oil in a large skillet over medium-high heat.
2. Add your mixed vegetables and stir-fry for about 2-3 minutes until they soften.
3. Push the veggies to the side and pour in the beaten eggs, scrambling until fully cooked.
4. Mix in the cooked rice and soy sauce, stirring everything together until heated through.
5. Cook for an additional 2-3 minutes. Garnish with chopped green onions before serving.
Tips:
– For a flavor boost, add minced garlic or ginger!
– This dish is incredibly flexible—feel free to swap in any veggies you have on hand.
FAQs:
– Can I make it vegan? Yes! Just skip the eggs or use tofu instead.
– How do I store leftovers? Keep them in an airtight container in the fridge for up to 3 days.
Enjoy your homemade Vegetable Fried Rice! It’s not just a meal; it’s a way to make the most of what you have while keeping your budget intact. Perfect for busy days when you need something quick and satisfying!
Vegetable Fried Rice
Editor’s Choice
CAROTE Nonstick Frying Pan Skillet,Non Stick Granite Fry Pan Egg Pan Ome…

Kikkoman Less Sodium Soy Sauce Dispenser – 5 oz.

Ankou Airtight Food Storage Container Sets with Lids 6Pcs Pop Containers…
10. Greek Yogurt Parfait

Have you ever needed a quick and healthy lunch that won’t break the bank? Look no further than a Greek Yogurt Parfait! This dish combines creamy Greek yogurt, fresh fruits, and crunchy granola. Not only is it simple to prepare, but it also looks beautiful in a bowl or glass. You can adjust the sweetness with a drizzle of honey or maple syrup, making it a versatile choice to please any palate.
Creating a Greek Yogurt Parfait takes just a few minutes. You can easily swap in seasonal fruits to keep things fresh and exciting. Picture vibrant strawberries, blueberries, and raspberries layered together, topped with a sprinkle of granola. It’s not just about taste; it’s about enjoying a delightful meal that also nourishes your body.
Recipe Overview:
– Servings: 2
– Prep Time: 5 minutes
– Cook Time: 0 minutes
– Total Time: 5 minutes
– Calories: 200 per serving
Nutrition Information:
– Protein: 10g
– Carbs: 30g
– Fat: 5g
– Fiber: 4g
Ingredients:
– 2 cups Greek yogurt
– 1 cup mixed berries (strawberries, blueberries, raspberries)
– 1/2 cup granola
– Honey or maple syrup to drizzle
Instructions:
1. Start by placing half of the Greek yogurt at the bottom of a bowl or glass.
2. Next, add a layer of your mixed berries followed by a handful of granola.
3. Repeat these layers until you’ve used all the ingredients.
4. Finish with a drizzle of honey or syrup on top. Enjoy right away for the best texture!
Tips:
– Prepare it ahead of time and store it in the fridge for a quick grab-and-go option!
– Experiment with different fruits and nuts to find your favorite combination.
FAQs:
– Can I use non-dairy yogurt? Yes! Almond or coconut yogurt works beautifully.
– What if I don’t have granola? Oats or a mix of nuts can be great substitutes.
With this quick and affordable lunch idea, you can enjoy a delicious meal that fits your budget. Perfect for busy days or as a healthy snack, a Greek Yogurt Parfait is sure to satisfy your hunger and your taste buds!
Greek Yogurt Parfait
Editor’s Choice

FAGE Total Greek Yogurt, 0% Nonfat, Plain, 32 oz

Nature Valley Protein Granola, Oats and Honey Granola, Resealable Snack …

VERONES 10 Pack Glass Meal Prep Containers, Airtight Glass Lunch Contain…
11. Sweet Potato and Black Bean Bowl

This Sweet Potato and Black Bean Bowl is a delicious and filling lunch option, perfect for anyone on a budget. Imagine warm, roasted sweet potatoes paired with hearty black beans and creamy avocado, all finished with a zesty squeeze of lime. It’s a meal that not only satisfies your hunger but also packs a nutritional punch. Best of all, you can prepare a big batch ahead of time, making it an ideal choice for meal prep during a busy week.
Recipe Overview:
– Servings: 4
– Prep Time: 15 minutes
– Cook Time: 30 minutes
– Total Time: 45 minutes
– Calories: 350 per bowl
Nutrition Information:
– Protein: 12g
– Carbohydrates: 55g
– Fat: 10g
– Fiber: 15g
Ingredients:
– 2 large sweet potatoes, diced
– 1 can black beans (15 oz), drained and rinsed
– 1 avocado, sliced
– Juice of 1 lime
– 1 tbsp olive oil
– Salt and pepper to taste
Instructions:
1. Preheat your oven to 425°F (220°C). Toss the diced sweet potatoes with olive oil, salt, and pepper.
2. Spread the sweet potatoes on a baking sheet and roast for about 25-30 minutes, until they’re tender.
3. In bowls, layer the roasted sweet potatoes, black beans, and avocado slices.
4. Finish with a generous drizzle of lime juice before serving.
Tips:
– Add fresh cilantro for an extra burst of flavor!
– Customize your bowl by mixing in corn or a dollop of salsa for variety.
FAQs:
– Can I use frozen sweet potatoes? Yes, just adjust the cooking time as needed.
– How long can I store this bowl? It keeps well in the fridge for up to 4 days.
This bowl not only looks vibrant, but it also tastes amazing and is easy on your wallet. You can enjoy a nutritious meal that feels indulgent without spending much. Dive into this delightful dish and enjoy the simple pleasures of healthy eating!
Sweet Potato and Black Bean Bowl
Editor’s Choice
50 Pack (100-Piece) 24 oz Meal Prep Containers Reusable with Lids, Sturd…

SupMaKin Safe Mandoline Slicer for Kitchen, Potato Slicer for Chips, Veg…


Last update on 2026-02-10 / Affiliate links / Images from Amazon Product Advertising API
12. Tomato and Mozzarella Salad

This Tomato and Mozzarella Salad is a delightful dish that looks and tastes gourmet, yet comes together in just minutes. Imagine juicy, vine-ripened tomatoes paired with soft, creamy mozzarella. Add a sprinkle of fresh basil and a drizzle of olive oil, and you have a salad that bursts with flavor. It’s light, refreshing, and perfect for a quick lunch that won’t break the bank.
To make this dish, you only need a few simple ingredients. It’s a great example of how you can enjoy a fancy meal without spending a lot. This salad is not only quick to prepare but also a healthy choice, making it a go-to for busy days when you need something satisfying yet easy.
Recipe Overview:
– Servings: 2
– Prep Time: 10 minutes
– Cook Time: 0 minutes
– Total Time: 10 minutes
– Calories: 250 per serving
Nutrition Information:
– Protein: 10g
– Carbs: 7g
– Fat: 20g
– Fiber: 1g
Ingredients:
– 2 large tomatoes, sliced
– 1 cup fresh mozzarella, sliced
– Fresh basil leaves
– 2 tbsp olive oil
– Salt and pepper to taste
Instructions:
1. On a plate, layer the sliced tomatoes and mozzarella alternately.
2. Insert fresh basil leaves between the layers.
3. Drizzle olive oil over the top, then sprinkle with salt and pepper.
4. Serve immediately for the best flavor.
Tips:
– Use heirloom tomatoes for a rainbow of colors and flavors!
– Enjoy this salad fresh, but it can last a day in the fridge.
FAQs:
– Add avocado or olives for a twist!
– Swap fresh mozzarella with shredded mozzarella or feta if needed.
This simple salad not only delights your taste buds but also fits perfectly into a budget-friendly meal plan. Enjoy it as a light lunch or pair it with crusty bread for a more filling option. You’ll feel satisfied and energized, ready to tackle the day!
Tomato and Mozzarella Salad
Editor’s Choice

ORGANIC VALLEY Organic Mozzarella String Cheese, 8 OZ

Bellucci Premium Olive Oil, Extra Virgin Organic, 16.9 fl oz

Set of 2 Basil Plants Live in 4 Inc Potted, Live Sweet Basil Plants, Bas…
13. Cauliflower Tacos

Cauliflower tacos are a delicious and trendy option for lunch or dinner, especially when you’re on a budget. These tasty treats swap traditional meat for perfectly roasted cauliflower, making them both satisfying and healthy. With a sprinkle of spices and some fresh toppings, you can whip up a meal that’s sure to please everyone at the table.
Imagine biting into a warm corn tortilla filled with golden, seasoned cauliflower. You can top it with fresh salsa, creamy avocado, and maybe a sprinkle of cilantro. This meal is not only flavorful, but it’s also vegan and gluten-free, making it a versatile choice for various dietary needs.
Let’s get into how to make these scrumptious tacos!
Recipe Overview:
– Servings: 2
– Prep Time: 10 minutes
– Cook Time: 20 minutes
– Total Time: 30 minutes
– Calories: 180 per taco
Nutrition Information:
– Protein: 4g
– Carbs: 30g
– Fat: 8g
– Fiber: 5g
Ingredients:
– 1 small head of cauliflower, cut into florets
– 2 tsp chili powder
– 1 tsp cumin
– 1 tbsp olive oil
– Corn tortillas
– Toppings: salsa, avocado, cilantro
Instructions:
1. Preheat your oven to 425°F (220°C). Toss the cauliflower florets in olive oil, chili powder, and cumin until well coated.
2. Spread the cauliflower on a baking sheet and roast for about 20 minutes, until golden and tender.
3. While the cauliflower is roasting, warm the corn tortillas in a skillet or microwave.
4. Once the cauliflower is ready, fill the tortillas with the roasted florets and top with salsa and avocado.
5. Serve your tacos warm and enjoy!
Tips:
– Add jalapeños for a spicy kick!
– These tacos are great for meal prep; keep toppings separate until serving.
FAQs:
– Can I use frozen cauliflower? Yes, but make sure to thaw it first.
– What else can I add? Consider adding slaw or pickled onions for extra crunch!
These cauliflower tacos are not just a meal; they’re a tasty way to eat healthy without breaking the bank. Enjoy making them and savor the deliciousness!
Cauliflower Tacos
Editor’s Choice


Guerrero White Corn Tortillas, Gluten Free, Trans Fat Free, Small Soft T…

Soeos Premium Sichuan Chili Powder 8oz(226g),All Natural,Asian Chili Pow…
14. Oatmeal with Fruits and Nuts

Warm up your day with a comforting bowl of oatmeal topped with fruits and nuts. This meal isn’t just for breakfast; it’s a cozy option that works perfectly for lunch too. Imagine creamy oats, sweet banana slices, crunchy nuts, and a drizzle of honey all mixed together. Not only does it satisfy your hunger, but it’s also easy on the wallet. Plus, you can change it up based on what you have in your pantry, making it a versatile choice for any budget.
Ready to whip up this delicious dish? Here’s how to do it:
Recipe Overview:
– Servings: 2
– Prep Time: 5 minutes
– Cook Time: 10 minutes
– Total Time: 15 minutes
– Calories: 250 per serving
Nutrition Information:
– Protein: 8g
– Carbs: 45g
– Fat: 6g
– Fiber: 7g
Ingredients:
– 1 cup rolled oats
– 2 cups water or milk
– 1/2 banana, sliced
– 1/4 cup mixed nuts (like almonds and walnuts)
– Honey for drizzling
Instructions:
1. In a pot, combine rolled oats and water or milk. Bring to a boil.
2. Lower the heat and let it simmer for 5 to 7 minutes, stirring occasionally until thickened.
3. Pour the oats into bowls and top with banana slices, mixed nuts, and a drizzle of honey.
4. Serve warm and enjoy every bite!
Tips:
– Use almond milk for a creamier texture!
– Sprinkle on some cinnamon or nutmeg for added flavor.
FAQs:
– Can I prepare this overnight? Yes! Just make it the night before and reheat it in the morning for a quick meal.
– What fruits should I use? Try berries, chopped apples, or peaches for a tasty twist!
This oatmeal bowl is not just filling; it’s a warm hug in a dish. Perfect for busy days or when you want something simple yet delicious. Enjoy the benefits of a nutritious meal without breaking the bank!
Oatmeal with Fruits and Nuts
Editor’s Choice

Bob’s Red Mill Organic Old Fashioned Rolled Oats, 32oz (Pack of 4) – Non…

PLANTERS Deluxe Mixed Nuts, Cashews, Almonds, Pecans, Pistachios, Hazeln…

Nate’s 100% Pure, Raw & Unfiltered Honey – Award-Winning Taste, 32oz. Sq…
15. Pea and Mint Soup

Craving a light and refreshing lunch that won’t break the bank? Look no further than Pea and Mint Soup! This delightful dish combines sweet peas and fresh mint for a burst of flavor that’s both nutritious and satisfying. Whether you enjoy it hot or chilled, this soup is a quick and easy option, ready in just 20 minutes. It’s a smart way to use up those frozen peas sitting in your freezer, making it perfect for budget-friendly meals.
Recipe Overview:
– Servings: 4
– Prep Time: 5 minutes
– Cook Time: 15 minutes
– Total Time: 20 minutes
– Calories: 150 per serving
Nutrition Information:
– Protein: 5g
– Carbs: 25g
– Fat: 4g
– Fiber: 5g
Ingredients:
– 4 cups frozen peas
– 1 onion, chopped
– 2 cups vegetable broth
– 1/2 cup fresh mint leaves
– Salt and pepper to taste
Instructions:
1. Start by sautéing the chopped onion in a pot until it’s soft and translucent.
2. Next, add the frozen peas and vegetable broth, bringing everything to a boil. Let it cook for about 5 minutes.
3. Stir in fresh mint leaves and season with salt and pepper to your taste.
4. Use an immersion blender to purée the soup until it’s smooth and creamy.
5. Serve it warm or chill it in the fridge for a refreshing cold soup!
Tips:
– Garnish your soup with extra mint leaves for a pop of color and flavor!
– This soup keeps well in the fridge for up to 3 days, making it great for meal prep.
FAQs:
– Can I use fresh peas? Yes, just cook them a little longer until tender.
– How can I make it creamier? Add a splash of cream or coconut milk for a richer texture!
This Pea and Mint Soup is not only healthy and quick to make but also a dish that’s bound to impress. Enjoy the vibrant flavors and the ease of preparation, making lunchtime a breeze on a budget!
Pea and Mint Soup
Editor’s Choice

Immersion Blender Handheld Corded Hand Blenders Set 1100W, Trigger Varia…

365 by Whole Foods Market, Organic Low Sodium Vegetable Broth, 32 Fl Oz

Sadaf Mint Leaves Cut – Dried mint leaves cut and sifted – Kosher and Ha…
16. Cucumber and Avocado Sushi Rolls

Looking for a fun and budget-friendly lunch idea? Try Cucumber and Avocado Sushi Rolls! These rolls are not only simple to make, but they also bring a fresh taste to your midday meal. Perfect for beginners, you can whip them up in just a few minutes. The combination of crunchy cucumber and creamy avocado makes each bite satisfying and delicious.
Imagine laying a nori sheet flat, spreading fluffy sushi rice, and adding crisp cucumber sticks alongside ripe avocado slices. Then, you roll it all up tightly for a beautiful sushi masterpiece. You’ll love how easy it is to impress your friends or family with this delightful dish!
Recipe Overview:
– Servings: 4
– Prep Time: 15 minutes
– Cook Time: 10 minutes
– Total Time: 25 minutes
– Calories: 180 per roll
Nutrition Information:
– Protein: 4g
– Carbs: 30g
– Fat: 6g
– Fiber: 4g
Ingredients:
– 1 cup sushi rice, cooked
– 4 sheets nori
– 1 cucumber, julienned
– 1 avocado, sliced
– Soy sauce for dipping
Instructions:
1. Lay a nori sheet on a bamboo sushi mat.
2. Spread a thin layer of sushi rice, leaving a 1-inch border at the top.
3. Place the cucumber and avocado in the center of the rice.
4. Roll the sushi tightly from the bottom using the mat to help you. Slice into bite-sized pieces.
5. Serve with soy sauce for dipping, and enjoy!
Tips:
– Add sesame seeds for a nutty flavor and crunch!
– Experiment with fillings like carrots or bell peppers for extra color and taste.
FAQs:
– Can I use brown rice? Yes, just follow the package instructions for cooking.
– How do I store leftovers? Place them in an airtight container in the fridge for freshness.
These sushi rolls are not only easy on your wallet, but they also make lunchtime feel special. You’ll find them perfect for a quick meal at home or a packed lunch on the go!
Cucumber and Avocado Sushi Rolls
Editor’s Choice

Asian Kitchen White Sona Masoori Aged Rice 4-Pound Bag, 4lbs (1.81kg) Sh…

Gimme Seaweed Sushi Nori Premium Organic Roasted Seaweed Sheets, Keto, V…
17. Veggie Omelette

A Veggie Omelette is your go-to solution when hunger strikes but you’re short on time and cash. It’s quick, tasty, and packed with protein. Picture fluffy eggs mingling with colorful veggies like vibrant bell peppers, fresh spinach, and zesty onions. In just about 10 minutes, you can whip up this nutritious meal. Want to jazz it up? Add a sprinkle of cheese or some fresh herbs for an extra flavor kick. Pair it with whole grain toast for a satisfying lunch.
Recipe Overview:
– Servings: 1
– Prep Time: 5 minutes
– Cook Time: 5 minutes
– Total Time: 10 minutes
– Calories: 220 per omelette
Nutrition Information:
– Protein: 15g
– Carbs: 5g
– Fat: 15g
– Fiber: 2g
Ingredients:
– 2 eggs
– 1/4 cup diced vegetables (bell peppers, onions, spinach)
– 1 tbsp olive oil
– Salt and pepper to taste
Instructions:
1. Heat olive oil in a skillet over medium heat.
2. In a bowl, whisk together the eggs, salt, and pepper.
3. Pour the egg mixture into the skillet and top with the diced vegetables.
4. Cook for about 3-4 minutes until the edges set. Then fold the omelette in half and serve.
5. Enjoy it with a slice of whole grain bread or a fresh side salad!
Tips for Perfection:
– Add cheese to make your omelette creamy and delicious!
– Use a splash of milk in the eggs for an even fluffier texture.
FAQs:
– Can I make it vegan? Absolutely! Just swap eggs for chickpea flour.
– What other fillings can I use? Feel free to experiment with mushrooms or zucchini for a fun twist.
This Veggie Omelette is not just a meal; it’s a canvas for your creativity. Get cooking and enjoy a healthy lunch without breaking the bank!
Veggie Omelette
Editor’s Choice
CAROTE Nonstick Frying Pan Skillet,Non Stick Granite Fry Pan Egg Pan Ome…

Fullstar The Original Pro Chopper – Vegetable Chopper and Spiralizer, Fo…

Stainless Steel Egg Whisk, Hand Push Rotary Whisk Blender, Versatile Mil…
18. Roasted Garlic and Tomato Pasta

Craving something delicious yet wallet-friendly for lunch? Look no further than Roasted Garlic and Tomato Pasta! This dish is not only quick to make but also bursts with flavor. Roasting tomatoes with garlic enhances their natural sweetness, creating a rich sauce that perfectly coats your favorite pasta. You can easily customize this meal with herbs you love, making it a personal favorite you’ll want to repeat.
Recipe Overview:
– Servings: 4
– Prep Time: 10 minutes
– Cook Time: 20 minutes
– Total Time: 30 minutes
– Calories: 320 per serving
Nutrition Information:
– Protein: 12g
– Carbs: 50g
– Fat: 8g
– Fiber: 3g
Ingredients:
– 12 oz pasta (spaghetti or penne)
– 2 cups cherry tomatoes
– 5 cloves garlic, peeled
– 2 tbsp olive oil
– Fresh basil for garnish
– Salt and pepper to taste
Instructions:
1. Preheat your oven to 400°F (200°C).
2. Spread the cherry tomatoes and garlic on a baking sheet. Drizzle them with olive oil, then sprinkle with salt and pepper.
3. Roast for 15-20 minutes until the tomatoes burst and turn slightly caramelized.
4. As the tomatoes roast, cook the pasta according to the package instructions until al dente.
5. Combine the roasted tomatoes and garlic with the cooked pasta. Toss in some fresh basil before serving.
Tips:
– Choose whole wheat pasta for an extra fiber boost!
– Enjoy this dish fresh, but it can be stored in the fridge for three days.
FAQs:
– Can I use regular tomatoes? Yes, just chop them into quarters.
– What if I don’t have fresh basil? Dried herbs will work just fine!
This simple yet satisfying meal is perfect for busy lunches or a quick dinner. With just a few ingredients, you’ll whip up something delightful that everyone will love!
Roasted Garlic and Tomato Pasta
Editor’s Choice

Pompeian Robust Extra Virgin Olive Oil, Contains Polyphenols, First Cold…

365 by Whole Foods Market, Organic Whole Wheat Penne Rigate, 16 Ounce

Zulay Kitchen Premium Garlic Press Set – Rust Proof & Dishwasher Safe Pr…
19. Mixed Bean Salad

Brighten up your lunch with a delicious Mixed Bean Salad! This colorful dish is not only packed with protein but is also super refreshing and satisfying. You can whip it up in just 10 minutes, making it the perfect option for busy days. Plus, it stores well in the fridge for up to a week, so you can prepare it ahead of time and enjoy it throughout the week!
Imagine biting into a mix of kidney beans, chickpeas, and crisp green beans, all tossed in a zesty lemon vinaigrette. It’s a feast for your taste buds that keeps you full and energized. This salad is perfect for lunch at home, work, or even a picnic.
Recipe Overview:
– Servings: 4
– Prep Time: 10 minutes
– Cook Time: 0 minutes
– Total Time: 10 minutes
– Calories: 220 per serving
Nutrition Information:
– Protein: 12g
– Carbs: 30g
– Fat: 5g
– Fiber: 8g
Ingredients:
– 1 can kidney beans (15 oz), drained and rinsed
– 1 can chickpeas (15 oz), drained and rinsed
– 1 cup green beans, trimmed and chopped
– 1/4 cup chopped red onion
– 1/4 cup olive oil
– Juice of 1 lemon
– Salt and pepper to taste
Instructions:
1. In a large bowl, mix the kidney beans, chickpeas, green beans, and red onion.
2. In a separate bowl, whisk together the olive oil, lemon juice, salt, and pepper.
3. Pour the dressing over the beans and toss everything together until well coated.
4. Chill in the fridge for a bit, or serve right away at room temperature.
Tips:
– Add some chopped bell peppers for an extra crunch!
– Feel free to switch up the beans with your favorites, like black beans or pinto beans.
FAQs:
– Can I add other ingredients? Yes! Corn or diced avocado can elevate the flavor.
– How long does it last? This salad will keep fresh in the fridge for about a week.
With this Mixed Bean Salad, you’ll have a vibrant lunch that’s easy to prepare and pleasing to the palate. Enjoy the balance of flavors and the nourishment it brings!
Mixed Bean Salad
Editor’s Choice

Bento Box Adult Lunch Box, Containers for Adults Men Women with 4 Compar…

OXO Good Grips Salad Spinner | Lettuce Spinner | Fruit Washer | Fruit Wa…
20. Smashed Avocado Toast

Smashed Avocado Toast is a fantastic choice for lunch, and it’s not just a breakfast trend! This creamy delight combines ripe avocado with whole-grain toast, creating a quick and satisfying meal. You can easily customize it with your favorite toppings like juicy tomatoes, crunchy radishes, or a sprinkle of tangy feta cheese. It’s a simple dish that packs in flavor and nutrition, perfect for a busy day.
Here’s how to whip up your own Smashed Avocado Toast in no time:
Recipe Overview:
– Servings: 2
– Prep Time: 5 minutes
– Cook Time: 5 minutes
– Total Time: 10 minutes
– Calories: 250 per serving
Nutrition Information:
– Protein: 6g
– Carbs: 30g
– Fat: 12g
– Fiber: 6g
Ingredients:
– 1 ripe avocado
– 4 slices of whole-grain bread
– Salt and pepper to taste
– Optional toppings: cherry tomatoes, radishes, feta cheese
Instructions:
1. Toast the bread to your desired crispness.
2. In a bowl, mash the ripe avocado and mix in salt and pepper.
3. Spread the avocado mash generously on the toasted bread.
4. Top with your favorite extras like tomatoes or radishes.
5. Serve immediately and enjoy the fresh flavors!
Tips:
– Drizzle olive oil over the top for added richness!
– Sprinkle crushed red pepper flakes for a spicy kick.
FAQs:
– Is it better to use ripe avocados? Yes! Ripe avocados are creamy and easy to spread.
– Can I prepare it ahead of time? For the best taste, enjoy it fresh to prevent browning.
Smashed Avocado Toast is not only delicious but also budget-friendly. It’s the perfect lunch that feels indulgent without emptying your wallet. This dish is a great way to ensure you get healthy fats and fiber while keeping your lunch exciting!
Smashed Avocado Toast
Editor’s Choice

Nature’s Own Perfectly Crafted Multigrain Bread, Thick Sliced Non-GMO Sa…

Pompeian USDA Certified Organic Extra Virgin Olive Oil Non-Stick Cooking…


Last update on 2026-02-10 / Affiliate links / Images from Amazon Product Advertising API
21. Cabbage and Carrot Slaw

Cabbage and Carrot Slaw is a vibrant, crunchy dish that can brighten up any meal. It’s perfect as a side or a light lunch all by itself. The mix of shredded cabbage and carrots gives you a satisfying crunch, while the tangy dressing adds a refreshing zing. This slaw is not only low in calories but also a fantastic way to pack in some veggies without feeling heavy. Plus, it keeps well in the fridge, making it a great choice for meal prep!
Here’s how you can whip it up in no time. This recipe serves four and takes just about 10 minutes to prepare. You can enjoy it right away or let the flavors meld together in the fridge for a bit.
Recipe Overview:
– Servings: 4
– Prep Time: 10 minutes
– Cook Time: 0 minutes
– Total Time: 10 minutes
– Calories: 80 per serving
Ingredients:
– 2 cups shredded cabbage
– 1 cup shredded carrots
– 1/4 cup mayonnaise or yogurt
– 1 tablespoon apple cider vinegar
– Salt and pepper to taste
Instructions:
1. In a large bowl, mix the shredded cabbage and carrots together.
2. In a separate bowl, whisk the mayo (or yogurt), vinegar, salt, and pepper until smooth.
3. Pour the dressing over the cabbage and carrots, then toss everything to combine.
4. For the best flavor, refrigerate the slaw for at least 30 minutes before serving.
Quick Tips:
– Add chopped apples or raisins for a touch of sweetness!
– Use this slaw as a topping on sandwiches or tacos for extra crunch!
FAQs:
– Can I make it vegan? Absolutely! Just use vegan mayo or yogurt.
– How long does it last? This slaw can stay fresh in the fridge for about a week.
This slaw not only tastes great but also helps you stay within your budget. It’s a simple, delicious way to enjoy more veggies in your meals. Enjoy the fresh flavors and get creative with your toppings!
Cabbage and Carrot Slaw
Editor’s Choice

365 by Whole Foods Market, Organic Coleslaw Mix, 12 Ounce

Backpack Bistro Dehydrated Shredded Carrots 14.8 oz (420 g) | Ideal for …

Hellmann’s Vegan Dressing and Spread Vegan 3 Ct for a Rich, Creamy Plant…
22. Egg Salad Lettuce Wraps

Egg Salad Lettuce Wraps offer a refreshing twist on a classic dish, perfect for those watching their carbs or just looking for a light lunch. Crisp lettuce leaves cradle a creamy egg salad that’s both satisfying and easy to whip up. You can customize it by adding ingredients like avocado or fresh dill to jazz up the flavor. Plus, they are a fantastic option for meal prep. You can store them in the fridge for up to three days, making your week so much easier!
Recipe Overview:
– Servings: 2
– Prep Time: 10 minutes
– Cook Time: 10 minutes
– Total Time: 20 minutes
– Calories: 200 per serving
Nutrition Information:
– Protein: 12g
– Carbs: 5g
– Fat: 15g
– Fiber: 2g
Ingredients:
– 4 hard-boiled eggs, chopped
– 2 tbsp mayonnaise
– 1 tsp mustard
– 1/4 cup diced celery
– Lettuce leaves (like romaine or butter lettuce)
– Salt and pepper to taste
Instructions:
1. In a bowl, mix the chopped eggs, mayonnaise, mustard, and diced celery together until smooth.
2. Season with salt and pepper to your taste.
3. Scoop generous portions of egg salad onto the lettuce leaves.
4. Roll the lettuce leaves up like a wrap and enjoy!
Tips:
– Add a dash of hot sauce for a spicy kick!
– Use Greek yogurt instead of mayonnaise for a lighter option.
– Try different types of lettuce for varied textures.
– These wraps make a great snack or light meal, perfect for lunch at home or on the go!
FAQs:
– Can I use Greek yogurt instead of mayo? Yes! It’s a great healthier alternative.
– What kind of lettuce is best? Romaine or butter lettuce works well.
Egg Salad Lettuce Wraps
Editor’s Choice

50 Pack (100-Piece) 32 oz Meal Prep Containers Reusable with Lids 3-Comp…

DASH Rapid Egg Cooker: 7 Egg Capacity Electric Egg Cooker for Hard Boile…
23. Rice and Bean Burritos

Craving a hearty lunch that won’t empty your wallet? Look no further than Rice and Bean Burritos! These delicious wraps are not only filling but also incredibly easy to prepare. Picture warm tortillas enveloping a comforting mixture of rice, beans, and cheese. You can whip up a batch in no time, making them perfect for meal prepping. They freeze beautifully, so you can enjoy a quick, satisfying meal whenever hunger strikes.
Here’s how to make these delightful burritos:
Recipe Overview:
– Servings: 4
– Prep Time: 10 minutes
– Cook Time: 20 minutes
– Total Time: 30 minutes
– Calories: 350 per burrito
Nutrition Information:
– Protein: 14g
– Carbs: 50g
– Fat: 10g
– Fiber: 8g
Ingredients:
– 1 cup cooked rice
– 1 can black beans (15 oz), drained and rinsed
– 1 cup cheese (cheddar or your choice)
– 4 large tortillas
– Salsa for serving
Instructions:
1. Preheat your oven to 350°F (175°C).
2. In a mixing bowl, combine the cooked rice, black beans, and cheese. Stir until well mixed.
3. Spoon the filling onto each tortilla, then roll them up tightly.
4. Place the burritos in a baking dish and bake them for about 15 minutes, until they’re heated through.
5. Serve warm with salsa on the side for dipping!
Tips:
– Add chopped veggies like bell peppers or corn for extra flavor and nutrition!
– Wrap burritos in foil before freezing to keep them fresh.
FAQs:
– Can I make them vegan? Yes! Just skip the cheese or use a vegan alternative.
– How do I reheat frozen burritos? Bake them in the oven at 350°F until they’re hot all the way through.
With these Rice and Bean Burritos, you can enjoy a tasty meal that fits your budget perfectly. They’re great for lunch, dinner, or any time you need a quick bite!
Rice and Bean Burritos
Editor’s Choice

Reusable 100% Silicone Food Storage Bags, Sandwich Snack Bags New Genera…

Nordic Ware Microwave Tortilla and Pancake Warmer, 10-Inch Holder – Fits…
24. Spinach and Cheese Quesadillas

Looking for a quick and tasty lunch that won’t break the bank? Spinach and Cheese Quesadillas are your answer! These cheesy delights are not only super easy to make, but they also pack in some healthy greens. Imagine biting into a warm, crispy quesadilla, melted cheese oozing out, and fresh spinach adding a pop of color and nutrition. Pair these with salsa or guacamole, and you’ve got a satisfying meal in no time!
Recipe Overview:
– Servings: 2
– Prep Time: 5 minutes
– Cook Time: 10 minutes
– Total Time: 15 minutes
– Calories: 300 per serving
Nutrition Information:
– Protein: 12g
– Carbs: 30g
– Fat: 15g
– Fiber: 3g
Ingredients:
– 4 tortillas
– 2 cups fresh spinach
– 1 cup cheese (cheddar or mozzarella)
– 1 tbsp olive oil
Instructions:
1. Heat olive oil in a skillet over medium heat.
2. Place a tortilla in the skillet and sprinkle cheese and spinach over one half.
3. Fold the tortilla in half. Cook until the cheese melts and the tortilla turns golden brown.
4. Flip it to cook the other side, then remove and slice into wedges.
5. Serve warm with salsa or guacamole for a tasty dip!
Tips:
– Add diced bell peppers or onions for extra flavor!
– Keep an eye on them while cooking; they can brown quickly!
FAQs:
– Can I make them vegan? Yes! Use vegan cheese and tortillas.
– What other fillings can I add? Try cooked mushrooms or shredded chicken for variety!
These quesadillas are not just budget-friendly; they’re also versatile. You can mix and match ingredients based on what you have in your kitchen. Perfect for a busy day or a cozy lunch at home, you’ll love how satisfying and easy they are to whip up!
Did you know a spinach and cheese quesadilla can clock in at under $2 per serving, while still delivering greens and protein? Quick, wallet-friendly lunches like this cut meal prep time to 5 minutes and boost flavor with salsa or guacamole.
Spinach and Cheese Quesadillas
Editor’s Choice
CAROTE Nonstick Frying Pan Skillet,Non Stick Granite Fry Pan Egg Pan Ome…
Nordic Ware Microwave Tortilla and Pancake Warmer, 10-Inch Holder – Fits…

Urbanstrive Cheese Grater With Container Box Grater Stainless Steel Grat…
25. Apple and Nut Butter Snacks

Apple and Nut Butter Snacks: A Quick and Healthy Choice
When you’re in need of a quick snack or a light lunch, look no further than apple and nut butter snacks. This combo is not just easy to whip up but also delicious and satisfying. The crunchy sweetness of fresh apples pairs perfectly with the creamy richness of nut butter. Plus, it offers a great balance of carbohydrates, protein, and healthy fats, making it a smart choice for anyone on a budget. You can have this delightful snack ready in just five minutes!
Recipe Overview:
– Servings: 2
– Prep Time: 5 minutes
– Cook Time: 0 minutes
– Total Time: 5 minutes
– Calories: 150 per serving
Nutrition Information:
– Protein: 5g
– Carbs: 20g
– Fat: 7g
– Fiber: 4g
Ingredients:
– 2 fresh apples, sliced
– 1/4 cup of your favorite nut butter (try almond or peanut)
Instructions:
1. Start by slicing the apples into wedges.
2. Place the nut butter in a small bowl for dipping.
3. Enjoy your apple slices with the nut butter for a quick and nutritious meal!
Tips to Elevate Your Snack:
– Add a sprinkle of cinnamon to your nut butter for an extra flavor kick.
– Pack this snack in containers for busy days on the go.
FAQs:
– Can I use other fruits? Absolutely! Bananas and pears are great alternatives.
– What if I’m allergic to nuts? Try sunflower seed butter for a tasty nut-free option.
This simple snack not only keeps you full but also adds a touch of sweetness to your day. Perfect for busy schedules, it’s a healthy treat that won’t break the bank.
Apple and Nut Butter Snacks
Editor’s Choice

Fueled by AF Nut Butter Variety pack, Pistachio, Dubai, Maple Pecan nut …

PrepWorks Dishwasher Safe Apple Slicer and Corer – 16-Slice Thin Apple C…

Bentgo Prep – 2-Compartment Snack Containers with Lids – Reusable, Micro…
Conclusion

With these 25 easy and cheap lunch ideas, you’ll never have to sacrifice taste for budget! Each recipe is designed to be simple, quick, and filled with fresh ingredients, so you can enjoy delightful meals without stress.
Whether you’re prepping for a busy week or just looking for some healthy inspiration, these ideas will keep your lunches exciting and satisfying. Don’t forget to share your favorite recipes or tips in the comments below!
Note: We aim to provide accurate product links, but some may occasionally expire or become unavailable. If this happens, please search directly on Amazon for the product or a suitable alternative.
This post contains Amazon affiliate links, meaning I may earn a small commission if you purchase through my links, at no extra cost to you.
Frequently Asked Questions
What are some easy and cheap lunch ideas for a busy week?
If you’re juggling a busy schedule, easy and cheap lunch ideas can save the day! Think about making a batch of vegetable stir-fry with rice or quinoa, or whip up some wraps using whole grain tortillas, hummus, and your favorite veggies. These options are not only quick to prepare but also wallet-friendly and delicious!
How can I meal prep affordable lunch options for the week?
Meal prepping is a fantastic strategy to ensure you have budget-friendly meals ready to go! Start by making a list of your favorite recipes, like chickpea salads or lentil soups. Cook in bulk, portion into containers, and store them in the fridge. This way, you’ll have quick lunch recipes that are healthy, satisfying, and easy to grab on busy days!
Are there healthy lunch ideas that fit a tight budget?
Absolutely! Healthy lunch ideas can be very budget-friendly. Consider dishes like a vegetable quinoa bowl or a black bean salad—both are nutritious and inexpensive. Incorporating seasonal produce can also help keep costs down while adding variety to your meals. Remember, healthy doesn’t have to mean expensive!
What are some quick lunch recipes that I can make in under 15 minutes?
If you’re short on time, you’ll love these quick lunch recipes! How about a caprese salad with fresh mozzarella, tomatoes, and basil drizzled with balsamic? Or try a tuna salad served in a lettuce wrap for something light and refreshing. These meals are not only fast but also super easy to prepare!
How can I make simple meal prep more enjoyable?
Making simple meal prep enjoyable can transform your week! Try listening to your favorite podcast or music while you cook. Get creative with seasoning and experiment with different cuisines to keep things interesting. Involve family or friends for a fun cooking session, making it a social event while you prepare your affordable lunch options!
Related Topics
easy lunch ideas
budget-friendly meals
quick lunch recipes
affordable options
healthy vegetarian
simple meal prep
college meal ideas
meal planning
30-minute meals
cheap eats
vegetarian recipes
lunch on a budget