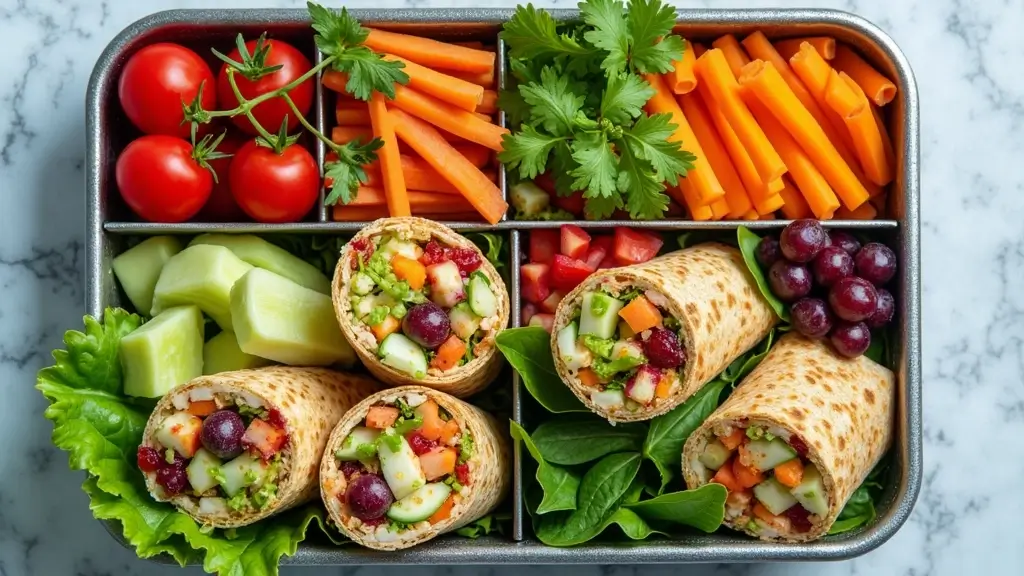
We all know that lunchtime can be tricky. You want something quick, but you also want it to be filling and, of course, healthy. If you’re trying to stick to a keto lifestyle, packing a delicious lunch can feel like a challenge. That’s why I created this post. I want to help you find easy and satisfying lunch ideas that keep your energy up without the carbs weighing you down.
If you’re an adult juggling a busy schedule, you might be searching for quick meals that don’t compromise on taste or nutrition. You’re not alone! Many people are looking for ways to make their lunch hours more enjoyable and less stressful. Whether you’re at the office, on the go, or working from home, having a reliable stash of keto-friendly lunch options can make a big difference in your day.
In this post, you’ll discover over 30 keto lunch box ideas that are not just simple to prepare but also packed with flavor. These meals are designed to be filling, so you stay satisfied throughout the afternoon. You’ll find recipes that are easy to assemble, require minimal cooking, and are perfect for any lunch box.
So let’s dive into these tasty ideas! Each one is not only keto-friendly but also tailored to fit into your busy lifestyle. You’ll be able to mix and match them to keep your lunches exciting. Get ready to elevate your lunchtime game and fuel your day with meals that are both nutritious and delicious!
1. Zucchini Noodles with Pesto
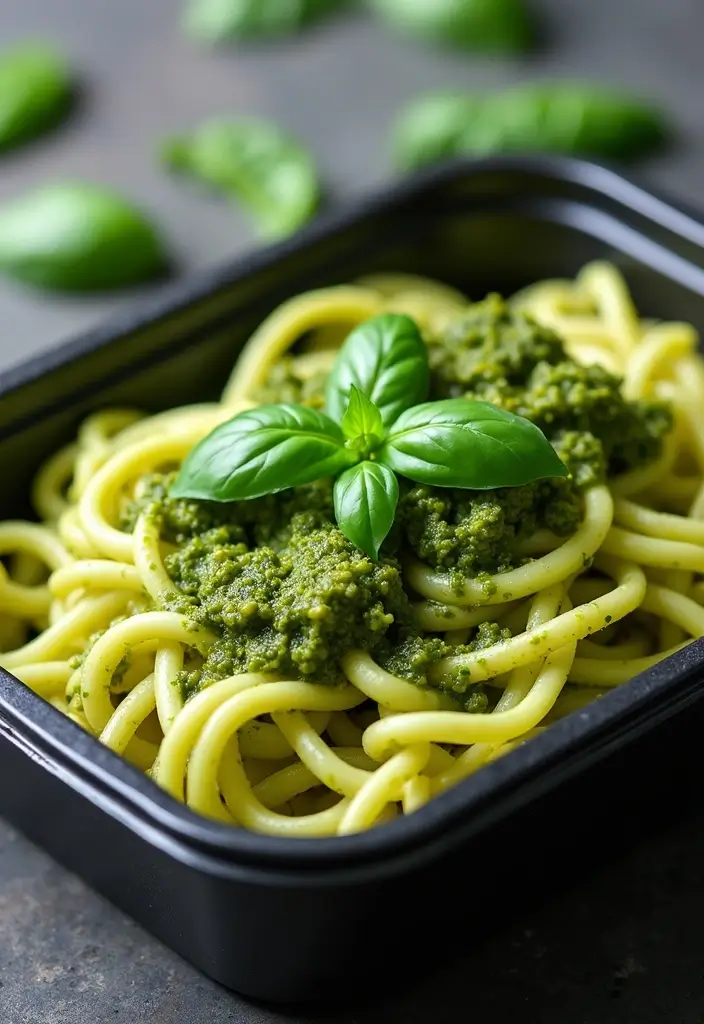
Discover a Quick and Tasty Keto Favorite: Zucchini Noodles with Pesto
If you’re looking for a quick and delicious lunch option, zucchini noodles with pesto are your answer. This dish is low in carbs, making it perfect for a keto lifestyle. Picture fresh, spiralized zucchini drenched in a vibrant, homemade pesto that bursts with flavor. The nuttiness of pine nuts and the aroma of basil create a mouthwatering combination. Plus, you can easily customize it—add grilled chicken or shrimp for a protein kick!
Here’s how to whip up this delightful meal:
Ingredients:
– 2 medium zucchinis
– 1 cup fresh basil leaves
– 1/4 cup pine nuts
– 1/4 cup grated Parmesan cheese
– 1/4 cup olive oil
– Salt and pepper to taste
Instructions:
1. Use a spiralizer to turn the zucchinis into noodles. If you don’t have one, a vegetable peeler will work for wider strips.
2. In a blender, mix the basil, pine nuts, Parmesan, and olive oil until you have a smooth pesto.
3. Heat a skillet over medium heat and sauté the zucchini noodles for about 2-3 minutes until they’re just tender.
4. Toss the noodles in the pesto, seasoning with salt and pepper to taste.
5. Serve right away or pack it up for a tasty lunch on the go!
Tips: For a burst of flavor, consider adding sun-dried tomatoes or olives to your dish. If you prefer a creamier texture, stir in a bit of cream cheese or Greek yogurt. Enjoy the freshness of this meal while keeping your carb count low!
FAQ: Can I use store-bought pesto? Absolutely! While homemade is often fresher, store-bought options can save time and still taste good. Just check the label for added sugars.
Enjoy this quick recipe that not only satisfies your hunger but also keeps you on track with your keto goals!
Zucchini Noodles with Pesto
Editor’s Choice

2. Chicken Salad Lettuce Wraps
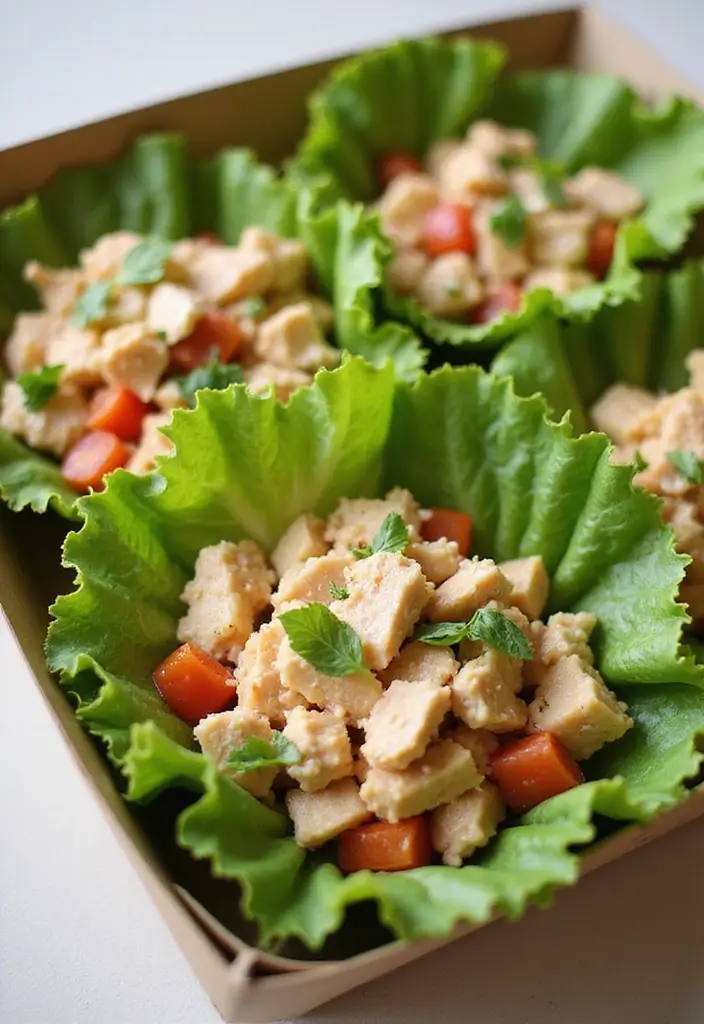
Overview: Servings: 4 | Prep Time: 15 mins | Cook Time: 0 mins | Total Time: 15 mins | Calories: 250 (approx.)
Are you looking for a tasty, low-carb lunch? Chicken salad lettuce wraps are your answer! These wraps are crispy, refreshing, and loaded with protein. You’ll love how easy they are to make. Just mix shredded chicken with Greek yogurt, crunchy celery, and your favorite spices.
Using romaine or iceberg lettuce as your wrap gives you a fresh crunch that makes every bite enjoyable. Plus, they fit perfectly in lunchboxes, making them a convenient choice for busy days. You can whip them up in just 15 minutes!
Ingredients:
– 2 cups cooked shredded chicken
– 1/2 cup Greek yogurt
– 1/4 cup diced celery
– 1 tablespoon Dijon mustard
– Salt and pepper to taste
– Lettuce leaves for wrapping
Instructions:
1. In a mixing bowl, combine the shredded chicken, Greek yogurt, diced celery, Dijon mustard, salt, and pepper.
2. Stir everything together until well mixed.
3. Take a lettuce leaf and fill it with the chicken salad mixture. Wrap it tightly for easy handling.
4. Pack them in your lunchbox for a quick, healthy meal on the go.
Tips: Want to kick up the flavor? Add avocado for a creamy touch and extra nutrients!
FAQ: How long can you store these wraps? They taste best when eaten within 3 days, so enjoy them fresh!
Fact: A chicken salad lettuce wrap packs about 250 calories and 25 g protein per serving. Prep takes about 15 minutes, and a crisp romaine leaf gives you a satisfying bite every time. Perfect for keto lunch box ideas for adults who need quick, filling lunches.
Chicken Salad Lettuce Wraps
Editor’s Choice

50 Pack (100-Piece) 24 oz Meal Prep Containers Reusable with Lids, Sturd…
 Amazon$23.99
3. Caprese Skewers
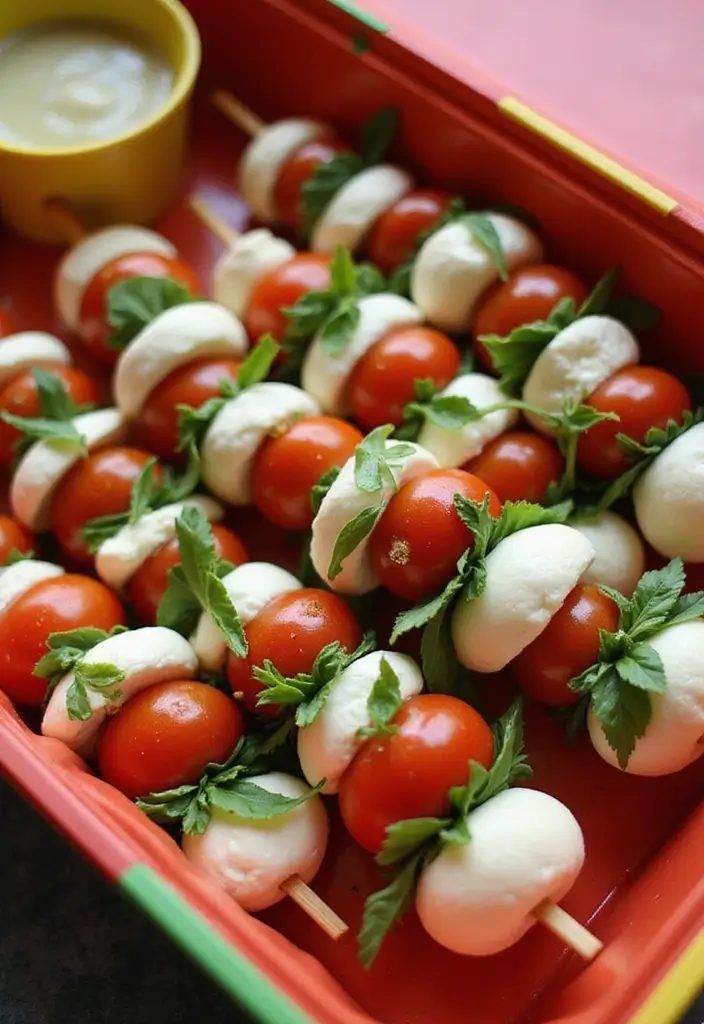
Caprese Skewers: A Fresh, Healthy Option for Your Lunch Box
Are you looking for a quick, healthy snack that’s also delicious? Look no further than Caprese skewers! These delightful bites combine juicy cherry tomatoes, creamy mozzarella balls, and fragrant basil leaves. Drizzle them with balsamic vinegar for an added burst of flavor. Not only do they taste amazing, but they also bring a splash of color to your lunch. Pinterest is full of these vibrant skewers, making them a trendy choice for any meal prep enthusiast!
Making these skewers is a breeze. You can prepare them ahead of time, saving you precious minutes during your busy workday. Plus, they’re budget-friendly and use simple ingredients that you probably already have in your kitchen. Imagine opening your lunch box to find these tasty bites, perfect for a midday pick-me-up that feels both light and satisfying.
Here’s how to make your own Caprese skewers:
Ingredients:
– 1 pint cherry tomatoes
– 1 cup mozzarella balls
– Fresh basil leaves
– Balsamic reduction for drizzling
– Skewers
Instructions:
1. Grab your skewers and thread a cherry tomato onto each one.
2. Next, add a mozzarella ball followed by a basil leaf. Repeat until the skewer is filled.
3. Drizzle balsamic reduction over the skewers before serving for an extra flavor kick.
4. Pack them in your lunch box for a refreshing snack that’s ready to go!
Tips:
– Choose small skewers for easy handling and a perfect bite.
– Experiment with different cheeses like feta or cheddar for variety!
– Keep leftovers in the fridge for a quick snack throughout the week.
– Pair with olives or nuts for a complete lunch experience!
Caprese skewers are not just tasty; they also make eating healthy exciting. Enjoy your flavorful, low-carb snack that brightens up your lunch routine!
Caprese Skewers
Editor’s Choice

300PCS Cocktail Picks Bamboo Skewers for Appetizers, FATLODA Paddle Wood…
 Amazon$7.97
TRADITIONAL – Rich, Extra Thick Balsamic Vinegar REDUCTION, No Added Sug…
 Amazon$12.75
50 Pack (100-Piece) 24 oz Meal Prep Containers Reusable with Lids, Sturd…
 Amazon$23.99
4. Egg Muffins

Overview: Servings: 6 | Prep Time: 10 mins | Cook Time: 20 mins | Total Time: 30 mins | Calories: 150 (approx.)
If you’re looking for a quick and nutritious lunch option, egg muffins are your answer. These delightful bites are packed with protein and easy to customize. You can use whatever veggies and meats you enjoy, making them perfect for your taste.
Just whip up a batch in muffin tins, and you have a tasty, filling meal ready to go. Imagine biting into a fluffy muffin with your favorite flavors—it’s satisfying and keeps you energized throughout the day.
Ingredients:
– 6 large eggs
– 1/2 cup diced bell peppers (any color you like)
– 1/4 cup cooked sausage or chopped spinach for a vegetarian twist
– 1/2 cup shredded cheese (cheddar or mozzarella works great)
– Salt and pepper to taste
Instructions:
1. Preheat your oven to 350°F (175°C).
2. In a mixing bowl, whisk the eggs and season with salt and pepper.
3. Stir in the diced bell peppers and your choice of meat or spinach.
4. Pour the mixture into a greased muffin tin, filling each cup about three-quarters full.
5. Bake for 20 minutes or until the muffins are fluffy and the eggs are set.
6. Allow them to cool before removing from the tin, then pack them for a delicious lunch.
Tips: Store your egg muffins in the fridge for up to 5 days.
FAQ: Can you freeze them? Yes, they freeze nicely! Just thaw and reheat when you’re ready to eat.
These egg muffins are not just easy to make; they’re also a fantastic way to enjoy a keto-friendly meal that keeps you full and satisfied. Perfect for meal prep and busy days ahead!
Egg Muffins
Editor’s Choice

Amazon Basics Nonstick Round Muffin Baking Pan, 12 Cups, Set of 2, Gray,…
 Amazon$14.97
Bento Box Adult Lunch Box, Containers for Adults Men Women with 4 Compar…
 Amazon$9.99
Norpro Egg Beater Classic Hand Crank Style 18/10 Stainless Steel Mixer 1…
 Amazon$25.94
5. Greek Yogurt with Nuts and Berries
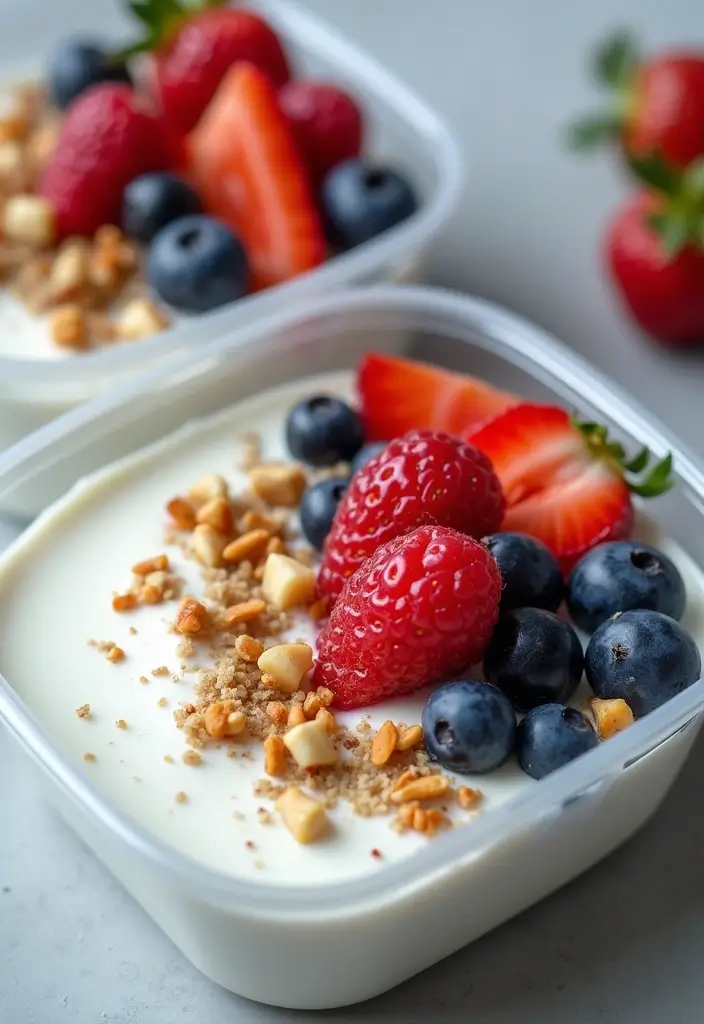
Overview: Servings: 1 | Prep Time: 5 mins | Cook Time: 0 mins | Total Time: 5 mins | Calories: 200 (approx.)
Need a quick and satisfying lunch? Greek yogurt topped with nuts and berries is your go-to solution. This meal is packed with protein and healthy fats, making it a filling option that keeps hunger at bay. Plus, it’s a treasure trove of vitamins and minerals that your body craves.
Imagine creamy Greek yogurt as your base. Top it with a crunchy mix of nuts and a handful of sweet, juicy berries. You can easily swap in your favorite nuts or seasonal fruit. This lunch is not just tasty; it’s incredibly easy to pack for work or a picnic!
Ingredients:
– 1 cup Greek yogurt
– 1/4 cup mixed nuts (almonds, walnuts, pecans, etc.)
– 1/4 cup fresh berries (strawberries, blueberries, raspberries, etc.)
Instructions:
1. Start by scooping the Greek yogurt into your favorite serving container.
2. Sprinkle the mixed nuts generously over the yogurt.
3. Add fresh berries on top for that burst of sweetness.
4. Seal it up and pack it for an easy, healthy lunch option.
Tips: Keep your nuts and berries in separate compartments until lunchtime. This way, they stay fresh and crunchy!
FAQ: Can I use frozen berries? Absolutely! They defrost nicely in the yogurt, making your meal refreshing.
This Greek yogurt bowl is not just quick; it’s versatile, nutritious, and delicious. Perfect for those busy days when you need something healthy on the go!
Greek Yogurt with Nuts and Berries
Editor’s Choice


PLANTERS Deluxe Mixed Nuts, Cashews, Almonds, Pecans, Pistachios, Hazeln…
 Amazon$15.01
6. Shrimp Avocado Salad
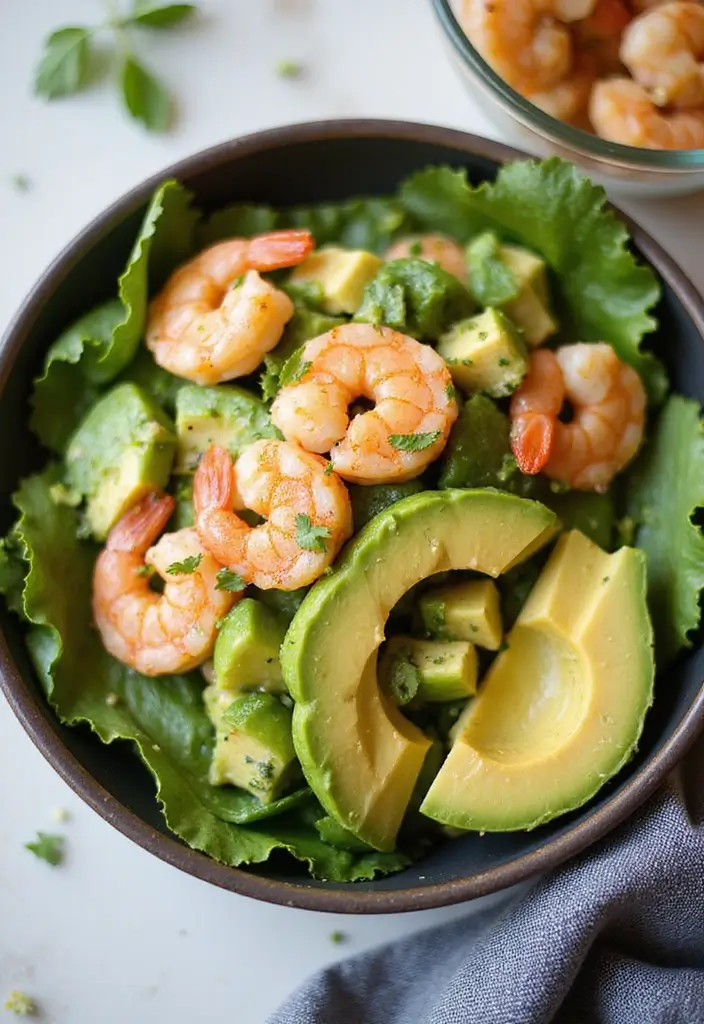
Overview: Servings: 2 | Prep Time: 15 mins | Cook Time: 0 mins | Total Time: 15 mins | Calories: 300 (approx.)
Are you looking for a light yet satisfying lunch idea for those warm workdays? Look no further than this vibrant shrimp avocado salad. It’s not just tasty; it’s also packed with healthy fats from creamy avocados and protein from juicy shrimp. This dish is all about quick assembly, making it a perfect choice for your busy schedule.
Imagine biting into fresh greens mixed with ripe avocado and succulent shrimp. The zesty lime juice adds a refreshing kick. You can whip this up in just 15 minutes, so it fits perfectly into your lunch routine.
Ingredients:
– 1 pound cooked shrimp (peeled and deveined)
– 2 avocados, diced
– 3 cups mixed greens (like spinach, arugula, or romaine)
– Juice of 1 lime
– Salt and pepper to taste
Instructions:
1. Start by grabbing a large bowl. Toss in the cooked shrimp, diced avocados, and mixed greens.
2. Squeeze the juice of one lime over the mixture. Season it with salt and pepper to your liking.
3. Gently toss everything together until well combined.
4. Pack it in a container, and it’s ready for lunch!
Tips: Use fresh lime juice for the best flavor! You can also add cherry tomatoes or cucumber slices for extra crunch.
FAQ: Can I use frozen shrimp? Yes, just make sure to thaw them before mixing.
Enjoy this delightful salad! It’s not only quick to prepare but also a refreshing way to keep your lunch keto-friendly and satisfying.
Shrimp Avocado Salad
Editor’s Choice

50 Pack (100-Piece) 24 oz Meal Prep Containers Reusable with Lids, Sturd…
 Amazon$23.99

Maine Man Shrimp Peeler Deveiner Cleaner Tool, 8-Inches, Red
 Amazon$9.73
7. Beef and Broccoli Stir-Fry
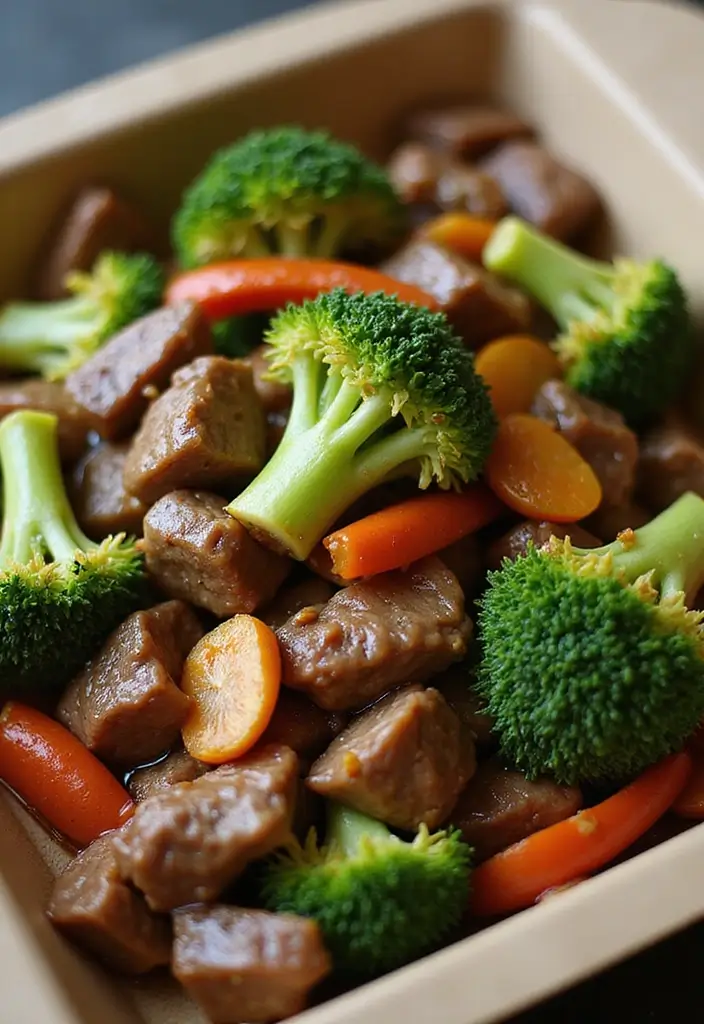
Overview: Servings: 2 | Prep Time: 10 mins | Cook Time: 15 mins | Total Time: 25 mins | Calories: 400 (approx.)
Are you looking for a quick and satisfying lunch? Look no further than this beef and broccoli stir-fry! This dish is not only high in protein but also packed with flavor. You can whip it up in just 25 minutes. Picture tender beef slices mingling with fresh broccoli, all coated in a savory soy sauce and aromatic sesame oil. It’s a perfect meal to keep you full and energized throughout your busy day.
This stir-fry pairs wonderfully with cauliflower rice, adding a delightful texture without the carbs. You can make a big batch ahead of time to ensure you have a hearty lunch ready for the workweek.
Ingredients:
– 1 pound beef sirloin, thinly sliced
– 2 cups broccoli florets
– 1/4 cup soy sauce (or coconut aminos for a soy-free option)
– 2 tablespoons sesame oil
– 1 tablespoon minced garlic
Instructions:
1. Heat the sesame oil in a pan over medium heat.
2. Add the minced garlic and sliced beef, stirring until the beef is nicely browned.
3. Toss in the broccoli florets and soy sauce. Cook for about 5-7 minutes until the broccoli is tender but still crisp.
4. Serve the stir-fry over cauliflower rice or pack it into your lunch box for a delicious meal on the go.
Tips: Make extra for leftovers to save time later!
FAQ: Can I use frozen broccoli? Yes, just remember to adjust the cooking time so it doesn’t get mushy!
Beef and Broccoli Stir-Fry
Editor’s Choice

365 by Whole Foods Market, Organic Riced Cauliflower, 12 oz, (Frozen)
 Amazon$2.89
8. Turkey and Cheese Roll-Ups
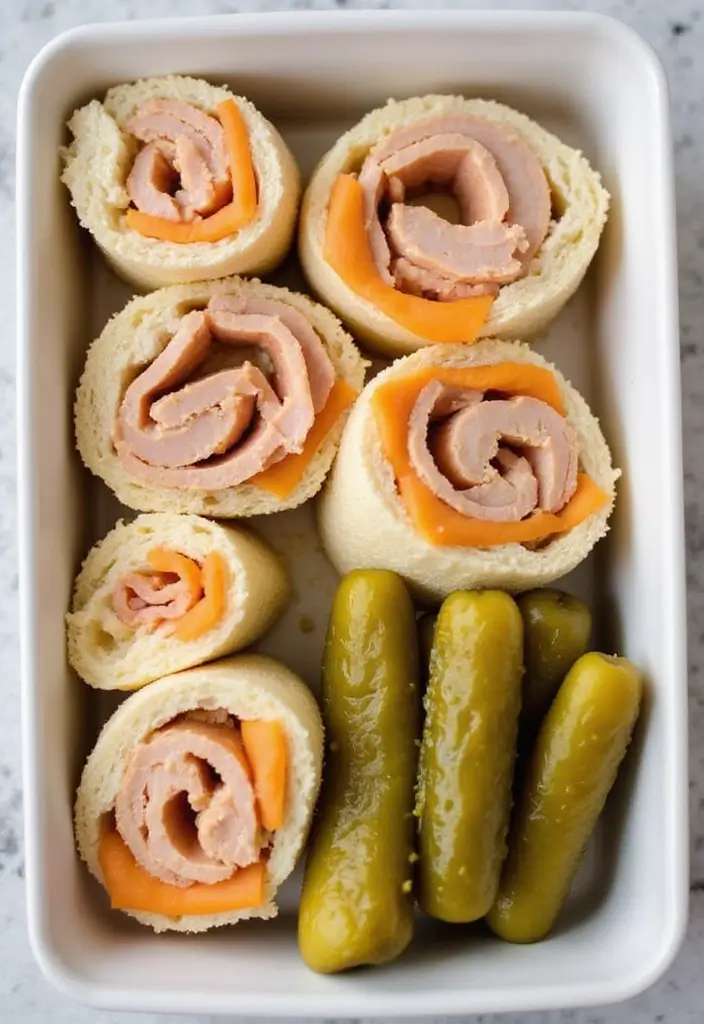
Overview: Servings: 1 | Prep Time: 5 mins | Cook Time: 0 mins | Total Time: 5 mins | Calories: 150 (approx.)
If you’re looking for a quick, satisfying lunch that fits your keto lifestyle, turkey and cheese roll-ups are a fantastic choice. These simple bites are packed with protein and flavor. Just roll slices of turkey around your favorite cheese, and you’re set! For a tasty twist, add a slice of pickle or a few olives to amp up the flavor.
These roll-ups are not just low in carbs; they’re also incredibly easy to prepare. If you’re juggling a busy day, this lunch is perfect for eating on the go.
Ingredients:
– 4 slices turkey breast
– 2 slices cheese (Swiss, cheddar, or your choice)
– Pickles or olives for garnish (optional)
Instructions:
1. Start by laying out the turkey slices on a clean surface.
2. Place a slice of cheese on each turkey slice.
3. Roll them up tightly. You can use toothpicks to hold them together if needed.
4. Pack them along with pickles or olives for a crunchy side.
Tips: Mix it up by trying different cheese varieties or adding spices to the turkey. This keeps your lunch exciting!
FAQ: Can I use deli meats? Yes, just make sure they’re keto-friendly! You can choose turkey, ham, or roast beef, depending on your preference.
These roll-ups are a delightful way to enjoy a hearty lunch without the carbs. Whether you’re at home or on the go, they make every bite count!
Turkey and Cheese Roll-Ups
Editor’s Choice

Bentgo Easyboxes – Original Stackable Lunch Boxes – Reusable 3-Compartme…
 Amazon$14.99
500PCS Cocktail Picks Kit, 4 Styles Fancy Toothpicks for Appetizers, 3 S…
 Amazon$7.99
Nature’s Garden Keto Variety Snack Packs – Keto Snack Mix, Keto Deluxe M…
 Amazon$24.99
9. Cauliflower Fried Rice
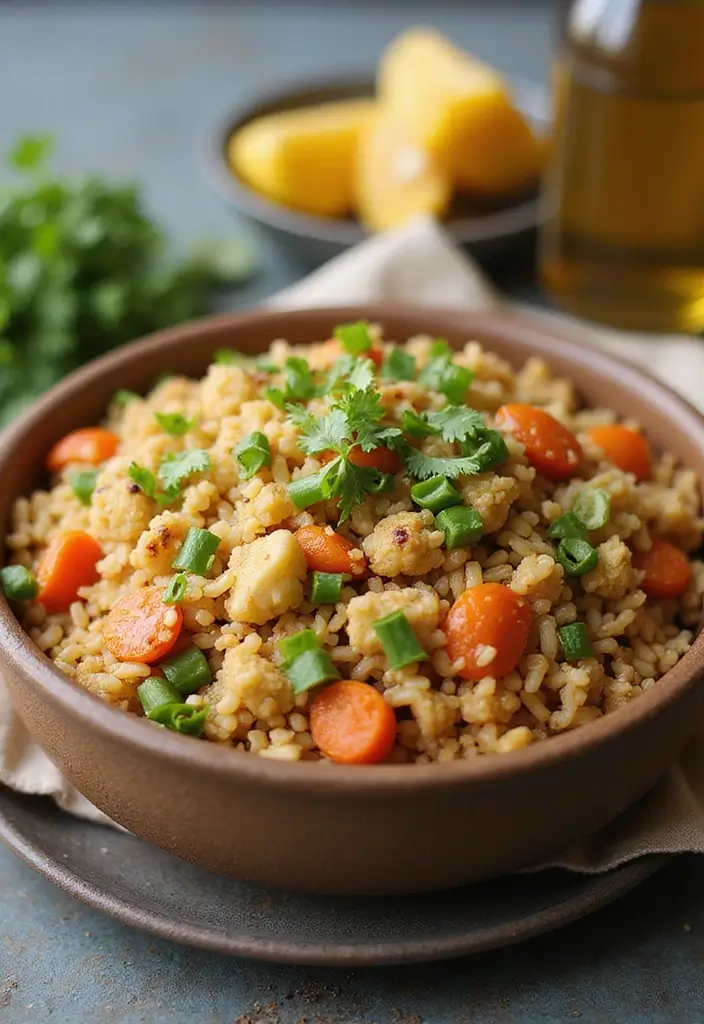
Overview: Servings: 4 | Prep Time: 10 mins | Cook Time: 10 mins | Total Time: 20 mins | Calories: 160 (approx.)
Say goodbye to heavy lunches and hello to Cauliflower Fried Rice! This dish is a game-changer for anyone following a keto diet. It’s not just low in carbs; it’s also bursting with flavor and packed with nutrients. Imagine riced cauliflower sautéed with colorful peas, crunchy carrots, and fluffy scrambled eggs. You can whip this up in just 20 minutes, making it an ideal choice for your lunchbox.
Plus, it’s super versatile. Have leftover chicken or shrimp? Toss it in for a protein boost! This meal is perfect for prep ahead of time, so make extra and enjoy it later.
Ingredients:
– 1 head cauliflower, riced (or store-bought)
– 1/2 cup peas and carrots mix
– 2 eggs
– 2 tablespoons soy sauce
– 1 tablespoon sesame oil
– Green onions for garnish (optional)
Instructions:
1. Heat sesame oil in a skillet over medium heat.
2. Add the riced cauliflower along with the peas and carrots. Cook for 5-7 minutes, stirring occasionally until soft.
3. Push the mixture to one side of the pan and crack in the eggs. Scramble them until cooked through.
4. Mix everything together and pour in the soy sauce. Stir and cook for another 2 minutes.
5. If you like, sprinkle green onions on top before packing!
Tips: For the best texture, choose fresh cauliflower.
FAQ: Can you freeze this dish? Absolutely! It freezes well for those busy days when you need a quick meal.
Now, grab your cauliflower and get cooking! You’ll love how satisfying and delicious this dish is, making lunchtime a delight rather than a chore.
Fun fact: A single serving of Cauliflower Fried Rice clocks in around 160 calories and packs clean protein and veggies. It comes together in about 20 minutes, making keto lunch box ideas for adults both quick and satisfying. Say goodbye to heavy carbs and hello to flavor-packed, grab-and-go meals.
Cauliflower Fried Rice
Editor’s Choice

365 by Whole Foods Market, Organic Riced Cauliflower, 24 Ounce
 Amazon$4.19
50 Pack (100-Piece) 24 oz Meal Prep Containers Reusable with Lids, Sturd…
 Amazon$23.99
10. Spinach and Feta Stuffed Chicken Breast
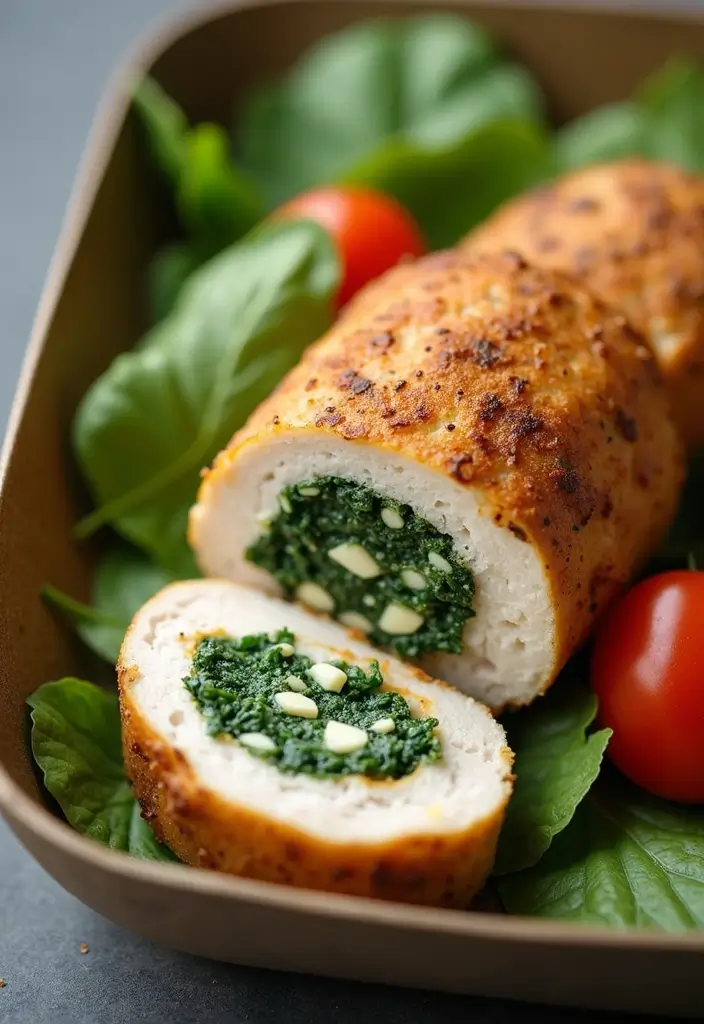
Overview: Servings: 2 | Prep Time: 15 mins | Cook Time: 30 mins | Total Time: 45 mins | Calories: 350 (approx.)
Are you on the hunt for a tasty and filling keto lunch? Look no further! Spinach and feta stuffed chicken breast is a delightful dish that checks all the boxes. It’s low in carbs and high in flavor, making it a perfect meal for your lunch box. This recipe might take a bit of effort, but trust me, it’s worth every bite.
Baking the chicken keeps it juicy, while the spinach and feta stuffing adds a creamy burst of flavor. Pair it with a fresh side salad, and you have a wholesome meal that will keep you energized throughout the day.
Ingredients:
– 2 chicken breasts
– 1 cup fresh spinach
– 1/2 cup feta cheese
– 1 tablespoon olive oil
– Salt and pepper to taste
Instructions:
1. Preheat your oven to 375°F (190°C).
2. Butterfly the chicken breasts and sprinkle them with salt and pepper.
3. In a mixing bowl, combine the spinach and feta cheese. Stuff this mixture into the chicken breasts.
4. Secure the openings with toothpicks and drizzle olive oil over the top.
5. Bake for 30 minutes or until the chicken is cooked through. Slice it up and pack it for lunch!
Tips: Allow the chicken to cool before slicing. This will help you get cleaner cuts!
FAQ: What if I want to switch cheeses? Goat cheese is a fantastic alternative if you’re looking for something different!
Spinach and Feta Stuffed Chicken Breast
Editor’s Choice

50 Pack (100-Piece) 24 oz Meal Prep Containers Reusable with Lids, Sturd…
 Amazon$23.99
TrendPlain 16oz/470ml Glass Olive Oil Sprayer for Cooking – 2 in 1 Olive…
 Amazon$8.99
11. Tuna Salad Stuffed Avocados
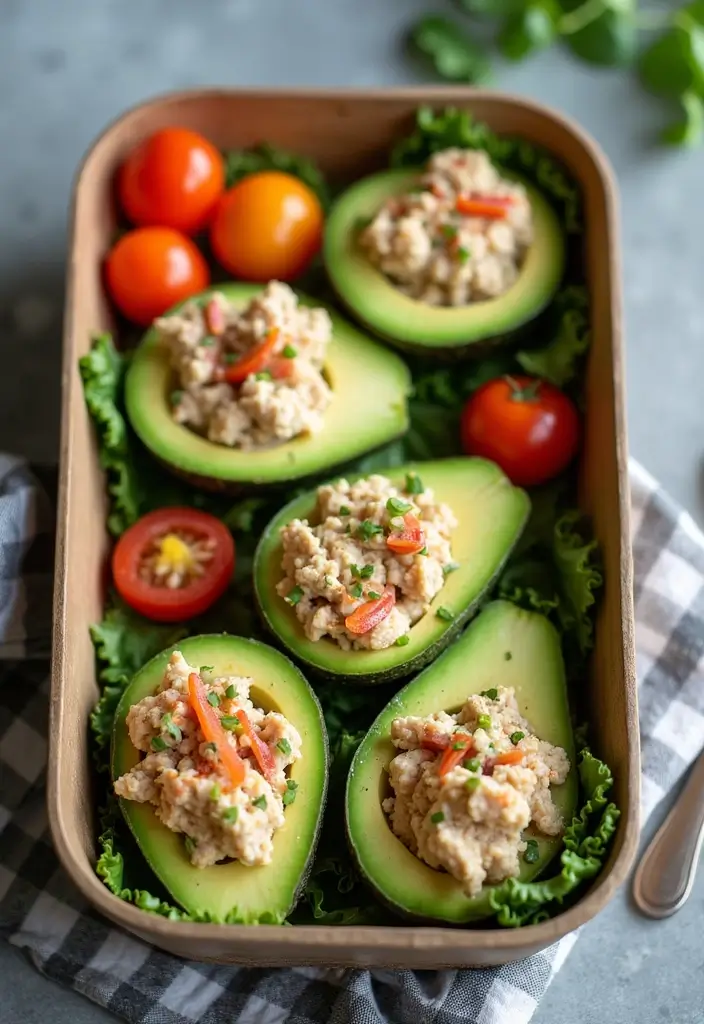
Overview: Servings: 2 | Prep Time: 10 mins | Cook Time: 0 mins | Total Time: 10 mins | Calories: 300 (approx.)
Are you looking for a quick, satisfying lunch that fits perfectly into your keto lifestyle? Look no further than these Tuna Salad Stuffed Avocados! With creamy avocado and flavorful tuna salad, this dish gives you healthy fats and protein to keep you full and energized. Plus, it’s easy to prepare and visually appealing, making it a hit at lunchtime!
To make this recipe, simply mix tuna with mayo, relish, and your favorite spices. Scoop this delicious mixture into avocado halves for a meal that’s not only nutritious but also a treat for the eyes. This is an ideal choice when you need a light yet fulfilling lunch.
Ingredients:
– 2 ripe avocados
– 1 can of tuna (drained)
– 1/4 cup mayonnaise
– 1 tablespoon dill pickle relish
– Salt and pepper to taste
Instructions:
1. Start by cutting the avocados in half and carefully removing the pit.
2. In a mixing bowl, combine the drained tuna, mayonnaise, relish, salt, and pepper. Stir until well blended.
3. Generously fill the avocado halves with the tuna mixture.
4. Pack them up for a fresh, healthy lunch on the go!
Tip: Squeeze a bit of lemon juice into the tuna for an extra burst of flavor!
FAQ: How long will they stay fresh? Enjoy them within a day or two for the best taste and texture.
Tuna Salad Stuffed Avocados
Editor’s Choice

Bentgo Prep – 20-Piece 1-Compartment Reusable Meal Prep Containers with …
 Amazon$12.53
KitchenAid Classic Multifunction Can Opener and Bottle Opener Easy to Us…
 Amazon$14.35
12. Sausage and Peppers Skewers
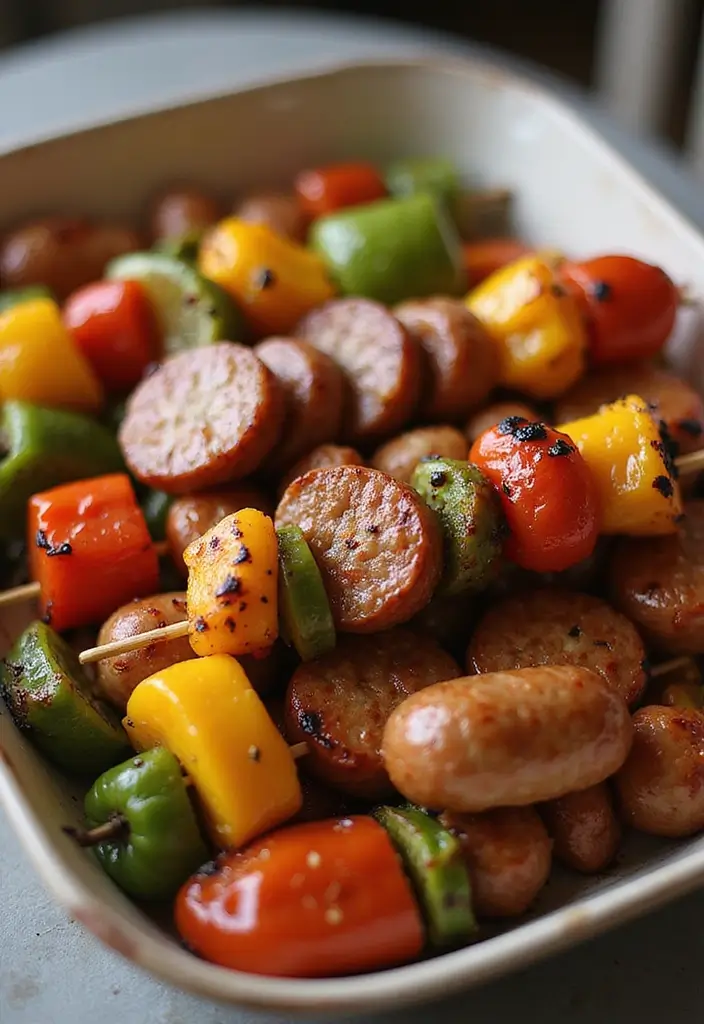
Overview: Servings: 4 | Prep Time: 15 mins | Cook Time: 15 mins | Total Time: 30 mins | Calories: 350 (approx.)
Looking for a tasty lunch that fits your keto diet? Try these sausage and peppers skewers! They’re bursting with flavor and super easy to make. You can whip them up in just half an hour, making them perfect for a quick lunch. Plus, they’re packed with protein and fiber, so they’ll keep you feeling full and satisfied. Enjoy them hot off the grill or cold from the fridge—either way, they make a delicious meal on the go!
To get started, grab your ingredients and let’s make this fun dish.
Ingredients:
– 1 pound sausage (Italian or chicken)
– 2 bell peppers (any color), cut into chunks
– 1 onion, cut into chunks
– Olive oil, salt, and pepper for seasoning
Instructions:
1. Preheat your grill or oven to 400°F (200°C).
2. Thread the sausage, bell peppers, and onion onto skewers.
3. Brush them with olive oil and sprinkle with salt and pepper.
4. Grill or bake for about 15 minutes until the sausage is cooked through and the veggies are slightly charred.
5. Let the skewers cool before packing them for lunch.
Tips: For easy cooking and cleanup, use metal skewers instead of wooden ones.
FAQ: How long can you store these skewers? They stay fresh in the fridge for up to 3 days. Perfect for meal prep!
With just a few ingredients and simple steps, these sausage and peppers skewers can become a staple in your lunch rotation. Enjoy a healthy, keto-friendly meal that satisfies your cravings!
Sausage and Peppers Skewers
Editor’s Choice

Metal Skewer for Grilling,Kabob Skewer,Flat BBQ Barbecue Skewer,Grilling…
 Amazon$7.99
50 Pack (100-Piece) 24 oz Meal Prep Containers Reusable with Lids, Sturd…
 Amazon$23.99
13. Creamy Tomato Basil Soup
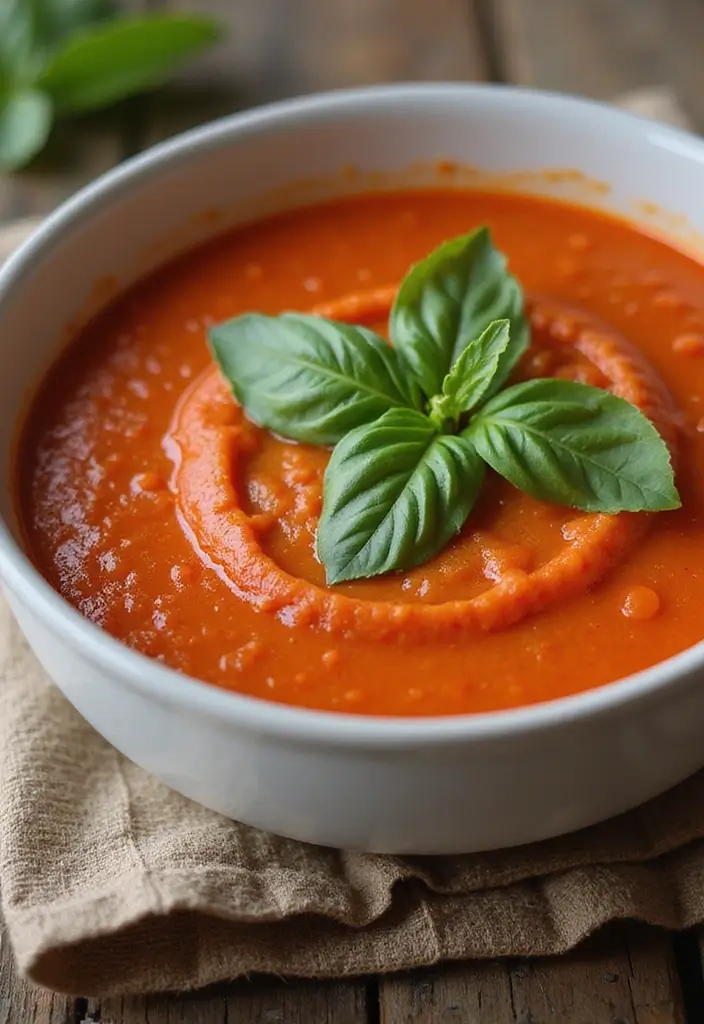
Warm Up Your Lunch Hour with Creamy Tomato Basil Soup
When you’re craving something cozy and satisfying, this creamy tomato basil soup is the answer. Perfect for those brisk days, it wraps you in warmth and flavor. With ripe tomatoes, rich heavy cream, and fragrant basil, you get a delicious way to enjoy veggies while sticking to your keto lifestyle. Picture yourself sipping this soup from a thermos, or pairing it with a slice of low-carb bread for a comforting lunch that keeps you full.
Making this soup is simple and quick, taking just 30 minutes. You’ll find it’s a fantastic make-ahead option, great for meal prep. Store it in the fridge for up to a week. Just reheat and enjoy! Plus, it’s budget-friendly, using just a few ingredients you probably already have at home.
Here’s how to whip up your own creamy tomato basil soup:
Ingredients:
– 1 can diced tomatoes
– 1 cup heavy cream
– 1/4 cup fresh basil, chopped
– 1 tablespoon olive oil
– Salt and pepper to taste
Instructions:
1. Heat the olive oil in a saucepan over medium heat.
2. Add the diced tomatoes and let them simmer for about 10 minutes.
3. Stir in the heavy cream and chopped basil, cooking for an additional 5 minutes.
4. Season with salt and pepper, then blend the mixture until smooth. A hand blender works perfectly for this!
5. Allow it to cool slightly before packing it up for lunch.
Tips: For an extra burst of flavor, sprinkle some fresh basil on top just before serving. This soup is not only tasty but also a wonderful way to nourish your body while enjoying your keto journey!
FAQ: Can I freeze it? Yes, this soup freezes well! Just remember to leave some space in your container for expansion. Enjoy the comfort of this warm bowl anytime you need a cozy meal.
Creamy Tomato Basil Soup
Editor’s Choice
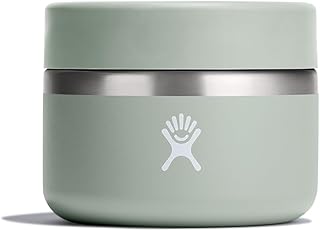
Hydro Flask Food Jar – Insulated Stainless Steel, Snack Travel Container…
 AmazonEUR 30.21
Immersion Blender Handheld Corded Hand Blenders Set 1100W, Trigger Varia…
 Amazon$35.99
Lunchskins Compostable Sandwich Bags – 50 Count | Avocado Design | Eco-F…
 Amazon$5.19
14. Cucumber and Hummus
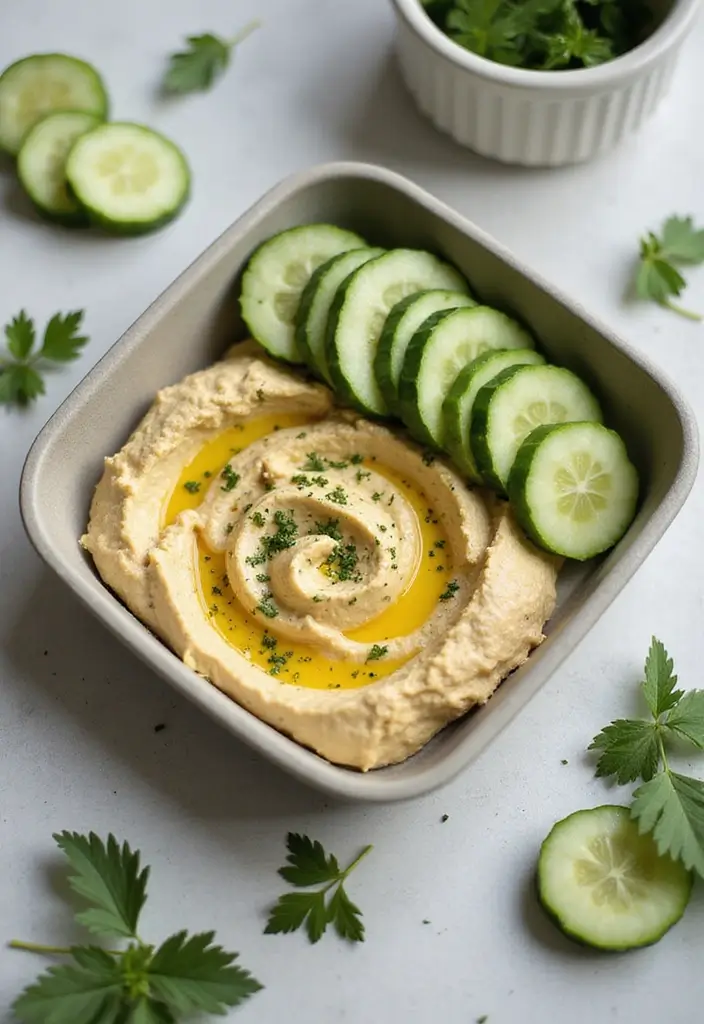
Overview: Servings: 1 | Prep Time: 5 mins | Cook Time: 0 mins | Total Time: 5 mins | Calories: 120 (approx.)
Looking for a quick and tasty snack? Cucumber slices paired with hummus might be just what you need. This combo is refreshing and satisfying, making it perfect for your keto lunch box. The crunch of the cucumber balances beautifully with the creamy texture of hummus. Just remember to choose a low-carb hummus to keep it keto-friendly.
Packing this snack is easy! Use a compartmentalized container to keep it fresh and ready for your desk. You can munch on it anytime you feel a little hungry.
Ingredients:
– 1 large cucumber
– 1/2 cup low-carb hummus (check the label for carb content)
Instructions:
1. Begin by slicing the cucumber into rounds or sticks. Both shapes are fun to eat!
2. Pour the hummus into a small container. You can even add a dash of olive oil on top for extra flavor.
3. Pack the cucumber and hummus together in your lunch container. They’re ready to go!
Tips: For an extra kick, sprinkle some paprika or cayenne pepper on the hummus. It adds a nice flavor boost!
FAQ: Is store-bought hummus okay? Yes! Just make sure to read the label for the carb count.
This cucumber and hummus snack is not only quick but also a delicious way to stay on track with your keto goals. Enjoy it at work or on the go!
Cucumber and Hummus
Editor’s Choice
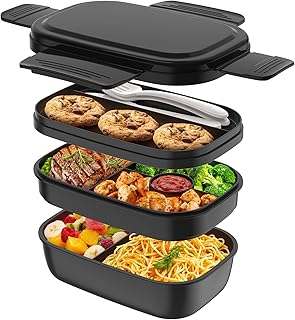
Bento Box Adult, Lunch Box Containers for Men Women with 8 Compartments,…
 Amazon$16.99

OXO Good Grips Handheld Mandoline Slicer for Kitchen, Adjustable Vegetab…
 Amazon$18.50
15. Baked Salmon with Asparagus
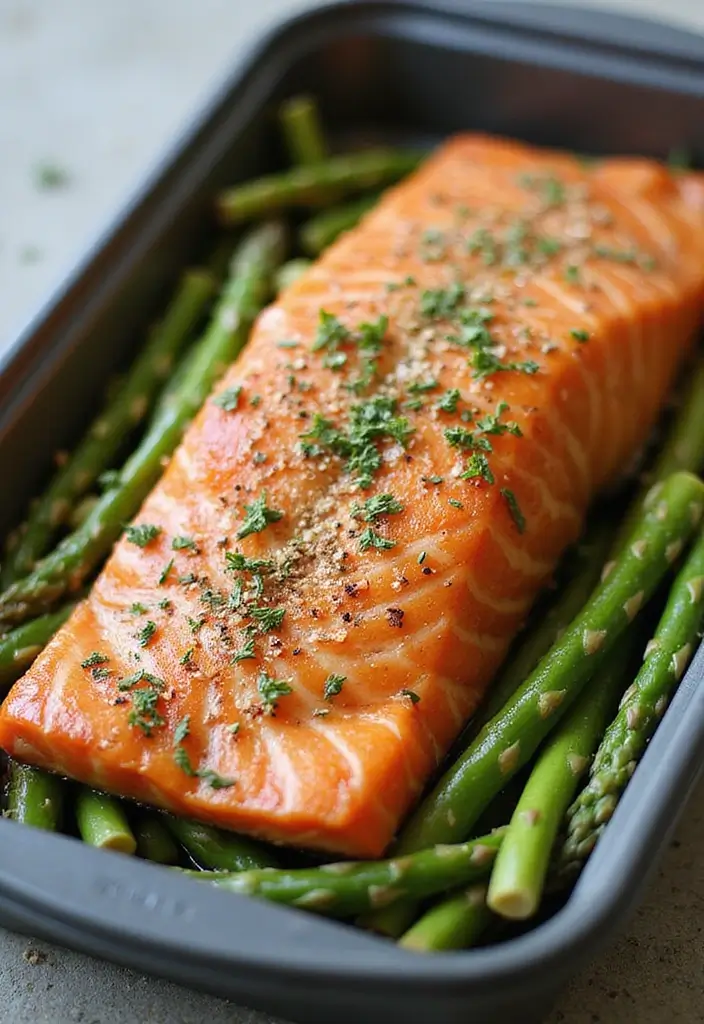
Overview: Servings: 2 | Prep Time: 10 mins | Cook Time: 20 mins | Total Time: 30 mins | Calories: 400 (approx.)
Are you looking for a delightful and healthy lunch option? Baked salmon with asparagus is just the ticket! This dish is not only rich in omega-3 fatty acids and high-quality protein but also super easy to whip up. With its beautiful colors and fresh flavors, it’s a meal that feels fancy without the fuss. Plus, it’s perfect for meal prepping ahead of time!
To make this dish, all you need to do is season the salmon and asparagus, pop them in the oven, and let the magic happen. You can enjoy it warm or cold, making it a versatile addition to your lunch box.
Ingredients:
– 2 salmon fillets
– 1 bunch asparagus
– 2 tablespoons olive oil
– Salt and pepper to taste
– Lemon wedges for serving (optional)
Instructions:
1. Preheat your oven to 400°F (200°C).
2. Place the salmon and asparagus on a baking sheet.
3. Drizzle everything with olive oil and sprinkle with salt and pepper.
4. Bake for 20 minutes, or until the salmon is opaque and flakes easily with a fork.
5. Let it cool for a few minutes before packing it up for lunch.
Tips: Squeeze fresh lemon juice over the salmon for an extra zing!
FAQ: Can I use frozen salmon? Yes, just remember to adjust the baking time accordingly.
This baked salmon with asparagus is not just a meal; it’s a step towards a healthier lifestyle. Enjoy the satisfaction of a delicious lunch that fuels your day!
Baked Salmon with Asparagus
Editor’s Choice

50 Pack (100-Piece) 32 oz Meal Prep Containers Reusable with Lids 3-Comp…
 Amazon$21.99
YARRAMATE 16oz/470ml Glass Olive Oil Sprayer for Cooking with Stickers, …
 Amazon$8.99
Amazon Fresh Brand, Wild Caught Pink Salmon Skinless Fillet Portions, Fr…
 Amazon$8.44
16. Egg Salad Lettuce Wraps
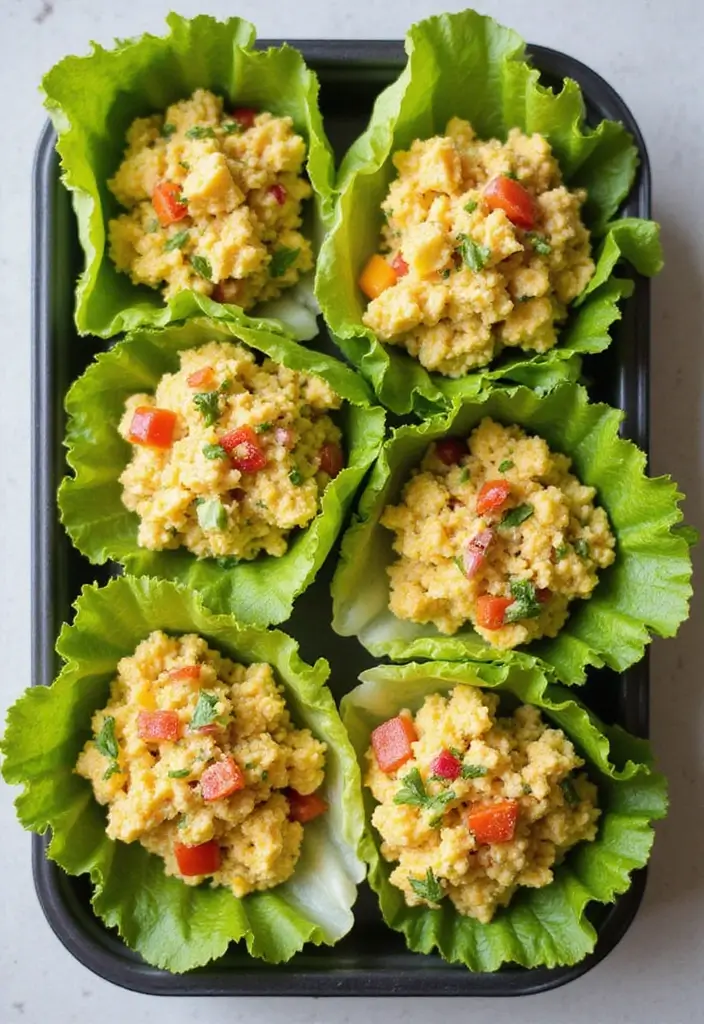
Overview: Servings: 4 | Prep Time: 10 mins | Cook Time: 0 mins | Total Time: 10 mins | Calories: 200 (approx.)
Are you searching for a tasty, quick lunch that fits your keto lifestyle? Look no further than these Egg Salad Lettuce Wraps! This classic dish gets a fresh twist by swapping bread for crunchy lettuce. The creamy egg salad is not only flavorful but also loaded with protein, making it the ideal meal for busy days. Plus, these wraps are perfect for meal prep, so you can whip them up in advance and grab them on the go.
To make this delicious dish, you’ll need just a few simple ingredients that are easy to find. Ready to dive in? Let’s go through the recipe!
Ingredients:
– 6 hard-boiled eggs, chopped
– 1/4 cup mayonnaise
– 1 tablespoon Dijon mustard
– Salt and pepper to taste
– Fresh lettuce leaves for wrapping
Instructions:
1. In a mixing bowl, combine the chopped eggs, mayonnaise, Dijon mustard, salt, and pepper. Stir until everything is well mixed.
2. Take a lettuce leaf and scoop a generous amount of the egg salad onto it.
3. Wrap it up like a burrito.
4. Pack it in a lunch container for an easy and satisfying meal.
Tips: Want to amp up the creaminess and health benefits? Add avocado to your egg salad for a delicious twist and a boost of healthy fats!
FAQ: How long will these wraps last? Enjoy them within three days for the best taste and freshness.
These Egg Salad Lettuce Wraps are not just easy to make; they’re also a delightful option that can keep your keto meal plan exciting. Perfect for lunch at work or a quick snack at home, you’ll love how simple and satisfying they are!
Fact: swapping bread for crisp lettuce can cut carbs by about 15–20g per serving, a win for keto lunch box ideas for adults. It’s quick, protein-packed, and perfect for meal prep on busy days.
Egg Salad Lettuce Wraps
Editor’s Choice

50 Pack (100-Piece) 32 oz Meal Prep Containers Reusable with Lids 3-Comp…
 Amazon$21.99

jawbush Professional Lettuce Knife, 11″ Serrated Salad Cutter for Veggie…
 Amazon$8.98
17. Roasted Vegetable Salad
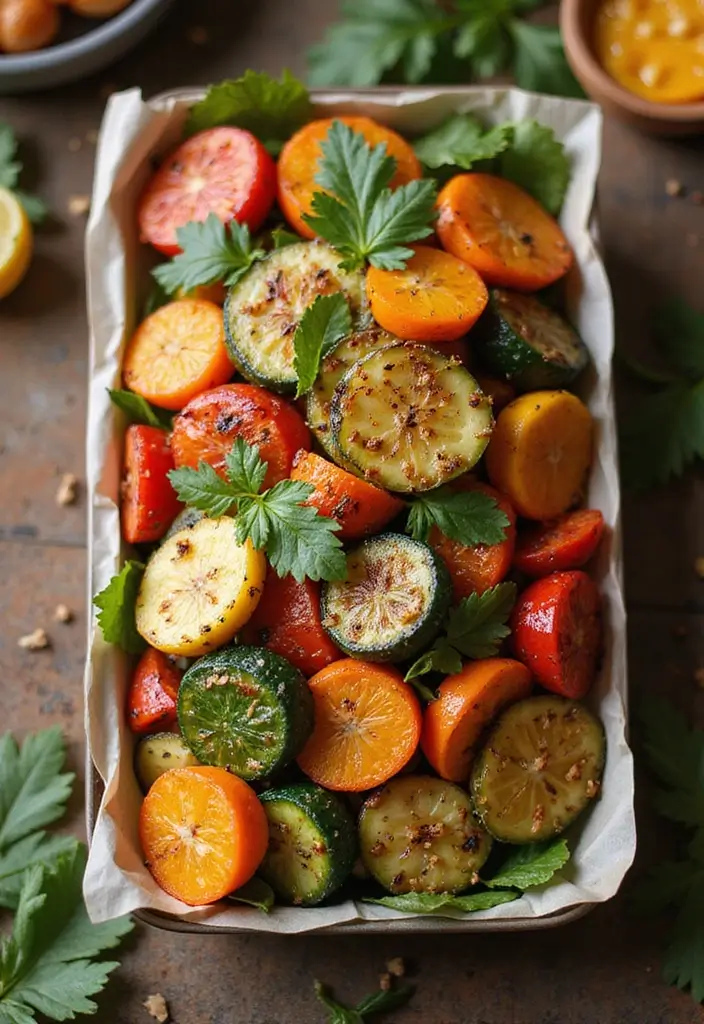
Overview: Servings: 2 | Prep Time: 15 mins | Cook Time: 25 mins | Total Time: 40 mins | Calories: 250 (approx.)
If you’re searching for a quick, filling lunch, look no further than this roasted vegetable salad. Packed with vibrant flavors and healthy nutrients, it’s an easy way to enjoy your favorite veggies. Imagine the sweet aroma of zucchini, bell peppers, and broccoli blending together as they roast. This salad is not only satisfying but also low-carb, making it perfect for your keto lifestyle.
You can easily prep this salad ahead of time. Enjoy it chilled from the fridge or at room temperature, making it a great option for those hectic days when time is tight.
Ingredients:
– 1 zucchini, diced
– 1 bell pepper, diced
– 1 cup broccoli florets
– 2 tablespoons olive oil
– 1 tablespoon balsamic vinegar
– Salt and pepper to taste
Instructions:
1. Preheat your oven to 425°F (220°C).
2. In a bowl, toss the zucchini, bell pepper, and broccoli with olive oil, balsamic vinegar, salt, and pepper. Make sure every piece is coated well.
3. Spread the vegetables on a baking sheet in a single layer. Roast for 25 minutes or until they are tender and slightly caramelized.
4. Let them cool before adding to a bed of greens or enjoying them solo.
Tips: For a burst of flavor, use seasonal veggies. They not only taste better but also save you money!
FAQ: Can I eat this cold? Absolutely! It’s delicious at any temperature, making it a flexible meal choice for your busy lifestyle.
Enjoy your vibrant, healthy lunch!
Roasted Vegetable Salad
Editor’s Choice

50 Pack (100-Piece) 24 oz Meal Prep Containers Reusable with Lids, Sturd…
 Amazon$23.99
YARRAMATE 16oz/470ml Glass Olive Oil Sprayer for Cooking with Stickers, …
 Amazon$8.99
365 by Whole Foods Market, Balsamic Vinegar Of Modena, 16.9 Fl Oz
 AmazonCheck Price
18. Almond Butter and Celery Sticks
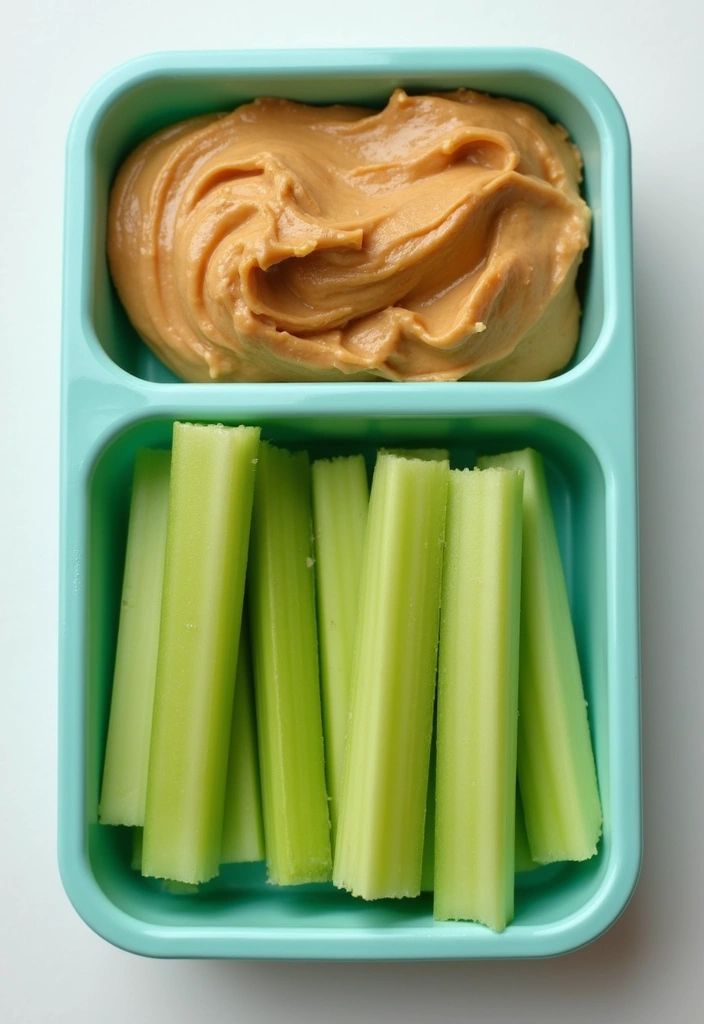
Overview: Servings: 1 | Prep Time: 5 mins | Cook Time: 0 mins | Total Time: 5 mins | Calories: 180 (approx.)
Looking for a quick and satisfying lunch option? Almond butter and celery sticks are your answer! This tasty combo offers a delightful crunch and keeps you feeling full. Packed with healthy fats and protein, it’s an easy choice for your keto lunch box. Plus, it takes less than five minutes to prepare, which is perfect for busy days!
You can spice things up by cutting the celery into fun shapes. Make it a little more exciting by trying out different nut butters like peanut or cashew. These small changes can turn a simple snack into something special.
Ingredients:
– 2 tablespoons almond butter
– 2 celery sticks
Instructions:
1. Rinse the celery sticks and cut them into your preferred lengths.
2. Spoon the almond butter into a small, portable container.
3. Pack the celery and almond butter together for a delicious and nutritious snack.
Tips: Experiment with various nut butters to keep your snacks fresh and exciting!
FAQ: Is almond butter safe for keto? Yes, just make sure to check for added sugars on the label to stay on track!
With this simple yet satisfying option, you can easily nourish your body and keep your energy up throughout the day. Enjoy your crunchy snack, and feel good knowing you’re sticking to your keto goals!
Almond Butter and Celery Sticks
Editor’s Choice

Signoraware Butter Dish with Lid -Butter Keeper Container with Clear Lid…
 Amazon$6.99
Cutting Sticks White for Challenge 305 (30.50″ x 0.495″ x 0.495″) (CS420…
 Amazon$57.00
Laurel’s Butter Variety Pack – Sample Pack of Favorite Flavors – Include…
 Amazon$24.99
19. Chia Seed Pudding
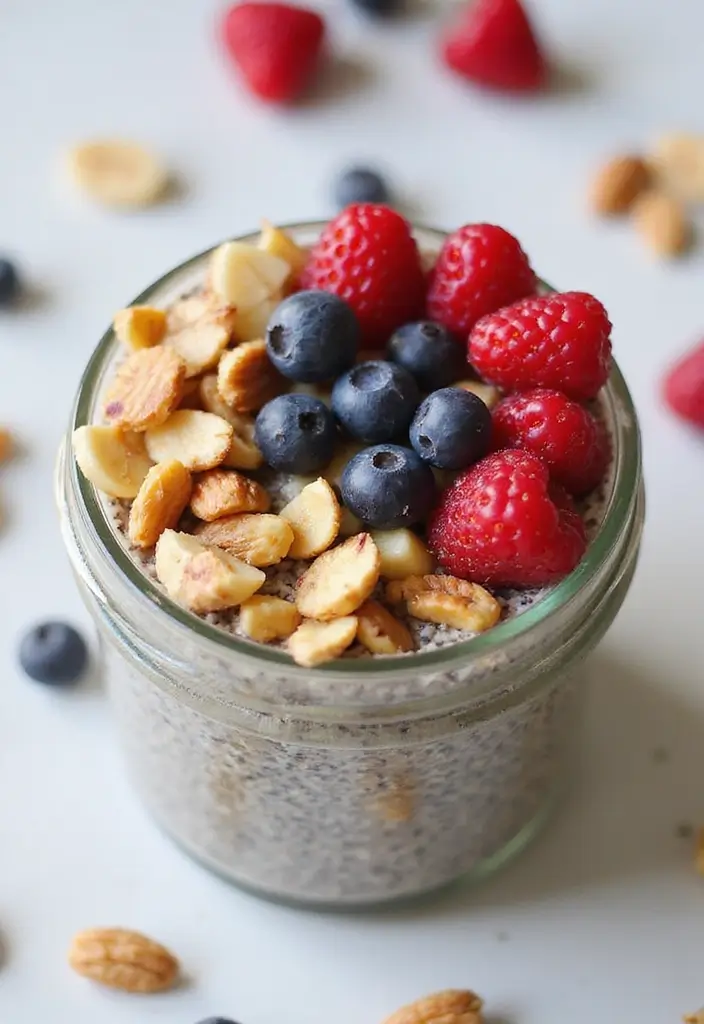
Chia Seed Pudding: A Wholesome Keto Snack
Chia seed pudding is a perfect choice for those busy days when you need a quick, keto-friendly meal. This delightful treat is not only easy to prepare but also rich in fiber and omega-3 fatty acids, making it a nutritious option for adults on the go. With just a few ingredients, you can whip up a creamy pudding that satisfies your cravings. Picture this: a smooth, thick pudding topped with crunchy nuts or plump berries, ready to brighten your lunch break!
Preparing chia seed pudding is a breeze. Combine chia seeds and almond milk, then let the mixture sit overnight. The seeds absorb the liquid and transform into a luscious pudding. This dish is a fantastic make-ahead option. Just pack it in a jar, and you’re ready for a delightful lunch or snack at work.
Here’s how to make it:
Ingredients:
– 1/4 cup chia seeds
– 1 cup unsweetened almond milk
– Sweetener of choice (like stevia or erythritol)
– Toppings: nuts (like almonds or walnuts) or berries (like strawberries or blueberries)
Instructions:
1. In a medium bowl, mix together chia seeds, almond milk, and your preferred sweetener.
2. Stir well to ensure the seeds are evenly distributed.
3. Cover the bowl and refrigerate overnight.
4. In the morning, give it a good stir.
5. Top with your favorite nuts or berries before packing it up for lunch.
Tips: Use a mason jar for easy transport. It keeps your pudding fresh and ready to enjoy!
FAQ: How long does it last? You can keep it in the fridge for up to five days.
With this simple recipe, you’ll always have a nutritious, filling snack or dessert on hand. Enjoy the creamy texture and delightful toppings while sticking to your keto goals!
Chia Seed Pudding
Editor’s Choice

BetterBody Foods Organic Chia Seeds 2 lbs, 32 Oz, with Omega-3, Non-GMO,…
 Amazon$11.97
Silk Shelf-Stable Almond Milk, Unsweetened Vanilla, Dairy-Free, Vegan, N…
 Amazon$11.27
Ball Regular Mouth 16-Ounces Mason Jar with Lids and Bands (12-Units)
 Amazon$13.44
20. Stuffed Bell Peppers
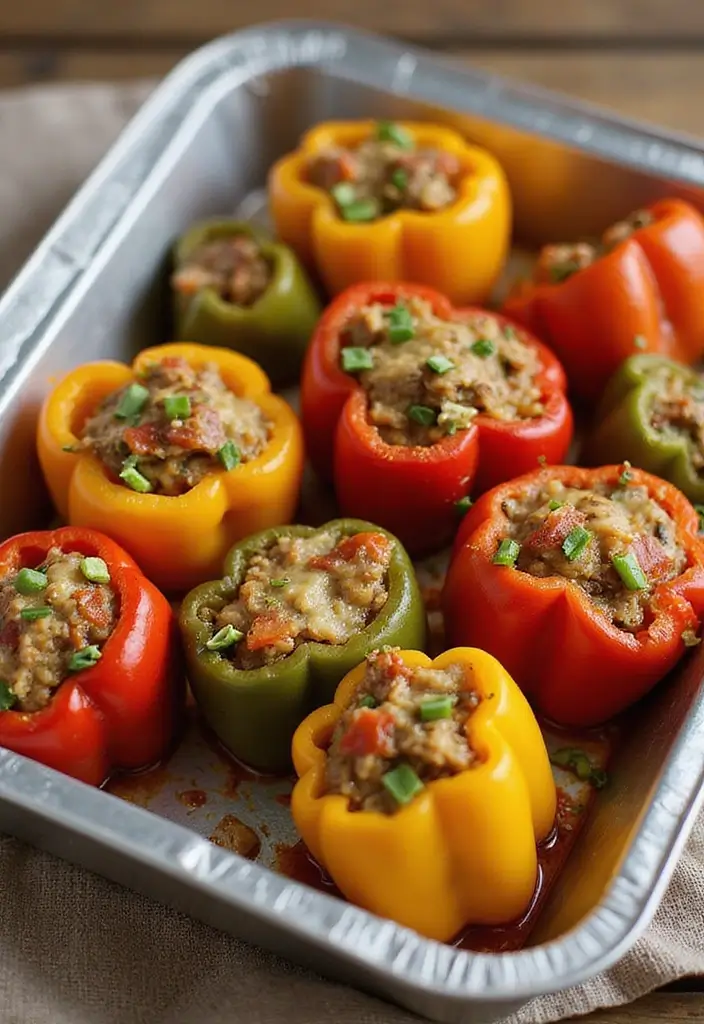
Overview: Servings: 4 | Prep Time: 15 mins | Cook Time: 30 mins | Total Time: 45 mins | Calories: 350 (approx.)
Stuffed bell peppers are not just a meal; they’re a colorful explosion of flavor and nutrition. Imagine sinking your teeth into a tender pepper filled with savory ground meat, melted cheese, and zesty spices. This dish is not only satisfying, but it’s also a feast for the eyes and your taste buds. Plus, they’re perfect for meal prep! Bake a batch ahead of time, and you’ll have delicious lunches ready to go all week long.
To make your stuffed bell peppers, gather these tasty ingredients:
Ingredients:
– 4 bell peppers (choose any color you like)
– 1 pound ground beef or turkey
– 1 cup diced tomatoes
– 1 cup shredded cheese
– Salt and pepper to taste
Now, let’s get cooking! Follow these simple steps:
Instructions:
1. Preheat your oven to 375°F (190°C) to get it nice and hot.
2. Carefully cut the tops off the bell peppers and scoop out the seeds.
3. In a skillet over medium heat, brown your ground meat. Once it’s cooked through, stir in the diced tomatoes, salt, and pepper.
4. Stuff the pepper halves with the meat mixture. Top each one generously with shredded cheese.
5. Place them in a baking dish and bake for 30 minutes, or until the peppers are tender and the cheese is bubbly.
6. Let them cool slightly before packing them up for lunch.
Tips: For a festive touch, mix and match the colors of your peppers. It not only looks great but also adds a variety of flavors!
FAQ: Can I freeze these? Absolutely! Stuffed peppers freeze well, making them a great option for future meals.
Enjoy your keto lunch with these delightful stuffed peppers, and watch your week become a little more flavorful!
Stuffed Bell Peppers
Editor’s Choice

50 Pack (100-Piece) 32 oz Meal Prep Containers Reusable with Lids 3-Comp…
 Amazon$21.99
The Wholesome Yum Easy Keto Cookbook: 100 Simple Low Carb Recipes. 10 In…
 Amazon$13.90
21. Almond Flour Pancakes
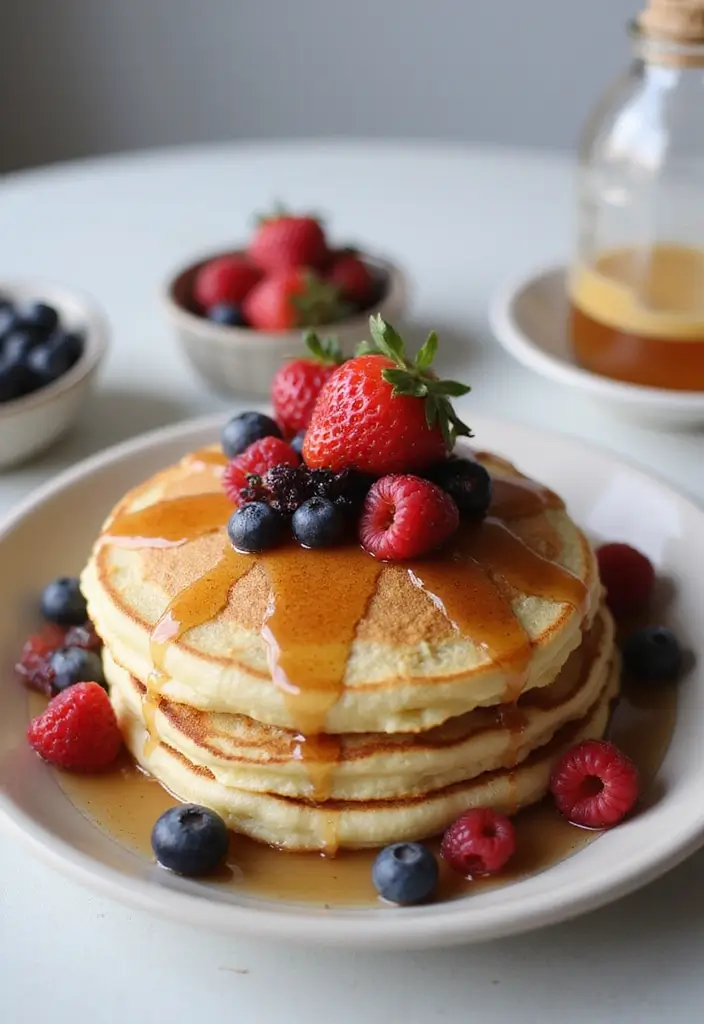
Overview: Servings: 2 | Prep Time: 10 mins | Cook Time: 10 mins | Total Time: 20 mins | Calories: 250 (approx.)
Craving pancakes while sticking to your keto diet? Look no further! These almond flour pancakes are your perfect solution. They’re light, fluffy, and incredibly satisfying. Imagine sinking your fork into a warm pancake topped with sugar-free syrup, fresh berries, or a dollop of whipped cream. It’s a treat that feels indulgent but fits right into your healthy eating plan. Pack a few in your lunchbox, and you’ve got a delicious meal ready to go!
Ready to whip up these keto-friendly delights? Here’s what you’ll need:
Ingredients:
– 1 cup almond flour
– 2 eggs
– 1/2 cup almond milk
– 1 teaspoon baking powder
– Sweetener of choice (optional)
Instructions:
1. In a mixing bowl, combine almond flour, eggs, almond milk, baking powder, and sweetener. Stir until the mixture is smooth.
2. Heat a non-stick skillet over medium heat. Pour in some batter to form a pancake.
3. Cook until bubbles appear on the surface, then flip and cook until golden brown.
4. Serve warm with your choice of toppings.
Tips: Cooking these pancakes in coconut oil adds a subtle flavor that enhances their deliciousness.
FAQ: Can you make these ahead of time? Absolutely! Store them in the fridge, and they’ll stay fresh for a few days. Just reheat them before serving for a quick meal.
These almond flour pancakes are perfect for breakfast or lunch. They’re versatile and can easily fit into your meal prep. Enjoy them fresh or save them for later – either way, you’ll be treating yourself to a delightful keto-friendly meal!
Almond Flour Pancakes
Editor’s Choice

Blue Diamond Almonds Almond Flour, Gluten Free, Blanched, Finely Sifted,…
 AmazonCheck Price
CAROTE Nonstick Frying Pan Skillet,Non Stick Granite Fry Pan Egg Pan Ome…
 Amazon$14.99
ChocZero Maple Syrup, Sugar Free, Low Carb, Sugar Alcohol Free, Gluten F…
 Amazon$9.99
22. Vegetable Egg Frittata
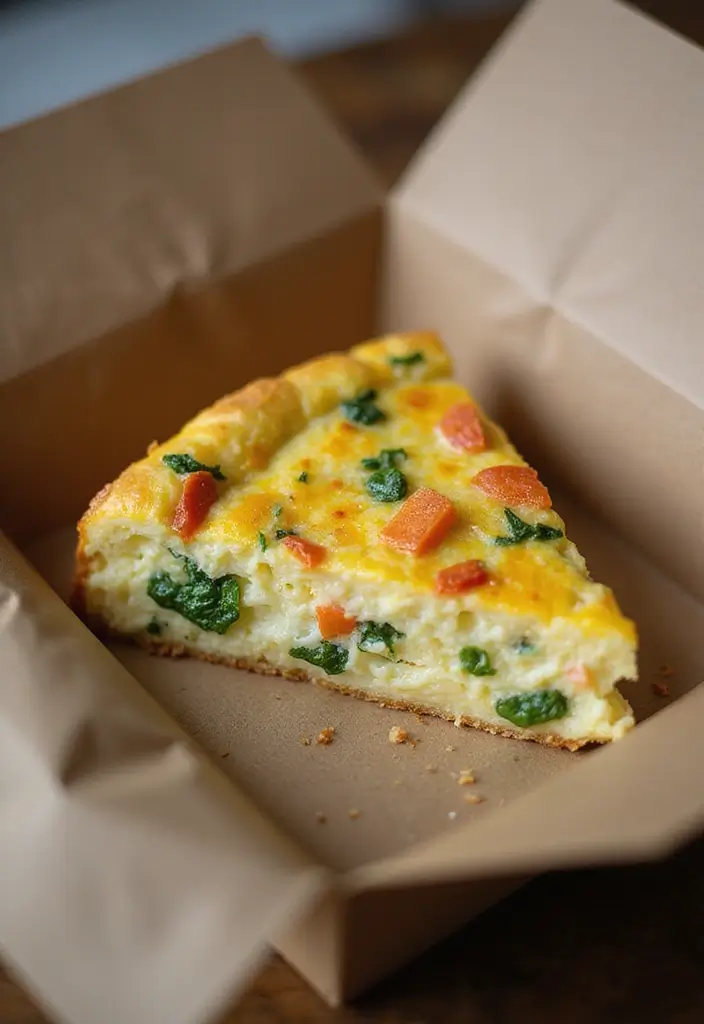
Overview: Servings: 4 | Prep Time: 10 mins | Cook Time: 20 mins | Total Time: 30 mins | Calories: 200 (approx.)
Need a quick, fulfilling lunch that’s easy to make? A vegetable egg frittata might just be your new go-to! Packed with protein and colorful veggies, this dish is not only nutritious but also incredibly versatile. You can whip it up in advance, and it tastes great both warm and cold. Just slice it into wedges for simple lunch box packing!
Let’s dive into how you can create this delicious frittata. You can mix and match your favorite vegetables to suit your taste. Think about adding zucchini, mushrooms, or even fresh herbs for that extra kick.
Here’s what you’ll need to make your frittata:
Ingredients:
– 6 large eggs
– 1 cup spinach, chopped
– 1/2 cup bell peppers, diced
– 1/2 cup cheese (your choice)
– Salt and pepper to taste
Instructions:
1. Start by preheating your oven to 375°F (190°C).
2. In a large bowl, whisk the eggs with a pinch of salt and pepper.
3. Gently fold in the chopped spinach, bell peppers, and cheese.
4. Pour the mixture into a greased oven-safe skillet.
5. Bake for about 20 minutes, or until the eggs are set and lightly golden.
6. Let it cool a bit, then slice into wedges for easy storage and transport.
Tips: Want to elevate your frittata?
– Add fresh herbs like basil or parsley for more flavor.
– Try different cheeses like feta or cheddar for a unique taste.
FAQ: How long will it last? You can keep it in the fridge for up to 5 days. Perfect for meal prep!
Enjoy your frittata as a satisfying lunch that fuels your day, whether at home or on the go!
Vegetable Egg Frittata
Editor’s Choice

Blue Diamond 5QT Saute Pan with Lid, Non Toxic PFAS-Free Diamond Ceramic…
 Amazon$34.97
50 Pack (100-Piece) 24 oz Meal Prep Containers Reusable with Lids, Sturd…
 Amazon$23.99
Fullstar The Original Pro Chopper – Vegetable Chopper and Spiralizer, Fo…
 Amazon$29.99
23. Chicken and Veggie Stew
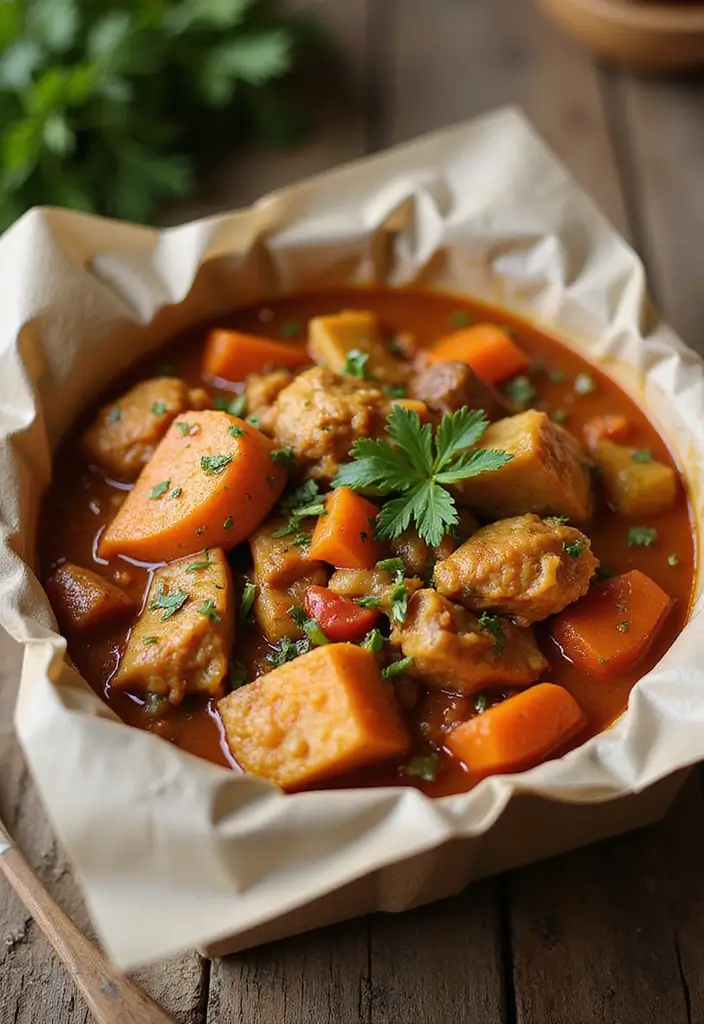
Overview: Servings: 4 | Prep Time: 15 mins | Cook Time: 30 mins | Total Time: 45 mins | Calories: 300 (approx.)
Are you looking for a warm and cozy lunch that won’t break your keto diet? Look no further than this delicious chicken and veggie stew. This hearty dish is packed with protein and colorful vegetables, making it a perfect meal to keep you satisfied. Plus, you can whip it up in just one pot, saving you time on cleanup. It’s an excellent option for meal prepping, allowing you to enjoy wholesome comfort food all week long.
Imagine savoring tender chicken pieces and fresh veggies simmered in a savory broth, seasoned with aromatic herbs. This stew not only fills your stomach but also warms your heart. Let’s get cooking with this simple recipe!
Ingredients:
– 1 pound chicken thighs, chopped into bite-sized pieces
– 2 cups mixed vegetables (like carrots, green beans, and bell peppers)
– 4 cups chicken broth
– 1 teaspoon Italian seasoning
– Salt and pepper to taste
Instructions:
1. In a large pot, combine the chopped chicken, mixed vegetables, chicken broth, and Italian seasoning. Add salt and pepper to taste.
2. Bring the mixture to a boil over medium-high heat. Once boiling, reduce the heat and let it simmer for about 30 minutes. This allows the chicken to cook through and the veggies to become tender.
3. After cooking, let the stew cool a bit before packing it into containers for lunch.
Tips: If you have leftovers, freeze them in individual portions for quick meals later on!
FAQ: Can I use frozen chicken? Absolutely! Just remember to adjust the cooking time to ensure it’s fully cooked. Enjoy your delicious stew!
Chicken and Veggie Stew
Editor’s Choice

Rubbermaid Brilliance Food Storage Containers BPA Free Airtight Lids Ide…
 Amazon$34.99
Ninja MC1001 Foodi PossibleCooker PRO 8.5 Quart Multi-Cooker, with 8-in-…
 Amazon$169.95
Easy Keto Meal Prep: Simplify Your Keto Diet with 8 Weekly Meal Plans an…
 Amazon$18.99
24. Cilantro Lime Chicken
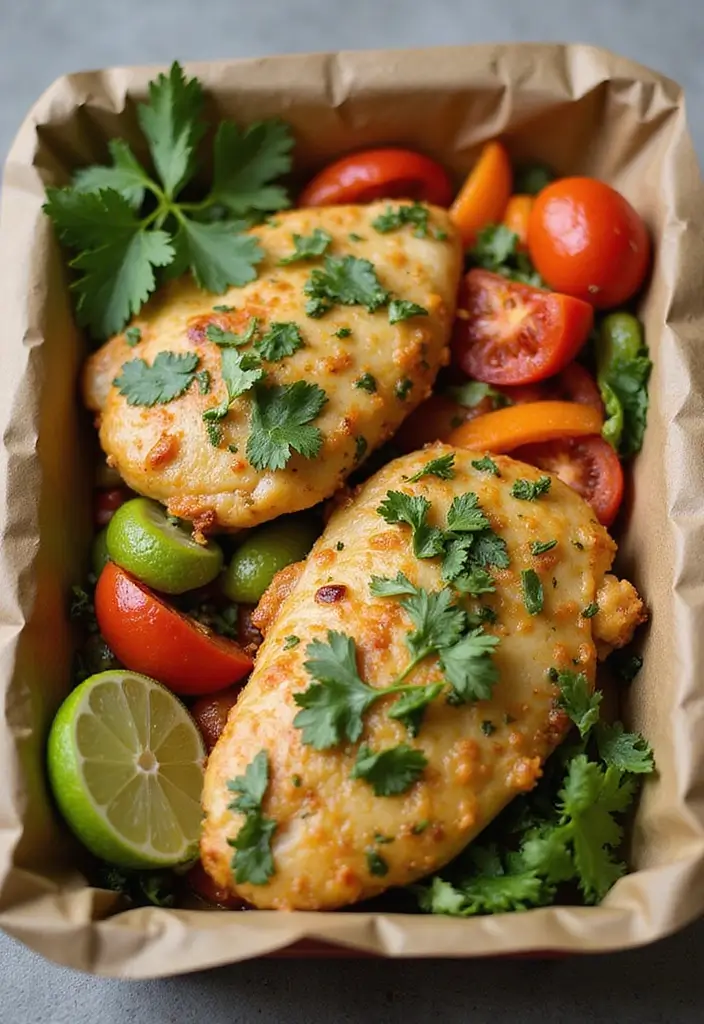
Overview: Servings: 4 | Prep Time: 10 mins | Cook Time: 20 mins | Total Time: 30 mins | Calories: 300 (approx.)
Looking for a lunch that’s bursting with flavor and easy to prepare? Try cilantro lime chicken! This dish is not only zesty and aromatic, but it also makes your taste buds dance. With a quick marinade of fresh cilantro and tangy lime, you can grill or bake the chicken to juicy perfection. It pairs wonderfully with crisp salads or roasted veggies, making it a versatile choice for your lunch box.
Plus, this recipe shines for meal prep! You can whip up a batch to enjoy throughout the week. Imagine diving into a delicious and healthy lunch that keeps you satisfied.
Ingredients:
– 1 pound chicken breasts
– 1/4 cup fresh cilantro, chopped
– Juice of 2 limes
– 2 tablespoons olive oil
– Salt and pepper to taste
Instructions:
1. In a mixing bowl, whisk together cilantro, lime juice, olive oil, salt, and pepper to make a refreshing marinade.
2. Add the chicken breasts to the marinade. Let them soak up the flavors for at least 30 minutes.
3. Preheat your grill or oven. Cook the chicken for about 20 minutes until it’s fully cooked and no longer pink inside.
4. Once done, let it cool, slice it up, and pack it for a tasty lunch!
Tips: Want to elevate your meal? Add sliced avocado for a creamy touch that complements the zesty chicken perfectly!
FAQ: Can I use bottled lime juice? Fresh lime juice definitely gives the best flavor, so opt for fresh if you can!
Cilantro Lime Chicken
Editor’s Choice

50 Pack (100-Piece) 32 oz Meal Prep Containers Reusable with Lids 3-Comp…
 Amazon$21.99
5-Blade Herb Cutter Scissors with Safety Cover, Cleaning Comb – Green
 Amazon$5.98
Alpha Grillers Meat Thermometer Digital – Instant Read Food Thermometer …
 Amazon$15.98
25. Beet and Goat Cheese Salad
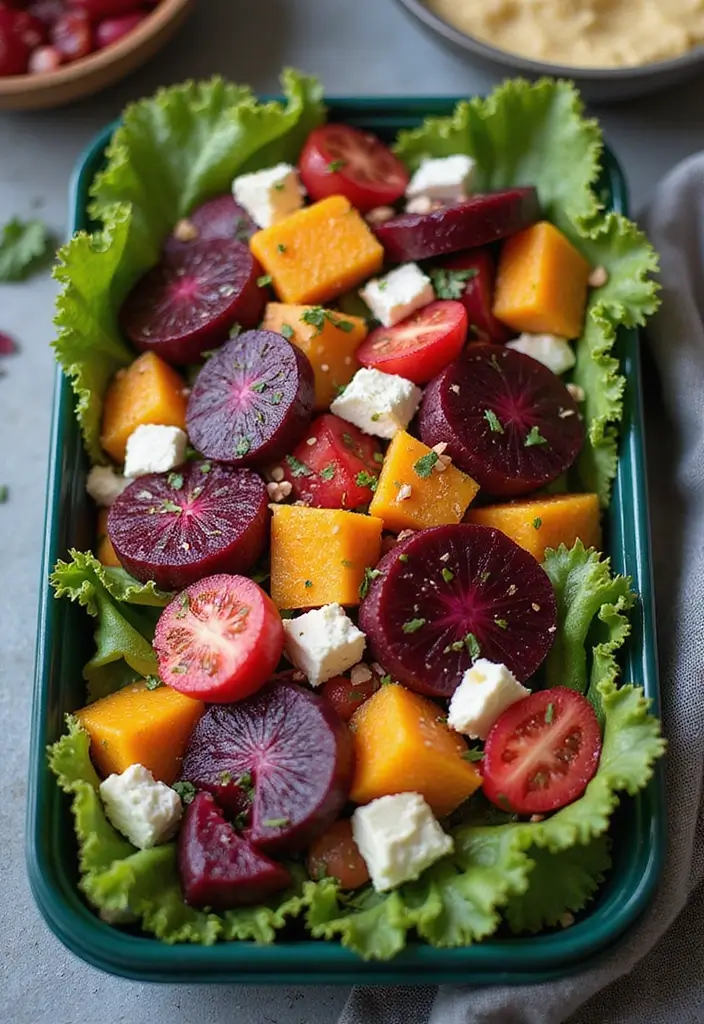
Overview: Servings: 2 | Prep Time: 10 mins | Cook Time: 30 mins | Total Time: 40 mins | Calories: 300 (approx.)
Looking for a refreshing lunch that’s both healthy and satisfying? A beet and goat cheese salad is just what you need! Roasted beets shine bright with their deep color and sweetness, while creamy goat cheese adds a rich, tangy flavor. This combination is not only delicious but also packed with nutrients to keep you energized throughout the day. Toss in some peppery arugula and crunchy walnuts, then drizzle with balsamic vinaigrette for a meal that’s as delightful to eat as it is to look at.
You can prep this salad ahead of time, making it perfect for busy lunches. Just store it in the fridge, and you’re ready to go when hunger strikes!
Ingredients:
– 2 medium beets, roasted and diced
– 4 ounces goat cheese, crumbled
– 2 cups arugula
– 1/4 cup walnuts, toasted
– 2 tablespoons balsamic vinaigrette
Instructions:
1. Begin by combining the roasted beets, crumbled goat cheese, arugula, and toasted walnuts in a large mixing bowl.
2. Drizzle the balsamic vinaigrette over the salad.
3. Toss gently to combine all the flavors.
4. Pack it up in a container for a refreshing lunch that’s ready when you are!
Tips: For quicker prep, use pre-cooked beets. They save time and still taste great!
FAQ: How long does it last? This salad stays fresh for about 3 days in the fridge, making it a great meal prep option. Enjoy every bite!
Beet and Goat Cheese Salad
Editor’s Choice

50 Pack (100-Piece) 32 oz Meal Prep Containers Reusable with Lids 3-Comp…
 Amazon$21.99
365 by Whole Foods Market, Balsamic Vinegar Of Modena, 16.9 Fl Oz
 AmazonCheck Price
Beets, Early Wonder, Heirloom, Non GMO, 25+ Seeds, Tender N Sweet Beet, …
 AmazonCheck Price
26. Cabbage Roll Casserole
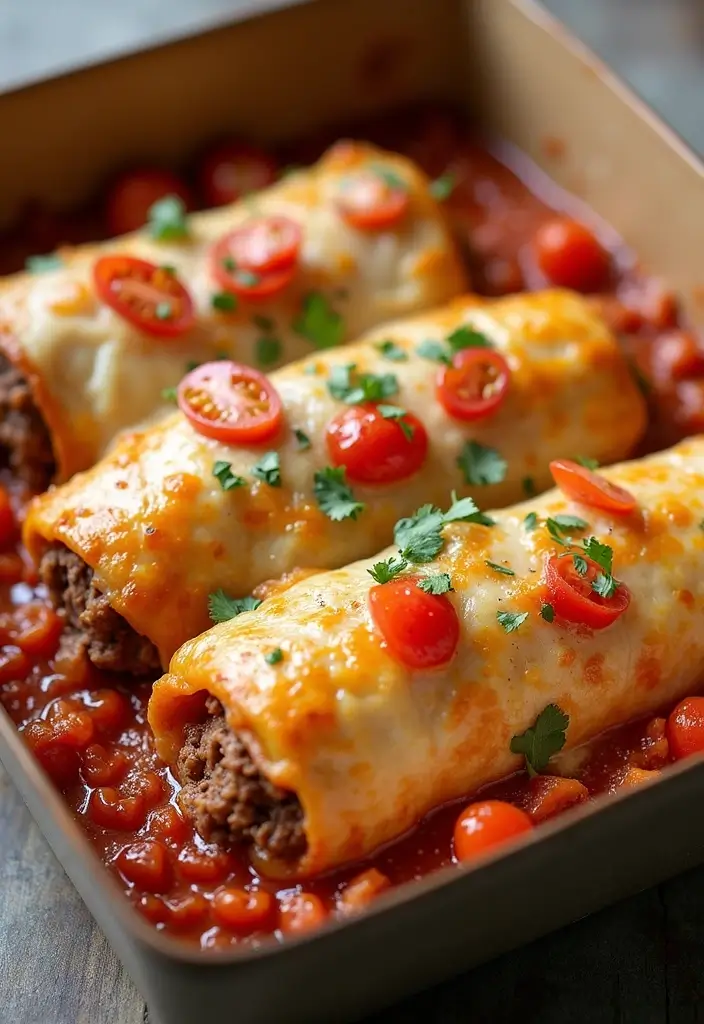
Overview: Servings: 4 | Prep Time: 15 mins | Cook Time: 40 mins | Total Time: 55 mins | Calories: 350 (approx.)
If you’re searching for a filling lunch that’s easy to make, look no further than cabbage roll casserole. This dish packs all the classic flavors of stuffed cabbage rolls into a simple, layered casserole. You’ll enjoy savory ground meat, tender cabbage, and zesty tomato sauce, all coming together in one delicious bite.
This casserole is perfect for meal prep. You can make a big batch ahead of time, store it in the fridge, and just reheat for a quick and satisfying lunch.
Ingredients:
– 1 pound ground beef or turkey
– 1/2 head of cabbage, chopped
– 1 can diced tomatoes
– 1 onion, diced
– 2 cloves garlic, minced
– Salt and pepper to taste
Instructions:
1. Preheat your oven to 350°F (175°C). This ensures your casserole cooks evenly.
2. In a large skillet, brown the ground meat with diced onion and minced garlic. This step builds flavor, so don’t rush it.
3. In a baking dish, layer the chopped cabbage, the cooked meat mixture, and diced tomatoes. You can sprinkle some salt and pepper between the layers for extra seasoning.
4. Cover and bake for 40 minutes. This allows the cabbage to become tender and the flavors to meld perfectly.
5. Once it’s done, let it cool slightly before packing it for lunch.
Tips: You can freeze portions of this casserole. Just thaw and reheat for a quick meal anytime!
FAQ: What if I want to use a different meat? Feel free to swap in any ground meat you like, such as chicken or pork.
Enjoy this easy and comforting dish that fits right into your keto lifestyle!
Cabbage Roll Casserole
Editor’s Choice

50 Pack (100-Piece) 32 oz Meal Prep Containers Reusable with Lids 3-Comp…
 Amazon$21.99
27. Lemon Garlic Shrimp
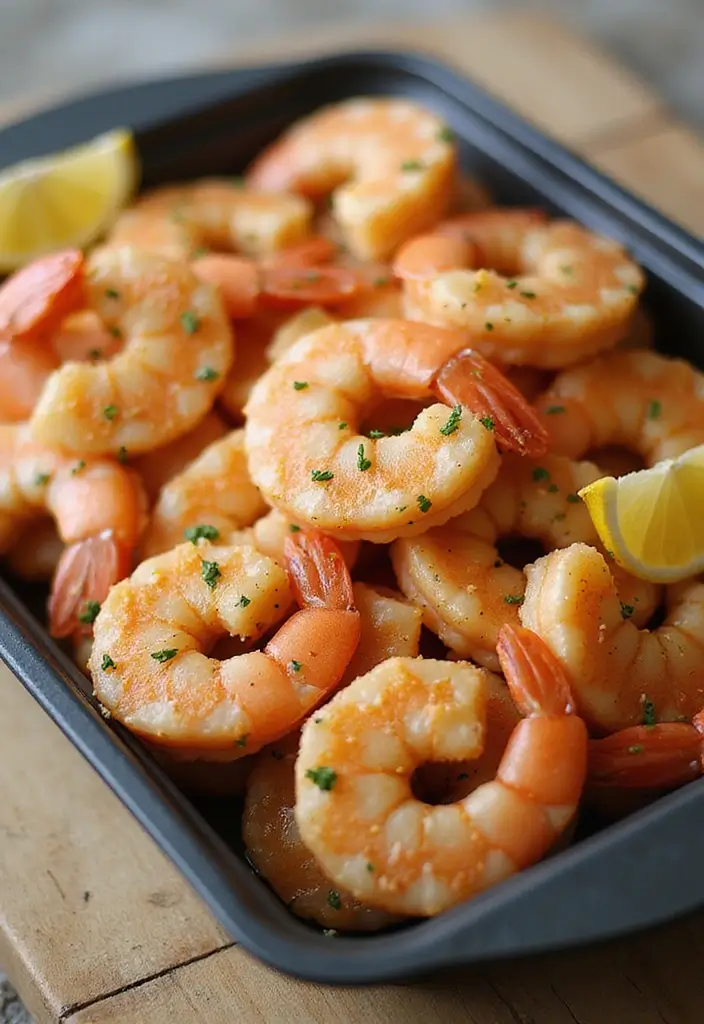
Overview: Servings: 2 | Prep Time: 10 mins | Cook Time: 10 mins | Total Time: 20 mins | Calories: 250 (approx.)
Lemon garlic shrimp is a delightful dish that bursts with flavor and is super easy to make. You’ll love how quickly it comes together. In just 20 minutes, you can whip up this zesty meal. Shrimp sautéed in fresh garlic and tangy lemon juice creates a light but satisfying lunch. Pair it with sautéed zucchini or cauliflower rice to make it even heartier.
This dish is wonderfully versatile, tasting great whether served warm or chilled. That makes it a perfect choice for your lunch box!
Ingredients:
– 1 pound shrimp, peeled and deveined
– 2 tablespoons olive oil
– 2 cloves garlic, minced
– Juice of 1 lemon
– Salt and pepper to taste
Instructions:
1. Heat olive oil in a skillet over medium heat.
2. Add shrimp and garlic, cooking until the shrimp turns pink and opaque.
3. Squeeze fresh lemon juice over the shrimp, then season with salt and pepper.
4. Serve it with sautéed zucchini or cauliflower rice, or simply let it cool and pack it for lunch.
Tips: Want a bit more heat? Add red pepper flakes to the shrimp as they cook for a spicy kick!
FAQ: Can I use frozen shrimp? Absolutely! Just thaw them before cooking for the best results.
Lemon Garlic Shrimp
Editor’s Choice

Silicone Freezer Tray With Lid – Soup Freezer Container molds – Large Ic…
 Amazon$15.99
Kitessensu High Effective Garlic Press With Studs, Heavy Duty Garlic Min…
 Amazon$11.99
Spiralizer for Veggies, 4 in 1 Zoodles Zucchini Noodle Maker, Zucchini S…
 Amazon$8.76
28. Veggie and Cheese Snack Box
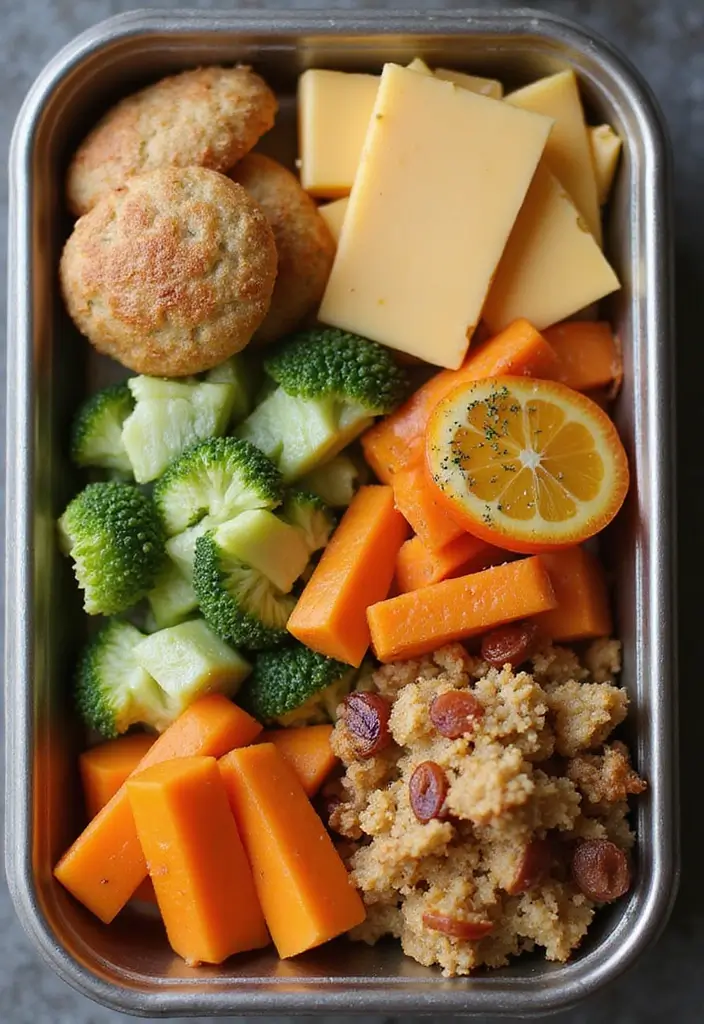
Overview: Servings: 1 | Prep Time: 10 mins | Cook Time: 0 mins | Total Time: 10 mins | Calories: 200 (approx.)
Need a quick and satisfying lunch? Try this colorful veggie and cheese snack box! Perfect for busy days, this meal gives you the crunch from fresh vegetables and the creamy goodness from your favorite cheeses. It’s light but filling, making it an ideal choice when you’re on the go.
You can customize this snack box to match your tastes. Use different cheeses and veggies to keep things exciting. Pinterest is buzzing with variations, so get inspired and make it your own!
Here’s how to put together your perfect veggie and cheese snack box:
Ingredients:
– 1/2 cup of your favorite cheese (think cheddar, mozzarella, or gouda)
– 1 cup of assorted fresh vegetables (try carrots, bell peppers, and cucumbers for a colorful mix)
Instructions:
1. Start by cutting your cheese into bite-sized cubes.
2. Chop your chosen vegetables into sticks or small pieces.
3. Pack everything into a snack box or container. You can layer the cheese and veggies for a fun look!
Tips: To elevate your snack box, add a low-carb dip like ranch or hummus. This adds flavor and keeps things interesting!
Now you have a tasty, nutritious lunch that’s easy to grab and enjoy! This veggie and cheese snack box not only satisfies your hunger but also lets you play with flavors and textures. Perfect for work, school, or a picnic, it’s a meal that feels special without the fuss.
• Choose a variety of cheeses for different flavors
• Pick colorful veggies for visual appeal
• Add a low-carb dip for extra taste
• Place everything in a bento box for an organized look
Veggie and Cheese Snack Box
Editor’s Choice

Bento Box Adult Lunch Box, Containers for Adults Men Women with 4 Compar…
 Amazon$9.99
A Blend Above Spinach Parmesan Dip Mix, 1oz, (3 Pack), Gluten-Free, No M…
 Amazon$17.97
Sopito Stainless Steel Wire Cheese Slicer With 3 Extra Wires Adjustable …
 AmazonEUR 8.64
29. Moroccan Chicken Salad
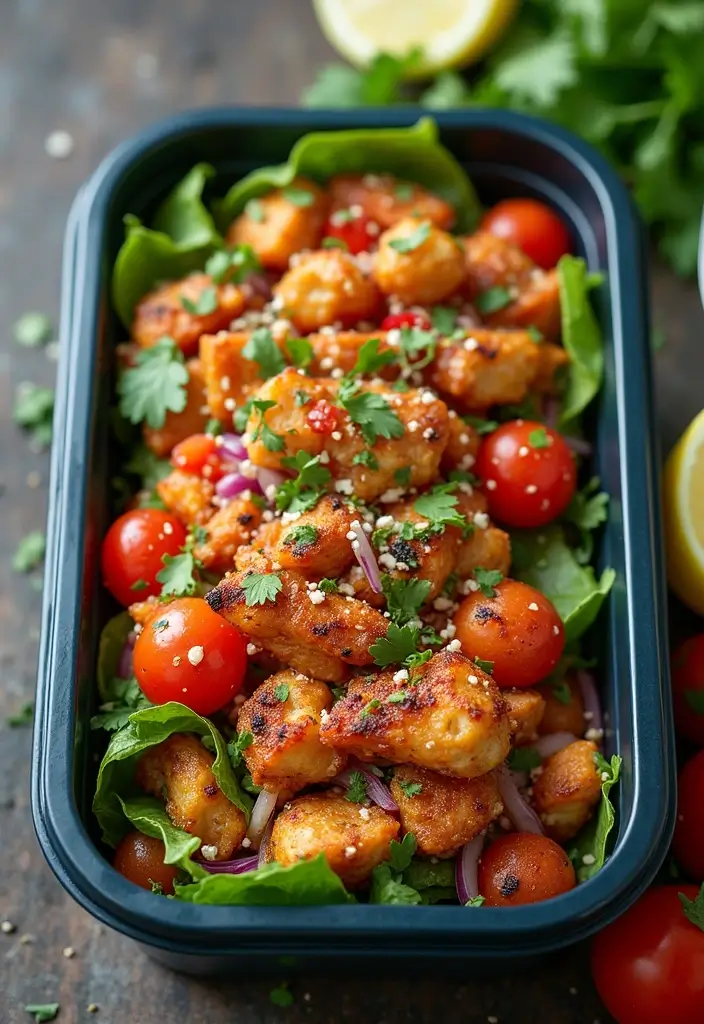
Overview: Servings: 2 | Prep Time: 15 mins | Cook Time: 0 mins | Total Time: 15 mins | Calories: 350 (approx.)
Looking for a lunch that packs a flavor punch? Try this Moroccan Chicken Salad! It’s an easy, no-cook dish that combines tender shredded chicken with warm spices and a hint of sweetness from dried fruits. The freshness of veggies adds a crisp texture, making every bite a delightful experience. This salad is not only quick to prepare but also perfect for meal prep, so you can enjoy it all week long.
You can serve it over a bed of greens or enjoy it straight from the bowl. Either way, you’ll feel satisfied and energized!
Ingredients:
– 2 cups cooked shredded chicken
– 1/4 cup dried apricots, chopped
– 1/4 cup almonds, toasted
– 1 teaspoon cumin
– 1/2 teaspoon cinnamon
– 2 cups mixed greens
Instructions:
1. In a large mixing bowl, combine the shredded chicken, chopped apricots, and toasted almonds.
2. Sprinkle in the cumin and cinnamon, then mix well to combine all the flavors.
3. Serve the salad over mixed greens or pack it as is for a tasty lunch option.
Tips: For an extra burst of flavor, add fresh herbs like cilantro or mint before serving!
FAQ: How long can I keep this salad? It’s best enjoyed within 3 days for maximum freshness.
This Moroccan Chicken Salad is a great way to spice up your lunch routine while sticking to your keto goals. Enjoy the rich flavors and textures that make this dish a winner!
Moroccan Chicken Salad
Editor’s Choice

50 Pack (100-Piece) 32 oz Meal Prep Containers Reusable with Lids 3-Comp…
 Amazon$21.99
Primal Kitchen Greek Vinaigrette & Marinade Salad Dressing made with Avo…
 AmazonCheck Price
Generic Simply Organic Starter Spice Gift Set, 0.33 Ounce (Pack of 12)
 Amazon$31.84
30. Mini Meatloaf Muffins
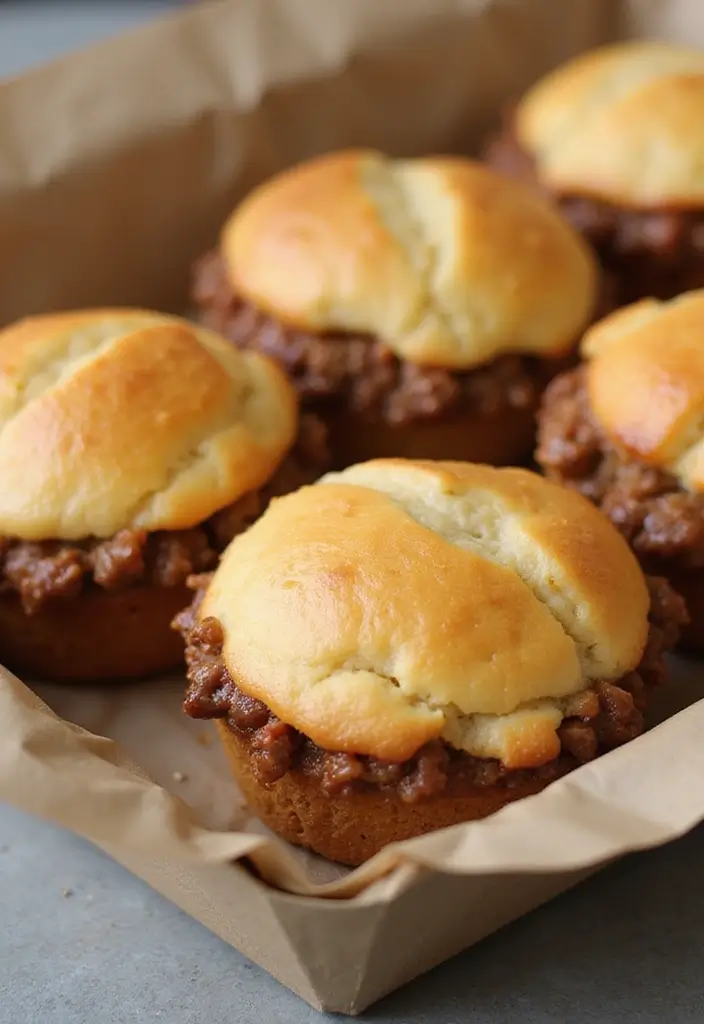
Overview: Servings: 2 | Prep Time: 10 mins | Cook Time: 25 mins | Total Time: 35 mins | Calories: 350 (approx.)
Looking for a delicious and filling lunch that fits your keto lifestyle? Try these Mini Meatloaf Muffins! They’re bite-sized, packed with protein, and bursting with flavor. Plus, they make meal prep a breeze. You can easily toss them in your lunch box for on-the-go convenience. Pair them with sautéed veggies for a satisfying, complete meal that travels well.
Ingredients:
– 1 pound ground turkey or beef
– 1/2 cup almond flour
– 1 egg
– 1/4 cup onion, chopped
– Salt and pepper to taste
Instructions:
1. Preheat your oven to 375°F (190°C).
2. In a mixing bowl, combine the ground meat, almond flour, egg, chopped onion, salt, and pepper. Stir until everything is well mixed.
3. Spoon the meat mixture into a greased muffin tin, filling each cup about three-quarters full.
4. Bake for 25 minutes or until they are cooked through and golden brown.
5. Let them cool before packing them away for lunch!
Tips: For a cheesy twist, sprinkle shredded cheese on top before baking. It adds a melty finish and extra flavor!
FAQ: Can I freeze these? Absolutely! They freeze perfectly, making them a great option for meal planning.
These Mini Meatloaf Muffins are not just tasty; they’re also a fantastic way to stick to your keto diet while enjoying a comforting classic. Perfect for busy days when you need something quick and filling. Enjoy every bite knowing you’re fueling your body right!
Mini Meatloaf Muffins
Editor’s Choice

2Pack Silicone Muffin Pan for Baking with Metal Reinforced Frame, 12 Cup…
 Amazon$19.99
50 Pack (100-Piece) 24 oz Meal Prep Containers Reusable with Lids, Sturd…
 Amazon$23.99
Blue Diamond Almonds Almond Flour, Gluten Free, Blanched, Finely Sifted,…
 Amazon$9.91
Conclusion
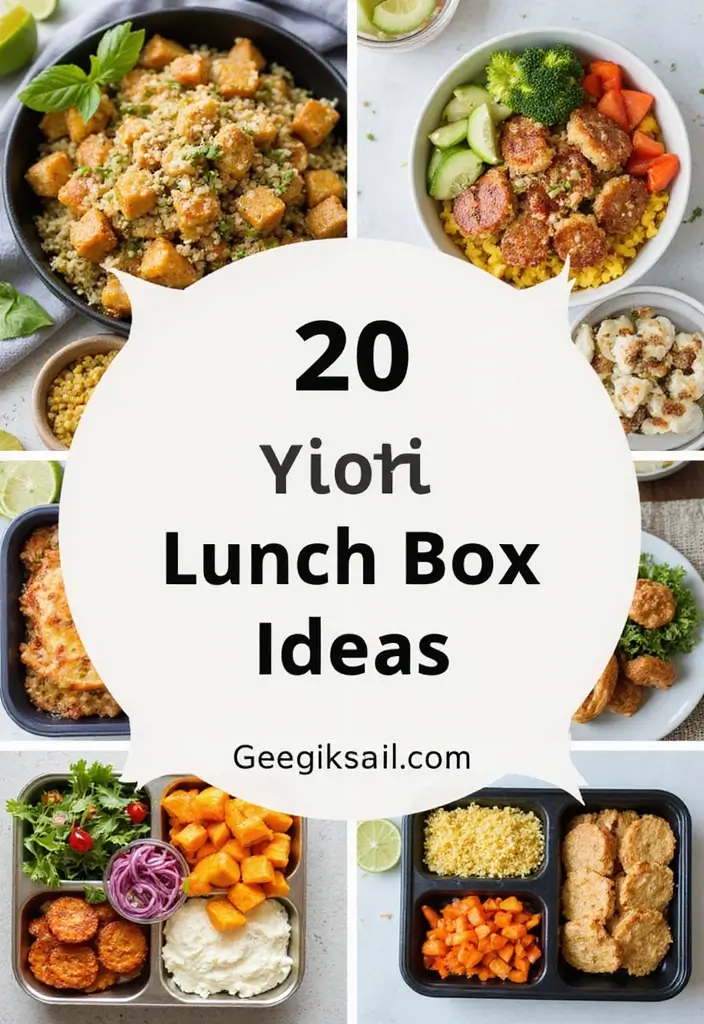
With these 30+ keto lunch box ideas, your meal prep just got a whole lot easier! Each option is designed to be quick and filling, making it convenient for busy professionals who want to stick to their keto lifestyle.
From colorful salads to hearty wraps and everything in between, there’s something here for everyone. Don’t hesitate to mix and match or add your own twist to these recipes. Happy lunch packing!
Note: We aim to provide accurate product links, but some may occasionally expire or become unavailable. If this happens, please search directly on Amazon for the product or a suitable alternative.
This post contains Amazon affiliate links, meaning I may earn a small commission if you purchase through my links, at no extra cost to you.
Frequently Asked Questions
What Are Some Easy Keto Lunch Box Ideas for Adults?
Looking for quick and filling options? Consider packing zucchini noodles with pesto and grilled chicken, or a cobb salad with avocado, bacon, and hard-boiled eggs. These keto lunch box ideas for adults are not only delicious but also low in carbs, making them perfect for a busy professional’s day!
How Can I Prepare Keto Meals for the Week?
Meal prepping is a game-changer! Start by selecting a few low-carb recipes that you enjoy. Prepare bulk items like grilled meats, roasted vegetables, and keto-friendly snacks such as cheese crisps and nuts. Portion them into containers, and you’ll have ready-to-go lunches throughout the week. This way, you can easily stick to your keto meal prep goals!
What Are Some Healthy Keto Snacks to Include in My Lunch Box?
Incorporating healthy keto snacks can keep your energy levels up. Think about adding items like almond butter packets, sliced cucumbers with cream cheese, or hard-boiled eggs. These snacks are not only filling but also complement your keto lunch box ideas for adults perfectly!
Can I Make Keto Lunches That Are Ready in Under 15 Minutes?
Absolutely! Quick keto meals can be achieved with minimal effort. Try wraps made with lettuce filled with turkey and cheese or a quick stir-fry with pre-cooked shrimp and veggies. With a little creativity, you can whip up delicious and satisfying lunches in no time, making it easier to follow your keto lunch box ideas for adults!
What Are Some Tips for Sticking to a Keto Diet During Busy Workdays?
Staying on track during busy workdays can be challenging, but having a plan helps! Always pack your keto lunch box ideas for adults the night before and keep healthy snacks on hand. Stay hydrated, and if you’re tempted by office treats, bring your own keto-friendly snacks to avoid the urge. Preparation and mindfulness are key to your success!
Related Topics
keto lunch box
meal prep
low-carb recipes
healthy lunches
quick keto meals
ketogenic snacks
easy keto recipes
office lunches
busy professionals
nutritious snacks
30-minute meals
adult lunch ideas
