School lunches can be a real challenge, can’t they? Trying to balance nutrition with what kids actually want to eat often feels like walking a tightrope. I created this post because I know the struggle of packing lunches that don’t end up in the trash. It’s time to break free from the same old turkey sandwich and apple routine.
If you’re a parent, caregiver, or anyone involved in feeding picky eaters, this post is definitely for you. You might be looking for ideas that are not only balanced and low in calories but also fun and appealing to kids. Let’s be honest: no one wants to be the lunchbox villain serving up food that gets rejected at the cafeteria table.
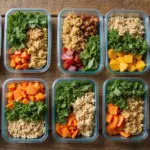
So, what can you expect? I pulled together 27 low-calorie school lunch ideas that kids will actually eat. These meals are not only healthy but also tasty and easy to prepare. From wraps to bento boxes, each idea aims to spark your child’s interest while keeping their nutrition in check. With these ideas, you’ll have a repertoire of lunches that kids will love, and you can feel good about sending them off with something nourishing.
Get ready to explore some creative and practical lunch options that will make lunchtime exciting again!
1. Rainbow Veggie Wraps

Brighten up your child’s lunchbox with these delightful Rainbow Veggie Wraps. Not only do they look amazing, but they also pack a nutritional punch. With a colorful mix of fresh veggies, these wraps keep your kids fueled and excited all day long. Using whole wheat tortillas, you can fill them with vibrant bell peppers, crunchy carrots, and nutrient-rich spinach for a tasty crunch in every bite.
To make these wraps even more appealing, spread a layer of creamy hummus or cream cheese on the tortilla. This adds flavor and helps hold all those delicious veggies together. Kids love fun colors, and these wraps are a fantastic way to encourage them to enjoy their vegetables. Plus, they can help assemble their own wraps, turning lunchtime into a creative adventure!
Recipe Overview:
– Servings: 4
– Prep Time: 15 minutes
– Cook Time: 0 minutes
– Total Time: 15 minutes
– Calories: Approximately 150 per wrap
Nutrition Information:
– Protein: 5g
– Carbs: 20g
– Fat: 6g
– Fiber: 4g
– Sugar: 2g
Ingredients:
– 4 whole wheat tortillas
– 1 cup hummus or cream cheese
– 1 red bell pepper, sliced
– 1 carrot, grated
– 1 cup spinach leaves
– ¼ cucumber, sliced
– Optional: sliced turkey or chicken for added protein
Instructions:
1. Start by spreading a thin layer of hummus or cream cheese on each tortilla.
2. Arrange the veggies in sections, keeping them colorful and neat.
3. If you like, add slices of turkey or chicken for a protein boost.
4. Roll the tortilla tightly and slice it into bite-sized pieces.
5. Pack the wraps in a sealed container to keep them fresh until lunchtime.
Tips for Success:
– Use a variety of vegetables to keep it fun and interesting.
– Let kids help assemble their wraps for an engaging lunchtime experience.
– Wrap tightly to prevent spills and make them easier to handle.
– Experiment with different spreads like avocado or yogurt for variety.
Frequently Asked Questions:
– Can I use a different type of tortilla? Yes, feel free to swap in any tortilla you prefer!
– How can I keep the wrap from getting soggy? Pack the spread separately and let your child add it before eating.
These Rainbow Veggie Wraps are not just healthy; they’re a creative way to keep lunchtime exciting! Enjoy experimenting with colors and flavors that your kids will love.
Rainbow Veggie Wraps
Editor’s Choice

365 Everyday Value Flour Tortillas Burrito Size, 16 Oz (Frozen)

Mezete Hummus Variety Pack | Authentic Middle Eastern | Free from Preser…

Bento Box Adult Lunch Box, Containers for Adults Men Women with 4 Compar…
2. Mini Quinoa Salad Jars

Mini Quinoa Salad Jars are a delightful way to pack a nutritious and fun lunch for your kids. These jars are not just cute; they’re filled with tasty ingredients that kids will love. Quinoa is a fantastic substitute for rice. It’s low in calories and packed with protein and essential nutrients. When you layer the salad in mason jars, it looks so inviting that your child won’t be able to resist!
To make these jars, start by cooking quinoa according to the package directions. Once it’s cool, grab a mason jar and begin layering. You can use colorful veggies like diced cucumbers, halved cherry tomatoes, and crunchy bell peppers. For a creamy touch, sprinkle in some feta cheese. Drizzle on a light vinaigrette, and you’ve got a lunch that’s as healthy as it is delicious. Plus, involving your kids in choosing the ingredients makes meal prep even more exciting!
Here’s how to make it:
Recipe Overview:
– Servings: 2
– Prep Time: 20 minutes
– Cook Time: 15 minutes
– Total Time: 35 minutes
– Calories: Approximately 220 per jar
Nutrition Information:
– Protein: 8g
– Carbs: 30g
– Fat: 7g
– Fiber: 5g
Ingredients:
– 1 cup cooked quinoa
– ½ cup cherry tomatoes, halved
– ½ cucumber, diced
– ¼ cup bell pepper, diced
– ¼ cup feta cheese, crumbled
– 2 tablespoons olive oil
– 1 tablespoon lemon juice
– Salt and pepper to taste
Instructions:
1. Cook the quinoa as per the package instructions and let it cool.
2. In a small bowl, whisk together olive oil, lemon juice, salt, and pepper for the vinaigrette.
3. In a mason jar, layer the quinoa first, then the veggies, and top with feta.
4. Drizzle the vinaigrette on top and seal the jar.
5. Store in the fridge until you’re ready to pack it for lunch.
To make your salad even more exciting, feel free to switch up the veggies or add protein like grilled chicken or beans. This salad stays fresh in the fridge for up to three days, making it a perfect make-ahead option for busy school weeks!
Quick Tips:
– Choose a variety of colorful vegetables for added nutrition.
– Pick grains like farro or brown rice if you want a change from quinoa.
– Add shredded chicken or beans for a more filling meal.
– Use different dressings to keep it fresh and interesting!
Mini Quinoa Salad Jars
Editor’s Choice

NETANY 6-pack 16 oz Overnight Oats Containers with Lids, Glass jars with…

Pride Of India – Natural Royal Red Bolivian Quinoa – Protein Rich Whole …

OXO Good Grips Little Salad Dressing Shaker – Black, Small
3. Fruit and Yogurt Parfait

Looking for a fun and healthy school lunch option? A Fruit and Yogurt Parfait is a great choice! This tasty treat is not just low in calories; it’s also packed with protein, fiber, and natural sugars. Your kids will love the colorful layers of yogurt, fresh fruit, and crunchy granola. You can easily customize it to fit their preferences.
Start with creamy low-fat yogurt. Then, layer in some delicious seasonal fruits like juicy strawberries, sweet bananas, or vibrant blueberries. Top it off with a sprinkle of granola for that perfect crunch. Best of all, you can prepare this parfait the night before, making it an easy grab-and-go meal for hectic mornings.
Here’s a simple recipe to make two servings:
Ingredients:
– 1 cup low-fat yogurt
– 1 cup mixed seasonal fruits
– ½ cup granola
Instructions:
1. Grab a tall glass or container and spoon in half of the yogurt as the base layer.
2. Add a layer of your favorite fruits, followed by a layer of granola.
3. Repeat these layers until the container is full.
4. Cover and store it in the refrigerator until you’re ready to eat.
Here are some tips to make it even better:
– Use Greek yogurt for an extra boost of protein.
– Choose low-sugar granola to keep it healthy.
Got questions? Here are some quick answers:
– Can I use frozen fruits? Yes, but fresh fruits taste better!
– How long can it last? It’s best to eat it within two days for the freshest taste.
Your kids will enjoy this fun, healthy lunch, and you’ll love how easy it is to prepare!
Fruit and Yogurt Parfait
Editor’s Choice


Cascadian Farm Organic Granola with No Added Sugar, Coconut Cashew Cerea…

KOMUEE 10 Packs 30 oz Glass Meal Prep Containers,Glass Food Storage Cont…
4. Turkey and Cheese Roll-Ups

Turkey and Cheese Roll-Ups are a hit with kids and a breeze to prepare! These tasty treats are not only low in calories but also fun to eat. Picture soft whole grain tortillas or slices of turkey wrapped around melty cheese. This simple lunch option allows you to get creative with flavors and textures. You can add a splash of color with fresh lettuce or a zesty spread like mustard. These roll-ups are perfect for little hands and can be enjoyed at school or on a picnic!
Here’s how to make these delicious roll-ups:
Recipe Overview:
– Servings: 4
– Prep Time: 10 minutes
– Cook Time: 0 minutes
– Total Time: 10 minutes
– Calories: About 120 per roll-up
Nutrition Information:
– Protein: 11g
– Carbs: 5g
– Fat: 7g
– Fiber: 1g
Ingredients:
– 4 whole grain tortillas or large slices of turkey
– 4 slices of cheese (try cheddar or mozzarella)
– Optional: lettuce, mustard, or any favorite spread
Instructions:
1. Lay out your tortillas on a clean surface.
2. Place a slice of turkey on each tortilla, followed by a slice of cheese.
3. Add any optional toppings like lettuce for extra crunch.
4. Roll the tortillas tightly and cut them into bite-sized pinwheels.
5. Pack these roll-ups in a lunchbox with some carrot sticks or apple slices for a balanced meal.
Pro Tips:
– Experiment with cheeses for new flavors.
– Include veggies to boost nutrition and crunch.
Frequently Asked Questions:
– Can I swap turkey for chicken? Absolutely! Chicken works just as well.
– How long can I store these? They taste best fresh but can last 1-2 days in the fridge.
Enjoy these roll-ups as a quick lunch solution that kids will love!
Fun fact: Turkey and Cheese Roll-Ups clock in at under 150 calories per serving, so you can pack two without bloating the lunchbox budget. Kids stay satisfied and moms stay calm, easy, tasty, and low calorie school lunch ideas that actually work.
Turkey and Cheese Roll-Ups
Editor’s Choice

365 by Whole Foods Market Flour Tortillas, 10.7 OZ

Sargento Natural Medium Cheddar Sliced Cheese, 11 Slices

Bentgo Kids Prints Leak-Proof, 5-Compartment Bento-Style Kids Lunch Box …
5. Cheesy Cauliflower Bites

Turn mealtime into a veggie celebration with these delightful Cheesy Cauliflower Bites! If you think your kids won’t touch their greens, think again. These tasty bites are not just a sneaky way to get them to eat cauliflower; they’re a fun, low-calorie snack that kids adore. With a cheesy flavor and a crispy texture, they’ll be begging for seconds. They’re fantastic for bento boxes or as a side dish that complements any meal!
Making these bites is super simple. Start by steaming cauliflower florets until they’re tender. Then, mix them with shredded cheese, breadcrumbs, and a hint of seasoning. Bake until they’re golden brown and crispy. Plus, they freeze well, making them a perfect meal prep option for busy weeks ahead!
Recipe Overview:
– Servings: 4
– Prep Time: 10 minutes
– Cook Time: 20 minutes
– Total Time: 30 minutes
– Calories: About 100 per serving
Nutrition Information:
– Protein: 5g
– Carbs: 9g
– Fat: 6g
– Fiber: 2g
Ingredients:
– 2 cups cauliflower florets
– 1 cup shredded cheese (cheddar or mozzarella)
– ½ cup breadcrumbs
– 1 egg
– Salt and pepper to taste
Instructions:
1. Preheat your oven to 425°F (220°C).
2. Steam the cauliflower until tender, about 5-7 minutes.
3. In a bowl, mash the cauliflower and mix in cheese, breadcrumbs, egg, and seasoning.
4. Form into bite-sized balls and arrange them on a baking sheet.
5. Bake for 15-20 minutes until golden brown.
Serve them with a low-calorie dip like salsa or yogurt to make it even more fun! Feel free to add in other veggies like broccoli for extra nutrition.
FAQs:
– Want to use frozen cauliflower? No problem! Just thaw it and drain any extra water before mixing.
– How long do they last? Store these bites in the fridge for up to 3 days for a quick snack!
Cheesy Cauliflower Bites
Editor’s Choice

Amazon Basics Silicone Rectangular Baking Mat, Non-Stick Reusable Oven B…

QQKO Bento Lunch Box for Kids Girls Boys, Toddler Kids Lunch Boxes for S…

Vegetable Steamer Basket, Premium Stainless Steel Veggie Steamer Basket …
6. Egg Muffins with Spinach and Feta

Give your child a tasty, nutritious boost with homemade egg muffins! These delightful bites, packed with protein and flavor, make a perfect addition to any school lunch. With a base of eggs, fresh spinach, and crumbled feta, they are as healthy as they are delicious. Plus, you can whip them up ahead of time and keep them in your fridge or freezer for quick grab-and-go meals.
Making egg muffins is a breeze. All you need to do is whisk together eggs, mix in some chopped spinach and feta cheese, and pour the blend into muffin tins. Bake until they’re set, and you’ve got a versatile snack that your kids can enjoy warm or cold. They’re great for lunchboxes and easy to customize with your child’s favorite veggies!
Here’s how to make delicious egg muffins:
Ingredients:
– 6 eggs
– 1 cup fresh spinach, chopped
– ½ cup feta cheese, crumbled
– Salt and pepper to taste
Instructions:
1. Preheat your oven to 350°F (175°C).
2. In a mixing bowl, whisk the eggs until smooth.
3. Stir in the chopped spinach and feta. Season with salt and pepper.
4. Pour the mixture into greased muffin tins, filling each cup about three-quarters full.
5. Bake for 15-20 minutes, or until the muffins are fully set.
These muffins are not only simple to make, but they’re also a great way to sneak in some veggies. You can even add diced bell peppers or onions for an extra flavor kick. Store them in an airtight container, and they’ll last up to a week!
Pro Tips:
– Use egg whites for a lighter option.
– Reheat in the microwave for about 30 seconds before serving.
– Mix in other veggies like mushrooms or tomatoes for variety.
– Pack them cold in your child’s lunch for a nutritious snack.
With these egg muffins, you’ll have a quick, easy, and healthy lunch option that your kids will love!
Egg Muffins with Spinach and Feta
Editor’s Choice

2Pack Silicone Muffin Pan for Baking with Metal Reinforced Frame, 12 Cup…

Airtight Food Storage Containers with Lids, Vtopmart 24 pcs Plastic Kitc…
7. Greek Yogurt with Honey and Nut Mix

Imagine a lunch that’s both delicious and nutritious. This Greek Yogurt with Honey and Nut Mix is just that! It’s a quick, easy option that kids adore. The creamy yogurt packs a punch of protein, while the nuts add healthy fats. Drizzling honey over the top brings a touch of sweetness, making it feel like a dessert. Your kids will think they’re indulging, but you’ll know it’s a wholesome choice.
To prepare this tasty treat, grab some plain or flavored Greek yogurt. Scoop it into a container, drizzle with honey, and sprinkle on a mix of their favorite nuts. For an extra flavor kick, toss in some dried fruits. It’s a delightful combination of creamy, crunchy, and sweet!
Here’s how to make it:
Recipe Overview:
– Servings: 1
– Prep Time: 5 minutes
– Cook Time: 0 minutes
– Total Time: 5 minutes
– Calories: Approximately 200
Nutrition Information:
– Protein: 15g
– Carbs: 25g
– Fat: 5g
Ingredients:
– 1 cup Greek yogurt
– 1 tablespoon honey
– ¼ cup mixed nuts (such as almonds, walnuts, or pecans)
– Optional: dried fruits like cranberries or raisins
Instructions:
1. Scoop the Greek yogurt into a container.
2. Drizzle honey over the yogurt for sweetness.
3. Top with mixed nuts and add dried fruits if desired.
Feel free to adjust the yogurt type to suit your child’s taste. Unsweetened yogurt can help manage sugar levels. You can also experiment with different nuts or even add a sprinkle of cinnamon for flavor.
This lunch idea is not only easy to make but also budget-friendly. It’s perfect for busy mornings when you need something quick. Plus, it offers a great way to keep your kids energized throughout the school day.
Let’s make lunchtime fun and nutritious with this Greek yogurt delight!
Greek Yogurt with Honey and Nut Mix
Editor’s Choice

365 By Whole Foods Market, Greek Yogurt, Plain Nonfat, 32 Ounce

The Fresh Honey Cookbook: 84 Recipes from a Beekeeper’s Kitchen
8. Avocado Toast with Cherry Tomatoes

Avocado toast isn’t just a trend; it’s a delicious and healthy lunch choice your kids will adore! This colorful meal combines creamy avocado with the juicy sweetness of cherry tomatoes, creating a dish that’s both nutritious and visually appealing. Packed with healthy fats, avocados help keep kids energized throughout their school day.
To whip up this tasty meal, simply slice a ripe avocado and mash it onto a piece of whole grain toast. Add halved cherry tomatoes on top for that burst of flavor. A pinch of salt and pepper brings it all together, making it irresistible to young palates. Plus, this dish is quick to prepare, taking only five minutes!
Here’s how to make it:
Recipe Overview:
– Servings: 1
– Prep Time: 5 minutes
– Cook Time: 0 minutes
– Total Time: 5 minutes
– Calories: Approximately 150
Nutrition Information:
– Protein: 3g
– Carbs: 15g
– Fat: 10g
Ingredients:
– 1 slice whole grain bread
– ½ ripe avocado
– ¼ cup cherry tomatoes, halved
– Salt and pepper to taste
Instructions:
1. Toast the bread until it’s golden brown.
2. In a bowl, mash the avocado with a fork until smooth.
3. Spread the mashed avocado over the toasted bread.
4. Top with halved cherry tomatoes and sprinkle with salt and pepper.
For an extra kick, try drizzling balsamic glaze over the top or sprinkling some feta cheese for added flavor.
Frequently Asked Questions:
– Can I use a different type of bread? Absolutely! Feel free to choose any bread you like, including gluten-free options.
– How do I prevent the avocado from browning? A splash of lemon juice works wonders, or you can store it in an airtight container.
This avocado toast makes a delightful school lunch that’s not only tasty but also packed with nutrients. Your kids will love it, and you’ll love how easy it is to make!
Avocado Toast with Cherry Tomatoes
Editor’s Choice


Dave’s Killer Bread 21 Whole Grains & Seeds Thin-Sliced, Whole Grain Org…

Alessi Balsamic Vinegar Reduction, Autentico from Italy, Ideal on Capres…
9. Hummus and Veggie Dippers

Hummus and Veggie Dippers make snack time exciting and healthy! This fun dish introduces kids to nutritious eating while allowing them to play with their food. Imagine a colorful plate filled with crunchy vegetables like bright orange carrots, crisp green cucumbers, and vibrant bell peppers. All of this pairs beautifully with creamy hummus. It’s a win-win that kids will love!
To prepare this delightful lunch, simply scoop hummus into a small container. Then, add an assortment of sliced veggies for dipping. You can even throw in some whole-grain pita chips for that extra crunch. This meal is not only colorful but also packed with protein and fiber, making it a balanced choice for school.
Here’s how to whip it up quickly:
Ingredients:
– 1 cup hummus
– 1 cup mixed vegetables (carrots, cucumbers, bell peppers)
– Optional: whole grain pita chips
Instructions:
1. Slice the vegetables into sticks or rounds.
2. Pack the hummus in a small container alongside the veggie sticks.
3. Add pita chips if you want some extra crunch.
This recipe takes just 10 minutes to prepare, and each serving has about 150 calories. You can even mix it up by trying different flavored hummus to keep things interesting. Encourage your kids to taste new veggies; they might discover a new favorite!
Tips for success:
– Use store-bought hummus if you’re short on time.
– Choose fresh veggies for the best taste and texture.
– Pack it right: keep veggies crisp by storing them in a separate container until lunch.
With these simple steps, you can create a fun and nutritious lunch that your kids will actually enjoy! Snack time has never been so colorful and delicious!
Hummus and Veggie Dippers
Editor’s Choice

Mezete Hummus Snack Pack with Breadsticks | Traditional Classic Hummus |…

OXO Good Grips Handheld Mandoline Slicer for Kitchen, Adjustable Vegetab…
10. Sweet Potato and Black Bean Tacos

Sweet Potato and Black Bean Tacos are a tasty way to make lunchtime exciting and healthy! Packed with nutrients and flavor, these tacos are sure to become a favorite for your kids. Imagine their delight in having a fun, colorful taco filled with sweet potatoes, beans, and all their favorite toppings. Plus, they’re low in calories, making them a win for parents too!
To make these delicious tacos, start by roasting some diced sweet potatoes until they’re nice and tender. While the potatoes are cooking, combine them with black beans and corn in a bowl. You can add spices like cumin or chili powder to give it a little kick. Once everything is ready, serve the mixture in warm corn tortillas and let your kids add toppings like avocado, salsa, or cheese. The combination of sweet and savory flavors will definitely impress!
Here’s how to whip up this quick and nutritious meal:
Recipe Overview:
– Servings: 4
– Prep Time: 10 minutes
– Cook Time: 25 minutes
– Total Time: 35 minutes
– Calories: About 250 per taco
Nutrition Information:
– Protein: 8g
– Carbs: 40g
– Fat: 5g
– Fiber: 10g
Ingredients:
– 2 medium sweet potatoes, diced
– 1 can black beans, rinsed and drained
– 1 cup corn (fresh or frozen)
– 8 corn tortillas
– Optional toppings: avocado, salsa, cheese
Instructions:
1. Preheat your oven to 400°F (200°C).
2. Toss the diced sweet potatoes with olive oil, salt, and pepper. Spread them on a baking sheet and roast for 20-25 minutes until tender.
3. In a mixing bowl, combine the roasted sweet potatoes, black beans, and corn. Feel free to add some spices for extra flavor.
4. Warm the corn tortillas in a pan or microwave until pliable.
5. Fill each tortilla with the sweet potato mixture and let your kids choose their favorite toppings.
Try squeezing some lime juice over the tacos for an extra burst of flavor! And if you’re short on time, using pre-made taco seasoning can speed things up.
Frequently Asked Questions:
– Can I use regular potatoes? Yes, regular potatoes can work just fine!
– How do I store leftovers? Keep them in an airtight container in the fridge for up to three days.
With these tacos, lunchtime will be a hit! Enjoy cooking and watching your kids devour this healthy treat.
Low calorie school lunch ideas can be delicious and kid-approved. Sweet Potato and Black Bean Tacos prove you can pack fiber, flavor, and fun in every bite—just roast the potatoes, stir in beans, and let kids top with toppings they love.
Sweet Potato and Black Bean Tacos
Editor’s Choice


365 by Whole Foods Market, Organic Taco Seasoning, 1 Ounce
11. Peanut Butter Banana Rice Cakes

Peanut Butter Banana Rice Cakes make for a fun and tasty school lunch that kids will love. The mix of crunchy rice cakes and smooth peanut butter, paired with sweet banana slices, creates a flavor explosion that’s hard to resist. Plus, this snack is low in calories and packed with protein, making it a filling option for your little ones. This combo not only satisfies their taste buds but also gives them a healthy boost for their busy school day.
To whip up this delightful snack, start with plain rice cakes. Spread a generous layer of peanut butter on each one, then top with fresh banana slices. For a little extra kick, add a sprinkle of cinnamon. It’s simple, quick, and can be easily customized with almond butter if your child has nut allergies or if you want to mix things up.
Recipe Overview:
– Servings: 2
– Prep Time: 5 minutes
– Cook Time: 0 minutes
– Total Time: 5 minutes
– Calories: Approximately 200 per serving
Nutrition Information:
– Protein: 6g
– Carbs: 30g
– Fat: 8g
– Fiber: 3g
Ingredients:
– 2 rice cakes
– 2 tablespoons peanut butter
– 1 banana, sliced
– Optional: sprinkle of cinnamon
Instructions:
1. Spread peanut butter evenly on each rice cake.
2. Place banana slices on top of the peanut butter.
3. If you like, sprinkle a bit of cinnamon for extra flavor.
These rice cakes are fun to make and can be enjoyed fresh or packed for later. You can even try using flavored rice cakes for a twist or substitute with different fruits like apples or strawberries to keep it interesting!
Quick Tips:
– Use flavored rice cakes for added taste.
– Choose almond butter for a nut-free option.
– Add seeds like chia for extra nutrition.
– Pack in a container for a fresh school lunch.
Kids love this easy, nutritious snack, and you’ll love how quick it is to prepare. It’s perfect for busy mornings or as an after-school treat. Enjoy!
Peanut Butter Banana Rice Cakes
Editor’s Choice

Quaker Large Rice Cakes, 3 Flavor Topper Variety Pack, Pack of 6


Garden of Life Chia Seeds 100% Organic for Smoothies, Pudding – Raw Orga…
12. Zucchini Noodles with Pesto

Looking for a fun and healthy lunch that your kids will actually enjoy? Zucchini Noodles with Pesto are here to save the day! This dish swaps traditional pasta for spiralized zucchini, adding a fresh, crunchy twist. The bright green pesto brings a delicious flavor that kids can’t resist. Plus, it’s quick to make, which is perfect for those busy school mornings.
Prepare this dish by spiralizing fresh zucchini and mixing it with either store-bought or homemade pesto. Want to add more color and nutrition? Toss in some cherry tomatoes or grilled chicken for extra protein. You can serve this meal warm or cold, making it an ideal choice for lunchboxes.
Here’s how to make it:
Recipe Overview:
– Servings: 2
– Prep Time: 10 minutes
– Cook Time: 5 minutes
– Total Time: 15 minutes
– Calories: About 150 per serving
Nutrition Information:
– Protein: 5g
– Carbs: 10g
– Fat: 10g
– Fiber: 3g
Ingredients:
– 2 medium zucchinis
– ½ cup pesto (store-bought or homemade)
– Optional: cherry tomatoes, grilled chicken
Instructions:
1. Spiralize the zucchinis to create noodles.
2. Heat a pan and sauté the noodles for 3-5 minutes until slightly tender.
3. Mix the noodles with pesto until well coated.
4. If desired, add cherry tomatoes or grilled chicken for a protein boost.
Want to make it even more appealing? Add a sprinkle of grated Parmesan cheese on top for extra flavor.
Frequently Asked Questions:
– Can I prepare this in advance? Yes, but it’s best eaten within a day for freshness.
– What if I don’t have a spiralizer? Use a vegetable peeler to create thin strips instead.
Enjoy this delightful dish that’s as nutritious as it is tasty—your kids will be asking for seconds!
Zucchini Noodles with Pesto
Editor’s Choice

Brieftons 5-Blade Vegetable Spiralizer: Strongest-Heaviest Spiral Slicer…

Filippo Berio Pesto, Organic Classic Basil, 6.7 Ounce Glass Jar, Gluten …

13. Chickpea Salad Sandwich

A Chickpea Salad Sandwich is a fantastic choice for a school lunch. It’s not just healthy; it’s also packed with flavor and easy to make! Kids love the creamy texture combined with crunchy veggies, making every bite enjoyable. Plus, it’s a plant-based option rich in protein and fiber, which means it will keep them full and energized throughout the day.
To whip up this delicious sandwich, start by mashing canned chickpeas. Then, mix in crunchy diced celery, sweet bell peppers, and a light dressing of Greek yogurt or your favorite mayo. You can spread this colorful mixture on whole grain bread or use a lettuce wrap for a low-carb twist. Add some fresh greens for extra crunch and flavor!
Here’s how to make it:
Recipe Overview:
– Servings: 2
– Prep Time: 10 minutes
– Cook Time: 0 minutes
– Total Time: 10 minutes
– Calories: Approximately 200 per sandwich
Nutrition Information:
– Protein: 10g
– Carbs: 30g
– Fat: 5g
– Fiber: 8g
Ingredients:
– 1 can chickpeas, drained and rinsed
– ¼ cup Greek yogurt or light mayonnaise
– ½ cup celery, diced
– ½ cup bell pepper, diced
– Salt and pepper to taste
– Your choice of bread or wraps
Instructions:
1. In a bowl, mash the chickpeas with a fork until chunky.
2. Mix in the Greek yogurt, diced celery, bell pepper, and seasoning.
3. Spread the mixture between slices of your favorite bread or wraps.
4. Top with greens if desired for extra crunch!
Serve it with crunchy cucumber slices or carrot sticks for a complete meal. This sandwich is perfect for meal prep, too. Make it ahead of time and store it in the fridge for up to 2-3 days.
Frequently Asked Questions:
– Can I use other canned beans? Yes, any canned beans work well!
– How long does it stay fresh in the fridge? Best enjoyed within 2-3 days.
Enjoy this simple and tasty Chickpea Salad Sandwich that kids will love! It’s nutritious, easy to make, and sure to be a hit at lunchtime.
Chickpea Salad Sandwich
Editor’s Choice

Amazon Grocery, Canned Garbanzo Beans, 15.5 Oz (Previously Amazon Fresh,…

Dave’s Killer Bread 21 Whole Grains & Seeds Thin-Sliced, Whole Grain Org…
14. Homemade Pizza Rolls

Looking for a fun and tasty lunch that your kids will adore? Homemade Pizza Rolls are the answer! These delightful, bite-sized snacks are not only low in calories but also customizable to fit even the pickiest eaters. With endless topping options, they can enjoy a different flavor every time. Imagine the smiles when they see these delicious rolls packed in their lunch!
To make them, grab some whole wheat pizza dough. Spread a layer of marinara sauce, sprinkle on cheese, and add any toppings your kids love—whether it’s pepperoni, bell peppers, or olives. Roll them up tightly and bake until they are golden brown and crispy. Serve with extra marinara or ranch dressing for dipping, and watch them disappear!
Here’s how to make these delightful rolls:
Recipe Overview:
– Servings: 6
– Prep Time: 15 minutes
– Cook Time: 15 minutes
– Total Time: 30 minutes
– Calories: Approximately 150 per roll
Nutrition Information:
– Protein: 6g
– Carbs: 20g
– Fat: 4g
– Fiber: 2g
Ingredients:
– 1 package whole wheat pizza dough
– ½ cup marinara sauce
– 1 cup cheese (mozzarella or your choice)
– Optional toppings: pepperoni, veggies, olives
Instructions:
1. Preheat your oven to 400°F (200°C).
2. Roll out the pizza dough on a floured surface. Spread marinara sauce evenly across it.
3. Sprinkle cheese and your chosen toppings over the sauce.
4. Roll the dough tightly from one end to the other and cut it into bite-sized pieces.
5. Place the rolls on a baking sheet and bake for about 15 minutes or until golden brown.
Tips for Success:
– Use whole wheat tortillas if you don’t have pizza dough on hand!
– Experiment with different cheeses or toppings for variety.
– These rolls freeze well before baking—perfect for meal prep!
– Pair with extra marinara for a kid-friendly dipping option.
Your kids will love these Homemade Pizza Rolls. They’re perfect for school lunches or after-school snacks, making every bite a delicious adventure!
Homemade Pizza Rolls
Editor’s Choice

Nutmeg State Pizza Company Organic Whole Wheat Pizza Dough Mix – Makes 3…

365 by Whole Foods Market, Organic Marinara Pasta Sauce, 25 Ounce

Urbanstrive Cheese Grater With Container Box Grater Stainless Steel Grat…
15. Almond Butter Apple Slices

Almond Butter Apple Slices are a fantastic lunch idea that kids can’t resist. This snack pairs the crispness of fresh apples with the creamy richness of almond butter. It’s not just tasty; it also gives your kids a healthy energy boost. Plus, it takes only a few minutes to prepare, making it a go-to choice for busy parents!
Start by slicing your favorite apple into wedges. Then, spread a generous layer of almond butter on each slice. If you want to add a bit of flair, sprinkle some cinnamon on top or toss in a few raisins for extra sweetness. Pack these delicious slices in a lunchbox along with a handful of nuts or whole grain crackers for a well-rounded meal that keeps kids full and satisfied.
Here’s how to make it:
Ingredients:
– 1 apple, sliced
– 2 tablespoons almond butter
– Optional: cinnamon or raisins
Instructions:
1. Wash the apple and slice it into even wedges.
2. Spread almond butter generously on each apple slice.
3. If desired, sprinkle with cinnamon or add raisins for a sweet touch.
Tips:
– Use different apple varieties for a mix of flavors and colors.
– Store the slices in an airtight container to keep them fresh and crunchy.
This snack is not only easy to make, but it’s also a hit with kids! They’ll love the sweetness of the apple and the creamy texture of the nut butter. Plus, it’s a simple way to sneak in healthy ingredients.
Frequently Asked Questions:
– Can I use peanut butter instead? Yes, any nut butter works great!
– How long can I store these? It’s best to eat them the same day to avoid browning.
Almond Butter Apple Slices
Editor’s Choice

MaraNatha Natural Creamy Almond Butter, No Stir, No Sugar or Salt Added,…

PrepWorks Dishwasher Safe Apple Slicer and Corer – 16-Slice Thin Apple C…
16. Savory Oatmeal with Veggies

Looking for a school lunch option that’s both tasty and nutritious? Try Savory Oatmeal with Veggies! This dish takes traditional oatmeal to a whole new level. It’s warm, filling, and packed with fiber and protein, making it a great choice for your kids. Plus, you can throw in any veggies you have lying around. Spinach, mushrooms, or bell peppers all work wonderfully!
Cook rolled oats according to the package directions, then stir in sautéed vegetables. For a protein boost, add a soft-boiled egg on top. Get creative with seasonings to match your child’s taste. You can even prepare it in advance and pack it warm!
Here’s how to make it:
Recipe Overview:
– Servings: 2
– Prep Time: 10 minutes
– Cook Time: 10 minutes
– Total Time: 20 minutes
– Calories: About 250 per serving
Nutrition Information:
– Protein: 10g
– Carbs: 40g
– Fat: 6g
– Fiber: 7g
Ingredients:
– 1 cup rolled oats
– 2 cups water or vegetable broth
– 1 cup mixed vegetables (like spinach, mushrooms, or bell peppers)
– 2 eggs (optional)
Instructions:
1. In a saucepan, bring water or broth to a boil. Add the oats.
2. Cook according to package instructions.
3. In another pan, sauté your chosen vegetables until they’re tender.
4. If you’re using eggs, boil them and peel once cooked.
5. Serve the oatmeal in bowls, topped with sautéed veggies and a soft-boiled egg.
Feel free to add cheese for a little extra flavor! Experiment with spices to find what your child loves best.
Frequently Asked Questions:
– Can I use instant oats? Yes, but adjust the water amount accordingly.
– How do I store leftovers? Keep them in the fridge and reheat for quick meals.
With this recipe, making a delicious and nutritious lunch is easy. Your kids will love the cozy flavors, and you’ll feel great knowing they’re eating something wholesome!
Savory Oatmeal with Veggies
Editor’s Choice

Bob’s Red Mill Organic Old Fashioned Rolled Oats, 32oz (Pack of 4) – Non…

COLLEGE INN 100% Natural Garden Vegetable Broth, 32 oz Carton (Pack of 6)

EXCELSTEEL Non Stick Easy Use Rust Resistant Home Kitchen Breakfast Brun…
17. Pita Bread with Tzatziki and Veggies

Make lunchtime fun and healthy with Pita Bread, Tzatziki, and Veggies! This Mediterranean-inspired dish is perfect for kids who need a tasty, low-calorie option. Tzatziki is a creamy sauce made from yogurt, cucumbers, and herbs, offering a refreshing dip that pairs wonderfully with crunchy veggies.
To prepare, simply cut whole wheat pita bread into wedges. Pack it alongside a small container of tzatziki and a mix of colorful sliced veggies. This hands-on meal allows kids to dip and crunch their way through lunch, making healthy eating enjoyable. Plus, it’s quick to prepare, taking only about ten minutes!
Recipe Overview:
– Servings: 2
– Prep Time: 10 minutes
– Cook Time: 0 minutes
– Total Time: 10 minutes
– Calories: Approximately 200 per serving
Nutrition Information:
– Protein: 6g
– Carbs: 30g
– Fat: 7g
– Fiber: 4g
Ingredients:
– 2 whole wheat pitas
– 1 cup tzatziki (store-bought or homemade)
– 1 cup mixed veggies (carrots, cucumbers, bell peppers)
Instructions:
1. Cut pita bread into wedges.
2. If making homemade, prepare the tzatziki sauce; otherwise, pack store-bought.
3. Slice veggies into sticks for easy dipping.
4. Pack everything in a container for lunch.
Let your kids pick their favorite veggies for dipping! Preparing tzatziki in advance makes packing a breeze.
Frequently Asked Questions:
– Can I use regular yogurt? Yes! Greek yogurt works perfectly.
– How long does the tzatziki last? Store it in the fridge for up to a week.
This Pita Bread with Tzatziki and Veggies is not just nutritious; it’s also a fun way to get kids excited about healthy eating!
Pita Bread with Tzatziki and Veggies
Editor’s Choice
Dave’s Killer Bread 21 Whole Grains & Seeds Thin-Sliced, Whole Grain Org…

OXO Good Grips Handheld Mandoline Slicer for Kitchen, Adjustable Vegetab…
18. Berry Smoothie Bowl

A Berry Smoothie Bowl is a fun and healthy lunch option that kids will love digging into with a spoon! This colorful dish is not only delicious but also loaded with antioxidants that keep kids energized for their school day. Plus, you can easily customize it with different fruits and toppings to keep things exciting. It’s a fruity treat that makes lunchtime something to look forward to.
To make this smoothie bowl, blend your favorite berries with yogurt or milk until it’s nice and thick. Pour the mixture into a bowl and let the kids go wild with toppings! Think sliced bananas, crunchy granola, or a sprinkle of coconut flakes. This interactive meal lets kids express their creativity while giving them the nutrients they need.
Recipe Overview:
– Servings: 1
– Prep Time: 5 minutes
– Cook Time: 0 minutes
– Total Time: 5 minutes
– Calories: Approximately 220 per bowl
Nutrition Information:
– Protein: 6g
– Carbs: 40g
– Fat: 4g
– Fiber: 5g
Ingredients:
– 1 cup mixed berries (fresh or frozen)
– ½ cup yogurt or milk
– Optional toppings: sliced banana, granola, coconut flakes
Instructions:
1. In a blender, combine the mixed berries and yogurt or milk until smooth.
2. Pour the smoothie mixture into a bowl.
3. Let the kids add their favorite toppings as they wish.
Feel free to switch up the fruits for variety. Try using a thicker yogurt for a creamier texture.
Common Questions:
– Can I make it ahead of time? It tastes best when fresh, but you can prep the ingredients in advance.
– What if I don’t have berries? No problem! Any fruit works well, like bananas or peaches.
This Berry Smoothie Bowl not only satisfies hunger but also boosts creativity, making it a perfect school lunch idea!
Berry Smoothie Bowl
Editor’s Choice

Ninja BL660 Professional Compact Smoothie & Food Processing Blender, 110…

KIND Healthy Grains Clusters, Granola Variety Pack, Healthy Snacks, Good…
19. Caprese Skewers

Caprese Skewers are a delightful way to pack some fun into your child’s lunch! These colorful bites are not just tasty—they’re also packed with nutrition. With juicy cherry tomatoes, creamy mozzarella, and fragrant basil, they create a meal that’s as pleasing to the eyes as it is to the taste buds. Plus, you can easily assemble them in minutes, making them a perfect choice for busy mornings.
To make these skewers, simply alternate cherry tomatoes, mozzarella balls, and fresh basil leaves on small skewers. For a flavor boost, drizzle them with balsamic glaze right before serving. This dish is great for little hands to grab, turning lunchtime into a joyful experience!
Recipe Overview:
– Servings: 4
– Prep Time: 10 minutes
– Cook Time: 0 minutes
– Total Time: 10 minutes
– Calories: Approximately 120 per serving
Nutrition Information:
– Protein: 6g
– Carbs: 10g
– Fat: 8g
– Fiber: 1g
Ingredients:
– 1 cup cherry tomatoes
– 1 cup mozzarella balls
– Fresh basil leaves
– Balsamic glaze (optional)
Instructions:
1. Thread cherry tomatoes, mozzarella balls, and basil leaves onto small skewers in an alternating pattern.
2. If you like, drizzle balsamic glaze over the skewers just before serving.
3. Pack them in a lunchbox for an exciting, portable meal.
You can add a twist by using different colored tomatoes for a burst of color. Pairing these skewers with whole grain crackers adds a satisfying crunch, making it a well-rounded lunch.
Tips for Success:
– Choose vibrant tomatoes for a more appealing look.
– Place skewers in a lunch container to keep them from rolling around.
– Add different cheeses like feta for a new flavor.
– Serve with a side of hummus for an extra nutritious dip.
Frequently Asked Questions:
– Can I use larger tomatoes? Yes! Just cut them into bite-sized pieces.
– What if I don’t have skewers? Serve it as a salad instead for easy eating!
This simple yet delicious recipe is sure to become a favorite in your household, making lunchtime both healthy and enjoyable!
Caprese Skewers
Editor’s Choice

HOPELF 12″ Natural Bamboo Skewers for BBQ,Appetiser,Fruit,Cocktail,Kabob…

Filippo Berio Glaze with Balsamic Vinegar of Modena, 8.4 Ounce Plastic B…

Bentgo Modern – Adult & Teen Bento Lunch Box; 3-4 Compartments, Leak-Res…
20. Spinach and Feta Stuffed Peppers

Discover the delightful world of Spinach and Feta Stuffed Peppers! This dish takes colorful bell peppers and fills them with a nutritious mix that your kids will love. With a tasty blend of spinach and feta cheese, these peppers are as fun to eat as they are good for you. They are perfect for school lunches, providing energy and essential vitamins.
To whip up this easy meal, start by hollowing out some bell peppers. Then, create a delicious filling with cooked quinoa, fresh spinach, crumbled feta, and your favorite spices. Bake until the peppers are tender and the filling is warm. You can even make them ahead of time. Just reheat them for a quick, healthy lunch!
Here’s how to make them:
Recipe Overview:
– Servings: 4
– Prep Time: 20 minutes
– Cook Time: 25 minutes
– Total Time: 45 minutes
– Calories: Approximately 150 per stuffed pepper
Nutrition Information:
– Protein: 6g
– Carbs: 20g
– Fat: 5g
– Fiber: 3g
Ingredients:
– 4 bell peppers (any color)
– 1 cup cooked quinoa
– 1 cup spinach, chopped
– ½ cup feta cheese, crumbled
– Salt and pepper to taste
Instructions:
1. Preheat your oven to 375°F (190°C).
2. Cut the tops off the bell peppers and remove the seeds.
3. In a bowl, mix the cooked quinoa, chopped spinach, crumbled feta, and seasoning.
4. Stuff the mixture into the hollowed-out peppers.
5. Place the stuffed peppers in a baking dish and bake for 25-30 minutes.
Feel free to get creative! You can swap quinoa for different grains like rice or farro. Add fresh herbs to enhance the flavor even more.
Frequently Asked Questions:
– Can I make them in advance? Yes, they store well in the fridge for up to 3 days.
– What if I don’t like feta? Substitute with any cheese you prefer, like mozzarella or cheddar.
With these stuffed peppers, you’ll have a colorful, healthy lunch option that your kids will enjoy. Get cooking and watch them disappear at lunchtime!
Spinach and Feta Stuffed Peppers
Editor’s Choice

HOMBERKING 10 Pack Borosilicate Glass Meal Prep Containers with Locking …

BetterBody Foods Organic Quinoa, Vegan, Gluten Free, Low Glycemic Rice R…

8-Piece Deep Glass Baking Dish Set with Plastic lids,Rectangular Glass B…
21. Vegetable Fried Rice

Introduce your kids to the delightful world of Vegetable Fried Rice! This dish is a favorite for a reason. Not only is it packed with nutrients, but it also offers a canvas for creativity. You can mix and match veggies and proteins, making it perfect for using up what’s in your fridge. Plus, it’s quick to whip up in just one pan!
To start, cook your rice according to the package instructions and let it cool. Next, grab a large skillet. Sauté a colorful blend of your child’s favorite vegetables like carrots, peas, and bell peppers, adding in garlic and ginger for an extra flavor kick. Then, throw in the cooled rice along with soy sauce, stirring everything together. Want to make it heartier? Toss in scrambled eggs, chicken, or tofu for a protein boost. This makes for a filling lunch that kids will love!
Recipe Overview:
– Servings: 4
– Prep Time: 10 minutes
– Cook Time: 15 minutes
– Total Time: 25 minutes
– Calories: Approximately 200 per serving
Nutrition Information:
– Protein: 5g
– Carbs: 35g
– Fat: 5g
– Fiber: 3g
Ingredients:
– 2 cups cooked rice (brown or white)
– 1 cup mixed vegetables (like carrots, peas, bell peppers)
– 2 tablespoons soy sauce
– 1 tablespoon oil for cooking
– Optional: scrambled egg or protein of choice
Instructions:
1. Heat the oil in a large pan over medium heat.
2. Add the mixed vegetables and sauté until they’re tender.
3. Stir in the cooked rice and soy sauce, mixing until everything is heated through.
4. If you’re using it, add your scrambled egg or protein and cook until warmed.
Feel free to get creative with the vegetables! You can also add a splash of sesame oil or a sprinkle of sesame seeds for extra flavor.
Frequently Asked Questions:
– Can I use leftover rice? Yes, it’s perfect for that!
– How long will it keep? Store it in the fridge for about 3 days.
This recipe is not just a meal; it’s a fun way to engage your kids in cooking. They’ll love choosing their favorite veggies and watching the magic happen in the kitchen!
Vegetable Fried Rice
Editor’s Choice

CAROTE Nonstick Frying Pan Skillet,Non Stick Granite Fry Pan Egg Pan Ome…

AROMA Digital Rice Cooker, 4-Cup (Uncooked) / 8-Cup (Cooked), Steamer, G…

Fullstar The Original Pro Chopper – Vegetable Chopper and Spiralizer, Fo…
22. Cauliflower Fried Rice

Looking for a delicious school lunch that sneaks in veggies? Try Cauliflower Fried Rice! This low-calorie dish is a fantastic twist on classic fried rice. Kids love the colorful veggies and tasty flavors, and you’ll love how easy it is to make. Plus, it’s a smart way to use up any leftover cauliflower or rice you have hanging around.
To whip this up, start by turning cauliflower florets into rice-sized pieces using a food processor. Then, sauté them with garlic, mixed veggies, and a splash of soy sauce. You can even add scrambled eggs or your favorite protein to make it a full meal that keeps everyone satisfied.
Here’s how to make it:
Recipe Overview:
– Servings: 4
– Prep Time: 10 minutes
– Cook Time: 10 minutes
– Total Time: 20 minutes
– Calories: Approximately 150 per serving
Nutrition Information:
– Protein: 4g
– Carbs: 10g
– Fat: 5g
– Fiber: 4g
Ingredients:
– 1 head of cauliflower, riced
– 1 cup mixed vegetables (like peas, carrots, and corn)
– 2 tablespoons soy sauce
– 1 tablespoon oil for cooking
– Optional: scrambled egg or protein of your choice (like chicken or tofu)
Instructions:
1. Pulse the cauliflower in a food processor until it looks like rice grains.
2. Heat the oil in a large skillet over medium heat.
3. Add the mixed vegetables and sauté until they are tender.
4. Stir in the riced cauliflower and soy sauce, mixing until heated through.
5. If using, add the scrambled egg or your choice of protein and cook until warmed through.
Want to boost the flavor? Add a drizzle of sesame oil or throw in some leftover meats for extra protein!
Frequently Asked Questions:
– Can I make this ahead of time? Yes! It’s perfect for prepping meals in advance.
– How long can I store it? It keeps well in the fridge for up to 3 days.
Cauliflower Fried Rice is not just a meal; it’s a simple way to make lunchtime healthier and more fun. Your kids will be asking for it again and again!
Cauliflower Fried Rice
Editor’s Choice

Hamilton Beach Food Processor & Vegetable Chopper for Slicing, Shredding…
CAROTE Nonstick Frying Pan Skillet,Non Stick Granite Fry Pan Egg Pan Ome…

23. Stuffed Avocado with Tuna

Looking for a lunch that kids will love and is also good for them? Try the Stuffed Avocado with Tuna. This dish is creamy, savory, and packed with protein. The buttery texture of the avocado pairs perfectly with the flavorful tuna mix. Plus, it’s low in calories and quite filling, making it an ideal choice for busy school days.
To make this meal, you’ll combine canned tuna with Greek yogurt and crunchy celery for added texture. Then, simply cut an avocado in half, scoop out the pit, and fill it with the tasty tuna mixture. It’s a fun, utensil-free option that kids can enjoy cold, perfect for those on-the-go lunches!
Here’s how to whip it up:
Recipe Overview:
– Servings: 2
– Prep Time: 10 minutes
– Cook Time: 0 minutes
– Total Time: 10 minutes
– Calories: About 250 per stuffed avocado
Nutrition Information:
– Protein: 15g
– Carbs: 10g
– Fat: 20g
– Fiber: 7g
Ingredients:
– 1 can tuna, drained
– 1 avocado, halved
– ¼ cup Greek yogurt
– ¼ cup celery, diced
– Salt and pepper to taste
Instructions:
1. In a bowl, mix the tuna, Greek yogurt, diced celery, salt, and pepper until combined.
2. Cut the avocado in half and remove the pit.
3. Spoon the tuna mixture into the center of each avocado half.
4. Serve immediately or pack it in a container for lunch.
Pro Tip: Add a squeeze of lemon juice to keep the avocado fresh and vibrant! For extra crunch, serve it with whole grain crackers.
Common Questions:
– Can I use mayo instead of yogurt? Yes, that works too!
– How long can I keep this in the fridge? For the best taste, enjoy within a day.
This stuffed avocado with tuna is not just a meal; it’s a step towards healthier eating habits for your kids. They’ll love the taste, and you’ll love how easy it is!
Fun fact: Stuffed Avocado with Tuna clocks in at about 260 calories and 20 grams of protein per serving. The creamy avocado blends with the tuna-yogurt mix, plus celery for crunch—making this a low calorie school lunch ideas option kids will actually finish.
Stuffed Avocado with Tuna
Editor’s Choice

StarKist Chunk Light Tuna in Water, 5 oz (8 Pack) Canned Tuna Fish, Wild…

24. Cucumber and Turkey Sandwiches

Transform lunchtime with delightful Cucumber and Turkey Sandwiches! This fun dish offers a crunchy twist on traditional sandwiches that kids simply love. Instead of bread, you’ll use crisp cucumber slices, which add a refreshing crunch while still delivering a tasty protein punch with turkey.
This meal is not just easy to make but also quick—prepping it takes only about 10 minutes! Plus, it’s a fantastic option for lunchboxes since it stays fresh and colorful. With a bit of mustard or hummus added, you’ll elevate the flavor and keep your little ones excited for lunchtime.
Recipe Overview:
– Servings: 2
– Prep Time: 10 minutes
– Cook Time: 0 minutes
– Total Time: 10 minutes
– Calories: Approximately 120 per serving
Nutrition Information:
– Protein: 10g
– Carbs: 5g
– Fat: 6g
– Fiber: 1g
Ingredients:
– 1 large cucumber
– 4 slices of turkey breast
– 2 slices of cheese (cheddar or your choice)
– Optional: mustard or hummus for added flavor
Instructions:
1. Slice the cucumber into ½ inch thick rounds.
2. Layer turkey and cheese between two cucumber slices.
3. Secure each stack with a toothpick. Add mustard or hummus if you like.
4. Pack them tightly in a lunch container to keep them fresh.
Feel free to get creative! Use flavored turkey for a zesty twist. You can even set up a little assembly line so kids can build their own sandwiches. This makes for a fun and interactive lunch prep!
Frequently Asked Questions:
– Can I use other meats? Yes, you can swap turkey for chicken or ham.
– How long will these last? For the best crunch, eat them the same day you make them!
These sandwiches are a great way to sneak in healthy veggies while keeping lunchtime fun!
Cucumber and Turkey Sandwiches
Editor’s Choice

4 Pack Bento Lunch Box Set 3 Compartment Food Storage Containers Wheat S…

600 Count Bamboo Toothpicks for Teeth Cleaning, Appetizer, Olive, Barbec…

Oscar Mayer Carving Board Flame Grilled Chicken Breast Strips Sliced Del…
25. Sweet Potato Hummus with Veggies

Sweet Potato Hummus with Veggies is a delicious twist on the classic dip that your kids will love! This nutritious treat combines the natural sweetness of roasted sweet potatoes with the creamy texture of traditional hummus. Not only is it packed with vitamins, but it also makes a fun and colorful snack. Serve it with crunchy veggie sticks for a delightful lunch that kids can enjoy.
Making this vibrant hummus is simple. Start by roasting a sweet potato until it’s soft and sweet. Then, blend it with chickpeas, tahini, lemon juice, and your favorite spices for a smooth dip. Pair it with a rainbow of veggies like carrots, cucumbers, and bell peppers. Not only does this dish taste great, but it also looks appealing, making it a hit with kids!
Here’s how to make it:
Recipe Overview:
– Servings: 4
– Prep Time: 10 minutes
– Cook Time: 30 minutes
– Total Time: 40 minutes
– Calories: Approximately 150 per serving
Nutrition Information:
– Protein: 5g
– Carbs: 30g
– Fat: 5g
– Fiber: 7g
Ingredients:
– 1 large sweet potato, roasted and peeled
– 1 can chickpeas, drained and rinsed
– 2 tablespoons tahini
– 1 tablespoon lemon juice
– Salt and pepper to taste
– Veggie sticks for dipping (carrots, celery, bell peppers, etc.)
Instructions:
1. Preheat your oven to 400°F (200°C). Roast the sweet potato for about 30 minutes until it’s soft.
2. Let it cool, then blend the roasted sweet potato with chickpeas, tahini, lemon juice, salt, and pepper until creamy and smooth.
3. Pack the hummus in a container and add an assortment of veggie sticks for dipping.
Looking for some extra flavor? Add spices like cumin or smoked paprika to make it even more exciting! This hummus also doubles as a tasty sandwich spread.
Frequently Asked Questions:
– Can I use canned sweet potatoes? Yes, but the flavor and texture will differ a bit.
– How long does it last? Store it in an airtight container for up to a week.
With this recipe, you can easily provide a nutritious, low-calorie lunch option that your kids will be eager to eat!
Sweet Potato Hummus with Veggies
Editor’s Choice

Rubbermaid Brilliance Food Storage Containers BPA Free Airtight Lids Ide…
Ninja BL660 Professional Compact Smoothie & Food Processing Blender, 110…
26. Cabbage Roll-Ups

Cabbage Roll-Ups are a delightful twist on a classic dish that kids will love. These tasty rolls are not only fun to eat but also packed with nutrition. With a filling of lean protein, fresh veggies, and warming spices, they check all the boxes for a healthy, low-calorie school lunch. Plus, they’re easy to prepare and can be enjoyed either warm or cold, making them perfect for lunchboxes!
To whip up these tasty roll-ups, start by blanching cabbage leaves until they’re nice and soft. Then, fill them with a scrumptious mixture of ground turkey, rice, and your favorite spices. Roll them up tightly, pop them in the oven, and bake until golden and delicious. Don’t forget to add a side of tomato sauce for dipping to take the flavor to the next level!
Here’s how to make them:
Recipe Overview:
– Servings: 4
– Prep Time: 30 minutes
– Cook Time: 45 minutes
– Total Time: 1 hour 15 minutes
– Calories: Approximately 200 per roll
Nutrition Information:
– Protein: 15g
– Carbs: 20g
– Fat: 7g
– Fiber: 4g
Ingredients:
– 8 large cabbage leaves
– 1 lb ground turkey
– 1 cup cooked rice
– 1 can diced tomatoes
– ½ onion, diced
– Salt and pepper to taste
Instructions:
1. Preheat your oven to 375°F (190°C).
2. Blanch the cabbage leaves in boiling water for about 3-4 minutes until tender, then let them cool.
3. In a mixing bowl, combine the ground turkey, cooked rice, diced onion, and your seasonings.
4. Take a cabbage leaf, place a portion of the filling in the center, and roll it up tightly.
5. Arrange the rolls in a baking dish, pour the diced tomatoes over them, and bake for 45 minutes until cooked through.
Feel free to get creative! You can use other ground meats like chicken or beef, or even make them vegetarian by substituting with lentils or beans. These rolls can be made ahead of time and frozen for quick lunches, lasting up to 3 months in the freezer.
Tips:
– Use different spices to customize the flavor.
– Choose low-sodium canned tomatoes for a healthier option.
– Pack them with a side of yogurt or sour cream for dipping.
– Make a double batch for easy meal prep!
Cabbage Roll-Ups are not just a meal; they’re a tasty adventure that will make lunchtime exciting again!
Cabbage Roll-Ups
Editor’s Choice
Amazon Basics Silicone Rectangular Baking Mat, Non-Stick Reusable Oven B…

50 Pack (100-Piece) 24 oz Meal Prep Containers Reusable with Lids, Sturd…

Zenport K113 Row Crop Harvest Knife, Hops and Cabbage, 6.75-Inch Stainle…
27. Mini Pancake Sandwiches

Mini Pancake Sandwiches are a delightful twist on lunchtime favorites. These bite-sized treats are not only fun to eat but also packed with nutrition. By using whole wheat flour and fresh fruits, you can create a meal that kids will love and parents will feel good about. Imagine your child’s face lighting up when they see these colorful, sweet sandwiches in their lunchbox!
To make these mini pancake wonders, start by preparing fluffy pancakes. Once they cool, layer peanut butter or yogurt between two pancakes. Add slices of ripe bananas or juicy berries for a tasty surprise. Don’t forget to pack a small container of maple syrup for dipping—it’s a fun way to enjoy them!
Here’s how to whip up these delicious sandwiches:
Recipe Overview:
– Servings: 2
– Prep Time: 10 minutes
– Cook Time: 15 minutes
– Total Time: 25 minutes
– Calories: Approximately 200 per serving
Nutrition Information:
– Protein: 6g
– Carbs: 30g
– Fat: 6g
– Fiber: 3g
Ingredients:
– 1 cup whole wheat flour
– 1 cup milk
– 1 egg
– 2 tablespoons sugar (optional)
– 1 teaspoon baking powder
– Optional fillings: peanut butter, yogurt, fruits
Instructions:
1. In a mixing bowl, combine flour, milk, egg, sugar, and baking powder. Stir until smooth.
2. Preheat a non-stick skillet over medium heat. Pour small amounts of batter to form mini pancakes.
3. Cook until bubbles form on the surface, then flip to brown the other side.
4. Allow pancakes to cool. Assemble sandwiches by adding your chosen fillings between two pancakes.
Feel free to get creative! Use Greek yogurt for a lighter option or add even more fruit for a balanced meal.
Here are some handy tips:
– Make them ahead: Prepare and store in the fridge for up to three days.
– Reheat easily: Warm them up in the microwave for a quick lunch.
– Mix flavors: Try different fruits and nut butters for variety.
– Pack them well: Use a divided lunch container to keep them fresh until lunchtime.
These mini pancake sandwiches are an exciting way to shake up school lunches. They are easy to make, fun to eat, and perfect for keeping kids fueled throughout the day!
Mini Pancake Sandwiches
Editor’s Choice

SENSARTE Nonstick Frying Pan Skillet, Swiss Granite Coating Omelette Pan…
4 Pack Bento Lunch Box Set 3 Compartment Food Storage Containers Wheat S…

Gold Medal Premium Quality All Natural Whole Wheat Flour, 5 lb
Conclusion

Lunchtime doesn’t need to be a chore when you have these 27 low calorie school lunch ideas up your sleeve! With an array of colorful, nutritious, and kid-friendly options, you can make every school day exciting and delicious. From veggie wraps to savory muffins, the possibilities are endless. It’s all about preparing healthy meals that your kids will actually enjoy eating, empowering them to develop better eating habits. So, grab those bento boxes and start packing some fun!
Let us know which recipes your kids loved the most or share your own creative lunch ideas in the comments below!
Note: We aim to provide accurate product links, but some may occasionally expire or become unavailable. If this happens, please search directly on Amazon for the product or a suitable alternative.
This post contains Amazon affiliate links, meaning I may earn a small commission if you purchase through my links, at no extra cost to you.
Frequently Asked Questions
What Are Some Quick and Easy Low Calorie School Lunch Ideas for Kids?
If you’re looking for quick and easy low calorie school lunch ideas that kids will actually eat, think about simple combinations like whole grain wraps with turkey and veggies, or hummus with carrot sticks and whole wheat pita. You can also try miniature bento boxes filled with sliced fruits, yogurt, and a handful of nuts for a balanced meal.
These options are not only nutritious but also fun, making lunchtime exciting for your little ones!
How Can I Make Healthy School Lunches More Appealing to My Kids?
Making healthy school lunches appealing to kids can be a fun challenge! Get creative by using colorful fruits and vegetables, arranging them in fun shapes, or using cute lunch containers. Try including dips like yogurt or salsa, and involve your kids in the lunch prep process to make them more excited about their meals.
Remember, the key is to make these nutritious lunch options look as fun as they are healthy!
Are There Any Nutritious Lunch Options That Are Also Budget-Friendly?
Absolutely! Nutritious lunch options don’t have to break the bank. Ingredients like brown rice, canned beans, and seasonal vegetables are affordable and can be easily transformed into delicious meals. Try making a bean salad with corn, tomatoes, and avocado, or a quinoa bowl with roasted veggies.
By planning ahead and buying in bulk, you can create healthy and budget-friendly school lunches your kids will enjoy!
What Are Some Balanced School Meals That Kids Can Prepare Themselves?
Encouraging kids to prepare their own balanced school meals can be a great way to teach them about nutrition. Options like DIY sandwich kits with whole grain bread, lean meats, and plenty of veggies empower them to choose what they want. You can also set up a snack station with whole fruits, yogurt, and nuts, allowing them to assemble their own nutritious meals.
This not only promotes independence but also helps them make healthier choices!
How Do I Ensure My Kids Get Enough Nutrients in Their School Lunches?
To ensure your kids get enough nutrients in their school lunches, aim for a balance of protein, healthy fats, and carbohydrates. Incorporate a variety of food groups by including lean proteins like chicken or tofu, colorful fruits and veggies, and whole grains. Don’t forget to mix in some healthy fats, such as avocado or nuts, to keep them full.
By rotating different foods each week, you can keep their lunches exciting and nutritionally rich!
Related Topics
low calorie lunches
healthy school lunches
bento box ideas
kid-friendly meals
easy lunch recipes
nutritious options
balanced meals
school lunch prep
fun lunch ideas
quick school lunches
wholesome snacks
parenting tips