Planning a field trip can be an adventure in itself, but packing lunch for one can feel like a whole different journey. You want meals that are delicious, easy to transport, and will still taste fresh hours later. That’s why I created this post. I know how challenging it can be to find lunch ideas that tick all those boxes.
If you’re a parent or a teacher often in charge of packing lunches for excited kids, this one’s for you. You care about keeping things fun and tasty while making sure the food stays safe to eat. You also want to avoid the dreaded soggy sandwich situation. No one wants to face a lunch full of complaints!
Here’s the good news: I pulled together 25 lunch ideas that are not only practical but also super appealing for kids. These options are tasty, colorful, and perfect for a day out of the classroom. You’ll find ideas that travel well and stay fresh, so you can focus on the fun of the trip, not the fuss of the food.
Get ready to explore a variety of options, from wraps and bento boxes to snacks that pack a punch. Whether you’re heading to the zoo, a museum, or a local park, you’ll have plenty of delicious choices at your fingertips. Let’s dive into these tasty ideas to make your next field trip a hit!
1. Turkey and Cheese Roll-Ups
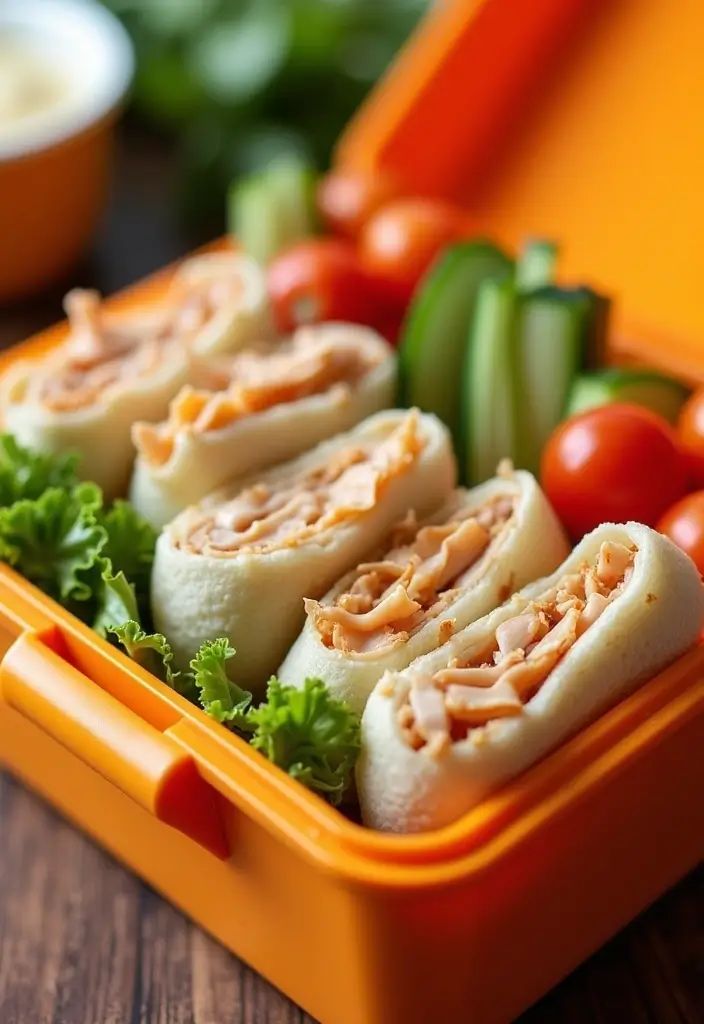
Imagine packing lunch for a field trip that delights even the pickiest eaters. Turkey and cheese roll-ups are your go-to solution! These tasty bites are not only simple to whip up but also travel well without making a mess. You can prepare them in just ten minutes, leaving you more time for fun adventures ahead!
Start with whole wheat tortillas. Spread a thin layer of cream cheese on each one, adding a creamy richness. Then, layer in slices of turkey and your favorite cheese, such as cheddar or Swiss. Roll them up tightly and slice into bite-sized pinwheels. They are perfect for little hands to grab and enjoy as you explore!
Here’s how to make them:
Ingredients:
– 4 whole wheat tortillas
– 8 slices of turkey breast
– 4 slices of cheese (cheddar or Swiss)
– 4 tablespoons cream cheese
Instructions:
1. Lay the tortilla flat on a clean surface.
2. Spread cream cheese evenly across the tortilla.
3. Layer turkey and cheese on top.
4. Roll the tortilla tightly and slice into pinwheels.
Tips for Success:
– Use deli meats without preservatives for a healthier option.
– Pair with crunchy carrot sticks or cucumber slices for a refreshing side.
– Add spinach or shredded lettuce for a boost of nutrients.
Frequently Asked Questions:
– Can I use a different type of meat? Absolutely! Ham or chicken works great, too.
– How long can these stay fresh? Keep them in a cooler, and they’ll last up to 6 hours.
Packing these roll-ups makes lunch exciting and stress-free. You’ll create a delicious meal that keeps everyone happy and energized for the day’s adventures!
Turkey and Cheese Roll-Ups
Editor’s Choice

HOTOR Insulated Lunch Box for Men & Women – Leak-Proof Cooler Lunch Bag …
 Amazon$9.96
Bento Box Adult Lunch Box, Containers for Adults Men Women with 4 Compar…
 Amazon$9.99
10 Pack Dishwasher Safe Reusable Bags, Leakproof Reusable Freezer Bags, …
 Amazon$9.99
2. Hummus and Veggie Cups
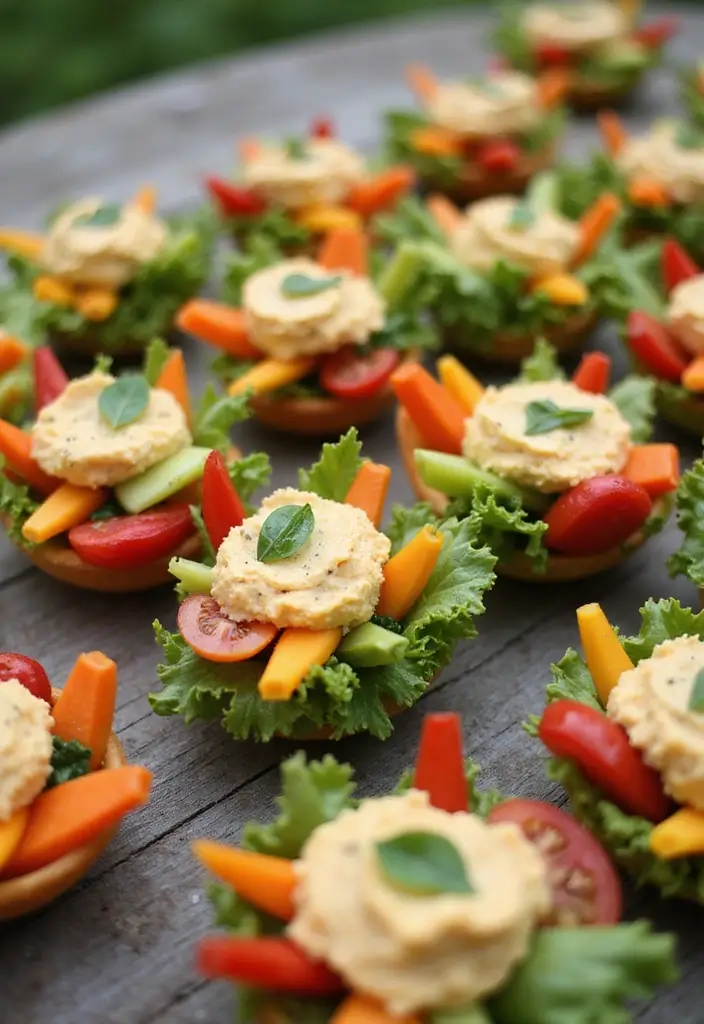
Looking for a fun way to make veggies exciting? Try Hummus and Veggie Cups! These colorful, healthy bites are perfect for field trips. Children love to dip and munch, which makes lunchtime a delightful adventure. Plus, packing individual cups keeps everything fresh and mess-free.
To create these tasty cups, grab some small containers. Fill each with a generous scoop of hummus, then surround it with an array of sliced vegetables. Think crunchy carrots, crisp bell peppers, and refreshing cucumber. The mix of colors not only looks appealing but also provides a variety of nutrients.
Here’s how to make it happen:
Recipe Overview:
– Servings: 4
– Prep Time: 15 minutes
– Cook Time: 0 minutes
– Total Time: 15 minutes
– Calories: About 100 per serving
Nutrition Information:
– Protein: 4g
– Carbohydrates: 15g
– Fat: 5g
Ingredients:
– 1 cup hummus
– 2 carrots, sliced
– 1 cucumber, sliced
– 1 bell pepper, sliced into strips
Instructions:
1. Start by adding about a quarter cup of hummus into each small cup.
2. Neatly arrange the sliced veggies around the hummus.
3. Seal the cups tightly and pack them in a cooler for freshness.
Want to make life easier? Prepare these cups the night before. Just store them in the fridge. If your child isn’t a fan of hummus, you can swap it out for guacamole or a yogurt dip.
Pro Tips:
– Choose organic vegetables for better flavor and nutrients.
– Pick a variety of colors to make the lunch visually appealing.
– Use mini plastic cups for easy handling.
– Keep it budget-friendly by buying produce in bulk.
With these cups, you’ll turn snack time into an interactive experience, ensuring kids eat their veggies and have fun while doing it! Enjoy the smiles on their faces as they dip and crunch their way through lunchtime.
Hummus and Veggie Cups
Editor’s Choice
Mezete Hummus Snack Pack with Breadsticks | Traditional Classic Hummus |…
 AmazonCheck Price
3. Quinoa Salad Jars
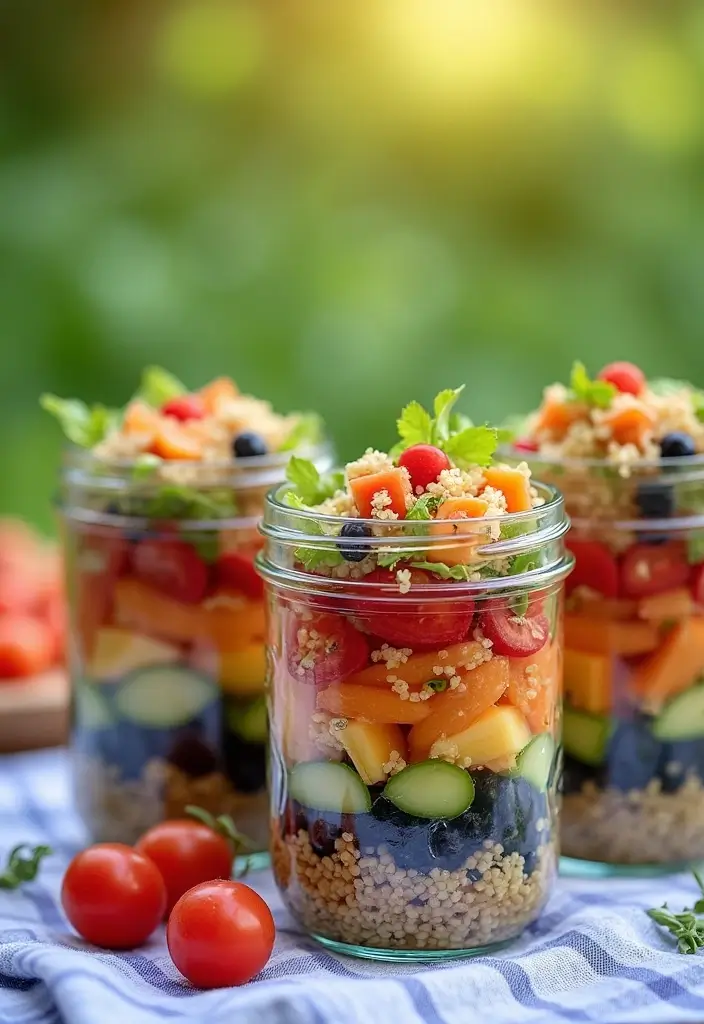
Quinoa salad jars are a fantastic option for your next field trip! They are not just cute but also packed with nutrients and flavor. Picture this: layers of fluffy quinoa mingling with fresh tomatoes, crunchy cucumbers, and hearty black beans, all drizzled with a zesty lime juice. These jars make it easy for kids to munch on the go, without the mess. Plus, they’re filling enough to keep those pesky hunger pangs away!
To make the most of your quinoa salad jars, consider these tips:
– Mix in a variety of beans for extra protein and texture.
– Add some creamy avocado right before eating to keep it fresh and vibrant.
Here’s a quick recipe for you:
Recipe Overview:
– Servings: 4
– Prep Time: 20 minutes
– Cook Time: 15 minutes
– Total Time: 35 minutes
– Calories: Approx. 250 per serving
Nutrition Information:
– Protein: 10g
– Carbohydrates: 40g
– Fat: 6g
Ingredients:
– 2 cups cooked quinoa
– 1 cup diced tomatoes
– 1 cup diced cucumbers
– 1 cup black beans, drained
– Juice of 1 lime
Instructions:
1. Start with a clean glass jar and layer the ingredients. Begin with the quinoa at the bottom.
2. Next, add the diced tomatoes and cucumbers.
3. Toss in the black beans for that protein boost.
4. Finish with a drizzle of lime juice and seal the jar tightly.
Frequently Asked Questions:
– How long can these jars last? They stay fresh for about 2-3 days in the fridge.
– Are they vegetarian? Absolutely! All the ingredients are plant-based.
You’ll love how simple and delightful these quinoa salad jars are. They’re perfect for picnics and field trips, ensuring everyone stays satisfied and energized!
Quinoa Salad Jars
Editor’s Choice

Rubbermaid Brilliance Food Storage Containers BPA Free Airtight Lids Ide…
 Amazon$34.99
SPLF 10 Pack Dishwasher Safe Reusable Snack Bags, BPA Free Reusable Food…
 Amazon$9.99
Instant Pot Zest 8 Cup One Touch Rice Cooker, From the Makers of Instant…
 Amazon$54.99
4. Fruit Skewers
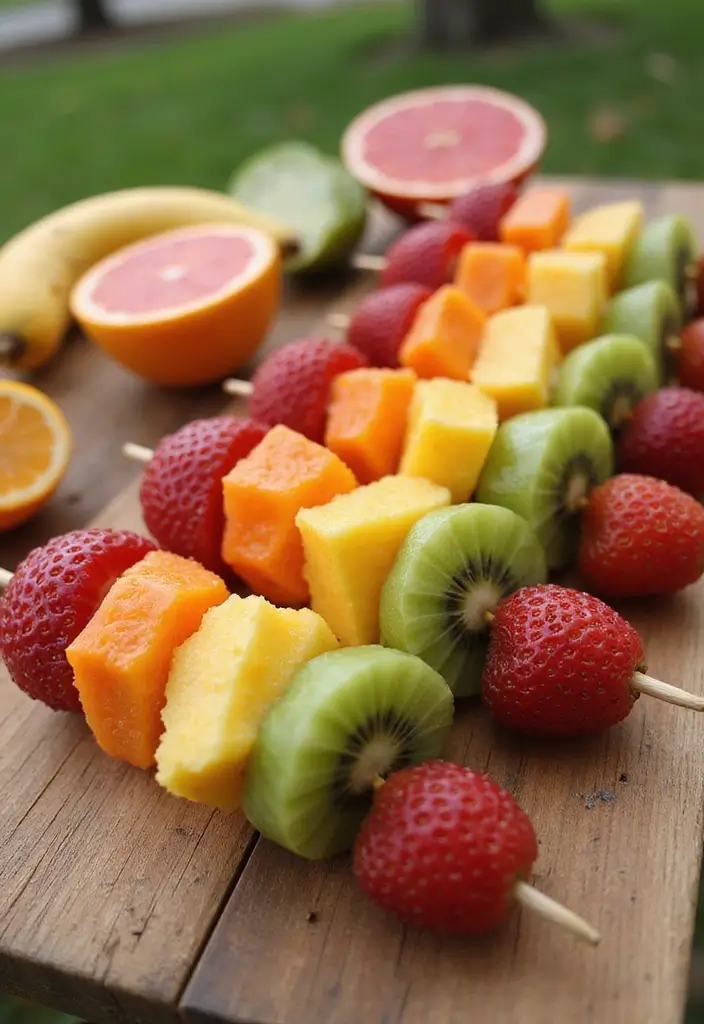
Fruit skewers make a delightful and healthy snack that’s perfect for field trips! They’re colorful, easy to grab, and bursting with flavor. Imagine juicy strawberries, sweet pineapple, and refreshing grapes all stacked on a skewer. Not only do they taste great, but they also provide the vitamins and energy kids need for a busy day of exploring.
Here’s how to make these fun fruit skewers work for you. First, pick fruits that are sturdy and won’t get squished during travel. Keep them cool by placing them with ice packs to maintain freshness. They’ll stay crisp and refreshing, ensuring your kids enjoy every bite.
Let’s break down the recipe:
Recipe Overview:
– Servings: 4
– Prep Time: 10 minutes
– Cook Time: 0 minutes
– Total Time: 10 minutes
– Calories: Approx. 80 per serving.
Nutrition Information:
– Protein: 1g
– Carbohydrates: 20g
– Fat: 0g
Ingredients:
– 1 cup strawberries, hulled
– 1 cup pineapple chunks
– 1 cup grapes
– 4 wooden skewers
Instructions:
1. Wash and cut the fruits into bite-sized pieces.
2. Alternate threading the strawberries, pineapple, and grapes onto the skewers.
3. Place the skewers in a container to keep them secure during your trip.
You can even involve the kids in assembling the skewers! It’s a fun way to get them excited about healthy eating.
Frequently Asked Questions:
– Can I use frozen fruits? Fresh fruits are ideal for the best texture and flavor.
– How long will these last? They can stay fresh for up to 4 hours in a cooler.
Enjoy these tasty fruit skewers on your next adventure. They’re not just snacks; they’re a fun way to stay energized and healthy on the go!
Fruit Skewers
Editor’s Choice
![25 Lunch Ideas for Field Trips That Travel Well and Stay Fresh 19 100% Compostable Food Storage Bags [Snack 150 Pack] Eco-Friendly Freezer...](https://m.media-amazon.com/images/I/71tOdZDW59L._AC_UL320_.jpg)
100% Compostable Food Storage Bags [Snack 150 Pack] Eco-Friendly Freezer…
 Amazon$11.28
HOTOR Insulated Lunch Box for Men & Women – Leak-Proof Cooler Lunch Bag …
 Amazon$9.96
5. Pita Bread with Tzatziki
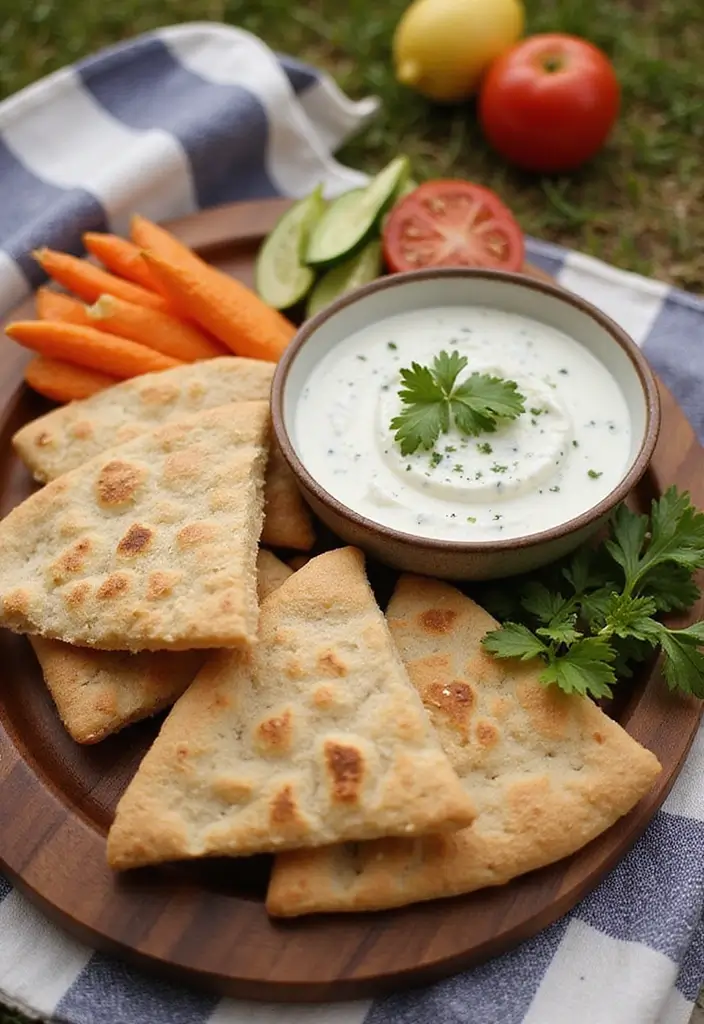
Imagine a lunch that’s not only delicious but also fun to eat! Pita bread paired with tzatziki dip brings a taste of the Mediterranean right to your picnic. This meal is not just easy to pack; it’s also a great way for kids to engage with their food. They can tear off pieces of warm pita and dip them into the cool, creamy tzatziki. It’s a perfect mix of flavors and textures that makes lunchtime exciting.
To make your tzatziki, combine creamy Greek yogurt with diced cucumbers, minced garlic, and a splash of lemon juice. The fresh taste of the cucumbers and the zesty lemon will brighten up your meal. Plus, it’s a breeze to prepare!
Tips for Packing:
– Choose whole wheat pita for added fiber and nutrients.
– Pack tzatziki in a leak-proof container to keep it fresh.
Recipe Overview:
– Servings: 4
– Prep Time: 15 minutes
– Cook Time: 5 minutes (for warming pita)
– Total Time: 20 minutes
– Calories: Approx. 180 per serving
Nutritional Information:
– Protein: 7g
– Carbohydrates: 25g
– Fat: 6g
Ingredients:
– 4 whole wheat pita breads
– 1 cup Greek yogurt
– 1 cucumber, finely diced
– 1 garlic clove, minced
– Juice of 1 lemon
Instructions:
1. In a bowl, mix together Greek yogurt, diced cucumber, minced garlic, and lemon juice until well combined.
2. Warm the pita bread in the oven for about 5 minutes, until soft and slightly toasted.
3. Pack the tzatziki in a small container to keep it cool during your trip.
4. Serve the warm pita alongside the tzatziki for a delightful dipping experience.
Frequently Asked Questions:
– Does tzatziki need to be refrigerated? Yes, keep it cold until you’re ready to eat.
– Can I add spices? Absolutely! A pinch of dill or mint can take the flavor up a notch.
– Want a twist? Try adding chopped olives for an extra burst of flavor!
This meal is not just healthy; it’s also a fun way to enjoy lunch outdoors. Pack it up, and you’re ready for a tasty adventure!
Pita Bread with Tzatziki
Editor’s Choice

Rubbermaid Brilliance BPA-Free Food Storage Containers, Medium Deep, 4.7…
 Amazon$18.85
Dave’s Killer Bread 21 Whole Grains & Seeds Thin-Sliced, Whole Grain Org…
 AmazonCheck Price
365 By Whole Foods Market, Greek Yogurt, Plain Nonfat, 32 Ounce
 Amazon$4.49
6. Mini Veggie Frittatas
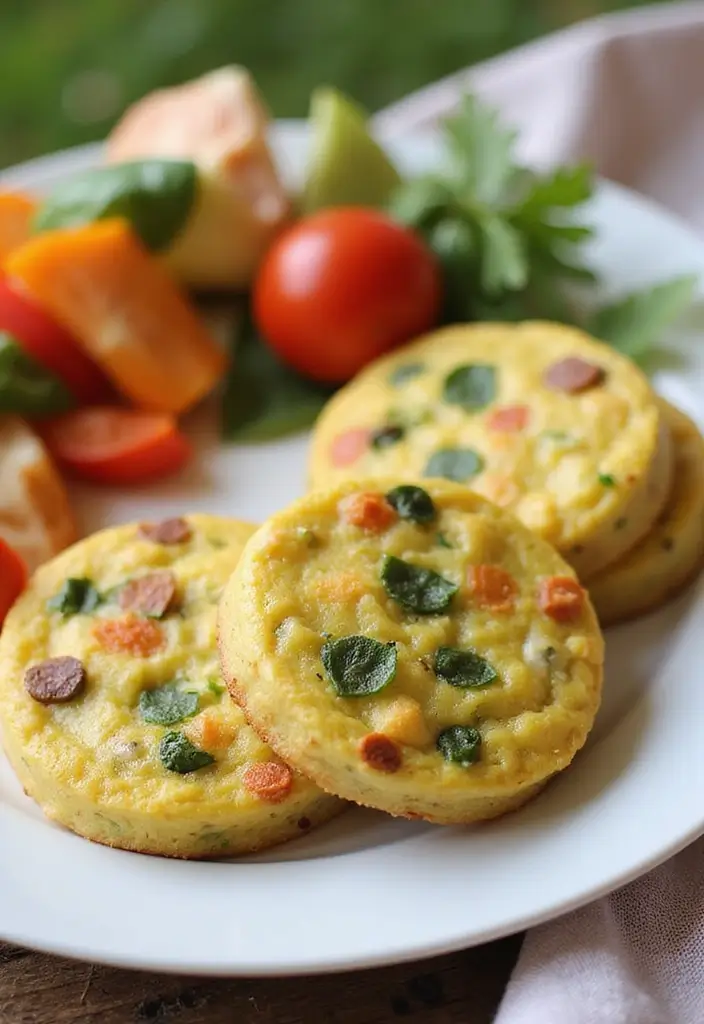
Looking for a tasty, healthy lunch that travels well? Try these mini veggie frittatas! They make an excellent breakfast-for-lunch option, packed with nutritious ingredients like eggs, spinach, and bell peppers. The best part? You can whip them up using a muffin tin, making them easy to prepare and even easier to pack. Whether enjoyed warm or cold, they’re perfect for field trips and will keep you energized throughout the day.
To make them even more delicious, experiment with different veggies and herbs. You might add diced zucchini, colorful cherry tomatoes, or fresh basil for a delightful twist. These small changes keep the flavors exciting and let you customize them to your taste.
Here’s how to make your own mini veggie frittatas:
Recipe Overview:
– Servings: 12 mini frittatas
– Prep Time: 15 minutes
– Cook Time: 20 minutes
– Total Time: 35 minutes
– Calories: Approx. 100 per frittata
Nutrition Information:
– Protein: 8g
– Carbohydrates: 2g
– Fat: 7g
Ingredients:
– 6 eggs
– 1 cup spinach, chopped
– 1 bell pepper, diced
– 1 cup shredded cheese (cheddar or mozzarella)
– Salt and pepper to taste
Instructions:
1. Preheat your oven to 375°F (190°C).
2. In a large bowl, whisk the eggs until well combined. Add the chopped veggies and cheese, mixing well.
3. Grease a muffin tin, then pour the mixture evenly into each cup.
4. Bake for 20 minutes or until the frittatas are set and slightly golden.
Frequently Asked Questions:
– Can I freeze these? Yes! They freeze well for up to a month, making meal prep a breeze.
– What other fillings can I use? Get creative! You can substitute with mushrooms, diced carrots, or any leftover veggies you have on hand.
Let your kids pick their favorite veggies to make these frittatas even more fun! These mini bites are not just filling; they’re a colorful addition to your lunch that everyone will love. Enjoy your adventure with these delicious frittatas!
Mini Veggie Frittatas
Editor’s Choice

Amazon Basics Nonstick Round Muffin Baking Pan, 12 Cups, Set of 2, Gray,…
 AmazonEUR 12.94
Bento Box Adult Lunch Box, Containers for Adults Men Women with 4 Compar…
 Amazon$9.99
Amazon Basics Reusable Silicone Baking Cups, BPA Free Muffin Liners, Dis…
 Amazon$6.99
7. Cheese and Cracker Packs
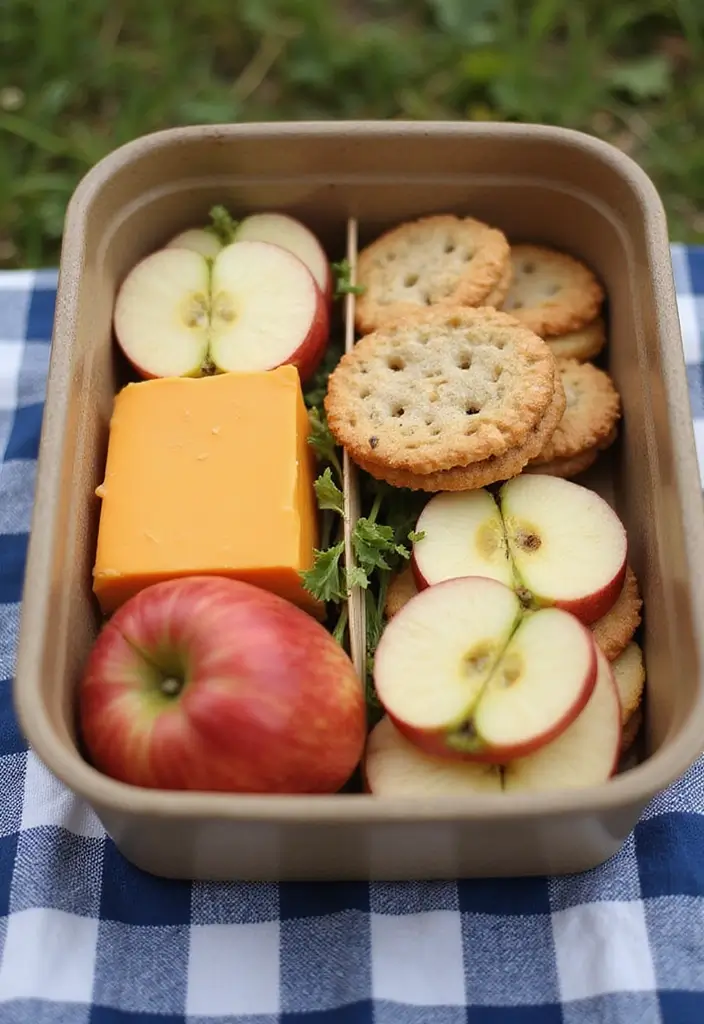
Let’s talk about a timeless favorite: cheese and cracker packs! These tasty snacks are not just easy to make; they bring a delightful crunch kids love. Imagine creamy cheddar cheese paired with crunchy whole grain crackers. Add some crisp apple or cucumber slices for a refreshing twist. This combo is perfect for field trips, offering a mix of flavors and textures that will keep everyone happy.
Here’s how to make the most of your cheese and cracker packs:
– Choose cheeses that travel well, like cheddar or gouda. They don’t need refrigeration and maintain their flavor.
– Mix it up with different whole grain crackers. A variety keeps things interesting and fun.
– Include fresh fruits or veggies like apples or cucumbers to add a juicy crunch.
Recipe Overview:
– Servings: 4
– Prep Time: 5 minutes
– Cook Time: 0 minutes
– Total Time: 5 minutes
– Calories: Approx. 150 per serving
Nutrition Information:
– Protein: 8g
– Carbohydrates: 15g
– Fat: 8g
Ingredients:
– 1 cup cheese slices (cheddar or gouda)
– 1 box whole grain crackers
– 1 apple, sliced (optional)
Instructions:
1. Prepare the cheese slices and arrange them with the crackers.
2. Optionally, add apple slices to each pack for extra flavor.
3. Place the packs in a container for simple transport.
Frequently Asked Questions:
– Can I use different types of cheese? Absolutely! Gouda or mozzarella work great too.
– How long do these stay fresh? They can safely last several hours without refrigeration.
Keep everything neat by using a divided lunch box. This way, the cheese stays with the crackers, and your lunch remains tidy and appealing. With this quick and easy snack, you’re all set for your next field trip! Enjoy the adventure!
Cheese and Cracker Packs
Editor’s Choice

Bento Box Adult Lunch Box, Containers for Adults Men Women with 4 Compar…
 Amazon$9.99
Keebler Sandwich Crackers, Lunch Snacks, Variety Pack (45 Packs)
 Amazon$20.95
Sargento Reserve Series Natural Aged Gouda Sliced Cheese, 8 Slices
 AmazonCheck Price
8. Chicken Salad Lettuce Wraps
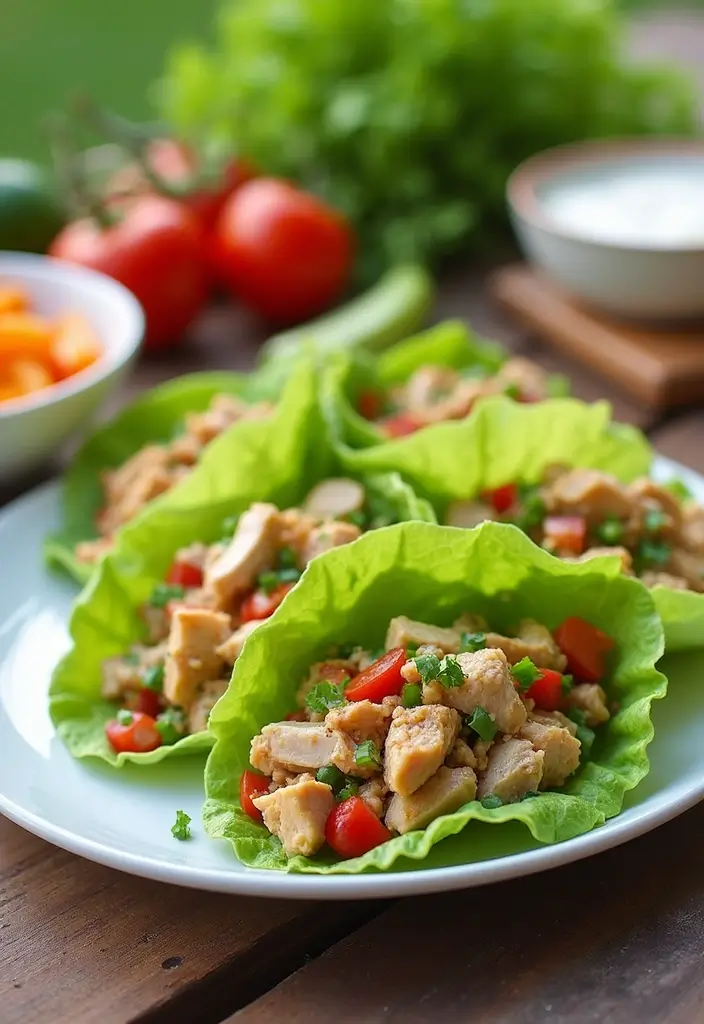
Looking for a lunch option that’s both tasty and easy to pack? Try these chicken salad lettuce wraps! They offer a refreshing twist on traditional chicken salad. Using crisp romaine or butter lettuce, you can create a delightful hand-held meal that kids will love. Plus, with a mix of shredded chicken, Greek yogurt, and crunchy celery, these wraps are not only delicious but also low in carbs and high in protein. They’re perfect for keeping energy levels up during a busy field trip.
To make these wraps even easier, consider using pre-cooked rotisserie chicken. It saves time and adds convenience. For a hint of sweetness, toss in grapes or diced apples. This small addition can make the wraps even more appealing to kids.
Here’s how to whip up these wraps quickly:
Recipe Overview:
– Servings: 4
– Prep Time: 10 minutes
– Total Time: 10 minutes
– Calories: About 120 per serving
Nutrition Information:
– Protein: 15g
– Carbohydrates: 3g
– Fat: 5g
Ingredients:
– 2 cups shredded chicken
– 1/2 cup Greek yogurt
– 1 cup diced celery
– Salt and pepper to taste
– 8 lettuce leaves
Instructions:
1. In a bowl, combine shredded chicken, Greek yogurt, and diced celery.
2. Season the mixture with salt and pepper to taste.
3. Spoon the chicken salad onto the lettuce leaves and fold them up like tacos.
4. Pack them in a container for a fresh and crisp lunch.
Frequently Asked Questions:
– How long do these wraps stay fresh? They are best enjoyed within a few hours of making.
– Can I use canned chicken? Yes, that’s a great shortcut!
Just remember to keep the chicken mixture from being too wet. This will help your lettuce stay crunchy and delicious. Enjoy your tasty and nutritious chicken salad lettuce wraps on your next field trip!
Fun fact: a protein-packed lunch like chicken salad lettuce wraps can boost field-trip energy by up to 20%. They’re easy to pack, kid-friendly, and keep energy steady for long excursions—perfect for practical lunch ideas for field trips.
Chicken Salad Lettuce Wraps
Editor’s Choice

50 Pack (100-Piece) 24 oz Meal Prep Containers Reusable with Lids, Sturd…
 Amazon$23.99
Whole Foods Market Organic Classic Rotisserie Chicken (Cold)
 AmazonCheck Price
9. Smoothie Packs
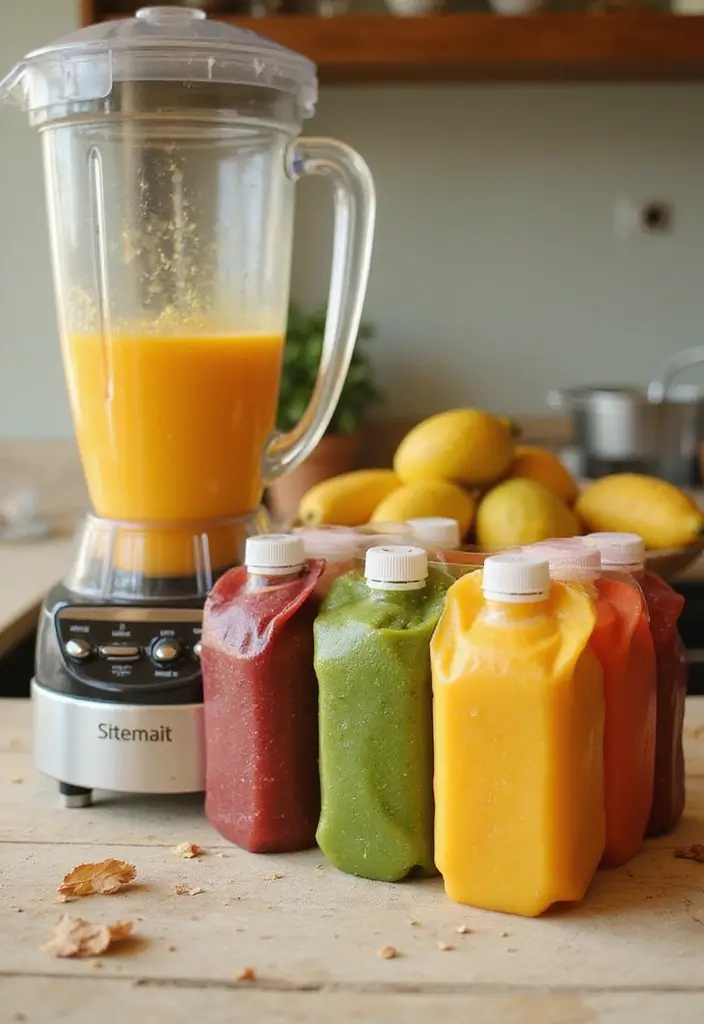
Smoothie packs are a delicious and nutritious option for lunches or snacks on field trips. You can prepare them ahead of time, making mornings a breeze. Just pack ingredients like spinach, banana, and strawberries into freezer bags. In the morning, toss everything into a blender with yogurt or almond milk, and you have a refreshing drink ready to go. These packs not only taste great, but they also help you stay hydrated and sneak in some greens!
Here’s how to get started with your smoothie packs:
Ingredients:
– 1 ripe banana
– 1 cup fresh spinach
– 1 cup strawberries (fresh or frozen)
– 1 cup yogurt or almond milk
Instructions:
1. Portion out the banana, spinach, and strawberries into freezer bags.
2. Seal the bags and freeze until you’re ready to use them.
3. When it’s time to enjoy, blend the contents with yogurt or almond milk until smooth.
Helpful Tips:
– Use frozen fruit for a thicker, frostier smoothie.
– Add a scoop of protein powder for an extra energy boost.
You might wonder how long you can keep these packs in the freezer. The good news is they last up to three months! Feel free to mix in other fruits like mango or blueberries to keep things interesting.
With a portable blender, you can whip these up anywhere, making them perfect for busy days or adventures. These smoothie packs are not only easy to make but also a fun way to keep your energy up during field trips.
• Freeze ingredients for easy prep
• Use any fruits your child loves
• Blend with yogurt for a creamy texture
• Customize with protein powder for added nutrition
Smoothie Packs
Editor’s Choice

Ninja BC151NV Blast Portable Blender, Cordless, 18oz. Vessel, Personal B…
 Amazon$59.95
Quart Food Storage Freezer Bags, Stay Open Design, Easy to Fill, 60 coun…
 Amazon$7.78
Optimum Nutrition Gold Standard 100% Whey Protein Powder, Double Rich Ch…
 Amazon$39.99
10. Baked Mini Potatoes
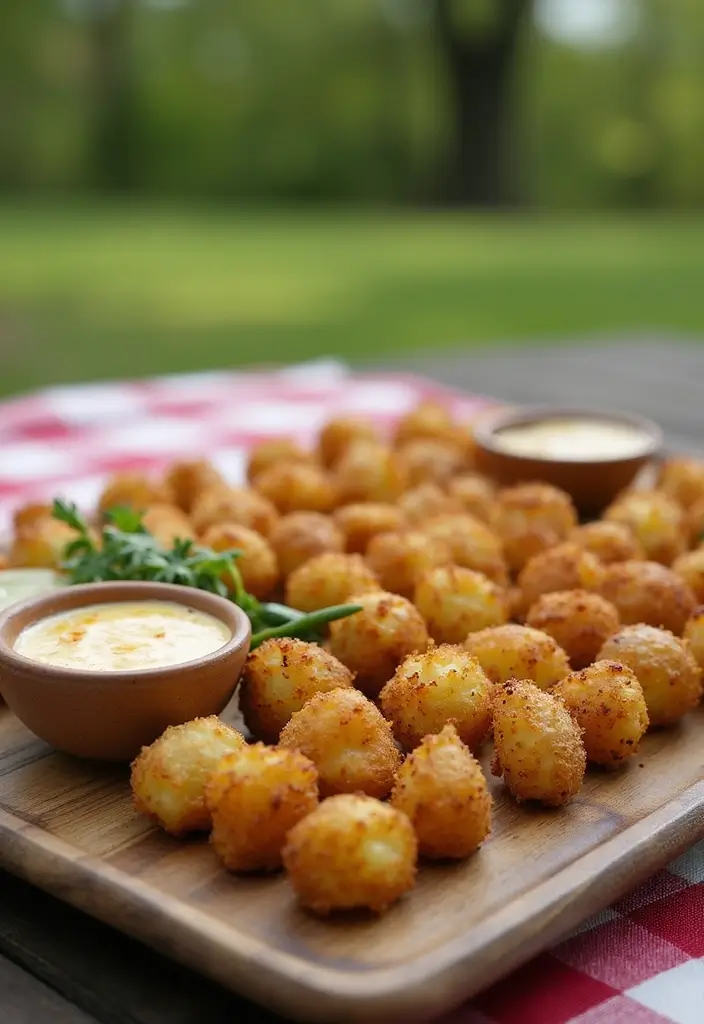
Baked mini potatoes are a fantastic choice for your next field trip lunch! These little gems are not only filling but also pack a nutritious punch. When baked to perfection, they become tender and fluffy, ready to fuel your adventure. You can easily customize them with toppings like creamy Greek yogurt or zesty salsa, adding a fun twist to this simple dish. Plus, they’re easy to eat on the go!
Here’s how to make them: Prepare your baked mini potatoes the night before to save time. Bake them until soft, then let them cool. Store your toppings separately in small containers to keep everything fresh until you’re ready to eat. This method ensures you have a delicious meal that stays warm and tasty during your outing.
Recipe Overview:
– Servings: 4
– Prep Time: 10 minutes
– Cook Time: 30 minutes
– Total Time: 40 minutes
– Calories: Approx. 130 per serving.
Nutrition Information:
– Protein: 3g
– Carbohydrates: 28g
– Fat: 0g
Ingredients:
– 1 pound mini potatoes
– 1 cup Greek yogurt (for topping)
– Salsa (optional)
Instructions:
1. Preheat your oven to 400°F (200°C).
2. Wash the mini potatoes and pierce them with a fork.
3. Arrange them on a baking sheet and bake for about 30 minutes or until they are tender.
4. Let them cool down before packing.
5. When ready to eat, add your desired toppings for a tasty treat!
Frequently Asked Questions:
– What can I use instead of yogurt? Try sour cream or guacamole for a creamy alternative.
– Can I prepare these in advance? Absolutely! They can be made a day ahead for convenience.
Using a cooling bag can help keep them warm longer, making your lunch even more enjoyable. With these tips and this easy recipe, you’re all set for a delicious, energy-boosting meal on your next adventure!
Baked Mini Potatoes
Editor’s Choice
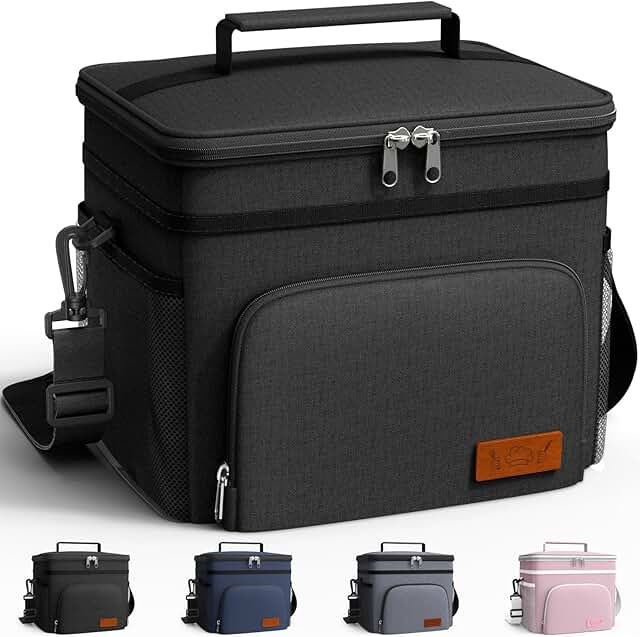
HOTOR Insulated Lunch Box for Men & Women – Leak-Proof Cooler Lunch Bag …
 Amazon$9.96
Rubbermaid Brilliance Food Storage Containers BPA Free Airtight Lids Ide…
 Amazon$34.99
11. Peanut Butter and Banana Roll-Ups
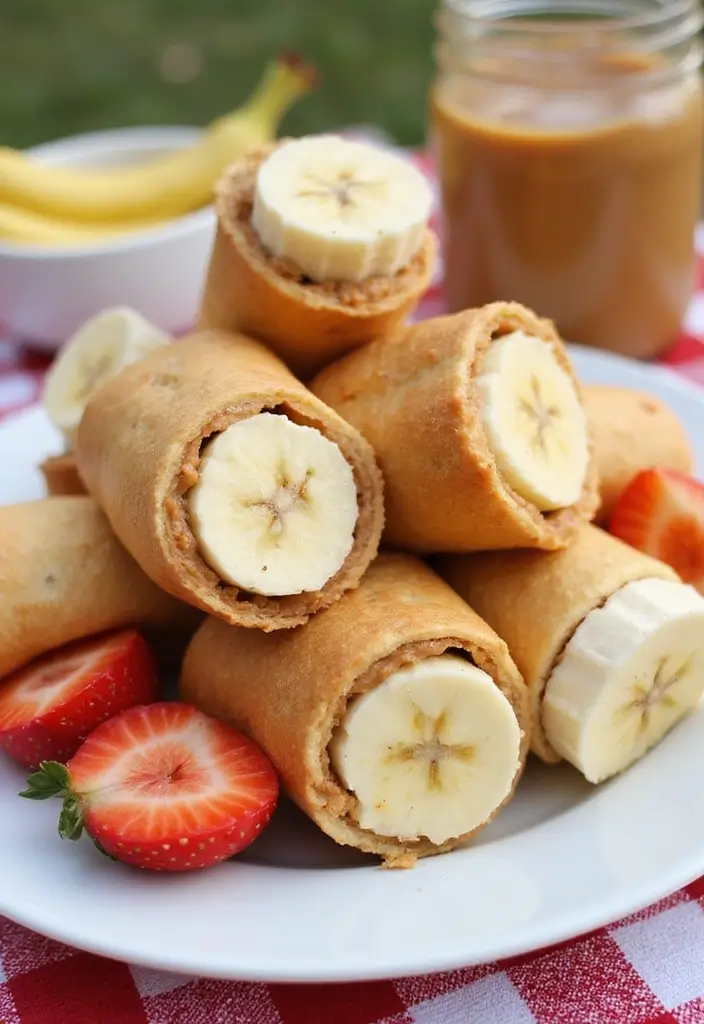
Peanut Butter and Banana Roll-Ups are a delightful choice for lunch on the go! These easy-to-make snacks are not only tasty but also packed with nutrition. You will love how simple they are to prepare. Just take a whole wheat tortilla, spread your favorite peanut butter (or a nut-free option), and place a ripe banana in the center. Roll it up tightly, and you’re ready to slice it into fun pinwheels. Kids adore these, and they’ll enjoy the burst of energy from the protein and potassium!
For the best results, choose ripe bananas. They’re softer and roll up easier. Keep these treats cool until it’s time to eat, so the peanut butter stays just right. These roll-ups are perfect for field trips, picnics, or any busy day!
Recipe Overview:
– Servings: 4
– Prep Time: 10 minutes
– Cook Time: 0 minutes
– Total Time: 10 minutes
– Calories: Approx. 200 per serving
Nutrition Information:
– Protein: 6g
– Carbohydrates: 30g
– Fat: 7g
Ingredients:
– 4 whole wheat tortillas
– 1/2 cup peanut butter or sunflower seed butter
– 2 ripe bananas
Instructions:
1. Spread the peanut butter on each tortilla.
2. Place one banana in the center of each tortilla.
3. Roll the tortilla tightly around the banana.
4. Slice into pinwheels and enjoy!
Frequently Asked Questions:
– What if my child has a nut allergy? Simply use sunflower seed butter instead of peanut butter.
– How long will they stay fresh? For the best taste, eat them within 4 hours of making.
Extra Tip: Add a sprinkle of cinnamon for a delicious twist!
These Peanut Butter and Banana Roll-Ups are sure to please your little ones while keeping them energized. Enjoy this quick and healthy snack on your next adventure!
Peanut Butter and Banana Roll-Ups
Editor’s Choice
Mission 10 Inch Carb Balance Whole Wheat Tortillas LARGE Burrito 8 ct 20…
 Amazon$27.67

4 Pack Bento Lunch Box Set 3 Compartment Food Storage Containers Wheat S…
 Amazon$13.98
12. Spinach and Feta Stuffed Wraps
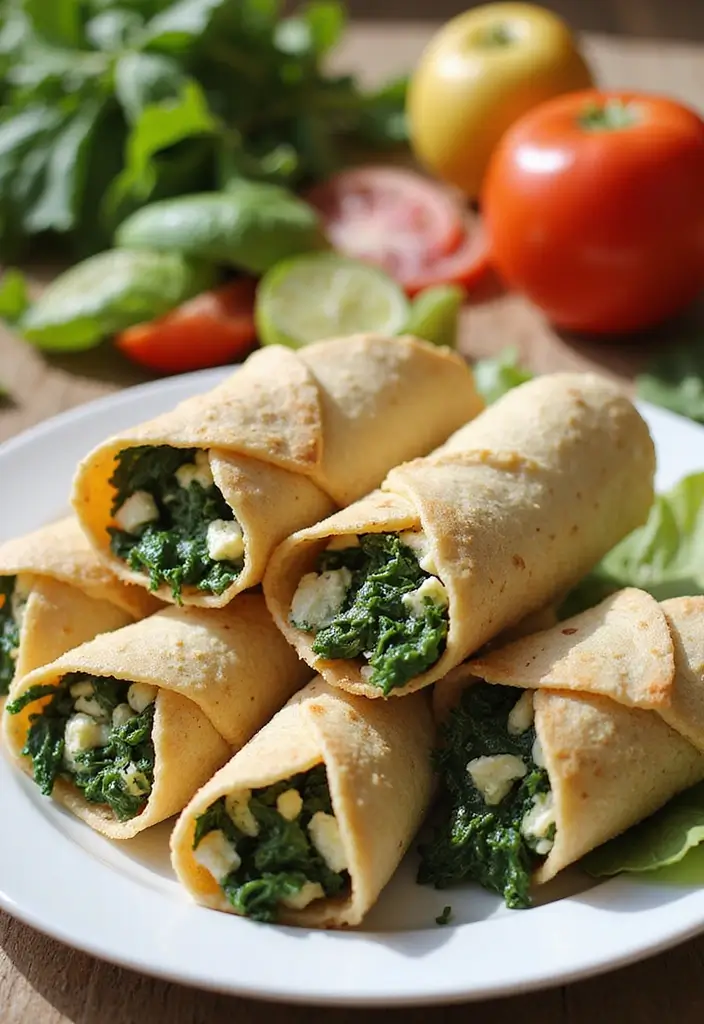
Imagine a lunch that’s not only tasty but also healthy and easy to pack. Spinach and feta stuffed wraps hit all those marks! These wraps are a delightful combination of fresh ingredients wrapped in a whole grain tortilla. They’re perfect for field trips, picnics, or busy school days. Your kids will love the flavor, and you’ll enjoy knowing they’re eating something nutritious.
To make these wraps, start with a whole grain tortilla. Spread a generous layer of hummus for creaminess. Next, add a handful of fresh spinach and a sprinkle of crumbled feta cheese. Roll it up tightly, slice it in half, and they’re ready to go! This simple recipe takes only about 10 minutes to prepare, making it a quick and satisfying lunch option.
Recipe Overview:
– Servings: 4
– Prep Time: 10 minutes
– Cook Time: 0 minutes
– Total Time: 10 minutes
– Calories: Approx. 180 per serving.
Nutrition Information:
– Protein: 6g
– Carbohydrates: 26g
– Fat: 7g
Ingredients:
– 4 whole grain wraps
– 1 cup fresh spinach
– 1/2 cup crumbled feta cheese
– 1/2 cup hummus
Instructions:
1. Spread a layer of hummus on each wrap.
2. Add fresh spinach and crumbled feta on top.
3. Roll the wrap tightly from one end to the other.
4. Slice in half and pack in a container for easy transport.
Here are a few tips to make these wraps even better:
– Use fresh spinach for a crisp texture.
– Add grilled chicken for extra protein.
– Mix in olives for a Mediterranean twist.
– Wrap tightly to keep everything fresh until lunchtime.
FAQs:
– Can I make this vegan? Absolutely! Just skip the feta cheese.
– How long do these last? Enjoy them within 24 hours for the best taste and freshness.
These spinach and feta stuffed wraps will surely be a hit with everyone. Enjoy packing a healthy lunch that stays fresh and delicious all day long!
Spinach and Feta Stuffed Wraps
Editor’s Choice

Bento Box Adult Lunch Box, Containers for Adults Men Women with 4 Compar…
 Amazon$9.99
365 Everyday Value Flour Tortillas Burrito Size, 16 Oz (Frozen)
 AmazonCheck Price
365 By Whole Foods Market, Original Single Serve Hummus, 12 Ounce, 6 Count
 Amazon$3.99
13. Yogurt Parfaits
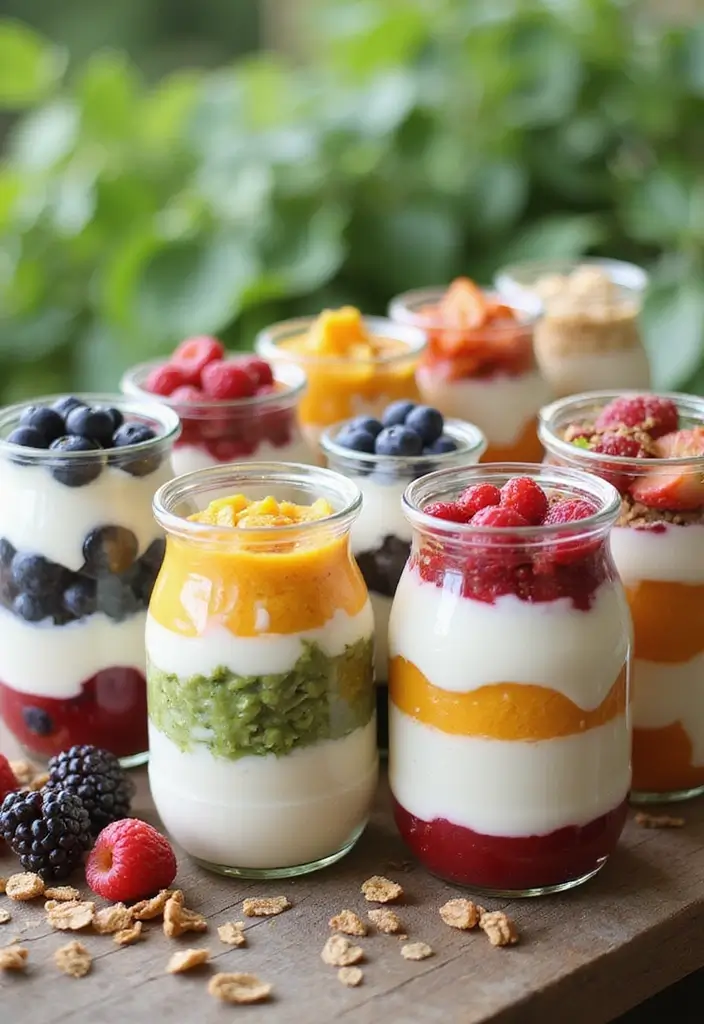
Yogurt Parfaits: A Delicious Field Trip Lunch
Yogurt parfaits aren’t just for breakfast anymore! These tasty treats make a perfect lunch option for field trips. Just picture creamy yogurt layered with crunchy granola and sweet mixed berries. Your kids will love the delightful flavors, and you’ll feel great knowing they’re getting protein and nutrients.
To keep these parfaits fresh and delicious, remember a few tips. Use Greek yogurt for a thicker texture, which holds up better during travel. Pack the granola separately to keep it crunchy until it’s time to eat.
Here’s how you can whip up this easy recipe:
Recipe Overview:
– Servings: 4
– Prep Time: 10 minutes
– Cook Time: 0 minutes
– Total Time: 10 minutes
– Calories: Approx. 150 per serving
Nutrition Information:
– Protein: 8g
– Carbohydrates: 25g
– Fat: 3g
Ingredients:
– 2 cups Greek yogurt
– 1 cup granola
– 2 cups mixed berries (like strawberries, blueberries, and raspberries)
Instructions:
1. In portable containers, layer the Greek yogurt, granola, and mixed berries.
2. Repeat the layers until the containers are full.
3. Keep the granola separate until it’s time to enjoy, so it stays crunchy.
Your kids will be excited to dig into these parfaits during the trip. Plus, they’re easy to pack and eat on the go.
Frequently Asked Questions:
– Can I use frozen berries? Yes! Fresh is best, but frozen berries work well, too.
– How long do they stay fresh? Aim to eat them within 4 hours of packing for the best taste.
Use mason jars for a beautiful presentation that’s sure to impress. These yogurt parfaits are not only delicious but also a hit with kids and parents alike!
Yogurt Parfaits
Editor’s Choice

ComSaf Mini Mason Jars 4oz – 8 Pack, Regular Mouth Mason Jar with Lids a…
 Amazon$12.99
FAGE Total Greek Yogurt, 0% Nonfat, Plain, 32 oz
 AmazonCheck Price
Nature Valley Protein Granola, Oats and Honey Granola, Resealable Snack …
 Amazon$5.98
14. Veggie Sushi Rolls
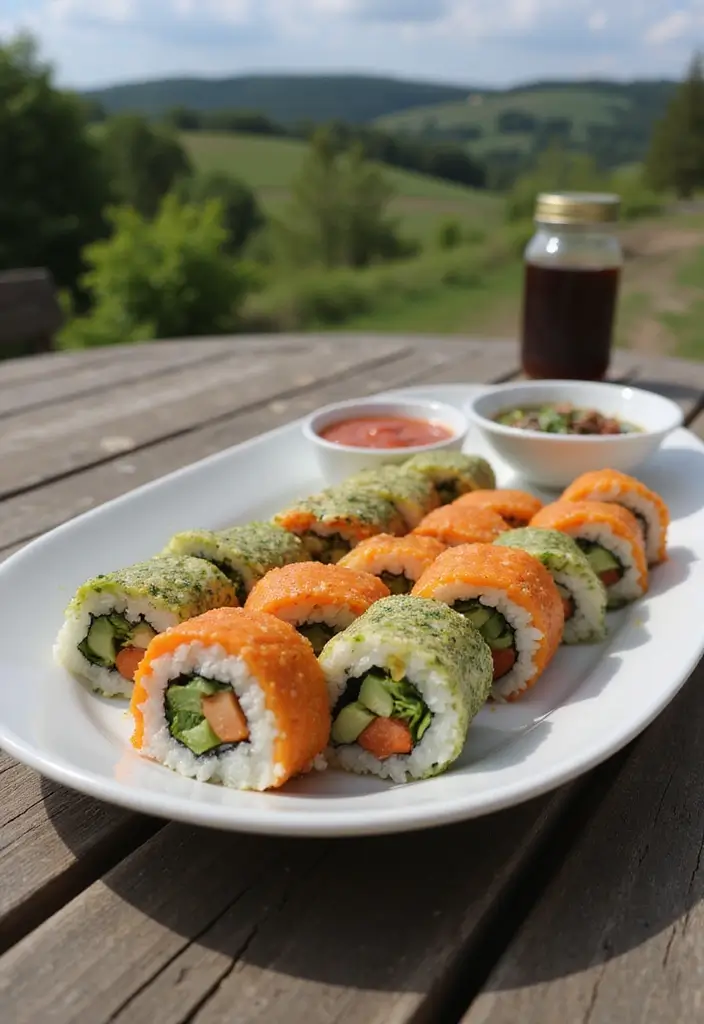
Veggie sushi rolls are a delightful option for your next field trip lunch. They are healthy, colorful, and surprisingly simple to make. Imagine the crunch of fresh vegetables like cucumber, bell pepper, and creamy avocado all wrapped in a flavorful nori sheet. These rolls not only travel well, but they also stay fresh and tasty, making them a hit with both kids and adults!
To make your veggie sushi rolls, you’ll need sushi rice and nori sheets. This fun activity can involve the whole family. Roll them tightly, slice into bite-sized pieces, and pack them in a lunchbox. These sushi rolls are a fantastic alternative to traditional sandwiches!
Here’s how you can whip up these rolls in no time:
Ingredients:
– 2 cups sushi rice, cooked
– 4 sheets nori
– 1 cucumber, julienned
– 1 bell pepper, julienned
– 1 avocado, sliced
Instructions:
1. Spread a thin layer of sushi rice evenly over a nori sheet.
2. Place the julienned veggies in the center.
3. Roll the nori tightly from one end to the other.
4. Slice into bite-sized pieces and pack.
For the best experience, serve with soy sauce or tamari for dipping. If you’re feeling adventurous, you can add protein like tofu or crab for extra flavor!
Tips for Success:
– Dampen your hands before handling sushi rice to prevent sticking.
– Enjoy them within a few hours for the freshest taste.
– Use a bamboo mat for easier rolling if you have one.
These veggie sushi rolls are perfect for keeping your lunch exciting and nutritious. They’re not just a meal; they’re a fun activity you can share with your family. Enjoy rolling up some delicious memories!
Veggie Sushi Rolls
Editor’s Choice

2 Pack Bamboo Sushi Rolling Mat, Sushi roll maker,Sushi making kit, Bamb…
 Amazon$4.99
Bento Box Adult Lunch Box, Containers for Adults Men Women with 4 Compar…
 Amazon$9.99
![25 Lunch Ideas for Field Trips That Travel Well and Stay Fresh 89 [8 Pack] Salad Dressing Container To Go, 2.4oz Small Condiment Container...](https://m.media-amazon.com/images/I/61zqhbNRC3L._AC_UL320_.jpg)
[8 Pack] Salad Dressing Container To Go, 2.4oz Small Condiment Container…
 Amazon$12.99
15. Oatmeal Energy Balls
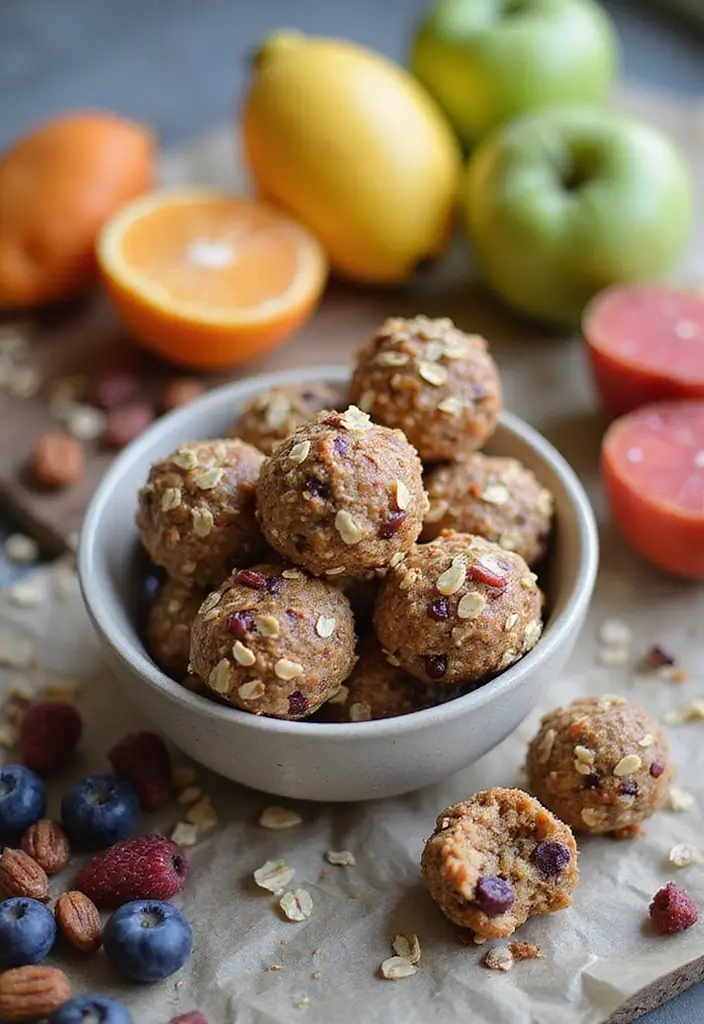
Oatmeal energy balls are bite-sized delights that offer a quick energy boost—perfect for busy field trips! These tasty snacks are easy to whip up and loved by kids. With a mix of oats, honey, peanut butter, and mini chocolate chips, they’re not only delicious but also a healthy, nut-free option that keeps hunger at bay.
To make the magic happen, start by mixing your ingredients. After rolling them into balls, let them chill in the fridge for at least 30 minutes. This step helps them firm up and makes them easier to pack. Want to switch things up? Feel free to experiment with mix-ins like dried fruits or seeds for added flavor and texture!
Here’s a quick look at the recipe:
Recipe Overview:
– Servings: 12
– Prep Time: 15 minutes
– Cook Time: 0 minutes
– Total Time: 15 minutes
– Calories: Approx. 100 per ball
Nutrition Information:
– Protein: 3g
– Carbohydrates: 15g
– Fat: 4g
Ingredients:
– 1 cup rolled oats
– 1/2 cup peanut butter or sunflower seed butter
– 1/4 cup honey
– 1/4 cup mini chocolate chips
Instructions:
1. In a bowl, mix all ingredients until well combined.
2. Roll the mixture into small balls.
3. Refrigerate for 30 minutes before packing for your trip.
These energy balls can last up to a week in an airtight container, making them a perfect make-ahead snack. Want them to be vegan? Simply swap honey for maple syrup!
Packing these oatmeal energy balls for your field trip means you’ll have a tasty treat that keeps everyone fueled and happy. Enjoy the adventure!
• Mix in dried fruits for a twist
• Use a cookie scoop for even sizes
• Keep in an airtight container for freshness
• Chill before packing to firm them up
Oatmeal Energy Balls
Editor’s Choice

Ice Cream Scoop, 18/8 Stainless Steel Cookie Scoop, Cookie Scoops for Ba…
 Amazon$7.49
Energy Balls: 30 Simple And Delicious Superfood Energy Balls And Bites R…
 AmazonGBP 7.49
16. Corn and Bean Salad
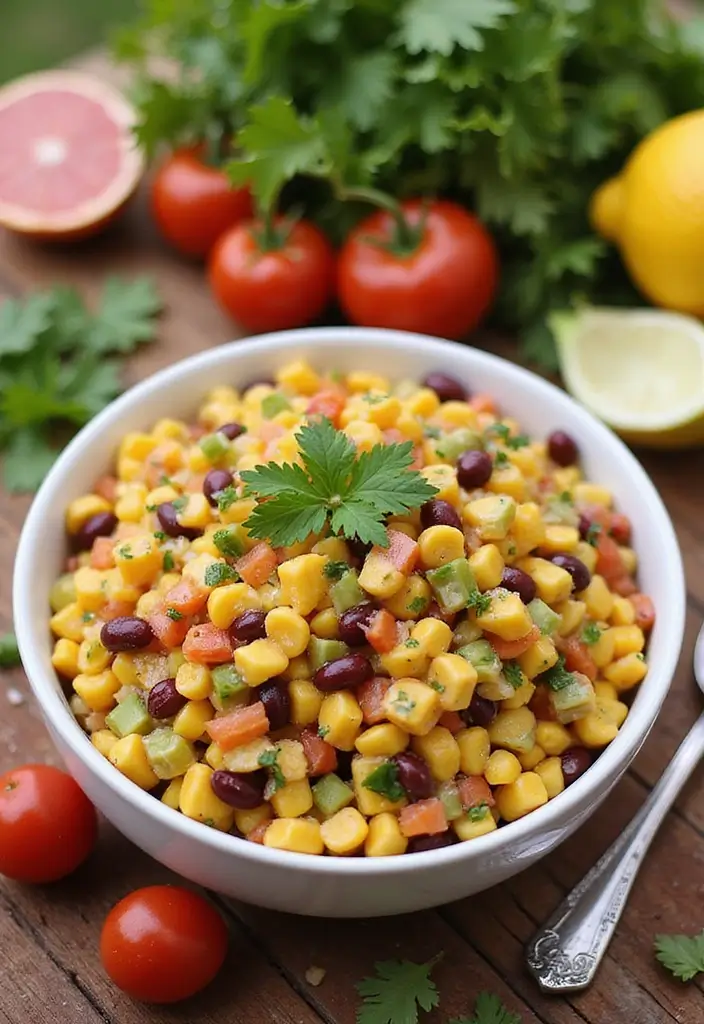
Try this vibrant corn and bean salad for your next field trip lunch! It’s not just tasty; it’s also packed with nutrients. The combination of sweet corn, hearty black beans, and crunchy bell peppers makes it a refreshing meal. You can eat it straight from the container or scoop it up with tortilla chips for an extra crunch. Kids love it, and you’ll appreciate how easy it is to prepare!
Here’s how to make it:
Gather your ingredients:
– 1 cup canned black beans, drained
– 1 cup corn (fresh or canned)
– 1 bell pepper, diced (choose your favorite color)
– Juice of 1 lime
– Salt and pepper to taste
Instructions:
1. In a mixing bowl, combine the black beans, corn, and diced bell pepper.
2. Squeeze the lime juice over the mixture.
3. Season with salt and pepper to your liking.
4. Mix everything well and pack it in a container with a lid.
Pro Tips:
– Use canned beans for quick prep.
– Fresh corn adds a pop of sweetness, but canned works too.
– Want to mix it up? Add diced cucumbers or cherry tomatoes for more flavor and color!
Nutrition Breakdown:
– Servings: 4
– Prep Time: 15 minutes
– Calories: About 150 per serving
– Protein: 6g
– Carbohydrates: 25g
– Fat: 2g
FAQs:
– Can I add more veggies? Yes! Feel free to toss in whatever you have on hand.
– How long will it stay fresh? Keep it chilled, and it will stay fresh for up to 6 hours.
This salad is not just colorful and delicious; it’s also a smart choice for busy days. Perfect for field trips, it’s a meal that keeps everyone happy and energized!
Corn and Bean Salad
Editor’s Choice

ZENPAC Small Brown Lunch Bag, Reusable & Washable Kraft, Leakproof Sack …
 AmazonCheck Price
Bento Box Adult Lunch Box, Containers for Adults Men Women with 4 Compar…
 Amazon$9.99
17. Caprese Salad Skewers
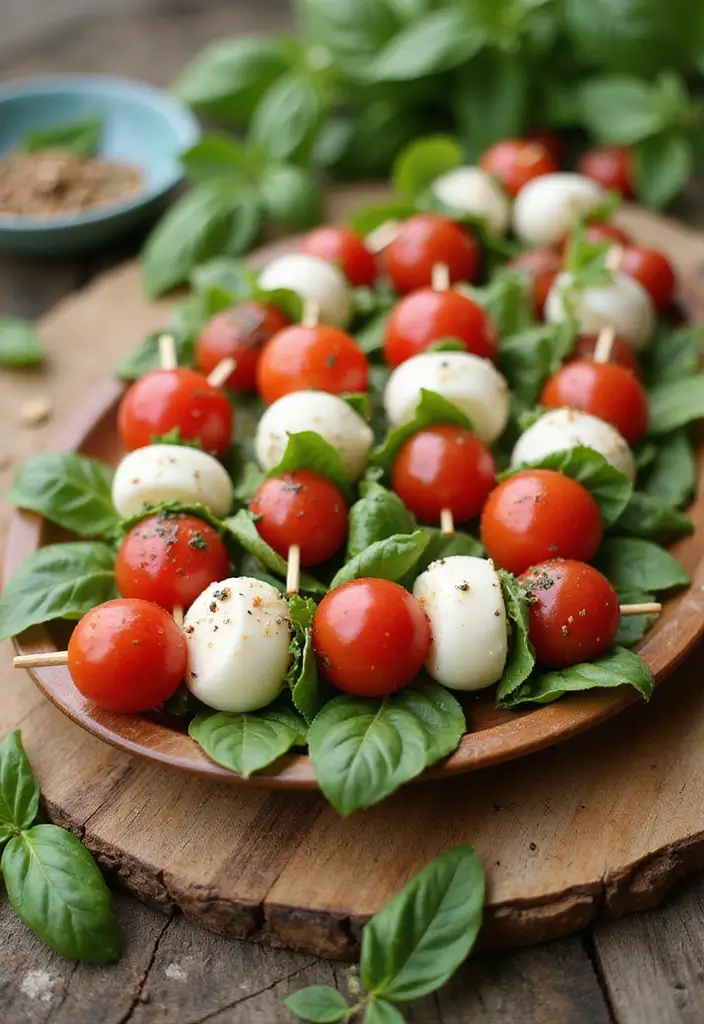
Looking for a fresh and easy lunch idea for your next field trip? Caprese salad skewers are a fun twist on a classic salad. These colorful skewers combine juicy cherry tomatoes, creamy mozzarella balls, and fragrant basil leaves. They’re not just tasty; they’re also a feast for the eyes. Drizzle them with balsamic glaze just before serving, and you have a delightful lunch that’s perfect for kids and adults alike. Pinterest is buzzing with these eye-catching snacks, and it’s easy to see why!
To make these skewers even better, here are some practical tips. Choose a mix of cherry tomatoes in red, yellow, and orange for a vibrant look. You can prepare them the night before and store the skewers in the fridge. Just remember to add the balsamic glaze right before you eat to keep that fresh flavor. These skewers are budget-friendly and require no cooking, making them a great choice for busy days. Whether you’re at the park or on a school trip, these skewers will brighten up your meal!
Here’s what you need:
– 1 cup cherry tomatoes
– 1 cup mozzarella balls
– Fresh basil leaves
– Balsamic glaze for drizzling
Instructions:
1. Start by threading one cherry tomato onto a skewer.
2. Next, add a mozzarella ball followed by a basil leaf.
3. Repeat this pattern until the skewer is filled to your liking.
4. Just before serving, drizzle the skewers with balsamic glaze.
Frequently Asked Questions:
– Can I make these ahead of time? Yes, but wait to drizzle with glaze until you’re ready to serve for the best flavor.
– How long do they last? They’re best enjoyed within 6 hours for the freshest taste!
– Can I use toothpicks instead of skewers? Absolutely! Toothpicks work perfectly for smaller portions.
– What else can I add? Try adding olives or grilled chicken pieces for extra flavor!
Caprese Salad Skewers
Editor’s Choice

8 Inch Stainless Steel BBQ Skewers, Shish Kebab Kabob Skewers 12 pcs
 AmazonGBP 5.99
365 by Whole Foods Market, Organic Balsamic Glaze, 8.45 Fl Oz (Pack of 2)
 AmazonCheck Price
4 Pack Bento Lunch Box Set 3 Compartment Food Storage Containers Wheat S…
 Amazon$13.98
18. Sweet Potato and Black Bean Tacos
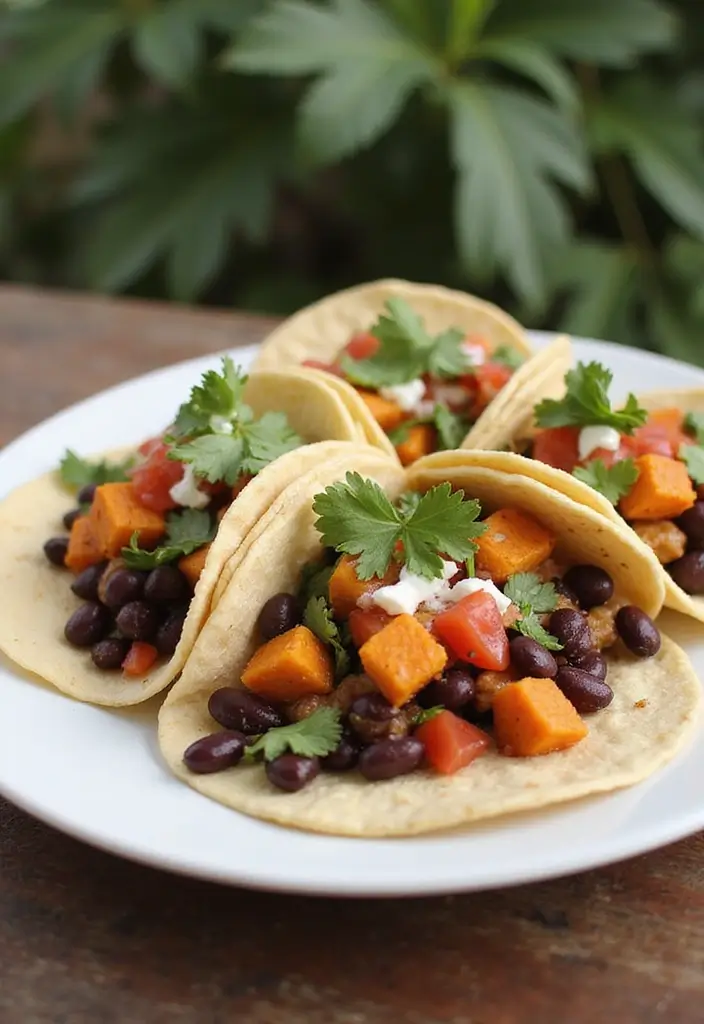
Sweet Potato and Black Bean Tacos are a fantastic choice for lunch on a field trip. These delicious tacos are not just for special occasions; they can bring a fun twist to any day! The blend of sweet potatoes and black beans packs a flavorful punch while providing essential nutrients. The sweetness of roasted sweet potatoes pairs beautifully with the hearty black beans, creating a satisfying meal. Plus, kids can personalize their tacos with their favorite toppings, adding a playful element to lunchtime.
For the best results, roast the sweet potatoes to enhance their flavor. Packing toppings like salsa, avocado, and cheese separately keeps everything fresh and tasty until you’re ready to eat. This way, each bite is bursting with flavor!
Recipe Overview:
– Servings: 4
– Prep Time: 15 minutes
– Cook Time: 25 minutes
– Total Time: 40 minutes
– Calories: Approximately 250 per serving
Nutrition Information:
– Protein: 9g
– Carbohydrates: 45g
– Fat: 7g
Ingredients:
– 2 sweet potatoes, diced
– 1 cup canned black beans, rinsed
– 8 corn tortillas
– Salt and pepper to taste
– Optional toppings: salsa, avocado, cheese
Instructions:
1. Preheat your oven to 425°F (220°C). Toss the diced sweet potatoes with salt and pepper.
2. Spread the sweet potatoes on a baking sheet. Roast for about 25 minutes or until they are tender and slightly caramelized.
3. Warm the corn tortillas in a skillet or microwave until pliable.
4. Fill each tortilla with a generous scoop of roasted sweet potatoes and black beans.
5. Pack your toppings separately to keep the tacos fresh and allow for customization.
Frequently Asked Questions:
– Can I use flour tortillas? Yes! Flour tortillas work just as well.
– How long do they last? These tacos are best eaten within 4 hours for optimal freshness.
Try adding a sprinkle of cheese for an extra layer of flavor if you like! Enjoy your tasty, nutritious tacos on your next field trip!
Sweet Potato and Black Bean Tacos
Editor’s Choice

Coobiiya Lunch Box Lunch Bag for Women Adults Men, Reusable Cute Lunch P…
 Amazon$7.99
Bento Box Adult Lunch Box, Containers for Adults Men Women with 4 Compar…
 AmazonGBP 7.49
Reusable Food Bags, 12 Pack 100% Silicone Food Storage Bags Stand Up Zip…
 Amazon$39.99
19. Chocolate Avocado Pudding
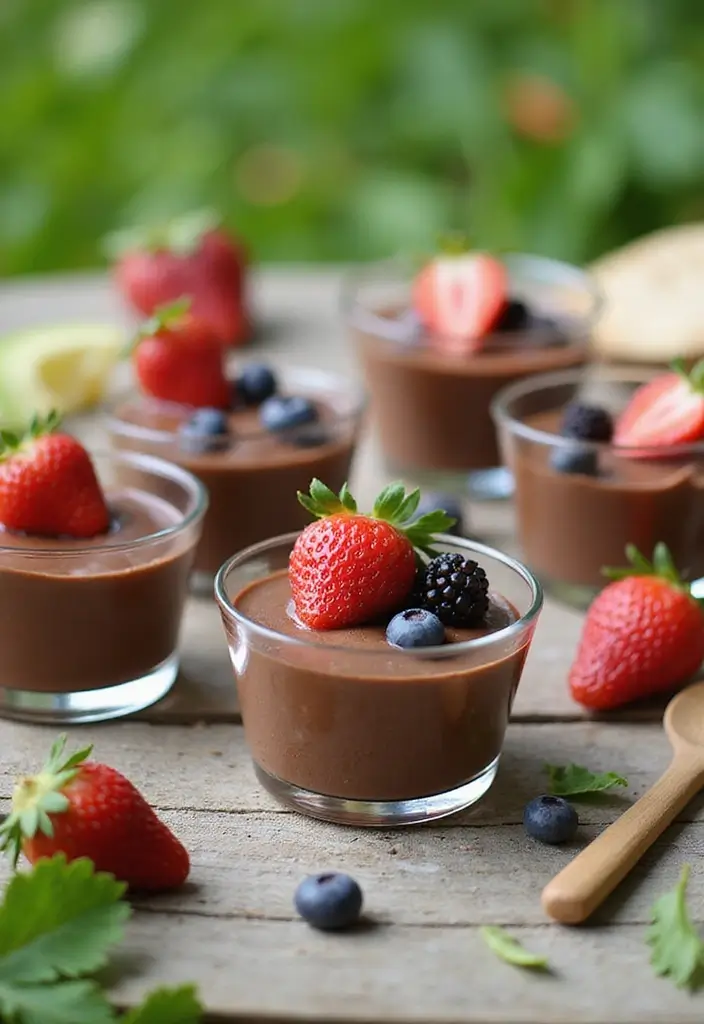
Indulge your sweet tooth without the guilt with a delightful treat: Chocolate Avocado Pudding. This creamy dessert is not only delicious but also packed with healthy fats from ripe avocados. It’s a perfect way to satisfy cravings during field trips while keeping energy levels up. Kids will love the rich chocolate flavor, and you’ll love how easy it is to prepare!
To make this pudding, simply blend ripe avocados with cocoa powder, your choice of sweetener, and a hint of vanilla. This combination creates a silky-smooth texture that feels indulgent but is actually quite nutritious. It’s a win-win for both you and the little ones!
Here’s how to make it:
Ingredients:
– 2 ripe avocados
– 4 tablespoons cocoa powder
– 4 tablespoons honey or maple syrup
– 1 teaspoon vanilla extract
Instructions:
1. Start by cutting the avocados in half and removing the pits. Scoop the flesh into a blender.
2. Add the cocoa powder, honey (or maple syrup), and vanilla extract to the blender.
3. Blend until the mixture is completely smooth and creamy. You might need to scrape down the sides to ensure everything mixes well.
4. Once blended, divide the pudding into small cups or containers for easy transport.
5. Refrigerate until you’re ready to serve. This pudding can stay fresh for up to three days in an airtight container.
Tips for the Best Pudding:
– Use ripe avocados for the smoothest texture.
– Feel free to adjust the sweetness based on your preference.
– Top with fresh berries for an extra burst of flavor and color!
This chocolate avocado pudding offers a tasty, nutritious dessert option for your next field trip. With its rich taste and easy prep, it’s sure to be a crowd-pleaser! Plus, you can feel good knowing that it’s a healthier choice compared to traditional sugary desserts.
Frequently Asked Questions:
– Can I use unsweetened cocoa? Yes, just add more sweetener to taste.
– How long will it last in the fridge? Up to three days in an airtight container.
Chocolate Avocado Pudding
Editor’s Choice

nutribullet Personal Blender, Shakes, Smoothies, Food Prep, and Frozen B…
 Amazon$47.49
Amazon Fresh, Unsweetened Cocoa Powder, 8 Oz (Pack of 3)
 AmazonCheck Price
20. Tomato Basil Pasta Salad
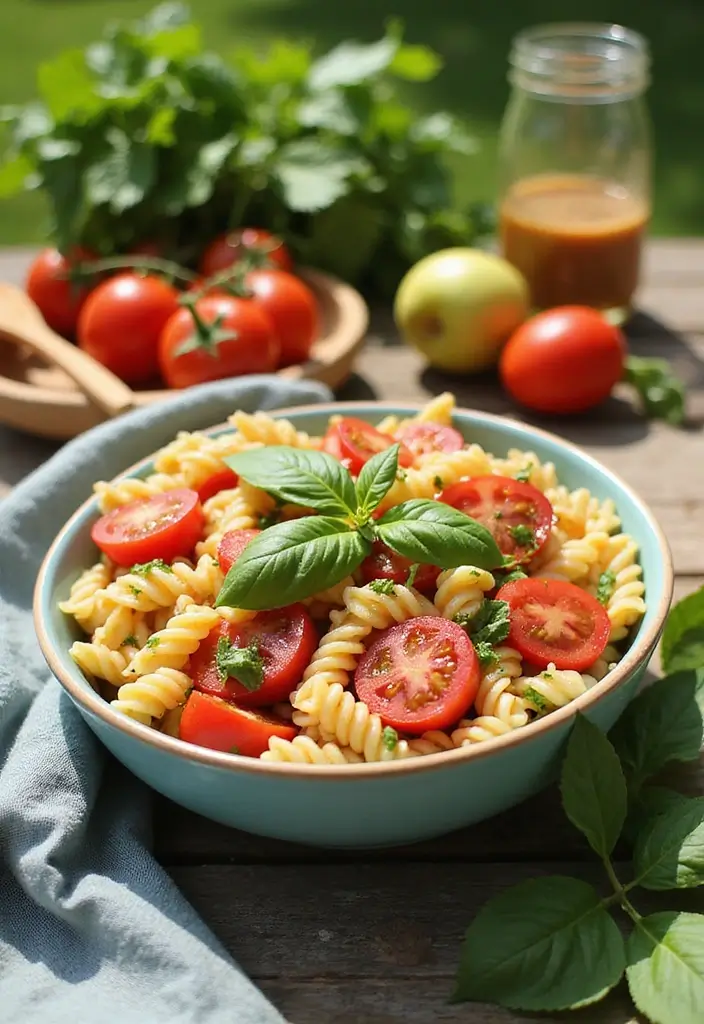
Craving a refreshing dish for your next field trip? Look no further than this delightful Tomato Basil Pasta Salad! It’s not just easy to make; it’s also light, flavorful, and perfect for enjoying on-the-go. The combination of juicy cherry tomatoes, fragrant basil, and a touch of balsamic vinegar creates a burst of flavor that makes this salad a hit with everyone.
To prepare, simply cook some whole grain pasta and toss it with cherry tomatoes, fresh basil, olive oil, and balsamic vinegar. This salad tastes even better after sitting for a while, allowing all the ingredients to mingle. Plus, it travels well and can be enjoyed cold, making it an ideal choice for picnics or field trips!
Here’s how to make it:
Ingredients:
– 8 oz whole grain pasta
– 1 cup cherry tomatoes, halved
– 1/4 cup fresh basil, chopped
– 2 tablespoons olive oil
– 1 tablespoon balsamic vinegar
Instructions:
1. Cook the pasta according to the package instructions until al dente.
2. Drain the pasta and rinse it under cold water to cool it down.
3. In a large bowl, combine the pasta, cherry tomatoes, chopped basil, olive oil, and balsamic vinegar.
4. Mix well to ensure everything is coated evenly.
5. Pack the salad in a container for transport, keeping it fresh and tasty.
Tips for a Perfect Salad:
– Use whole grain pasta for added fiber and nutrition.
– Add mozzarella balls for a creamy texture and extra flavor.
– Store in a cooler to keep your salad fresh during the trip.
Frequently Asked Questions:
– Can I make this ahead of time? Yes! It tastes even better after sitting for a few hours.
– What else can I add? Try grilled chicken or olives for extra protein and flavor.
This Tomato Basil Pasta Salad is not only delicious but also a versatile dish that can be tailored to your taste. Enjoy bringing a taste of home on your adventures!
Field trips demand meals you can grab and go without sacrificing flavor. These lunch ideas for field trips—think Tomato Basil Pasta Salad with fresh tomatoes, basil, and whole grain pasta—stay light, tasty, and travel-ready for miles.
Tomato Basil Pasta Salad
Editor’s Choice

HOTOR Insulated Lunch Box for Men & Women – Leak-Proof Cooler Lunch Bag …
 Amazon$9.96
Bento Box Adult Lunch Box, Containers for Adults Men Women with 4 Compar…
 Amazon$9.99
Barilla Whole Grain Penne Pasta, 16 oz. Box (Pack of 12) – Non-GMO, Made…
 Amazon$22.08
21. Garlic and Herb Roasted Chickpeas
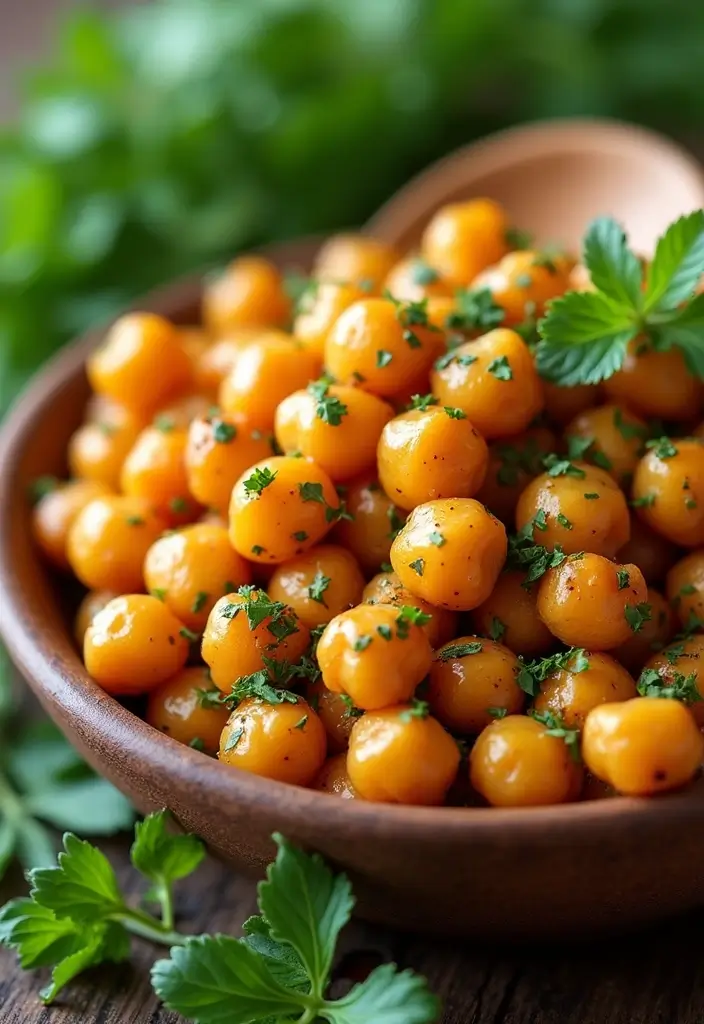
Craving a snack that’s crunchy, flavorful, and healthy? Look no further than garlic and herb roasted chickpeas! These bite-sized delights pack a punch of flavor while providing a satisfying crunch. Whether you’re on a field trip or simply enjoying a day out, they make the perfect portable snack. Plus, they’re loaded with protein and fiber to keep you energized throughout the day.
To whip up these tasty treats, start with a can of chickpeas. Toss them in olive oil, sprinkle with garlic powder, and add your favorite herbs. Roast them until they’re golden and crispy for a snack that’s hard to resist.
Here’s a quick overview of the recipe:
Recipe Overview:
– Servings: 4
– Prep Time: 10 minutes
– Cook Time: 30 minutes
– Total Time: 40 minutes
– Calories: Approx. 120 per serving
Nutrition Information:
– Protein: 6g
– Carbohydrates: 18g
– Fat: 4g
Ingredients:
– 1 can chickpeas, drained and rinsed
– 2 tablespoons olive oil
– 1 teaspoon garlic powder
– 1 teaspoon mixed herbs
Instructions:
1. Preheat your oven to 400°F (200°C).
2. In a bowl, toss the chickpeas with olive oil, garlic powder, and herbs until well coated.
3. Spread the chickpeas on a baking sheet in a single layer.
4. Roast for 30 minutes, stirring occasionally to ensure even cooking.
5. Allow them to cool before packing for your trip. Enjoy!
Curious about storage? These roasted chickpeas stay fresh in an airtight container for up to a week. Want to mix things up? Try adding spices like paprika or curry powder to create your own flavor combinations.
With just a few simple steps, you’ll have a delicious snack that’s perfect for any adventure. Enjoy the crunch and the health benefits all in one go!
• Choose dry chickpeas for a crunchier texture
• Experiment with different spices to discover your favorite flavor
• Make a big batch for easy snacks throughout the week
• Pack them in small containers to share with friends or family
Garlic and Herb Roasted Chickpeas
Editor’s Choice

Ankou Airtight Food Storage Container Sets with Lids 6Pcs Pop Containers…
 AmazonEUR 31.11

YARRAMATE 16oz/470ml Glass Olive Oil Sprayer for Cooking with Stickers, …
 Amazon$8.99
22. Zucchini Noodle Salad
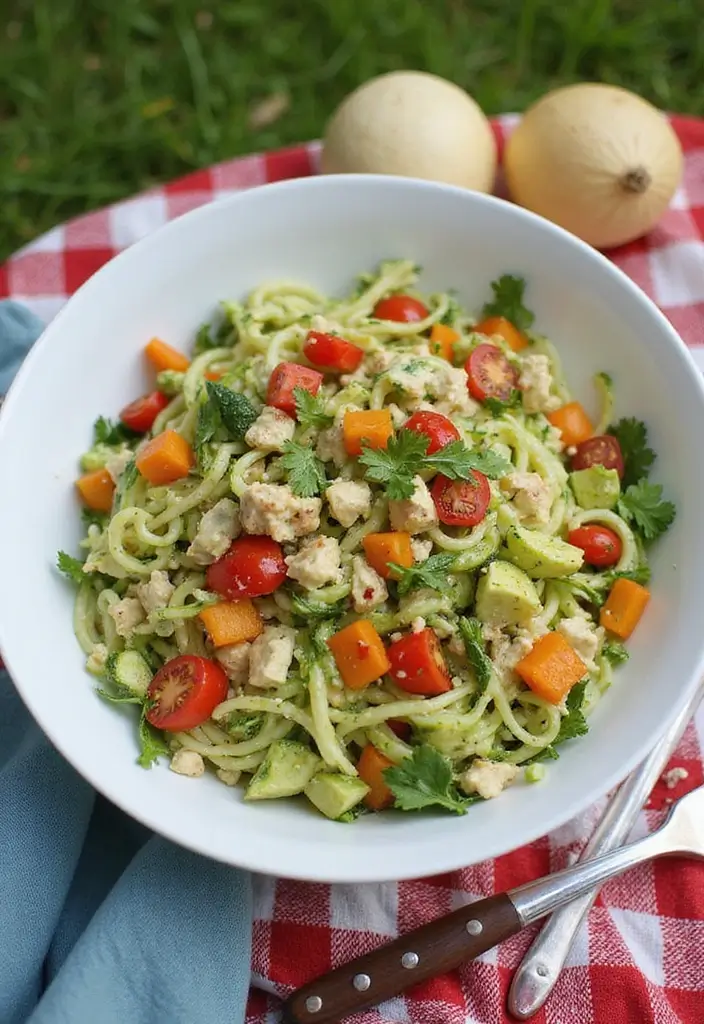
Zucchini noodle salad is a playful and healthy option that kids will love, perfect for field trips! These noodles are not only low-carb but also colorful and crunchy. They add a fun twist to any lunchbox. Combine spiralized zucchini with vibrant bell peppers and juicy cherry tomatoes, all tossed in a zesty lemon vinaigrette. This salad stays fresh and will keep your kids energized throughout their adventures!
To make this salad shine, use a spiralizer for those perfect, curly noodles. Serving it chilled enhances the flavors and makes it extra refreshing. Plus, it’s a sneaky way to pack in those greens without the fuss. Kids often enjoy fun shapes and colors, and this dish delivers both!
Here’s a quick recipe to follow:
Recipe Overview:
– Servings: 4
– Prep Time: 15 minutes
– Cook Time: 0 minutes
– Total Time: 15 minutes
– Calories: Approx. 100 per serving
Nutrition Information:
– Protein: 3g
– Carbohydrates: 10g
– Fat: 5g
Ingredients:
– 2 medium zucchinis
– 1 cup cherry tomatoes, halved
– 1 bell pepper, diced
– 2 tablespoons olive oil
– Juice of 1 lemon
Instructions:
1. Spiralize the zucchinis into noodles using a spiralizer.
2. In a large bowl, combine zucchini noodles, cherry tomatoes, and diced bell pepper.
3. Drizzle with olive oil and lemon juice, tossing everything until well mixed.
4. Pack the salad into a container, and chill before serving for the best taste.
Frequently Asked Questions:
– Can I add protein? Yes! Grilled chicken or chickpeas work great here.
– How long will this last? It’s best eaten within 6 hours for optimal freshness.
For an extra pop of color, use a variety of bell peppers. This not only makes the salad attractive but also provides different flavors. Enjoy this delightful dish on your next outing!
Zucchini Noodle Salad
Editor’s Choice

Brieftons 5-Blade Vegetable Spiralizer: Strongest-Heaviest Spiral Slicer…
 Amazon$31.99
QQKO Bento Lunch Box for Kids Girls Boys, Toddler Kids Lunch Boxes for S…
 Amazon$9.99
23. Kale and Apple Salad
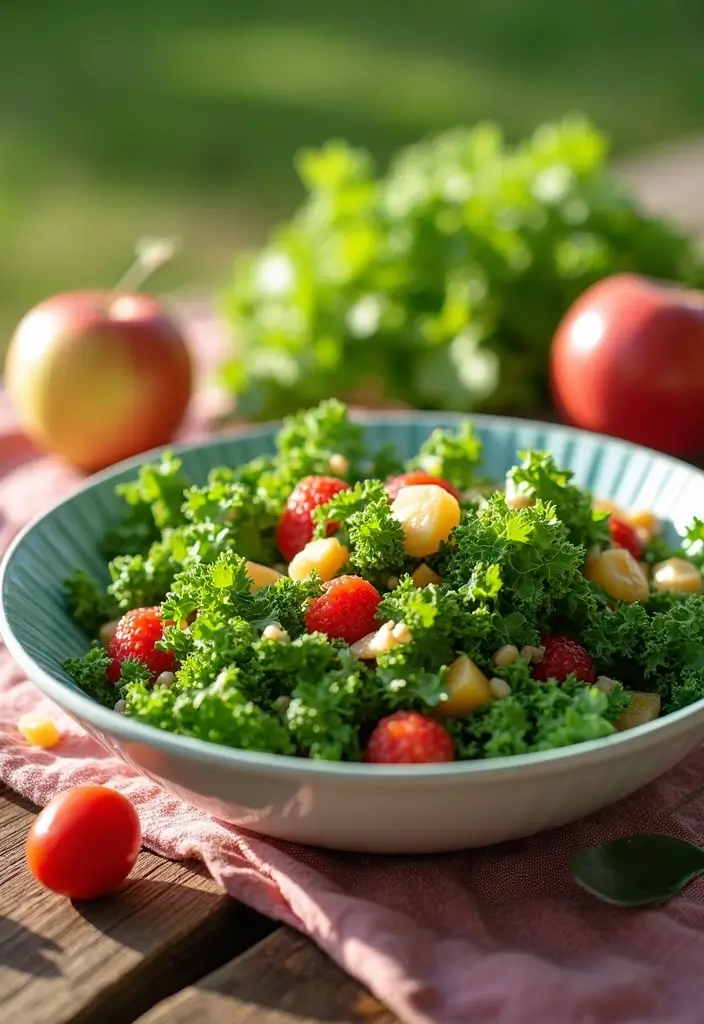
Imagine enjoying a crisp, refreshing salad packed with flavor and nutrition while on a field trip. The Kale and Apple Salad is just that! This delightful mix of kale and sweet apples creates a crunchy, satisfying dish that travels beautifully. Toss in some walnuts for a nutty crunch, and you’ve got a perfect side or light lunch option that stays fresh in your lunchbox.
To make this salad even better, try massaging the kale with dressing before mixing it all together. This simple step softens the kale, making it more tender and enjoyable. For a burst of flavor, use a combination of sweet and tart apples. This balance will make each bite exciting!
Here’s how to whip up this tasty salad:
Recipe Overview:
– Servings: 4
– Prep Time: 10 minutes
– Cook Time: 0 minutes
– Total Time: 10 minutes
– Calories: Approx. 150 per serving.
Nutrition Information:
– Protein: 4g
– Carbohydrates: 20g
– Fat: 8g
Ingredients:
– 4 cups kale, chopped
– 1 apple, diced
– 1/2 cup walnuts, roughly chopped
– 2 tablespoons olive oil
– 1 tablespoon apple cider vinegar
Instructions:
1. In a large bowl, combine the chopped kale, diced apple, and walnuts.
2. Drizzle the olive oil and apple cider vinegar over the mixture.
3. Toss everything together until well combined.
4. Pack the salad in a container, and it’s ready for your trip!
Quick Tips:
– Use almonds or pecans for a different nutty flavor.
– Store in the fridge for up to 24 hours for the best freshness.
– Add a sprinkle of cheese for an extra layer of taste.
– Mix in other veggies like carrots or bell peppers for added crunch.
This kale and apple salad not only tastes great but is also a healthy choice. It makes your lunch feel special while providing nutrients to keep you energized throughout your adventure. Enjoy every bite!
Kale and Apple Salad
Editor’s Choice

4 Pack Bento Lunch Box Set 3 Compartment Food Storage Containers Wheat S…
 Amazon$13.98

HOTOR Insulated Lunch Box for Men & Women – Leak-Proof Cooler Lunch Bag …
 AmazonCheck Price
24. Mango Citrus Salad
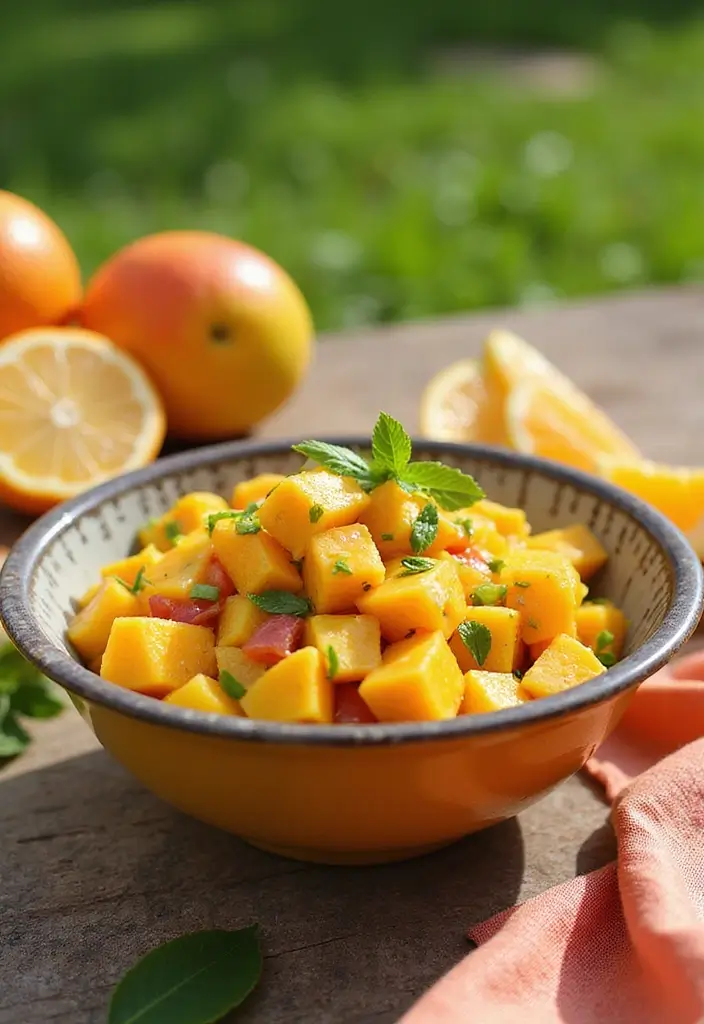
Imagine a sunny day filled with laughter and adventure. You need a tasty snack that can keep up with the fun. Enter the Mango Citrus Salad—a colorful, tropical treat that kids will absolutely love!
This salad combines the sweetness of ripe mangoes and juicy oranges, all tied together with a zesty splash of lime juice. Not only is it refreshing, but it also packs a nutritional punch, keeping everyone hydrated and energized for the day ahead. Plus, it’s so easy to eat on the go!
Recipe Overview:
– Servings: 4
– Prep Time: 10 minutes
– Cook Time: 0 minutes
– Total Time: 10 minutes
– Calories: Approximately 100 per serving.
Nutrition Information:
– Protein: 1g
– Carbohydrates: 25g
– Fat: 0g
Ingredients:
– 2 ripe mangoes, diced
– 2 oranges, segmented
– Juice of 1 lime
Instructions:
1. Start by cutting the mangoes into small, bite-sized pieces.
2. Segment the oranges, removing any seeds.
3. In a mixing bowl, combine the diced mango and orange segments.
4. Drizzle the lime juice over the fruit and gently toss to mix.
5. Pack the salad into a sealed container for easy transportation.
For the best taste, use ripe mangoes. They are sweeter and add a delicious flavor. Make sure to seal the container tightly to keep everything fresh.
Frequently Asked Questions:
• Can I add other fruits? Yes! Try adding pineapple or kiwi for extra fun.
• How long will this last? Enjoy it within a day for the best flavor.
• Should I chill it? Yes! Keeping it in the fridge before serving makes it even more refreshing.
This Mango Citrus Salad is perfect for field trips, picnics, or any outdoor fun. It brings sunshine to your day, one bite at a time!
Planning lunch ideas for field trips? Mango Citrus Salad travels beautifully—refreshing, mess-free, and kid-approved. A quick prep, vibrant flavors, and lime-zest energy keep little explorers fueled all day.
Mango Citrus Salad
Editor’s Choice

Bento Box Adult Lunch Box, Containers for Adults Men Women with 4 Compar…
 Amazon$9.99
10 Pack Dishwasher Safe Reusable Bags, Leakproof Reusable Freezer Bags, …
 Amazon$9.99
HOTOR Insulated Lunch Box for Men & Women – Leak-Proof Cooler Lunch Bag …
 Amazon$9.96
25. Applesauce Cups
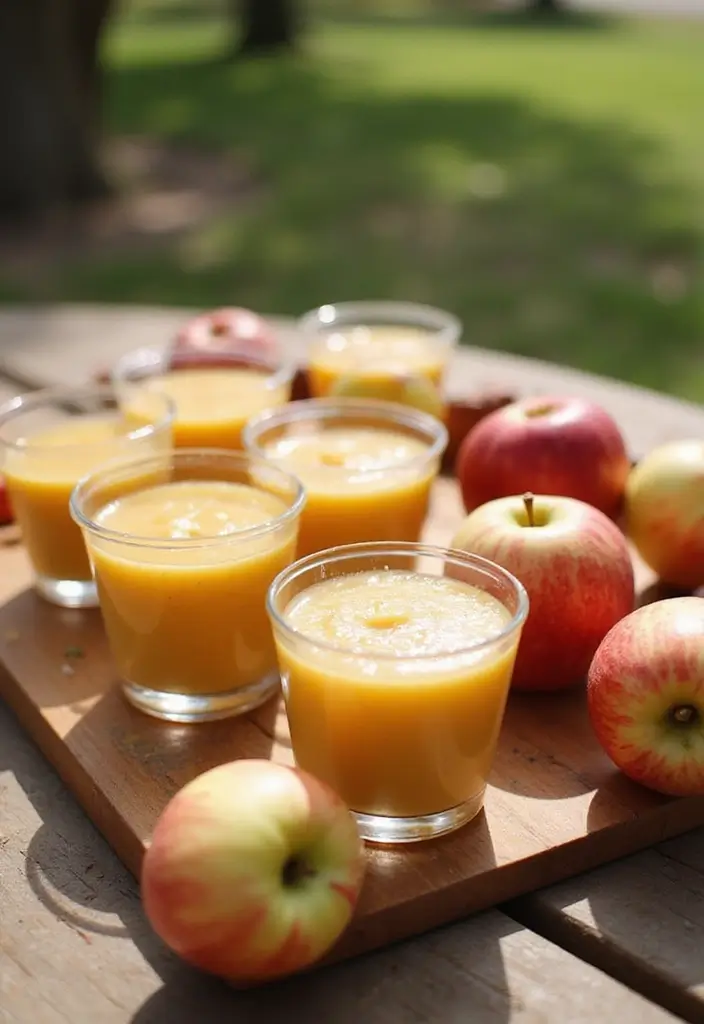
Looking for a quick snack that your kids will love on field trips? Applesauce cups are a fantastic choice! They’re easy to pack, delicious, and provide a healthy dose of fruit without any added sugars. You can go with store-bought cups or make your own at home. Either way, this sweet treat is sure to be a hit during lunchtime.
To make them even more exciting, try adding a sprinkle of cinnamon on top. This simple touch can elevate the flavor and make the applesauce feel special. Plus, it’s an excellent way to introduce kids to new tastes in a familiar snack.
Making applesauce cups is a breeze! You only need a few minutes to prepare them. Here’s how you can whip them up:
Recipe Overview:
– Servings: 4
– Prep Time: 5 minutes
– Cook Time: 0 minutes
– Total Time: 5 minutes
– Calories: Approx. 50 per serving.
Nutrition Information:
– Protein: 0g
– Carbohydrates: 14g
– Fat: 0g
Ingredients:
– 2 cups unsweetened applesauce
– Pinch of cinnamon (optional)
Instructions:
1. Portion the applesauce into individual cups for easy snacking.
2. If you like, sprinkle a pinch of cinnamon on top and stir gently.
3. Cover the cups and pack them in a cooler to keep them fresh.
Frequently Asked Questions:
– Can I use flavored applesauce? Yes, but check for added sugars.
– How long does this last? It stays fresh for up to 5 hours outside refrigeration.
These applesauce cups pair perfectly with a granola bar. Together, they make a balanced snack that keeps energy levels up for all the adventures ahead!
Applesauce Cups
Editor’s Choice

Bentgo Prep – 2-Compartment Snack Containers with Lids – Reusable, Micro…
 Amazon$12.99
KIND Chewy Granola Bars, Variety Pack, Chocolate Chip and Peanut Butter …
 Amazon$10.24
365 by Whole Foods Market, Organic Ground Cinnamon, 1.9 Ounce (Pack of 2)
 AmazonCheck Price
Conclusion

Packing a lunch for a field trip doesn’t have to be a chore!
With these 25 delightful, healthy, and nut-free lunch ideas, you can ensure that kids have nourishing meals that are easy to eat and enjoy while exploring the world around them.
These recipes cater to a variety of tastes and preferences, making lunchtime something to look forward to. Happy packing, and here’s to fabulous field trip adventures!
Note: We aim to provide accurate product links, but some may occasionally expire or become unavailable. If this happens, please search directly on Amazon for the product or a suitable alternative.
This post contains Amazon affiliate links, meaning I may earn a small commission if you purchase through my links, at no extra cost to you.
Frequently Asked Questions
What Are Some Quick and Easy Lunch Ideas for Field Trips?
When you’re prepping for a field trip, quick and easy lunch ideas are a must! Think portable lunch options like wraps filled with lean proteins and veggies, or bento boxes with a variety of fruits, cheeses, and whole-grain crackers. You can also pack some healthy travel-friendly snacks like nut-free trail mix or yogurt tubes to keep the energy levels up throughout the day!
How Can I Ensure My Child’s Lunch Stays Fresh During a Field Trip?
To keep your child’s lunch fresh, use an insulated lunch bag and include ice packs to maintain a safe temperature. Opt for nut-free lunch ideas that don’t spoil easily, such as hard-boiled eggs, hummus with veggie sticks, or whole-grain sandwiches. This way, you can be sure their meals stay tasty and safe until lunchtime!
Are There Healthy Options for Lunches That Kids Will Actually Enjoy?
Absolutely! Kids love variety and fun presentations. Try making kid-friendly lunch recipes like mini-pizza bagels using whole grain bagels topped with tomato sauce and cheese, or colorful fruit skewers. The key is to make them visually appealing and delicious, ensuring that your little ones are excited to dig into their healthy lunches!
What Should I Include in a Nut-Free Field Trip Lunch?
Great question! For a nut-free field trip lunch, focus on lean proteins like chicken or turkey slices, whole grain wraps, and a mix of crunchy veggies. You can also pack a side of fruit cups or apple slices with sunflower seed butter as a dip. Remember to check labels to ensure that all snacks are free from nut ingredients, keeping everyone safe!
Can You Suggest Some Travel-Friendly Snacks for Field Trips?
Certainly! When it comes to travel-friendly snacks, think of items that are easy to pack and eat on the go. Options like whole grain granola bars, popcorn, or cheese sticks are fantastic. Dried fruit or veggie chips are also great choices to keep energy levels up while exploring. Just make sure to pick things that are both delicious and nutritious!
Related Topics
lunch ideas for field trips
healthy lunch options
nut-free meals
portable lunch recipes
easy field trip meals
kid-friendly snacks
travel-friendly food
simple lunch prep
on-the-go meals
school trip lunches
fresh lunch ideas
