We’ve all been there: it’s lunchtime at work, and you’re stuck choosing between another sad sandwich or greasy takeout. I created this post because I’ve had enough of those uninspiring meals. Meal prepping is a game changer, especially when you’re juggling work, family, and everything in between. Eating well should not feel like a chore, and with the right ideas, it can actually be fun!
If you’re someone who wants to eat healthier, save money, and avoid those last-minute food runs, this post is for you. Whether you’re a busy professional, a student cramming for exams, or anyone trying to make the most of their lunch break, you deserve delicious meals that don’t take all day to prepare.
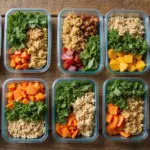
In this blog post, you’ll discover over 30 meal prep lunch ideas that are not only tasty but also quick to prepare. These meals are designed to keep your energy up and your taste buds happy. From colorful salads packed with nutrients to satisfying grain bowls that will fill you up, there’s something here for everyone.
I’ve included variations to suit different dietary preferences, whether you’re a meat-lover or plant-based eater. Plus, these lunches are easy to store and great for on-the-go. You can mix and match ingredients based on what you love, making it easier than ever to whip something together that you actually want to eat.
So, let’s dive into these practical meal prep lunch ideas and make your workweek a lot tastier. Get ready to say goodbye to boring lunches and hello to exciting, homemade meals!
1. Quinoa and Black Bean Salad

Looking for a lunch that’s both light and satisfying? Try this refreshing Quinoa and Black Bean Salad! It’s packed with nutrients and flavor, keeping you energized without weighing you down. The combination of fluffy quinoa and hearty black beans makes this salad a delightful meal that’s perfect for your workday. Toss in some colorful veggies and a zesty lime dressing, and you’re ready to enjoy a tasty, healthy lunch.
Let’s break down how to whip this up in no time. You’ll need just a few ingredients, and the prep is quick. Plus, it’s budget-friendly! This salad is not just nutritious; it’s also a great way to use up any leftover veggies you have in your fridge. Serve it chilled for the best experience, and you’ll have a meal that feels special, even at your desk.
Recipe Overview:
– Servings: 4
– Prep Time: 15 minutes
– Cook Time: 15 minutes
– Total Time: 30 minutes
– Calories: 250 per serving
Nutrition Information:
– Protein: 10g
– Carbs: 42g
– Fats: 4g
Ingredients:
– 1 cup quinoa, rinsed
– 2 cups water
– 1 can black beans, drained and rinsed
– 1 cup corn
– 1 red bell pepper, diced
– 1/4 cup chopped cilantro
– Juice of 2 limes
– Salt and pepper to taste
Step-by-Step Instructions:
1. Cook the quinoa in 2 cups of water over medium heat for about 15 minutes, or until fluffy. Let it cool down.
2. In a large mixing bowl, combine the cooled quinoa, black beans, corn, diced bell pepper, and chopped cilantro.
3. Squeeze the juice of the limes over the mixture. Sprinkle with salt and pepper, then toss everything together until well combined.
4. Portion the salad into meal prep containers and refrigerate until you’re ready to eat.
Tips:
– Add avocado just before serving to keep it fresh and creamy.
FAQs:
– Can I freeze it? No, it’s best enjoyed fresh within a week.
This quinoa salad is the perfect meal prep option. It’s colorful, full of flavor, and a true crowd-pleaser. Try it out and get ready to enjoy a delicious and healthy lunch at work!
Quinoa and Black Bean Salad
Editor’s Choice

50 Pack (100-Piece) 24 oz Meal Prep Containers Reusable with Lids, Sturd…

Viva Naturals Organic Quinoa, 24 oz (1.5 lb) – Pre-Washed Whole Grain, P…
2. Mediterranean Chickpea Bowls

Get ready to spice up your lunch routine with these Mediterranean Chickpea Bowls! They burst with flavor and nutrition while being super easy to prepare. Imagine crunchy cucumbers, juicy tomatoes, and savory olives coming together with protein-packed chickpeas. Top it off with a creamy tahini dressing, and you have a meal that’s sure to impress, even without heating it up.
Perfect for busy workdays, these bowls take just 10 minutes to whip up, making them an ideal choice for meal prep. You’ll love how quickly they come together, letting you enjoy a delicious and healthy lunch without the hassle.
Recipe Overview:
– Servings: 4
– Prep Time: 10 minutes
– Cook Time: 0 minutes
– Total Time: 10 minutes
– Calories: 350 per serving
Nutrition Information:
– Protein: 15g
– Carbs: 45g
– Fats: 15g
Ingredients:
– 1 can chickpeas, drained
– 1 cup cherry tomatoes, halved
– 1 cucumber, diced
– 1/2 cup kalamata olives, pitted
– 1/4 cup feta cheese, crumbled
– 1/4 cup tahini
– Juice of 1 lemon
– Salt and pepper to taste
Step-by-Step Instructions:
1. In a large bowl, combine the chickpeas, cherry tomatoes, diced cucumber, kalamata olives, and crumbled feta cheese. Toss them gently to mix.
2. In a separate small bowl, whisk together tahini, lemon juice, salt, and pepper until smooth.
3. Drizzle the tahini dressing over the chickpea mixture and toss gently to coat everything evenly.
4. Pack the bowls into containers for easy grab-and-go lunches, and keep any extra dressing on the side for added flavor.
Tips:
– For an extra protein boost, add grilled chicken or roasted veggies to the mix.
– Feel free to swap out the veggies based on what you have on hand!
FAQs:
– Is this meal vegan? Yes, it’s entirely plant-based and delicious!
With these vibrant Mediterranean Chickpea Bowls, you’ll not only save time but also savor every bite. Enjoy your tasty, nutritious lunch!
Mediterranean Chickpea Bowls
Editor’s Choice

50 Pack (100-Piece) 32 oz Meal Prep Containers Reusable with Lids 3-Comp…

Ziyad Premium Hummus with Tahini Sauce, Chick Pea Dip, 100% All-Natural,…

Amazon Grocery, Canned Garbanzo Beans, 15.5 Oz (Previously Amazon Fresh,…
3. Turkey and Hummus Wraps

Turkey and Hummus Wraps are your new go-to for quick, healthy lunches! These wraps are not only easy to make, but they also provide a tasty boost of energy for your busy workday. With lean turkey, creamy hummus, and fresh veggies, each bite is satisfying and delicious. You can whip these up in just minutes and grab them on your way out the door.
Recipe Overview:
– Servings: 2 wraps
– Prep Time: 5 minutes
– Cook Time: 0 minutes
– Total Time: 5 minutes
– Calories: 300 per wrap
Nutrition Information:
– Protein: 25g
– Carbs: 30g
– Fats: 10g
Ingredients:
– 2 whole-grain wraps
– 1/2 cup hummus (your favorite flavor)
– 6 slices turkey breast
– 1 cup fresh spinach
– 1/2 bell pepper, thinly sliced
Step-by-Step Instructions:
1. Start by spreading 1/4 cup of hummus on each wrap. Make it even for the best taste!
2. Next, layer the turkey slices on top, followed by a handful of fresh spinach and the sliced bell pepper. You can add any other vegetables you enjoy, like cucumbers or carrots.
3. Roll the wrap tightly from one end to the other. This keeps everything inside and makes it easy to eat.
4. Slice the wrap in half and pack it in a container. Enjoy your lunch at work or on the go!
Tips:
– Experiment with different hummus flavors, like roasted garlic or spicy red pepper, to keep things interesting.
– Add some cheese or avocado for extra creaminess, but remember this will change the calorie count.
FAQs:
– Can I freeze these wraps? It’s best to eat them fresh for the best texture. Freezing may make the wrap soggy.
With these simple wraps, you’ll never have to worry about lunch again. They’re quick, nutritious, and full of flavor! Enjoy your meal prep!
Turkey and Hummus Wraps
Editor’s Choice

Ole Ole Xtreme Wellness, Hifiber and Low Carb Wraps, 8 ct


Bento Box Adult Lunch Box, Containers for Adults Men Women with 4 Compar…
4. Mason Jar Salad

Mason Jar Salads are not just trendy—they’re a clever solution for keeping your lunch fresh and delicious! These colorful salads look great in your fridge and are super easy to make. The secret is in the layering. Start with your dressing at the bottom. Then stack hearty veggies, grains, and finish with your greens on top. When you’re ready to eat, just shake it up for a perfect mix of flavors!
Here’s how to create your own delicious Mason Jar Salad. It’s budget-friendly and perfect for meal prep. Plus, it stays fresh for up to five days, making it a smart choice for your workweek lunches. You can mix and match ingredients based on what you love or have on hand. This method not only saves time but also ensures you enjoy a variety of flavors throughout the week.
Recipe Overview:
– Servings: 1
– Prep Time: 15 minutes
– Cook Time: 0 minutes
– Total Time: 15 minutes
– Calories: 400 per jar
Nutrition Information:
– Protein: 12g
– Carbs: 45g
– Fats: 18g
Ingredients:
– 1/4 cup balsamic vinaigrette
– 1/2 cup cherry tomatoes, halved
– 1/2 cucumber, diced
– 1/2 cup cooked quinoa
– 1 cup mixed greens
Step-by-Step Instructions:
1. Pour the balsamic vinaigrette into the bottom of the jar.
2. Layer the halved cherry tomatoes and diced cucumber on top of the dressing.
3. Next, add the cooked quinoa, followed by the mixed greens.
4. Seal the jar and refrigerate it. When you’re ready to eat, shake it up to mix everything together!
Tips:
– Use sturdy greens like kale or spinach to keep your salad fresh longer.
– Experiment with different dressings for new flavors.
– Add protein like chickpeas or grilled chicken for a more filling meal.
– Try various toppings like nuts or seeds for added crunch.
Enjoy your Mason Jar Salad as a quick and tasty lunch option that makes your workdays easier and healthier!
Mason Jar Salad
Editor’s Choice

NETANY 6-pack 16 oz Overnight Oats Containers with Lids, Glass jars with…

Primal Kitchen Greek Vinaigrette & Marinade Salad Dressing made with Avo…

OXO Good Grips Little Salad Dressing Shaker – Black, Small
5. Sweet Potato and Black Bean Burrito Bowl

Get ready to elevate your lunch game with this delicious Sweet Potato and Black Bean Burrito Bowl! This meal is not only full of flavor but also packed with nutrients to keep you energized throughout your busy workday. Imagine creamy, roasted sweet potatoes paired with hearty black beans, all coming together in a colorful bowl. Top it off with a dollop of Greek yogurt and a sprinkle of fresh cilantro for that refreshing kick.
Recipe Overview:
– Servings: 4
– Prep Time: 10 minutes
– Cook Time: 30 minutes
– Total Time: 40 minutes
– Calories: 350 per serving
Nutrition Information:
– Protein: 12g
– Carbs: 55g
– Fats: 5g
Ingredients:
– 2 medium sweet potatoes, peeled and diced
– 1 can black beans, drained and rinsed
– 1 cup corn (frozen or fresh)
– 1 tsp cumin
– 1/2 cup Greek yogurt
– 1/4 cup chopped cilantro
– Salt and pepper to taste
Step-by-Step Instructions:
1. Preheat your oven to 400°F (200°C). Spread the diced sweet potatoes on a baking sheet and roast for 20-25 minutes until tender and slightly caramelized.
2. In a large bowl, combine the roasted sweet potatoes, black beans, corn, and cumin. Mix everything well.
3. Season your mix with salt and pepper to taste, adjusting to your preference.
4. Portion the mixture into meal prep containers. Top each serving with a generous scoop of Greek yogurt and a sprinkle of cilantro for that extra freshness.
Tips:
– Add diced avocado for a boost of healthy fats.
– Make it spicy with a dash of hot sauce if you like heat!
FAQs:
– Can I use different beans? Absolutely! Kidney beans work well too, so feel free to mix it up.
– How long will it last in the fridge? These bowls are great for meal prep and can last up to 4 days in the fridge.
Now, you’re all set to enjoy a hearty, wholesome lunch that saves you time and satisfies your taste buds. Enjoy your Sweet Potato and Black Bean Burrito Bowl!
Sweet Potato and Black Bean Burrito Bowl
Editor’s Choice
50 Pack (100-Piece) 32 oz Meal Prep Containers Reusable with Lids 3-Comp…
6. Vegetable Stir-Fry with Brown Rice

Looking for a quick and healthy lunch option that doesn’t skimp on flavor? Try a Vegetable Stir-Fry with Brown Rice! This dish bursts with color and nutrition, making it a fantastic choice for your busy workweek. You can whip it up in just 25 minutes, giving you more time to enjoy your lunch rather than stressing over meal prep.
Imagine vibrant bell peppers, crunchy broccoli, and sweet carrots sizzling in a hot pan. Add a splash of soy sauce and a hint of ginger, and you have an Asian-inspired treat that’s as satisfying as it is simple. Pair it with brown rice for a filling meal that keeps you energized throughout the day.
Recipe Overview:
– Servings: 4
– Prep Time: 10 minutes
– Cook Time: 15 minutes
– Total Time: 25 minutes
– Calories: 300 per serving
Nutrition Information:
– Protein: 10g
– Carbs: 40g
– Fats: 5g
Ingredients:
– 2 cups mixed vegetables (bell peppers, broccoli, carrots)
– 1 cup cooked brown rice
– 2 tbsp soy sauce
– 1 tsp ginger, grated
– 2 cloves garlic, minced
– 1 tbsp olive oil
Step-by-Step Instructions:
1. Heat the olive oil in a wok over medium-high heat.
2. Add the minced garlic and grated ginger, stirring for about a minute.
3. Toss in the mixed vegetables and stir-fry until they are tender, which should take about 5-7 minutes.
4. Mix in the cooked brown rice and soy sauce, heating everything through for another minute.
5. Portion into meal prep containers for a grab-and-go lunch!
Tips:
– Use leftover rice to speed up your prep time.
– Feel free to add protein like chicken or tofu for extra heartiness.
– Experiment with different vegetables based on what you have at home.
With this stir-fry, you’ll have a delicious and nutritious lunch ready in no time, perfect for those hectic weekdays!
Vegetable Stir-Fry with Brown Rice
Editor’s Choice
Bento Box Adult Lunch Box, Containers for Adults Men Women with 4 Compar…

Wok, 13 Inch carbon steel woks & stir-fry pans nonstick, Pre-Seasoned 5….

EIKS Excelity Cruet Dispenser Set for Olive Oil Vinegar Soy Sauce with E…
7. Cauliflower Fried Rice

Cauliflower Fried Rice is a delicious twist on the classic dish. This low-carb alternative not only satisfies your cravings but also sneaks in extra veggies. Imagine a bowl filled with colorful peas and carrots, all tossed together with fluffy eggs and flavorful cauliflower. It’s a perfect meal prep option for your busy workweek!
Ready to dive into this easy recipe? Let’s break it down step by step. You’ll be amazed at how quickly you can whip this up. With just a few fresh ingredients and around 20 minutes, you can enjoy a hearty, nutritious lunch that keeps you energized throughout the day.
Recipe Overview:
– Servings: 4
– Prep Time: 10 minutes
– Cook Time: 10 minutes
– Total Time: 20 minutes
– Calories: 200 per serving
Nutrition Information:
– Protein: 8g
– Carbs: 25g
– Fats: 10g
Ingredients:
– 1 head of cauliflower, chopped into florets
– 1/2 cup peas
– 1/2 cup carrots, diced
– 2 eggs, beaten
– 2 tbsp soy sauce (use gluten-free if needed)
– 1 tbsp sesame oil
Step-by-Step Instructions:
1. Start by pulsing the cauliflower florets in a food processor until they look like rice grains.
2. Heat sesame oil in a pan over medium heat. Add the beaten eggs and scramble until fully cooked.
3. Toss in the cauliflower, peas, and carrots. Stir-fry everything together for about 5-7 minutes until the veggies are tender.
4. Pour in the soy sauce, mix well, and serve your tasty cauliflower fried rice in meal prep containers.
Tips:
– Add chicken, shrimp, or tofu for a protein boost.
– Spice it up with garlic or ginger for extra flavor.
– Store leftovers in the fridge for up to four days.
FAQs:
– Is it gluten-free? Yes, just choose gluten-free soy sauce for your dish!
– Can I freeze it? Absolutely! Just make sure to thaw before reheating.
Enjoy this simple yet satisfying meal that keeps your lunch game strong while fitting right into your healthy eating routine!
Cauliflower Fried Rice
Editor’s Choice

Hamilton Beach Food Processor & Vegetable Chopper for Slicing, Shredding…
50 Pack (100-Piece) 24 oz Meal Prep Containers Reusable with Lids, Sturd…

Aloha Shoyu – Gluten Free Soy Sauce – Smooth, Balanced Soy Sauce – Made …
8. Spinach and Feta Stuffed Peppers

Spinach and Feta Stuffed Peppers are a colorful and nutritious option for your work lunches. These tasty bell peppers are filled with a delicious blend of spinach, creamy feta cheese, and hearty quinoa. They not only look great but also offer a healthy boost to your day. Prepare a batch at the start of the week, and you’ll have satisfying meals ready to go!
Recipe Overview:
– Servings: 4
– Prep Time: 15 minutes
– Cook Time: 25 minutes
– Total Time: 40 minutes
– Calories: 220 per pepper
Nutrition Information:
– Protein: 12g
– Carbs: 30g
– Fats: 8g
Ingredients:
– 4 bell peppers (any color you like!)
– 1 cup cooked quinoa
– 2 cups fresh spinach, chopped
– 1/2 cup feta cheese, crumbled
– 1 tsp dried oregano
– Salt and pepper to taste
Step-by-Step Instructions:
1. Preheat your oven to 375°F (190°C).
2. Slice the tops off the peppers and remove the seeds.
3. In a mixing bowl, combine quinoa, chopped spinach, feta, oregano, salt, and pepper.
4. Stuff the mixture into each pepper and arrange them upright in a baking dish.
5. Bake in the oven for 25 minutes or until the peppers are tender.
Tips:
– Experiment with different pepper colors for a more appealing look.
– Add some diced tomatoes or olives for extra flavor!
FAQs:
– Can I make them vegan? Yes, just swap the feta for your favorite plant-based cheese. This makes the meal lighter, while still being filling and delicious!
These stuffed peppers not only taste great but also make your lunch breaks exciting. Enjoy the delightful flavors and feel good knowing you’re fueling your body with wholesome ingredients.
Spinach and Feta Stuffed Peppers
Editor’s Choice
50 Pack (100-Piece) 32 oz Meal Prep Containers Reusable with Lids 3-Comp…

BetterBody Foods Organic Quinoa, Vegan, Gluten Free, Low Glycemic Rice R…
9. Thai Chicken Salad

Brighten your lunch break with a delicious Thai Chicken Salad! This refreshing salad combines shredded chicken, crunchy vegetables, and a creamy peanut dressing. Each bite bursts with flavor, making it a satisfying option for your workday. Plus, it’s easy to prepare, and it keeps well in the fridge, so you can enjoy it all week long.
Recipe Overview:
– Servings: 4
– Prep Time: 15 minutes
– Cook Time: 0 minutes
– Total Time: 15 minutes
– Calories: 350 per serving
Nutrition Information:
– Protein: 25g
– Carbs: 15g
– Fats: 20g
Ingredients:
– 2 cups shredded chicken
– 1 cup shredded carrots
– 1 cup sliced bell peppers
– 1/4 cup chopped peanuts
– 1/4 cup peanut dressing
Step-by-Step Instructions:
1. Grab a large bowl and combine the shredded chicken, carrots, bell peppers, and peanuts.
2. Drizzle the peanut dressing over the salad and toss everything together until it’s well coated.
3. Portion the salad into meal prep containers for easy grab-and-go lunches.
Tips:
– Experiment with different dressings to keep things exciting! Try a soy sauce or sesame dressing for a new twist.
– This salad stays fresh for up to four days, making it perfect for meal prep.
– Feel free to add other veggies like cucumbers or snap peas for extra crunch!
FAQs:
– Can I make this salad ahead of time? Yes! It tastes great even after a few days in the fridge.
– What if I don’t have shredded chicken? You can use rotisserie chicken or even tofu for a vegetarian option.
Thai Chicken Salad
Editor’s Choice

60 Sets (120-Piece) Deli Containers with Lids, 32/16/8 oz X 20 Set Each,…

P.F. Chang’s Home Menu Salad Dressing, Creamy Sesame 16 fl oz.

Whole Foods Market Organic Classic Rotisserie Chicken (Cold)
10. Egg Muffins with Spinach and Cheese

Start your workday right with these tasty Egg Muffins featuring spinach and cheese. These little bites are packed with protein and flavor, making them a perfect grab-and-go meal. You can whip them up quickly, and they fit perfectly into your busy schedule. Plus, they are a wholesome choice that will keep you energized!
To make these delightful muffins, gather a few simple ingredients. They are not only easy to prepare but also budget-friendly. You can customize them with your favorite veggies or cheeses, ensuring you never get bored. Imagine the aroma of fresh eggs baking in the oven, filling your kitchen with warmth.
Recipe Overview:
– Servings: 12 muffins
– Prep Time: 10 minutes
– Cook Time: 20 minutes
– Total Time: 30 minutes
– Calories: 90 per muffin
Nutrition Information:
– Protein: 7g
– Carbs: 1g
– Fats: 6g
Ingredients:
– 6 eggs
– 1 cup spinach, chopped
– 1/2 cup cheese, shredded (cheddar or feta)
– Salt and pepper to taste
Step-by-Step Instructions:
1. Preheat your oven to 350°F (175°C) and lightly grease a muffin tin.
2. In a bowl, whisk the eggs and season with salt and pepper.
3. Gently stir in the chopped spinach and shredded cheese.
4. Pour the mixture into the muffin tins, filling each about two-thirds full.
5. Bake for 20 minutes or until the muffins are set and lightly golden on top.
Tips:
– Add diced ham or bell peppers for a fun twist.
– Store leftovers in the fridge or freeze for easy meals later.
FAQs:
– Can I freeze these muffins? Absolutely! Just reheat them in the microwave for a quick, nutritious meal.
These Egg Muffins are perfect for busy workdays. They’re not just delicious; they’re also a smart choice for meal prep. You’ll love having a healthy option ready to go!
Egg Muffins with Spinach and Cheese
Editor’s Choice

Stainless Steel Egg Whisk, Hand Push Rotary Whisk Blender, Versatile Mil…
11. Lentil Soup

Lentil soup is not just a meal; it’s a warm hug in a bowl. Perfect for busy workdays, this soup is filling and flavorful. The combination of lentils, vegetables, and spices creates a rich tapestry of taste. Plus, it gets even tastier after a day in the fridge. Pinterest users rave about its hearty nature, making it a go-to for meal prep.
Making lentil soup is simple and budget-friendly. You can whip it up in just 40 minutes and have lunch ready for the week. This dish is perfect for those who want to eat healthy without spending hours in the kitchen. You don’t need fancy ingredients; just grab some lentils and veggies. The result? A comforting soup that makes your work lunches exciting.
Recipe Overview:
– Servings: 6
– Prep Time: 10 minutes
– Cook Time: 30 minutes
– Total Time: 40 minutes
– Calories: 210 per serving
Nutrition Information:
– Protein: 14g
– Carbs: 36g
– Fats: 4g
Ingredients:
– 1 cup lentils
– 1 onion, chopped
– 2 carrots, diced
– 2 celery stalks, diced
– 4 cups vegetable broth
– 1 tsp cumin
– Salt and pepper to taste
Step-by-Step Instructions:
1. In a large pot, heat a splash of oil over medium heat. Sauté the onion, carrots, and celery until they soften, about 5 minutes.
2. Add the lentils, vegetable broth, cumin, salt, and pepper. Stir everything together.
3. Bring the mixture to a boil, then reduce the heat. Let it simmer for about 30 minutes, or until the lentils are tender.
4. Once cooked, let the soup cool slightly before transferring it to containers for the week.
Tips:
– Blend the soup for a creamier texture.
– Add a squeeze of lemon juice before serving for a fresh twist.
FAQs:
– How long does it last? It keeps well in the fridge for up to a week, making it an ideal meal prep option.
This lentil soup is a fantastic way to nourish yourself without breaking the bank. Enjoy every spoonful!
Fun fact: Lentil soup can be ready in about 40 minutes and taste even better after a day in the fridge. It fuels busy workdays with protein and fiber, turning meal prep lunch ideas to work into a tasty routine.
Lentil Soup
Editor’s Choice
Bento Box Adult Lunch Box, Containers for Adults Men Women with 4 Compar…

Immersion Blender Handheld Corded Hand Blenders Set 1100W, Trigger Varia…

365 by Whole Foods Market, Organic Low Sodium Vegetable Broth, 32 Fl Oz
12. Pesto Pasta Salad

Pesto Pasta Salad is a meal prep superstar that packs a flavorful punch! This dish is not only delicious but also incredibly easy to prepare. With its vibrant colors and fresh ingredients, it brightens up any lunch break. Imagine sitting down to a bowl of whole wheat pasta, juicy cherry tomatoes, and aromatic basil pesto. It’s perfect for those busy days when you need a quick, satisfying meal.
Let’s get to the heart of the recipe. You’ll need just a few simple ingredients that you might already have at home. Plus, it only takes about 25 minutes from start to finish. This salad is fantastic served cold or at room temperature, making it the ideal choice for a packed lunch. And if you want to kick up the protein, adding grilled chicken is a great option!
Recipe Overview:
– Servings: 4
– Prep Time: 15 minutes
– Cook Time: 10 minutes
– Total Time: 25 minutes
– Calories: 400 per serving
Nutrition Information:
– Protein: 12g
– Carbs: 60g
– Fats: 14g
Ingredients:
– 2 cups whole wheat pasta
– 1 cup cherry tomatoes, halved
– 1/2 cup basil pesto
– 1/4 cup Parmesan cheese, grated
– Salt and pepper to taste
Step-by-Step Instructions:
1. Cook the whole wheat pasta according to the package instructions. Drain and let it cool.
2. In a large mixing bowl, combine the cooled pasta, halved cherry tomatoes, pesto, and grated Parmesan cheese.
3. Season with salt and pepper to taste. Toss everything together until well mixed.
4. Divide the salad into meal prep containers for easy grab-and-go lunches.
Tips:
– Add grilled chicken for an extra protein boost.
– Store in the fridge for up to four days for maximum freshness.
– Experiment with different vegetables like bell peppers or spinach for extra crunch!
FAQs:
– Can it be made vegan? Yes! Simply swap the Parmesan with nutritional yeast for that cheesy flavor without dairy.
Now, you have a delicious, easy meal prep option that will keep you energized throughout the day. Enjoy your Pesto Pasta Salad!
Pesto Pasta Salad
Editor’s Choice
50 Pack (100-Piece) 32 oz Meal Prep Containers Reusable with Lids 3-Comp…

365 by Whole Foods Market, Organic Whole Wheat Penne Rigate, 16 Ounce (P…

Filippo Berio Pesto, Plant Based Vegan Basil, 6.7 Ounce Glass Jar, Veget…
13. Chicken Fajitas

Chicken Fajitas are a fantastic choice for a quick and delicious lunch. They pack a punch of flavor and are super easy to make. Picture tender chicken strips sautéed with colorful bell peppers and onions, all seasoned to perfection. You can wrap them in warm tortillas or serve them over fluffy rice. Plus, they taste just as good reheated, making them ideal for meal prepping!
Recipe Overview:
– Servings: 4
– Prep Time: 10 minutes
– Cook Time: 15 minutes
– Total Time: 25 minutes
– Calories: 350 per serving
Nutrition Information:
– Protein: 30g
– Carbs: 40g
– Fats: 10g
Ingredients:
– 1 lb chicken breast, sliced
– 2 bell peppers, sliced (any color you prefer)
– 1 onion, sliced
– 1 tbsp fajita seasoning (store-bought or homemade)
– 1 tbsp olive oil
Step-by-Step Instructions:
1. Heat the olive oil in a large skillet over medium heat.
2. Add the sliced chicken and cook until browned, about 5-7 minutes.
3. Toss in the bell peppers, onions, and fajita seasoning. Stir well to combine.
4. Cook for another 5-7 minutes until the veggies are tender and the chicken is cooked through.
5. Serve your fajitas with warm tortillas or over rice in meal prep containers.
Tips:
– Add shredded cheese and guacamole for an extra burst of flavor.
– Try using steak or shrimp if you’re looking for a different protein option.
– Experiment with different veggies like zucchini or mushrooms for variety.
FAQs:
– Can I use steak? Absolutely! Steak fajitas are just as tasty and a great alternative.
– How do I store leftovers? Keep them in an airtight container in the fridge for up to 3 days.
With Chicken Fajitas, you get a meal that’s not just quick to prepare but also satisfying. Enjoy your tasty lunch while saving time during your busy work week!
Chicken Fajitas
Editor’s Choice
50 Pack (100-Piece) 24 oz Meal Prep Containers Reusable with Lids, Sturd…

Chef Merito | Fajitas Rancheras Seasoning | 13 OZ | Authentic Latin Flav…

CAROTE Nonstick Frying Pan Skillet,Non Stick Granite Fry Pan Egg Pan Ome…
14. Creamy Tomato Basil Soup

Imagine diving into a warm bowl of Creamy Tomato Basil Soup during your lunch break. This dish wraps you in comfort and is a breeze to prepare ahead of time. With just a handful of fresh ingredients like ripe tomatoes and fragrant basil, you can create a meal that tastes like a cozy hug. Pair it with crusty bread, and you’ve got a satisfying lunch that’s both delicious and easy to make.
Recipe Overview:
– Servings: 4
– Prep Time: 10 minutes
– Cook Time: 20 minutes
– Total Time: 30 minutes
– Calories: 200 per serving
Nutrition Information:
– Protein: 5g
– Carbs: 30g
– Fats: 8g
Ingredients:
– 2 cans diced tomatoes
– 1 cup vegetable broth
– 1/2 cup heavy cream
– 1/4 cup fresh basil, chopped
– Salt and pepper to taste
Step-by-Step Instructions:
1. In a large pot, combine the diced tomatoes and vegetable broth. Bring the mixture to a gentle simmer.
2. Stir in the cream and chopped basil. Season with salt and pepper according to your taste.
3. For a silky texture, blend the soup until smooth using an immersion blender or regular blender.
4. Allow it to cool before storing in airtight containers. Reheat when you’re ready to enjoy!
Tips:
– Pair your soup with grilled cheese sandwiches for a classic combo that never disappoints.
– This soup freezes well, so make a big batch and enjoy it later. Just reheat it on the stove for a quick meal!
With this simple and tasty recipe, you’ll have a go-to lunch option that’s comforting, healthy, and ready in under 30 minutes. It’s perfect for meal prepping, ensuring you can enjoy quality food even on your busiest days. Enjoy your delicious soup!
Creamy Tomato Basil Soup
Editor’s Choice
Immersion Blender Handheld Corded Hand Blenders Set 1100W, Trigger Varia…

Airtight Food Storage Containers with Lids, Vtopmart 24 pcs Plastic Kitc…
15. Shrimp and Avocado Salad

Imagine enjoying a light, refreshing lunch that also fills you up. The Shrimp and Avocado Salad is just that! With tender shrimp and creamy avocado, this dish is perfect for warm days when you crave something cool. Plus, it’s simple to make and can impress your coworkers at lunch.
Here’s why you’ll love it: this salad combines fresh ingredients and zesty flavors. The juicy shrimp pairs beautifully with the buttery avocado, while a squeeze of lime adds a tangy kick. It’s the kind of meal that feels like a treat but is healthy too.
Recipe Overview:
– Servings: 4
– Prep Time: 15 minutes
– Cook Time: 5 minutes
– Total Time: 20 minutes
– Calories: 350 per serving
Nutrition Information:
– Protein: 25g
– Carbs: 15g
– Fats: 22g
Ingredients:
– 1 lb shrimp, peeled and deveined
– 2 ripe avocados, diced
– 2 cups mixed greens
– Juice of 1 lime
– Salt and pepper to taste
Step-by-Step Instructions:
1. Heat a skillet over medium heat. Add a splash of olive oil.
2. Cook the shrimp until pink and opaque, about 5 minutes.
3. In a large bowl, combine the cooked shrimp, diced avocado, and mixed greens.
4. Squeeze fresh lime juice over the salad. Season with salt and pepper. Toss gently to combine.
5. Divide the salad into meal prep containers and refrigerate.
Tips:
– Add fresh cilantro for an extra burst of flavor.
– Enjoy within 2 days for the best taste and freshness.
This Shrimp and Avocado Salad is not just easy to make; it also brings a delightful mix of textures and flavors that you’ll look forward to eating. Perfect for meal prep, it makes your lunch feel special, helping you stay energized throughout the day!
Shrimp and Avocado Salad
Editor’s Choice

TrendPlain 16oz/470ml Glass Olive Oil Sprayer for Cooking – 2 in 1 Olive…

Zulay Kitchen Metal 2-in-1 Lemon Squeezer – Sturdy Max Extraction Hand J…
16. Greek Yogurt and Berry Parfait

Brighten your lunch break with a delightful Greek Yogurt and Berry Parfait. This easy-to-make treat combines creamy yogurt, juicy berries, and crunchy granola. It’s perfect for satisfying your sweet cravings without straying from healthy eating. Plus, it looks beautiful in a glass, making it a feast for the eyes as well as the stomach!
To whip up this parfait, you’ll need just a few ingredients. It takes only 10 minutes to prepare, and you can make it in batches to enjoy throughout the week. Let’s dive into the recipe details!
Recipe Overview:
– Servings: 4
– Prep Time: 10 minutes
– Cook Time: 0 minutes
– Total Time: 10 minutes
– Calories: 200 per serving
Nutrition Information:
– Protein: 10g
– Carbs: 30g
– Fats: 5g
Ingredients:
– 2 cups Greek yogurt
– 2 cups mixed berries (like strawberries, blueberries, and raspberries)
– 1 cup granola
Step-by-Step Instructions:
1. Grab a glass or a mason jar. Start by adding a layer of Greek yogurt at the bottom.
2. Next, add a layer of mixed berries, followed by a sprinkle of granola for that satisfying crunch.
3. Repeat these layers until your container is full, finishing with a layer of berries on top.
4. Seal it up and store in the fridge. Enjoy it when hunger strikes!
Tips:
– Choose seasonal berries for the best flavor and freshness.
– Mix in a drizzle of honey or maple syrup if you like it sweeter.
FAQs:
– Can I make it vegan? Absolutely! Swap Greek yogurt for plant-based yogurt options.
– What if I want to add more protein? Add a scoop of protein powder to the yogurt before layering.
This parfait is not just a quick fix; it’s a versatile option that you can dress up or down. With its vibrant colors and delicious taste, it’s sure to become a go-to lunch for your work week! Enjoy every bite!
Greek Yogurt and Berry Parfait
Editor’s Choice
NETANY 6-pack 16 oz Overnight Oats Containers with Lids, Glass jars with…

4 Pack 23oz Yogurt Parfait Cups with Lids Reusable, Yogurt Containers wi…

Chobani® Low-Fat Vanilla Greek Yogurt, Mixed Berry on the Bottom 5.3oz 4…
17. Chickpea Salad Sandwich

Looking for a quick, healthy lunch option? The Chickpea Salad Sandwich is here to save the day! This tasty sandwich offers a delightful mix of flavors and textures, making it a fantastic plant-based alternative to traditional meat sandwiches. You’ll love how creamy mashed chickpeas blend with crunchy veggies and a zesty dressing. It’s simple, satisfying, and perfect for your busy workweek.
Recipe Overview:
– Servings: 4
– Prep Time: 10 minutes
– Cook Time: 0 minutes
– Total Time: 10 minutes
– Calories: 250 per serving
Nutrition Information:
– Protein: 12g
– Carbs: 35g
– Fats: 8g
Ingredients:
– 1 can chickpeas, drained and rinsed
– 1/4 cup mayo or Greek yogurt
– 1/2 cup diced celery
– 1/4 cup diced red onion
– Salt and pepper to taste
Step-by-Step Instructions:
1. In a mixing bowl, mash the chickpeas with a fork until mostly smooth.
2. Add the mayo or Greek yogurt, diced celery, red onion, salt, and pepper. Stir until everything is well combined.
3. Spread the mixture on slices of whole grain bread. Top with fresh lettuce and tomato for extra crunch.
Tips for Extra Flavor:
– Add a pinch of cumin to give your chickpea salad a warm, earthy taste.
– Experiment with herbs like dill or parsley for a fresh twist.
Storing Your Sandwich:
– You can prepare this salad a few days in advance. It keeps well in the fridge for 2-3 days, making it ideal for meal prep.
This Chickpea Salad Sandwich isn’t just easy to make; it’s also budget-friendly! You can find chickpeas and veggies at any grocery store without breaking the bank. Plus, it’s a great way to add more plant-based meals to your diet. Enjoy a wholesome lunch that’s not only delicious but also helps you stay energized throughout your busy day!
Chickpea Salad Sandwich
Editor’s Choice
Bento Box Adult Lunch Box, Containers for Adults Men Women with 4 Compar…

365 by Whole Foods Market, Organic Garbanzo Beans, 15.5 Ounce

Dave’s Killer Bread 21 Whole Grains & Seeds Thin-Sliced, Whole Grain Org…
18. BBQ Chicken Wraps

BBQ Chicken Wraps are a delightful way to transform your leftovers into a tasty lunch. Imagine biting into a soft wrap filled with tender, smoky BBQ chicken, crisp lettuce, and melted cheese. This quick meal not only satisfies your hunger but also brings excitement to your lunch routine. Plus, you can enjoy them cold or warm, making them versatile for any workday!
Recipe Overview:
– Servings: 4
– Prep Time: 10 minutes
– Cook Time: 0 minutes
– Total Time: 10 minutes
– Calories: 350 per wrap
Nutrition Information:
– Protein: 30g
– Carbs: 40g
– Fats: 10g
Ingredients:
– 2 cups shredded BBQ chicken (cooked)
– 4 whole wheat wraps
– 1 cup lettuce, shredded
– 1/2 cup cheese
Step-by-Step Instructions:
1. Start by laying out your wrap flat on a clean surface.
2. Spoon the shredded BBQ chicken onto the wrap, spreading it evenly.
3. Add a handful of shredded lettuce and sprinkle cheese on top.
4. Roll the wrap tightly from one end to the other, ensuring the filling stays inside.
5. Slice the wrap in half for easier handling.
6. Store in meal prep containers for a grab-and-go lunch option!
Tips:
– Add pickles or jalapeños for a spicy twist!
– Swap in pulled pork if you prefer a different flavor.
BBQ Chicken Wraps are not just easy to make; they’re also budget-friendly. You can use leftover chicken from dinner, saving both time and money. These wraps are perfect for busy weekdays, making lunchtime feel special. Enjoy the satisfaction of a homemade meal without the hassle!
Fun fact for meal prep lunch ideas to work: BBQ leftovers become lunch heroes. Reheating or rolling them in a BBQ wrap cuts meal prep time by 50-60%.
BBQ Chicken Wraps
Editor’s Choice

Fully Automatic Roti Chapati Maker – No Need To Roll Dough, Electric Cou…

Hickory Brown Sugar Bbq Sauce | Pack Of 1 | 27 Ounce | Kinders Sauce | L…
19. Apricot and Almond Couscous Salad

Get ready to elevate your lunch game with the delicious Apricot and Almond Couscous Salad. This dish is a perfect blend of sweet and savory flavors that will keep you satisfied all afternoon. The chewy couscous pairs wonderfully with the tartness of dried apricots and the satisfying crunch of almonds. With a drizzle of light vinaigrette, every bite feels refreshing and energizing.
Ready to make it? Here’s a quick overview of the recipe:
Recipe Overview:
– Servings: 4
– Prep Time: 10 minutes
– Cook Time: 5 minutes
– Total Time: 15 minutes
– Calories: 250 per serving
Nutrition Information:
– Protein: 6g
– Carbs: 36g
– Fats: 10g
Ingredients:
– 1 cup couscous
– 1 cup water
– 1/2 cup dried apricots, chopped
– 1/2 cup almonds, chopped
– 1/4 cup olive oil
– Salt and pepper to taste
Step-by-Step Instructions:
1. Start by boiling 1 cup of water in a pot. Once boiling, stir in 1 cup of couscous and then remove it from the heat.
2. Let it sit for 5 minutes to absorb the water, and then fluff it with a fork.
3. In a large bowl, combine the fluffy couscous with the chopped dried apricots and almonds. Drizzle in 1/4 cup of olive oil, and season with salt and pepper to taste.
4. Mix everything well, then portion into containers for easy meal prep.
Tips:
– Try swapping in different dried fruits like cranberries or raisins for a twist.
– This salad tastes great both warm and cold, making it versatile for your lunch needs.
Now you have a quick, healthy meal that’s full of flavor! Prepare this Apricot and Almond Couscous Salad to enjoy a delightful lunch that keeps you fueled and ready to tackle your day!
Apricot and Almond Couscous Salad
Editor’s Choice
Bento Box Adult Lunch Box, Containers for Adults Men Women with 4 Compar…

AOZITA 17oz Glass Olive Oil Bottle Dispenser – 500ml Green Oil and Vineg…

Couscoussier 6 Liter Moroccan Steamer Pot Imported from Morocco Couscous…
20. Zucchini Noodles with Pesto

Looking for a fresh and healthy lunch option? Try Zucchini Noodles with Pesto! This dish is a fantastic low-carb alternative to traditional pasta. It’s not just nutritious; it’s also bursting with flavor. The spiralized zucchini gives a satisfying crunch, while the homemade pesto adds a rich, herby taste. Throw in some cherry tomatoes for a pop of color and sweetness, and you’ve got a lunch that’s as pleasing to the eyes as it is to the palate.
Let’s break down how to prepare this easy meal. In just 15 minutes, you can whip up a delightful dish that will keep you energized throughout your workday. Plus, it’s a breeze to make in bulk for meal prep. Just keep the zucchini noodles and pesto separate until you’re ready to eat for the best flavor and texture.
Recipe Overview:
– Servings: 4
– Prep Time: 10 minutes
– Cook Time: 5 minutes
– Total Time: 15 minutes
– Calories: 200 per serving
Nutrition Information:
– Protein: 5g
– Carbs: 15g
– Fats: 15g
Ingredients:
– 4 medium zucchinis
– 1 cup pesto (store-bought or homemade)
– 1 cup cherry tomatoes, halved
Step-by-Step Instructions:
1. Spiralize the zucchinis to create noodles. Aim for thin strands for the best texture.
2. Heat a skillet over medium heat and lightly sauté the zucchini noodles for about 2-3 minutes. You want them tender but still firm.
3. Remove from heat and toss the noodles with the pesto and halved cherry tomatoes until well coated.
4. Divide into meal prep containers and enjoy throughout the week!
Tips:
– Add grilled chicken or shrimp for extra protein and flavor.
– Experiment with different pesto flavors, like sun-dried tomato or spinach.
– Top with grated Parmesan cheese for a tasty finish.
This meal is perfect for busy days. It’s quick, easy, and packed with goodness. You’ll feel satisfied, not sluggish. Enjoy your healthy lunchtime boost!
Zucchini Noodles with Pesto
Editor’s Choice

Brieftons 5-Blade Vegetable Spiralizer: Strongest-Heaviest Spiral Slicer…
50 Pack (100-Piece) 32 oz Meal Prep Containers Reusable with Lids 3-Comp…

21. Creamy Avocado Pasta

Creamy Avocado Pasta is the perfect solution for busy workdays. This dish is not only quick to make, but it’s also packed with flavor and nutrition. Imagine a luscious, creamy sauce made from ripe avocados, garlic, zesty lemon juice, and rich olive oil. Toss it with your favorite pasta, and you have a healthy meal that feels indulgent without the extra calories. It’s a refreshing option that will keep you satisfied and energized throughout your day!
Here’s a simple recipe to get you started:
Recipe Overview:
– Servings: 4
– Prep Time: 10 minutes
– Cook Time: 10 minutes
– Total Time: 20 minutes
– Calories: 300 per serving
Nutrition Information:
– Protein: 8g
– Carbs: 40g
– Fats: 15g
Ingredients:
– 2 ripe avocados
– 2 cloves garlic
– Juice of 1 lemon
– 1/4 cup olive oil
– 8 oz pasta (your choice)
Step-by-Step Instructions:
1. Cook the pasta according to the package directions, then drain it well.
2. While the pasta cooks, blend the avocados, garlic, lemon juice, and olive oil in a blender until smooth and creamy.
3. Toss the cooked pasta with the avocado sauce until every strand is coated.
4. Divide into meal prep containers for easy lunches throughout the week.
Tips:
– Add cherry tomatoes for a pop of color and sweetness.
– Sprinkle crushed red pepper for a spicy kick.
FAQs:
– Can I use store-bought pesto instead? Definitely! It’s a quick option when you’re short on time.
This creamy avocado pasta is not just a meal; it’s a time-saver and a crowd-pleaser. Enjoy it warm or cold, and watch how it brightens your workday lunch routine!
Creamy Avocado Pasta
Editor’s Choice

Rubbermaid Brilliance Meal Prep Containers, 2-Compartment Food Storage C…

Ninja BL660 Professional Compact Smoothie & Food Processing Blender, 110…
AOZITA 17oz Glass Olive Oil Bottle Dispenser – 500ml Green Oil and Vineg…
22. Baked Falafel with Tzatziki

Baked Falafel with Tzatziki is a delightful and wholesome lunch option that you can easily prepare at home. This chickpea-based dish is baked instead of fried, making it a lighter choice that still packs a punch of flavor. Pairing it with refreshing tzatziki not only enhances the taste but also adds a creamy texture to each bite. Imagine the warm, spiced falafel contrasting with the cool, tangy sauce—it’s a perfect combination!
Let’s dive into how you can make this tasty meal. It’s budget-friendly, quick to whip up, and great for meal prep. Plus, it’s perfect for a busy workweek. You can make a big batch ahead of time, store it in containers, and have a satisfying lunch ready to go. This dish is not just filling; it’s also rich in protein and fiber, helping you stay energized throughout the day.
Recipe Overview:
– Servings: 4
– Prep Time: 15 minutes
– Cook Time: 25 minutes
– Total Time: 40 minutes
– Calories: 280 per serving
Nutrition Information:
– Protein: 12g
– Carbs: 36g
– Fats: 10g
Ingredients:
– 1 can chickpeas, drained
– 1/4 cup parsley, chopped
– 1/4 cup flour
– 1 tsp garlic powder
– 1 tsp cumin
– 1/2 cup tzatziki for serving
Step-by-Step Instructions:
1. Preheat your oven to 375°F (190°C).
2. In a bowl, mash the chickpeas with a fork until slightly chunky. Add the parsley, flour, garlic powder, and cumin. Mix well.
3. Form the mixture into small balls or patties and place them on a baking sheet lined with parchment paper.
4. Bake for 25 minutes, flipping them halfway through for even cooking.
5. Serve your baked falafel warm with a generous dollop of tzatziki in meal prep containers for a satisfying lunch.
Tips:
– Adjust the spices to fit your taste preferences.
– Add chopped vegetables to the falafel mix for extra crunch.
– Store leftovers in the fridge for up to four days.
– Serve with pita bread or a salad for a complete meal.
FAQs:
– Can I pan-fry them instead? Sure, but this will increase the fat content.
– How do I store leftovers? Keep them in airtight containers in the fridge.
This Baked Falafel with Tzatziki is not just a meal; it’s a flavorful experience packed with nutrition. Enjoy your lunch without the hassle!
Busy days demand tasty, make-ahead lunches. Baked falafel with tzatziki proves you can save time while packing flavor—prep once, enjoy multiple meals, and turn your meal prep lunch ideas to work into a weekday win.
Baked Falafel with Tzatziki
Editor’s Choice
50 Pack (100-Piece) 32 oz Meal Prep Containers Reusable with Lids 3-Comp…

Bob’s Red Mill Chickpea Flour, 16oz (Pack of 1) – Non GMO, Gluten Free, …

23. Moroccan-Spiced Carrot and Chickpea Salad

Brighten up your lunch routine with a delicious Moroccan-Spiced Carrot and Chickpea Salad! This refreshing dish bursts with flavors and colors that will make your taste buds dance. It features roasted carrots and chickpeas, all seasoned with aromatic spices. Perfect on its own or paired with grains like quinoa, this salad is an ideal meal prep option for busy workdays.
Let’s dive into the details of this tasty recipe. You’ll need just a few simple ingredients to create a vibrant lunch that’s both nutritious and satisfying. Plus, it’s easy to prepare and saves well in the fridge, making it a smart choice for your weekly meal prep.
Recipe Overview:
– Servings: 4
– Prep Time: 15 minutes
– Cook Time: 25 minutes
– Total Time: 40 minutes
– Calories: 220 per serving
Nutrition Information:
– Protein: 8g
– Carbs: 40g
– Fats: 6g
Ingredients:
– 4 medium carrots, sliced
– 1 can of chickpeas, drained
– 2 tablespoons of olive oil
– 1 teaspoon of cumin
– 1 teaspoon of cinnamon
– Salt and pepper to taste
Step-by-Step Instructions:
1. Preheat your oven to 400°F (200°C).
2. In a bowl, combine the sliced carrots and chickpeas. Drizzle with olive oil and sprinkle with cumin, cinnamon, salt, and pepper. Toss until everything is well coated.
3. Spread the mixture on a baking sheet and roast for 25 minutes, or until the carrots are tender and slightly caramelized.
4. Allow the salad to cool before transferring it to meal prep containers for easy lunches throughout the week.
Tips:
– Serve over a bed of quinoa for added protein and texture.
– Feel free to add nuts like almonds or walnuts for crunch and healthy fats!
This Moroccan-Spiced Carrot and Chickpea Salad not only tastes amazing but also keeps your lunch exciting. Enjoy the vibrant flavors and textures, and watch as it transforms your lunchtime experience!
Moroccan-Spiced Carrot and Chickpea Salad
Editor’s Choice
50 Pack (100-Piece) 32 oz Meal Prep Containers Reusable with Lids 3-Comp…

Kirecoo Stainless Steel Stock Pot – 8 Quart Heavy Duty Induction Cooking…
24. Cilantro Lime Rice with Grilled Chicken

Cilantro Lime Rice with Grilled Chicken is the perfect lunch to brighten your workday. This dish combines the fresh flavors of zesty lime and fragrant cilantro with tender grilled chicken. It’s not just tasty; it’s also filling, making it a smart choice for meal prep. Plus, a squeeze of lime adds a refreshing twist that will wake up your taste buds!
Here’s how to make this delightful meal:
Recipe Overview:
– Servings: 4
– Prep Time: 15 minutes
– Cook Time: 20 minutes
– Total Time: 35 minutes
– Calories: 400 per serving
Nutrition Information:
– Protein: 30g
– Carbs: 50g
– Fats: 10g
Ingredients:
– 2 cups cooked rice
– 1 lb chicken breast
– 1/4 cup cilantro, chopped
– Juice of 2 limes
– Salt and pepper to taste
Step-by-Step Instructions:
1. Season the chicken breast with salt and grill it until it’s fully cooked. This should take about 6-7 minutes per side, depending on thickness.
2. In a mixing bowl, combine your cooked rice with lime juice, chopped cilantro, salt, and pepper. Stir well until everything is mixed evenly.
3. Slice the grilled chicken into strips and place it over a bed of the cilantro lime rice in your meal prep containers.
Tips:
– Add black beans for an extra boost of fiber and protein. They pair wonderfully with the lime and cilantro flavors.
– This dish stays fresh in the fridge for up to 4 days, making it an easy grab-and-go option for busy workweeks.
Enjoy this simple yet satisfying meal that not only saves you time but also delivers on taste!
Cilantro Lime Rice with Grilled Chicken
Editor’s Choice
50 Pack (100-Piece) 32 oz Meal Prep Containers Reusable with Lids 3-Comp…

Aroma Housewares Aroma 6-cup (cooked) 1.5 Qt. One Touch Rice Cooker, Whi…

SENSARTE Nonstick Grill Pan for Stove Tops, Versatile Griddle with Pour …
25. Loaded Sweet Potato Skins

Loaded Sweet Potato Skins are a delightful and wholesome option for your work lunches! These tasty bites give a fun twist to a classic favorite. Picture this: baked sweet potatoes filled with black beans, gooey cheese, and creamy avocado. Not only are they delicious, but they’re also super easy to prep in advance, making your busy weekdays a breeze!
Recipe Overview:
– Servings: 4
– Prep Time: 15 minutes
– Cook Time: 30 minutes
– Total Time: 45 minutes
– Calories: 350 per serving
Nutrition Information:
– Protein: 12g
– Carbs: 45g
– Fats: 15g
Ingredients:
– 2 large sweet potatoes
– 1 can black beans, drained
– 1 cup cheese, shredded
– 1 avocado, diced
– Salt and pepper to taste
Step-by-Step Instructions:
1. Preheat your oven to 400°F (200°C). Bake the sweet potatoes for 30 minutes or until tender.
2. Let them cool, then slice each potato in half and scoop out a bit of the flesh.
3. Fill each potato half with black beans, cheese, and a sprinkle of salt and pepper.
4. Return them to the oven for another 10 minutes, or until the cheese melts beautifully.
5. Top with freshly diced avocado and pack them in containers for your lunch!
Tips:
– Serve with salsa for an extra kick!
– You can also add chopped cilantro or a squeeze of lime for freshness.
– For a vegan version, simply leave out the cheese or use a plant-based alternative.
These Loaded Sweet Potato Skins are not just a meal; they’re a boost of energy and flavor that will keep you satisfied all afternoon! Enjoy the ease of meal prep while indulging in something that feels like a treat. Perfect for sharing too, if you want to impress your coworkers!
Loaded Sweet Potato Skins
Editor’s Choice
50 Pack (100-Piece) 24 oz Meal Prep Containers Reusable with Lids, Sturd…

26. Vegetable Samosas with Mint Chutney

Indulge in the delightful taste of Vegetable Samosas with Mint Chutney, a perfect lunch option that transports your taste buds to India! These crispy pastries are stuffed with a savory mix of spiced potatoes and peas, making them a delightful treat for your midday meal. Dipping them in refreshing mint chutney adds a burst of flavor that will brighten your lunch break.
Recipe Overview:
– Servings: 12 samosas
– Prep Time: 20 minutes
– Cook Time: 30 minutes
– Total Time: 50 minutes
– Calories: 150 per samosa
Nutrition Information:
– Protein: 3g
– Carbs: 20g
– Fats: 7g
Ingredients:
– 2 cups all-purpose flour
– 2 cups potatoes, boiled and mashed
– 1 cup peas
– 1 tsp cumin
– 1 tsp garam masala
– Mint chutney for serving
Step-by-Step Instructions:
1. Mix flour and water in a bowl until you form a soft dough. Let it rest for 10 minutes.
2. In another bowl, combine the mashed potatoes, peas, cumin, and garam masala. Mix well.
3. Roll the dough into thin circles. Place a spoonful of the potato mixture in the center of each circle.
4. Fold the dough over to create a pocket. Seal the edges tightly.
5. Deep fry the samosas in hot oil until they are golden brown. Drain on paper towels.
6. Serve warm with mint chutney for dipping.
Tips:
– Bake instead of frying for a lighter version.
– Freeze uncooked samosas for a quick meal later on.
With these vegetable samosas, you’ll enjoy a delicious and satisfying lunch that’s easy to prepare ahead of time. They are not only tasty but also versatile enough to serve as a snack or appetizer, making them a fantastic addition to your meal prep routine!
Vegetable Samosas with Mint Chutney
Editor’s Choice
50 Pack (100-Piece) 24 oz Meal Prep Containers Reusable with Lids, Sturd…

Hamilton Beach Electric Deep Fryer with 3 Baskets and Lid, 4.5 Liters / …
27. Sautéed Greens with Garlic

If you’re looking for a quick and healthy lunch option, Sautéed Greens with Garlic is a winner. This dish is not only nutritious but also bursting with flavor. You can use a variety of greens like kale, spinach, or collard greens. Sautéing them with garlic creates a delightful side that complements any meal. Plus, it’s ready in just ten minutes!
Imagine the vibrant green leaves wilting perfectly in a hot pan, releasing their earthy aroma mixed with the rich scent of garlic. This simple dish is perfect for meal prepping, ensuring you have a healthy addition to your lunch every day.
Here’s how to whip it up in no time:
Recipe Overview:
– Servings: 4
– Prep Time: 5 minutes
– Cook Time: 5 minutes
– Total Time: 10 minutes
– Calories: 70 per serving
Nutrition Information:
– Protein: 3g
– Carbs: 10g
– Fats: 3g
Ingredients:
– 1 bunch of your choice of greens (kale or spinach)
– 3 cloves garlic, minced
– 1 tbsp olive oil
– Salt and pepper to taste
Step-by-Step Instructions:
1. Heat olive oil in a pan over medium heat.
2. Add the minced garlic and sauté for about a minute until it’s fragrant.
3. Toss in the greens and cook until they wilt, roughly 3-5 minutes.
4. Season with salt and pepper to taste, then pack into meal prep containers.
Tips:
– Add a splash of lemon juice for a bright, zesty flavor.
– Experiment with different greens for variety throughout the week.
– If you’re in a hurry, frozen greens work just fine; just adjust the cooking time.
With this quick recipe, you can enjoy a delicious, nutritious side that enhances any lunch. It’s perfect for busy days, keeping your meals exciting and healthy!
Sautéed Greens with Garlic
Editor’s Choice
Bento Box Adult Lunch Box, Containers for Adults Men Women with 4 Compar…
AOZITA 17oz Glass Olive Oil Bottle Dispenser – 500ml Green Oil and Vineg…
28. Spaghetti Squash with Marinara Sauce

Enjoy a delicious and healthy lunch with Spaghetti Squash and Marinara Sauce! This dish offers a tasty, low-carb twist on traditional pasta. The roasted spaghetti squash transforms into tender strands that soak up the rich marinara, making each bite comforting and satisfying. Plus, it’s perfect for meal prep, keeping your lunches exciting throughout the week!
Ready to cook? Here’s how to make this easy meal. You’ll need just a few simple ingredients, and it comes together in under an hour. Whether you’re at home or in the office, this dish is sure to please your palate and fit your schedule.
Recipe Overview:
– Servings: 4
– Prep Time: 10 minutes
– Cook Time: 40 minutes
– Total Time: 50 minutes
– Calories: 150 per serving
Nutrition Information:
– Protein: 4g
– Carbs: 30g
– Fats: 2g
Ingredients:
– 1 spaghetti squash
– 2 cups marinara sauce
– 1/4 cup Parmesan cheese (optional)
Step-by-Step Instructions:
1. Preheat your oven to 400°F (200°C). Slice the spaghetti squash in half and scoop out the seeds.
2. Place the squash cut-side down on a baking sheet and roast for 30-40 minutes until tender.
3. Once cooked, scrape the inside with a fork to release the noodle-like strands.
4. Mix the strands with marinara sauce. If you like, sprinkle with Parmesan cheese before serving.
5. Portion into meal prep containers for easy lunches throughout the week.
Tips:
– Add cooked ground turkey or Italian sausage for extra protein.
– Store cooked spaghetti squash and sauce separately to keep it fresh.
FAQs:
– Can I freeze this dish? Yes! Freeze the cooked spaghetti squash and marinara sauce separately for future meals.
With this Spaghetti Squash and Marinara, you’ll have a nutritious, flavorful meal that’s easy to prepare. Enjoy!
Spaghetti Squash with Marinara Sauce
Editor’s Choice
50 Pack (100-Piece) 32 oz Meal Prep Containers Reusable with Lids 3-Comp…
Brieftons 5-Blade Vegetable Spiralizer: Strongest-Heaviest Spiral Slicer…

365 by Whole Foods Market, Organic Marinara Pasta Sauce, 25 Ounce
29. Caprese Salad Skewers

Caprese Salad Skewers are a delightful choice for a light and refreshing lunch at work. Imagine juicy cherry tomatoes, creamy mozzarella, and fragrant basil all on a stick—it’s a colorful feast for your eyes and taste buds! Drizzling them with balsamic glaze adds a tangy sweetness that ties it all together. These skewers are not just tasty; they’re also incredibly easy to make and perfect for meal prep.
Ready to whip up these delicious bites? Here’s how you can make them in no time. You’ll need just a few ingredients, and with a little prep, you can have a week’s worth of lunches ready to go. This dish is not only healthy but also visually appealing, making it a great option for impressing your coworkers. Best of all, they stay fresh in the fridge for up to three days!
Recipe Overview:
– Servings: 4
– Prep Time: 15 minutes
– Cook Time: 0 minutes
– Total Time: 15 minutes
– Calories: 200 per serving
Nutrition Information:
– Protein: 10g
– Carbs: 5g
– Fats: 15g
Ingredients:
– 1 pint cherry tomatoes
– 1 lb mozzarella balls
– Fresh basil leaves
– Balsamic glaze for drizzling
Step-by-Step Instructions:
1. Grab your skewers and start by threading on a cherry tomato.
2. Follow with a mozzarella ball and then a fresh basil leaf.
3. Repeat the process until your skewers are filled up, leaving a bit of space at the ends.
4. Just before serving, drizzle some balsamic glaze over the skewers for that extra flavor kick.
5. Store your skewers in containers for quick and easy lunches throughout the week.
Tips:
– Use toothpicks for bite-sized portions, perfect for snacking!
– Customize by adding other ingredients like olives or grilled veggies.
FAQs:
– How long do they last? Best enjoyed within 3 days for optimal freshness.
With Caprese Salad Skewers, you can enjoy a nutritious meal that’s as easy to make as it is to eat! Perfect for those busy workdays, they help you stay satisfied and energized.
Caprese Salad Skewers
Editor’s Choice

HOPELF 12″ Natural Bamboo Skewers for BBQ,Appetiser,Fruit,Cocktail,Kabob…
30. Frittata with Seasonal Vegetables

Imagine a meal that is both delicious and easy to prepare. A frittata with seasonal vegetables is just that! This dish allows you to clear out your fridge while enjoying a nutritious and satisfying meal. You can serve it warm or cold, making it perfect for lunch at work or a quick breakfast. Plus, it’s packed with protein and veggies, keeping you energized throughout the day.
Recipe Overview:
– Servings: 6
– Prep Time: 10 minutes
– Cook Time: 30 minutes
– Total Time: 40 minutes
– Calories: 250 per serving
Nutrition Information:
– Protein: 12g
– Carbs: 8g
– Fats: 18g
Ingredients:
– 6 eggs
– 1 cup seasonal vegetables (like zucchini, bell peppers, or spinach)
– 1/2 cup shredded cheese (your choice)
– Salt and pepper to taste
Step-by-Step Instructions:
1. First, preheat your oven to 375°F (190°C). This step is crucial for a perfectly cooked frittata.
2. Next, beat the eggs in a bowl. Stir in your chopped seasonal vegetables, cheese, salt, and pepper. The mix should be colorful and inviting!
3. Pour the mixture into a greased baking dish. Spread it evenly, so every slice has a good mix of eggs and veggies.
4. Bake for about 30 minutes or until the frittata is set and a little golden on top. Let it cool for a few minutes before slicing it into squares.
Tips:
– Use fresh, in-season vegetables for the best taste. They not only add flavor but also vibrant colors!
– Feel free to experiment with different types of cheese or herbs. This way, each frittata can be unique!
FAQs:
– Can I freeze frittata? Yes, you can! Just wrap it tightly in plastic wrap before storing it in the freezer. It’s a great way to have a meal ready whenever you need it.
With these simple steps, you’ll have a tasty frittata ready to enjoy. It’s not only convenient but also a fantastic way to eat healthy while saving time.
Frittata with Seasonal Vegetables
Editor’s Choice
Bento Box Adult Lunch Box, Containers for Adults Men Women with 4 Compar…

Farberware Nonstick Bakeware Baking Pan / Nonstick Cake Pan, Rectangle -…

Fullstar The Original Pro Chopper – Vegetable Chopper and Spiralizer, Fo…
Conclusion

Meal prepping is not just about saving time; it’s about enjoying delicious, wholesome meals throughout the week.
With these 30+ meal prep lunch ideas, you can easily stay on track with healthy eating even during your busiest workdays.
So grab your containers, get cooking, and make your lunch breaks something to look forward to!
Note: We aim to provide accurate product links, but some may occasionally expire or become unavailable. If this happens, please search directly on Amazon for the product or a suitable alternative.
This post contains Amazon affiliate links, meaning I may earn a small commission if you purchase through my links, at no extra cost to you.
Frequently Asked Questions
What Are Some Easy Lunch Recipes for Meal Prep?
Looking for easy lunch recipes to simplify your meal prep? Consider dishes like quinoa salad with roasted vegetables or chicken stir-fry with broccoli and bell peppers. These meals can be made in bulk and stored in the fridge for quick access during your workweek. Remember, the key is to choose recipes that hold up well in the fridge and reheat nicely!
How Can I Make Healthy Meal Prep More Convenient?
To make healthy meal prep more convenient, start by dedicating a few hours each week to cooking. Use make-ahead meals that can be frozen or refrigerated. Invest in good quality containers to keep your meals fresh, and consider batch cooking staples like grains and proteins to mix and match throughout the week. This way, you can easily create variety without extra effort!
What Are Some Quick Lunch Prep Ideas for Busy Professionals?
If you’re a busy professional, check out quick lunch prep ideas like wraps filled with hummus, veggies, and turkey or mason jar salads that can be layered ahead of time. These meals are not only quick to prepare but also packed with nutrients, making them perfect for a health-conscious lunch on the go!
How Do I Keep My Work Lunch Ideas Fresh and Interesting?
Keeping your work lunch ideas fresh and interesting can be a breeze! Rotate your ingredients and try different cuisines each week. For example, one week you might focus on Mediterranean flavors with falafel and tzatziki, and the next week, go for a Mexican twist with black bean tacos. This variety will keep you excited about your meals and help you avoid lunchtime boredom!
What Are Some Tips for Storing Make-Ahead Meals Properly?
To store your make-ahead meals properly, use airtight containers to maintain freshness and prevent spills. Label your meals with the date they were prepared to keep track of freshness. Additionally, consider freezing some meals if you know you won’t eat them within a few days. This way, you’ll always have a healthy option ready to go, no matter how busy your week gets!
Related Topics
meal prep
healthy lunches
work lunch ideas
easy lunch recipes
quick meal prep
make-ahead meals
busy professionals
time-saving meals
nutritious snacks
office meal prep
simple recipes
weekend cooking