Working from home has its perks. You can roll out of bed and start your day in your pajamas, but it can also lead to some serious lunchtime struggles. I know I’m not the only one who finds themselves staring blankly into the fridge or scrolling through delivery apps, wishing for a quick, tasty meal that doesn’t take much effort to whip up. That’s why I created this list of 30+ work from home lunch ideas for anyone who needs a midday meal that’s easy and satisfying.
If you’re someone who juggles remote work, family, or just life in general, this post is for you. You likely want lunches that won’t eat up your entire break but still give you the energy boost you need to tackle the rest of your day. Whether you’re a busy professional, a parent trying to manage it all, or simply someone who loves a good meal, you’ll find something here that fits your needs.
What can you expect from these lunch ideas? I’ve pulled together a mix of quick, delicious, and easy-to-make recipes. These meals are perfect for those hectic days when you need to refuel without losing track of time. You’ll find everything from hearty wraps to refreshing salads, all designed to keep your taste buds happy and your productivity up.
Let’s be real: lunchtime should be something you look forward to, not another chore. So, grab your favorite lunch container and let’s dive into these tasty ideas that will make your work-from-home experience a whole lot better. You deserve meals that are as enjoyable as they are quick.
1. Quinoa and Black Bean Salad
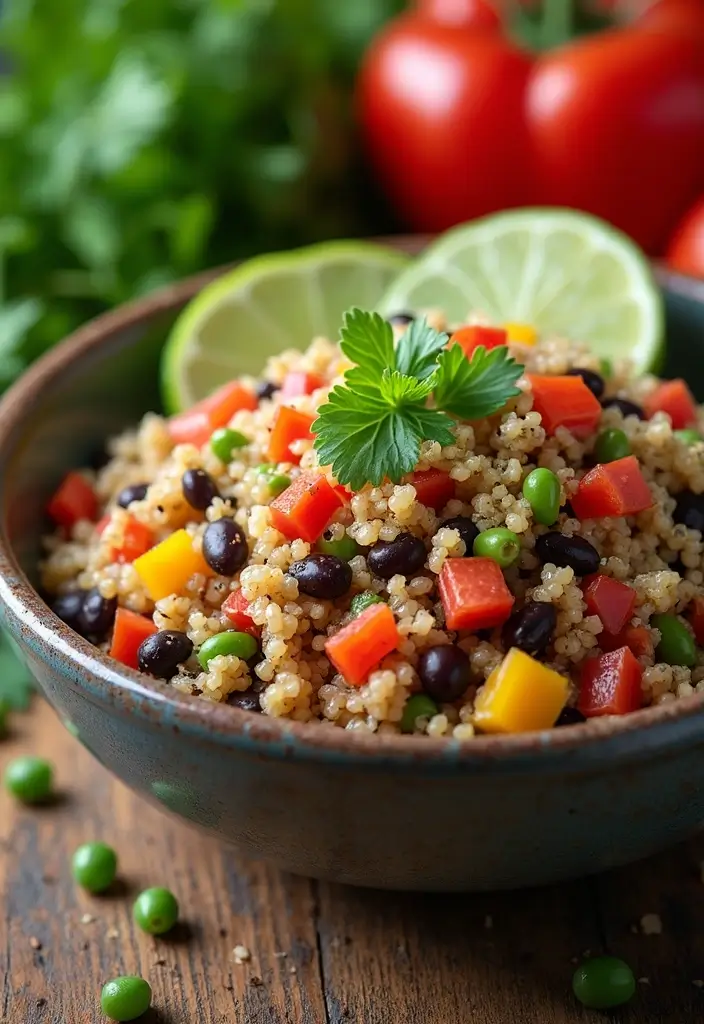
Quinoa and Black Bean Salad is your go-to option for a quick, healthy lunch. This salad is bursting with nutrients, offering a great mix of protein and fiber. With cooked quinoa, black beans, sweet corn, and fresh peppers, it’s not just healthy; it’s also colorful and tasty. Drizzled with a zesty lime dressing, this dish is best enjoyed chilled, making it a perfect make-ahead meal for busy workdays.
Feel the crunch of fresh veggies and the light, fluffy texture of quinoa as you dig in. The bright colors not only please the eye but also signal a variety of nutrients that keep you energized throughout the afternoon.
Here’s how to whip up this delicious salad in no time:
Ingredients:
– 1 cup quinoa, rinsed
– 1 can black beans, drained and rinsed
– 1 cup corn (fresh or frozen)
– 1 bell pepper, diced
– 1/4 cup cilantro, chopped
– Juice of 2 limes
– 2 tbsp olive oil
– Salt and pepper to taste
Instructions:
1. Cook the quinoa as per package instructions until fluffy.
2. In a large bowl, combine cooked quinoa, black beans, corn, diced bell pepper, and chopped cilantro.
3. In a separate small bowl, whisk together the lime juice, olive oil, salt, and pepper.
4. Pour the dressing over the salad and toss until everything is well mixed.
5. For the best flavor, chill the salad in the refrigerator for about 30 minutes before serving.
Tips to Enhance Your Salad:
– Add avocado for a creamy texture.
– Mix in other veggies like tomatoes or cucumbers for extra flavor.
FAQs:
– Can I prepare this salad in advance? Yes! It stays fresh in the fridge for up to three days.
– Is it suitable for vegans? Absolutely!
With this salad, you’ll enjoy a satisfying lunch that keeps you full and focused. It’s simple, quick, and packed with everything you need to power through your day!
Quinoa and Black Bean Salad
Editor’s Choice

50 Pack (100-Piece) 24 oz Meal Prep Containers Reusable with Lids, Sturd…
 AmazonEUR 20.74
AROMA Digital Rice Cooker, 4-Cup (Uncooked) / 8-Cup (Cooked), Steamer, G…
 Amazon$34.99
2. Caprese Sandwich
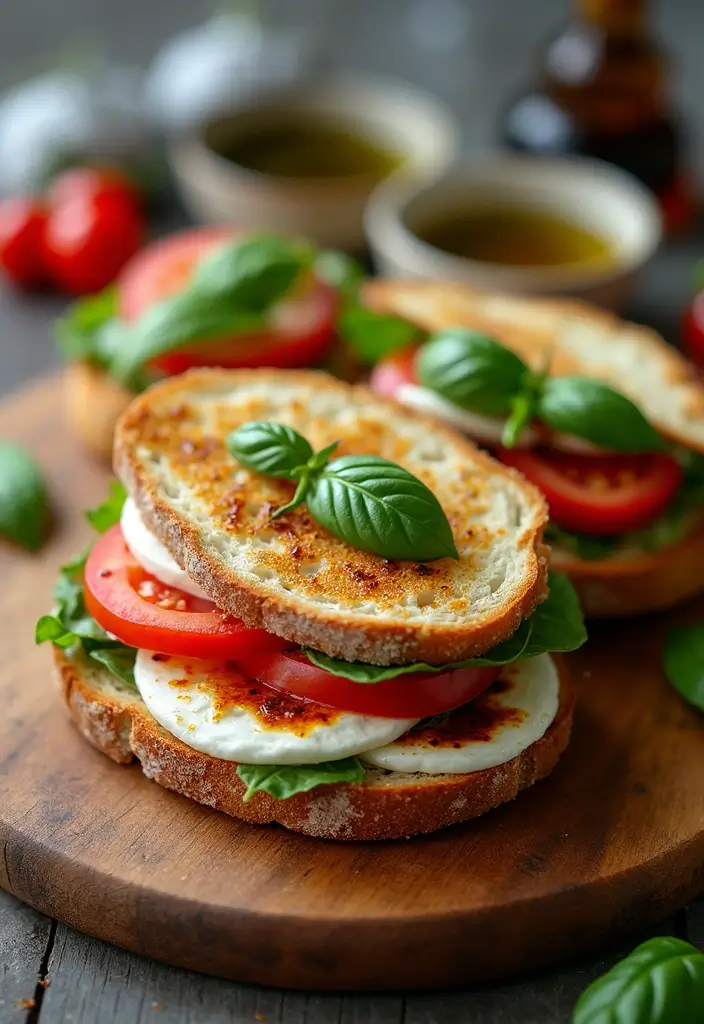
Looking for a quick and tasty lunch that won’t slow you down? The Caprese Sandwich is your answer! This Italian favorite combines fresh mozzarella, ripe tomatoes, and aromatic basil, all nestled between slices of crusty bread. With a drizzle of balsamic reduction, every bite bursts with flavor. It’s a refreshing choice that’s perfect for your work-from-home lunch break.
You can enjoy this sandwich warm or cold, making it adaptable to your schedule. The creamy mozzarella and juicy tomatoes will lift your spirits, while the fresh basil adds a delightful fragrance. Plus, it’s super simple to make!
Here’s how to whip up this delightful sandwich:
Ingredients:
– 4 slices of crusty bread
– 8 oz fresh mozzarella, sliced
– 1 large tomato, sliced
– Fresh basil leaves
– Balsamic reduction for drizzling
– Olive oil for drizzling
– Salt and pepper to taste
Instructions:
1. Start by laying out two slices of bread. Layer them with mozzarella and tomato slices.
2. Add fresh basil leaves on top for that burst of flavor.
3. Drizzle balsamic reduction and olive oil over the layers. Sprinkle with salt and pepper to taste.
4. Place the other slices of bread on top and press down gently.
5. Cut the sandwich in half and serve immediately.
If you’re in the mood for something warm, grill the sandwich in a pan with a touch of olive oil until it’s golden brown. For an extra twist, try adding slices of avocado for creaminess.
FAQs:
– Can I use a different type of bread? Yes! Ciabatta or a baguette also work great.
– What if I don’t have balsamic reduction? Regular balsamic vinegar is a tasty substitute.
This Caprese Sandwich is not only easy to prepare but also a delicious way to recharge during your busy day! Enjoy the burst of fresh flavors and the satisfaction of a homemade meal.
Caprese Sandwich
Editor’s Choice


ORGANIC VALLEY Organic Mozzarella String Cheese, 8 OZ
 AmazonCheck Price
Cuisinart Griddler Indoor Grill, Panini Press, Sandwich Maker & More, 5-…
 AmazonGBP 93.76
3. Chickpea Salad Sandwich
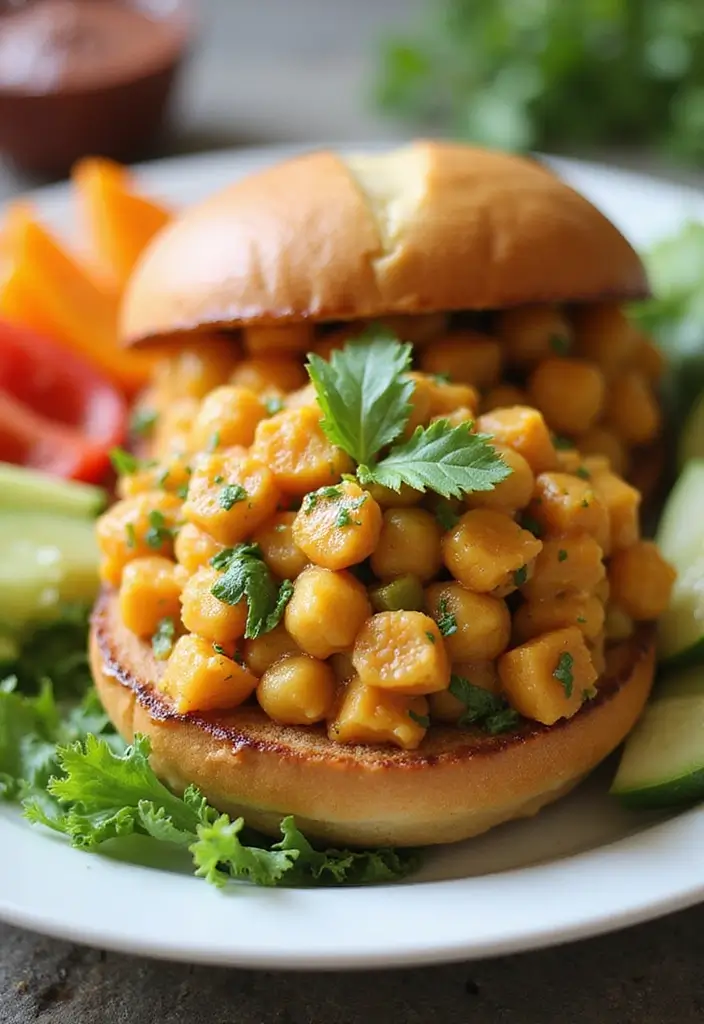
Looking for a tasty lunch that’s both quick and nutritious? The Chickpea Salad Sandwich is your answer. This vibrant, plant-based meal packs a punch with its hearty chickpeas and refreshing crunch from veggies. You’ll enjoy all the classic flavors of a traditional sandwich while keeping it completely vegan. Imagine biting into a creamy mixture of mashed chickpeas, crisp celery, zesty red onion, and a hint of lemon juice. It’s the perfect pick-me-up for your busy work-from-home day!
Making this sandwich is a breeze. You can whip it up in just 10 minutes and customize it with any crunchy veggies you have on hand. Slide it between two slices of whole grain bread or wrap it in crisp lettuce leaves for a refreshing twist. You’ll love how satisfying this meal is, and it will keep you energized for the rest of your day.
Here’s how to make it:
Ingredients:
– 1 can chickpeas, drained and rinsed
– 2 tbsp vegan mayo
– 1 celery stalk, diced
– 1/4 red onion, diced
– Juice of 1 lemon
– Salt and pepper to taste
– Whole grain bread or lettuce leaves
Instructions:
1. In a bowl, mash the chickpeas using a fork or potato masher until mostly smooth.
2. Stir in the vegan mayo, diced celery, red onion, lemon juice, salt, and pepper until well combined.
3. Spread the mixture on your choice of bread or spoon it into lettuce leaves for a low-carb option.
4. Enjoy right away, or store in an airtight container in the fridge for up to 3 days.
Feel free to get creative! Add diced pickles for extra zing. Choose your favorite spices like cumin or paprika to give it a personal touch.
FAQs:
– Is this sandwich gluten-free? Use gluten-free bread or lettuce wraps!
– Can I make this ahead of time? Yes, it keeps well in the fridge for a few days.
This sandwich not only satisfies your hunger but also fuels your focus throughout the day. Give it a try for your next lunch break!
Chickpea Salad Sandwich
Editor’s Choice

OXO Good Grips Stainless Steel Smooth Potato Masher, Black/Silver
 Amazon$15.49
Hellmann’s Vegan Dressing and Spread Vegan 3 Ct for a Rich, Creamy Plant…
 Amazon$11.22
Dave’s Killer Bread 21 Whole Grains & Seeds Thin-Sliced, Whole Grain Org…
 Amazon$5.99
4. Vegetable Stir-Fry with Brown Rice
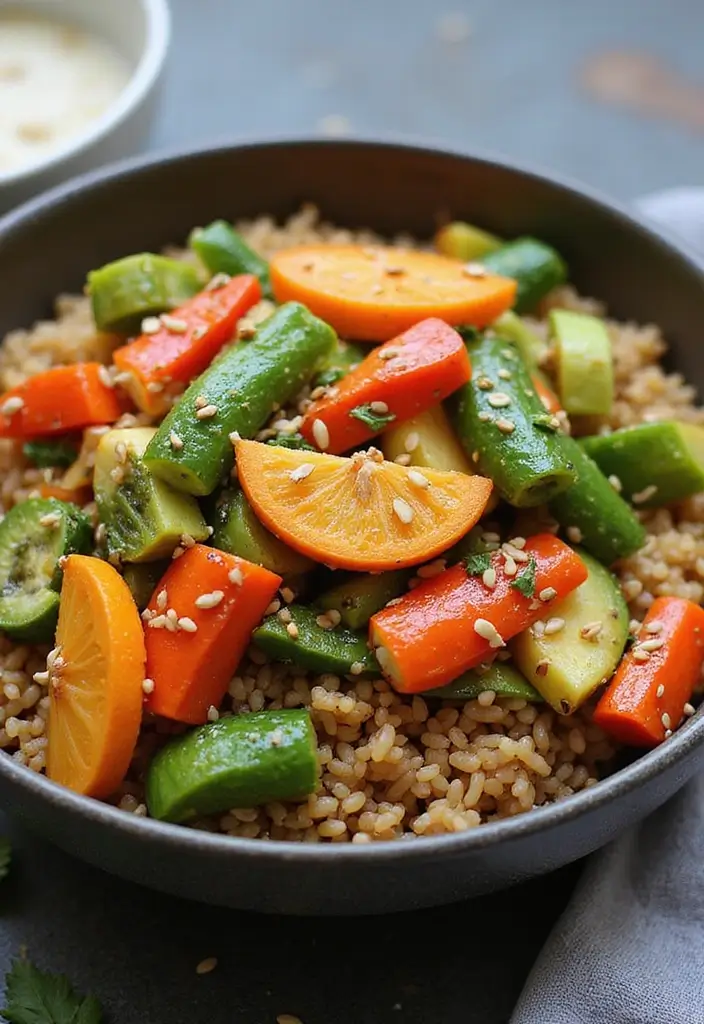
When you’re working from home, finding a quick and satisfying lunch can be a challenge. Enter the Vegetable Stir-Fry with Brown Rice. This warm, colorful dish brings comfort and nutrition to your midday break. Imagine vibrant bell peppers, crisp broccoli, and sweet snap peas all tossed together in a hot pan. The colors and aromas will make your kitchen feel lively, and the best part? You can whip it up in just 25 minutes!
This stir-fry is not just tasty; it’s also flexible. Use whatever vegetables you have in your fridge. Feeling adventurous? Toss in some tofu or chicken for extra protein. It’s a fantastic way to clean out your vegetable drawer while enjoying a hearty meal.
Overview:
– Servings: 4
– Prep Time: 10 min
– Cook Time: 15 min
– Total Time: 25 min
– Calories: 350 per serving
Nutrition Information:
– Protein: 9g
– Carbohydrates: 60g
– Fats: 7g
– Fiber: 5g
Ingredients:
– 2 cups brown rice, cooked
– 2 cups mixed vegetables (broccoli, bell peppers, carrots, etc.)
– 2 tbsp soy sauce
– 1 tbsp sesame oil
– 1 clove garlic, minced
– Salt and pepper to taste
Instructions:
1. Heat the sesame oil in a large pan over medium heat.
2. Add the minced garlic and mixed vegetables. Cook until tender, about 5-7 minutes.
3. Stir in the cooked brown rice and soy sauce. Mix everything well.
4. Cook for another 2-3 minutes until everything is heated through.
5. Serve hot and enjoy!
Want to elevate the dish? Add a sprinkle of sesame seeds for crunch. Or try a splash of hot sauce for an extra kick!
FAQs:
– Can I use frozen vegetables? Yes, frozen veggies are perfect for this recipe!
– Is brown rice better? Absolutely! It’s healthier than white rice, giving you more fiber and nutrients.
With this simple stir-fry, you’ll not only have a delicious lunch but also a great way to boost your veggie intake. Enjoy your cooking adventure!
Vegetable Stir-Fry with Brown Rice
Editor’s Choice

Wok, 13 Inch carbon steel woks & stir-fry pans nonstick, Pre-Seasoned 5….
 Amazon$33.99
5. Greek Yogurt and Berry Parfait
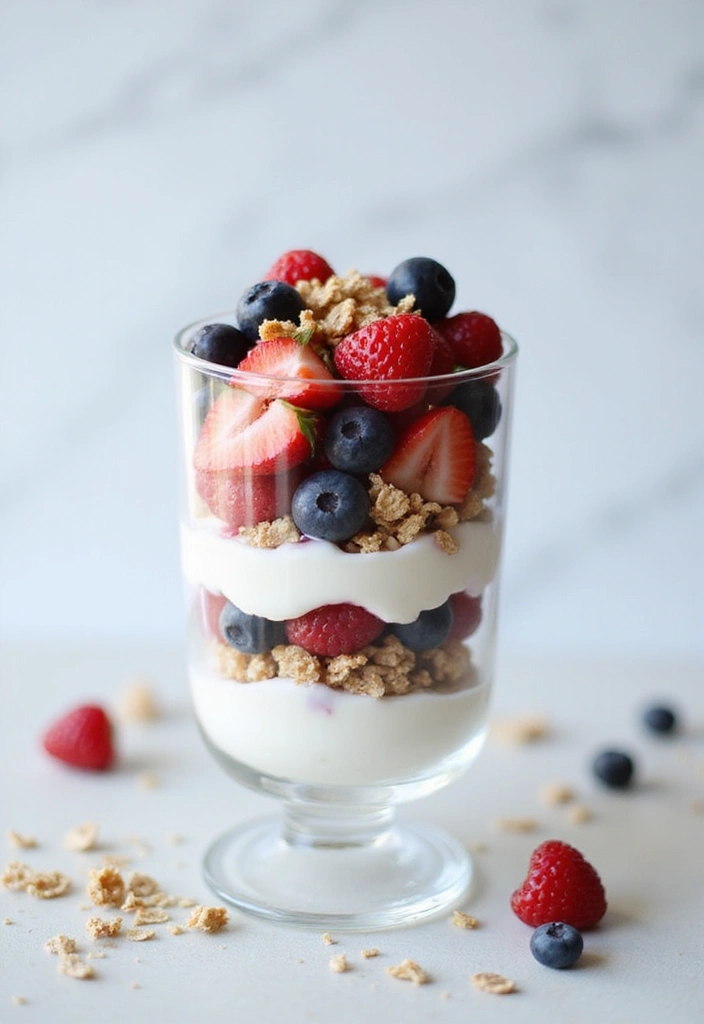
Looking for a quick and healthy lunch that won’t slow you down? A Greek Yogurt and Berry Parfait might just be your new favorite option. It’s light, delicious, and packed with nutrients. The creamy Greek yogurt layered with fresh berries and crunchy granola not only looks beautiful but also tastes amazing. Plus, it’s super easy to whip up, making it perfect for your busy work-from-home days.
You can mix and match your favorite fruits to keep things exciting. In the summer, opt for juicy strawberries and blueberries. In the fall, try apples and cinnamon. The best part? This parfait is a great source of protein and antioxidants, giving you that much-needed energy boost to tackle your afternoon tasks.
Here’s how to make your own parfait:
Ingredients:
– 2 cups Greek yogurt
– 1 cup mixed berries (like strawberries, blueberries, and raspberries)
– 1/2 cup granola
– Honey for drizzling (optional)
Instructions:
1. Start by taking two clear glasses or bowls.
2. Spoon a layer of Greek yogurt into each glass.
3. Add a layer of mixed berries on top of the yogurt.
4. Sprinkle some granola over the berries.
5. Repeat the layers until your glasses are full.
6. Drizzle honey on top if you like it sweeter, and enjoy right away!
Don’t forget these simple tips:
– Use seasonal fruits for the best taste.
– Pick nuts to sprinkle on top for extra crunch.
– Choose low-fat yogurt for a lighter option.
– Add a sprinkle of cinnamon for a warm flavor twist.
Curious about frozen berries? They work great, too! Just thaw them first. This parfait is not just healthy; it can satisfy your sweet tooth while keeping your lunch light. Enjoy every delicious bite!
Greek Yogurt and Berry Parfait
Editor’s Choice


365 by Whole Foods Market, Organic Blueberries, 32 Ounce, (Frozen)
 AmazonCheck Price
6. Zucchini Noodles with Pesto
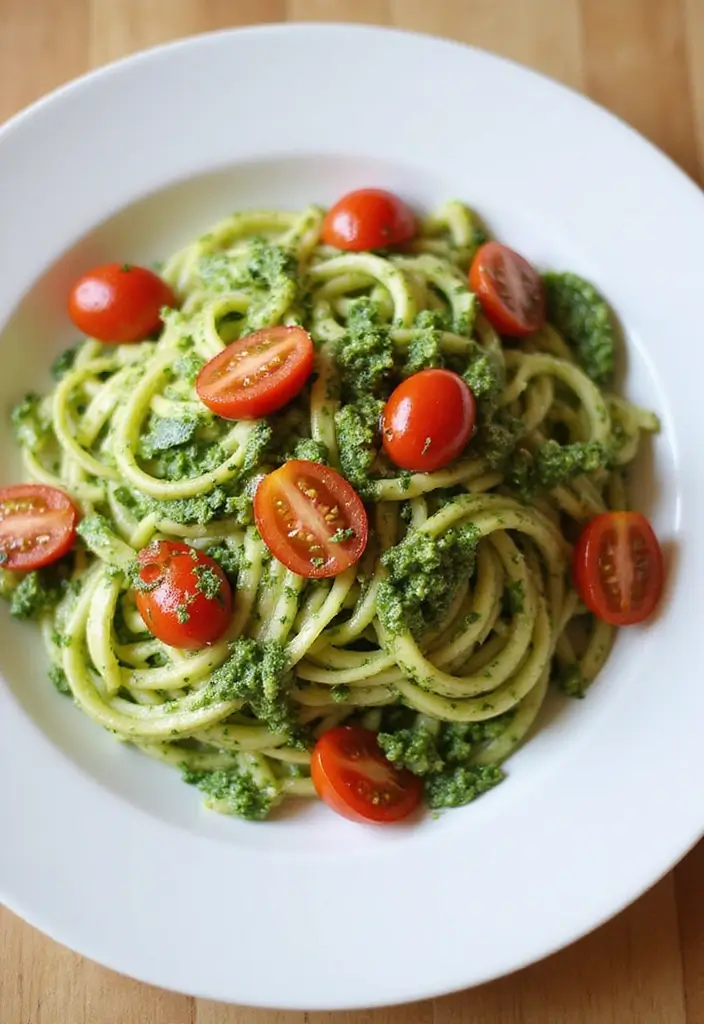
Craving something fresh and quick? Zucchini Noodles with Pesto is your answer! This dish is not only a delightful twist on traditional pasta, but it’s also low in carbs and gluten-free. Picture spiralized zucchini, twirling on your fork, enveloped in a vibrant basil pesto. The flavors burst in your mouth, bringing a garden-fresh taste to your midday meal.
Preparing this dish is a breeze. In just 15 minutes, you can whip up a satisfying meal perfect for your busy work-from-home schedule. Plus, it tastes great both warm or chilled, making it easy to save leftovers for tomorrow’s lunch. Let’s dive into the details!
Overview:
– Servings: 2
– Prep Time: 10 min
– Cook Time: 5 min
– Total Time: 15 min
– Calories: 300 per serving
Nutrition Information:
– Protein: 7g
– Carbohydrates: 20g
– Fats: 22g
– Fiber: 3g
Ingredients:
– 2 medium zucchinis
– 1/2 cup basil pesto
– 1/4 cup cherry tomatoes, halved
– Grated Parmesan cheese for topping
Instructions:
1. Spiralize the zucchinis into noodles.
2. In a pan, lightly sauté the zucchini noodles for 2-3 minutes, just until they soften.
3. Remove from heat and toss with basil pesto and halved cherry tomatoes.
4. Top with grated Parmesan cheese and serve right away.
Need a protein boost? Add grilled chicken for a hearty option. You can also customize with your favorite veggies like bell peppers or spinach!
FAQs:
– Can I make my own pesto? Absolutely! Homemade pesto is simple and delicious.
– How do I store leftovers? Keep them in an airtight container in the fridge for up to 2 days.
This dish not only satisfies your hunger but also impresses with its fresh flavors. Give it a try and enjoy a delightful meal that’s quick, healthy, and totally satisfying!
Zucchini Noodles with Pesto
Editor’s Choice

Brieftons 5-Blade Vegetable Spiralizer: Strongest-Heaviest Spiral Slicer…
 Amazon$31.99

Airtight Food Storage Containers with Lids, Vtopmart 24 pcs Plastic Kitc…
 Amazon$35.99
7. Avocado Toast
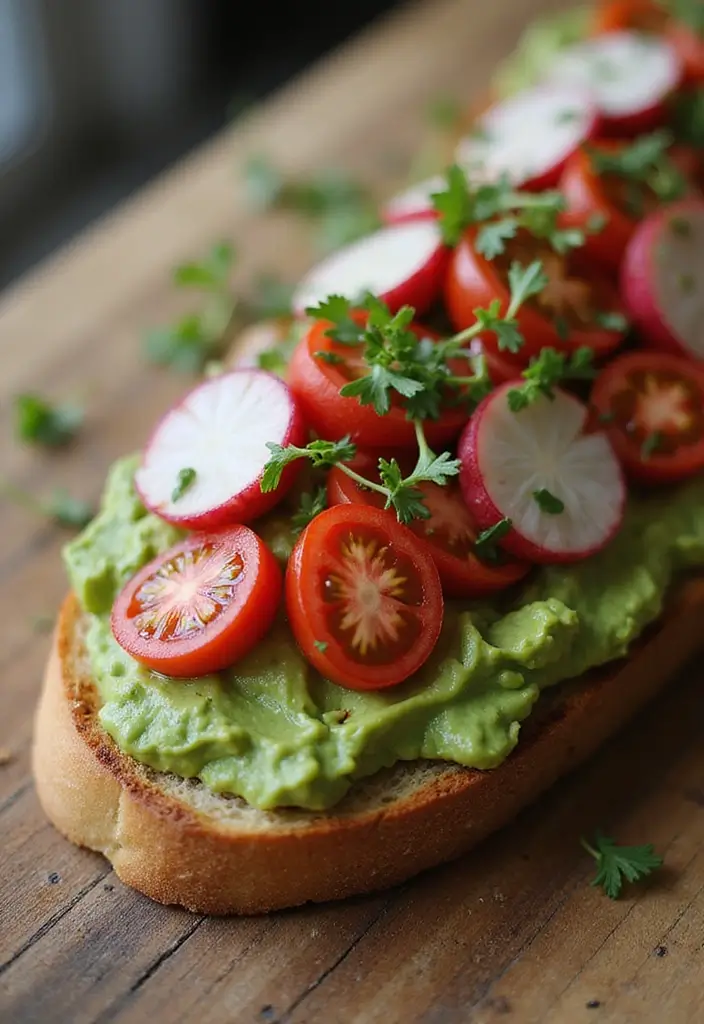
Avocado Toast has become a lunchtime favorite, and it’s easy to see why! This simple dish bursts with flavor and nutrition. You just mash a ripe avocado onto toasted bread and add your favorite toppings. Try sliced tomatoes, crunchy radishes, or a sprinkle of chili flakes for a kick. It’s a quick and satisfying meal that can keep you energized through the afternoon.
Did you know avocado toast is not just for breakfast? It’s a fantastic option for lunch too! The healthy fats from the avocado help keep you full, making it perfect for busy workdays.
Here’s how to make your own delicious avocado toast:
Overview:
– Servings: 1
– Prep Time: 5 min
– Cook Time: 0 min
– Total Time: 5 min
– Calories: 250 per serving
Nutritional Information:
– Protein: 6g
– Carbohydrates: 30g
– Fats: 14g
– Fiber: 7g
Ingredients:
– 1 slice whole-grain bread
– 1 ripe avocado
– Salt and pepper to taste
– Optional toppings: sliced tomatoes, radishes, chili flakes, lemon juice
Instructions:
1. Toast your bread until it’s golden brown.
2. In a bowl, mash the avocado. Add salt and pepper to taste.
3. Spread the mashed avocado evenly on the toast.
4. Top with your chosen ingredients for extra flavor.
For an added protein boost, place a poached egg on top. A dash of lemon juice can brighten the whole dish!
FAQs:
– How do I keep avocado from browning? Use lemon juice or store it in an airtight container.
– Can I use whole wheat bread? Yes! It’s both nutritious and tasty.
This quick and easy lunch is not only delicious but also a fantastic way to refuel during your workday. Enjoy your homemade avocado toast and feel great!
Avocado Toast
Editor’s Choice


365 By Whole Foods Market Organic Whole Wheat Bread, 20 Ounce
 Amazon$3.49
Spice Classics Crushed Red Pepper, 12 oz – One 12 Ounce Container of Dri…
 Amazon$5.94
8. Sweet Potato and Black Bean Tacos
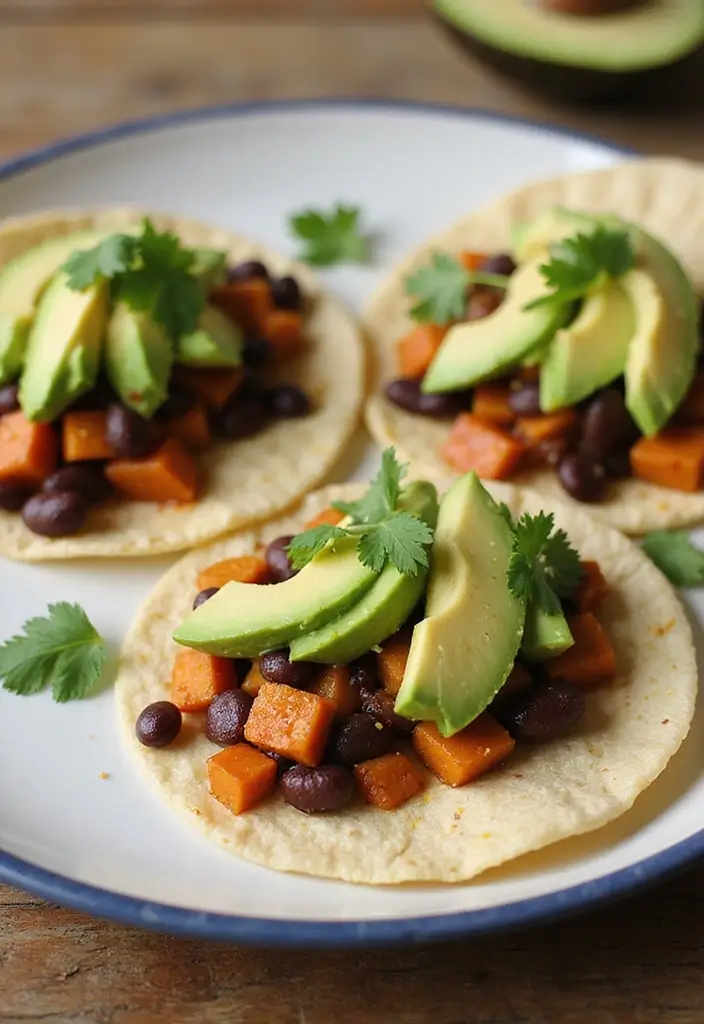
Transform your lunch break into a flavorful fiesta with Sweet Potato and Black Bean Tacos. These tacos are a delightful mix of taste and nutrition, making them a perfect midday meal. Roasting sweet potatoes brings out their natural sweetness, while black beans add protein and a hearty texture. Wrapped in warm corn tortillas, this dish is both satisfying and easy to prepare.
Top your tacos with creamy avocado slices or a zesty salsa for a burst of flavor. Whether you’re cooking for yourself or meal prepping for the week, these tacos are quick to whip up and even quicker to vanish from your plate!
Ingredients:
– 2 large sweet potatoes, peeled and cubed
– 1 can black beans, rinsed and drained
– 8 corn tortillas
– 1 tsp cumin
– 1 tsp paprika
– Olive oil
– Salt and pepper to taste
– Avocado for topping
– Optional: cilantro or lime juice for garnish
Instructions:
1. Preheat your oven to 425°F (220°C).
2. In a bowl, toss the sweet potato cubes with olive oil, cumin, paprika, salt, and pepper until well coated.
3. Spread the sweet potatoes on a baking sheet and roast for about 20 minutes, or until they are tender.
4. Meanwhile, warm the corn tortillas in a skillet or microwave until soft.
5. Fill each tortilla with the roasted sweet potatoes and black beans. Top with avocado and any optional garnishes you like.
These tacos are not just delicious; they are a great way to sneak in some veggies. They pack in about 400 calories per serving, with 12g of protein, 65g of carbohydrates, and 10g of fiber.
Quick Tips:
– Try different toppings: Add cheese or a squeeze of lime for extra zest.
– Make it spicy: If you enjoy heat, toss in some jalapeños or spicy salsa.
– Substitute the beans: If you’re out of black beans, try pinto or kidney beans for a different flavor.
FAQs:
– Can I use regular potatoes instead? Yes, but sweet potatoes give a unique twist.
– Are these tacos spicy? They’re mild unless you add spicy toppings!
Enjoy a fun and nutritious lunch with these sweet potato and black bean tacos. They are sure to brighten your day!
Sweet Potato and Black Bean Tacos
Editor’s Choice
365 by Whole Foods Market, Organic White Corn Tortilla Chips Thin and Cr…
 AmazonCheck Price
GoodCook Everyday Nonstick Carbon Steel Baking Sheet Set, 3 Pack – Small…
 Amazon$17.99
9. Spinach and Feta Stuffed Chicken Breast
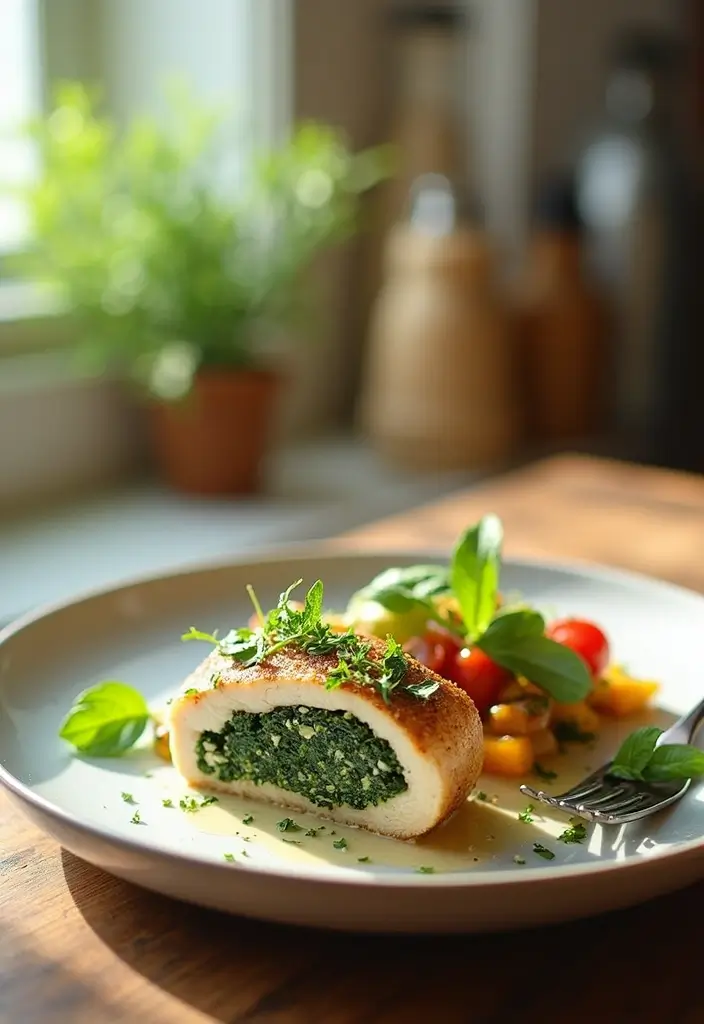
Transform your work-from-home lunch with a mouthwatering Spinach and Feta Stuffed Chicken Breast. This dish is not just delicious; it’s also a breeze to prepare in advance. Imagine sinking your teeth into tender chicken packed with fresh spinach, tangy feta, and aromatic herbs—all while saving time in your busy day.
Every bite bursts with flavor. The juicy chicken pairs wonderfully with a crisp side salad or colorful steamed veggies. This meal isn’t just filling; it’s a nourishing choice that helps you stay energized for the rest of your workday.
Here’s how to make it:
Ingredients:
– 4 boneless chicken breasts
– 2 cups fresh spinach, cooked and chopped
– 1/2 cup feta cheese, crumbled
– 1 tsp garlic powder
– Olive oil for drizzling
– Salt and pepper to taste
Instructions:
1. Preheat your oven to 375°F (190°C).
2. In a bowl, combine the cooked spinach, feta cheese, garlic powder, salt, and pepper.
3. Carefully cut a pocket into each chicken breast and stuff it with the spinach mixture.
4. Place the stuffed chicken in a baking dish, drizzle with olive oil, and sprinkle with more salt and pepper.
5. Bake for about 30 minutes or until the chicken reaches an internal temperature of 165°F (75°C).
For a delightful twist, try marinating the chicken overnight to deepen the flavors.
FAQs:
– Can I use frozen spinach? Yes, just make sure to thaw and drain it well.
– How do I check if the chicken is done? Use a meat thermometer to ensure it hits 165°F (75°C).
This impressive yet simple dish will elevate your lunch routine, making it a perfect fit for a healthy, flavorful midday meal!
Spinach and Feta Stuffed Chicken Breast
Editor’s Choice

ThermoPro TP19H Digital Meat Thermometer for Cooking with Ambidextrous B…
 Amazon$13.98
DOWAN Casserole Dish, 9×13 Ceramic Baking Dish, Large Lasagna Pan Deep f…
 Amazon$29.99
AOZITA 17oz Glass Olive Oil Bottle Dispenser – 500ml Green Oil and Vineg…
 Amazon$9.99
10. Hummus with Veggie Sticks
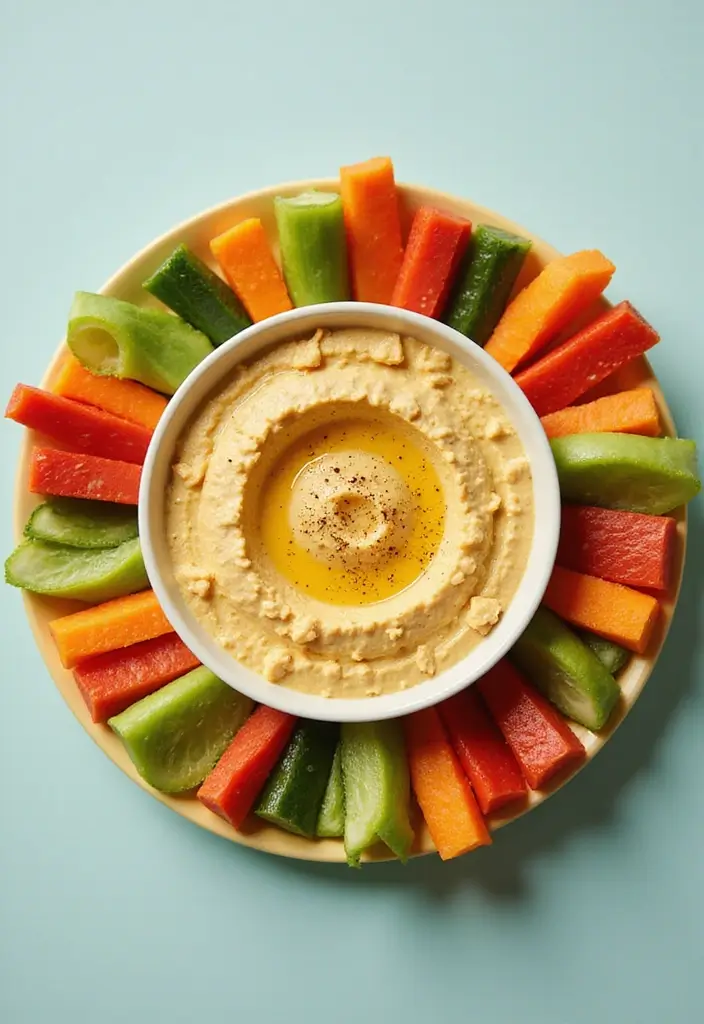
Pair your hummus with a rainbow of veggie sticks like crunchy carrots, refreshing cucumbers, and sweet bell peppers. This colorful plate not only looks appetizing but also helps you sneak in those essential daily veggies.
Recipe Overview:
– Servings: 2
– Prep Time: 5 minutes
– Cook Time: 0 minutes
– Total Time: 5 minutes
– Calories: 200 per serving
Nutrition Information per Serving:
– Protein: 8g
– Carbohydrates: 30g
– Fats: 10g
– Fiber: 5g
Ingredients:
– 1 cup hummus
– 2 carrots, cut into sticks
– 1 cucumber, cut into sticks
– 1 bell pepper, sliced
– Optional: pita bread for dipping
Instructions:
1. Arrange the veggie sticks neatly on a plate for an inviting look.
2. Place the hummus in the center for easy dipping.
3. If you’re using pita, cut it into triangles and serve it on the side.
Want to spice things up? Add olives or pickles as a garnish for an extra zing. You can also experiment with different flavors of hummus like roasted red pepper or garlic to keep things interesting.
Frequently Asked Questions:
– Can I make my own hummus? Yes! Just blend chickpeas, tahini, lemon juice, garlic, and olive oil until smooth.
– How long does hummus last? Store it in the fridge for up to a week.
This simple yet nutritious meal is perfect when you’re pressed for time but still want something that fuels your day!
Fun fact: Hummus with veggie sticks is one of the best work from home lunch ideas, packing protein and fiber to power you through a busy day in minutes. Store-bought or homemade, it’s ready fast and keeps you energized for the rest of your afternoon tasks.
Hummus with Veggie Sticks
Editor’s Choice
Mezete Hummus Snack Pack with Breadsticks | Traditional Classic Hummus |…
 AmazonCheck Price
Bento Box Adult Lunch Box, Containers for Adults Men Women with 4 Compar…
 Amazon$9.99
11. Rice Paper Rolls with Peanut Sauce
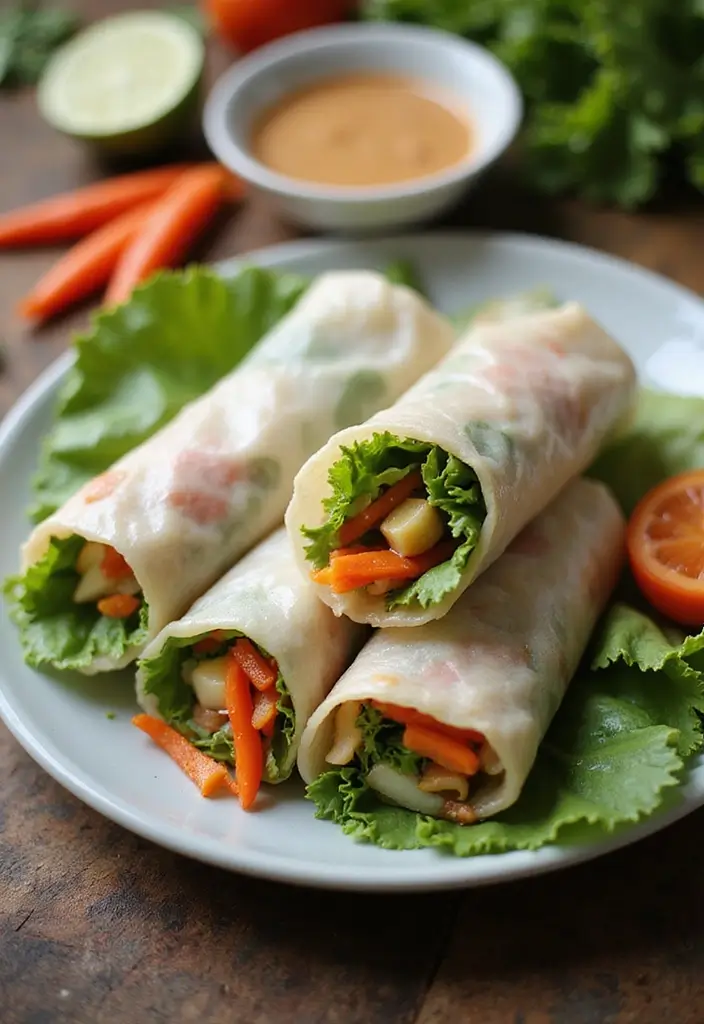
Craving a lunch that’s fresh, light, and bursting with flavor? Rice Paper Rolls with Peanut Sauce are your answer! These delightful rolls combine crisp vegetables and fragrant herbs, wrapped snugly in delicate rice paper. You can add shrimp or tofu for extra protein, making them a satisfying meal that won’t weigh you down.
Imagine biting into a roll and tasting the crunch of fresh veggies, paired with a smooth, creamy peanut sauce that elevates every bite. They’re not just easy to make; they’re also perfect for meal prep. Enjoy them fresh, or pack them for a delicious lunch later in the week!
Here’s what you need to create this tasty dish:
Overview:
– Servings: 4
– Prep Time: 15 min
– Cook Time: 5 min
– Total Time: 20 min
– Calories: 150 per roll
Nutrition Information:
– Protein: 5g
– Carbohydrates: 25g
– Fats: 6g
– Fiber: 3g
Ingredients:
– 8 rice paper wrappers
– 1 cup cooked shrimp or tofu (optional)
– 1 cup mixed vegetables (carrots, cucumbers, bell peppers)
– Fresh herbs (mint or cilantro)
– 1/4 cup peanut butter
– 1 tbsp soy sauce
– Water for dipping
Instructions:
1. Soak each rice paper wrapper in warm water for about 10-15 seconds until soft.
2. Lay the wrapper flat on a clean surface. Add shrimp or tofu, a handful of mixed veggies, and a sprinkle of herbs.
3. Roll it tightly like a burrito, folding in the sides as you go.
4. For the peanut sauce, mix the peanut butter with soy sauce and a little water until smooth.
5. Serve the rolls with the peanut sauce for dipping.
Want to make these rolls even more exciting? Here are some tips!
– Add lime juice to the sauce for a zesty kick!
– Use colorful veggies to make your rolls look as good as they taste.
– Try different proteins like chicken or tempeh to switch things up.
– Store rolls in the fridge, but enjoy them fresh for the best taste!
FAQs:
– Can I make these ahead of time? Yes, but they taste best fresh!
– Are they gluten-free? Absolutely, just use gluten-free soy sauce.
These rice paper rolls are a refreshing choice that will keep you energized and satisfied throughout your day! Enjoy your healthy lunch!
Rice Paper Rolls with Peanut Sauce
Editor’s Choice

Soeos Rice Paper, White Rice Paper Wrappers, 1 Pack, 34 Sheets-Fresh Spr…
 Amazon$4.59
Woodstock Organic Smooth Peanut Butter, Salt Added, 35 oz
 AmazonCheck Price
12. Turkey and Avocado Wrap
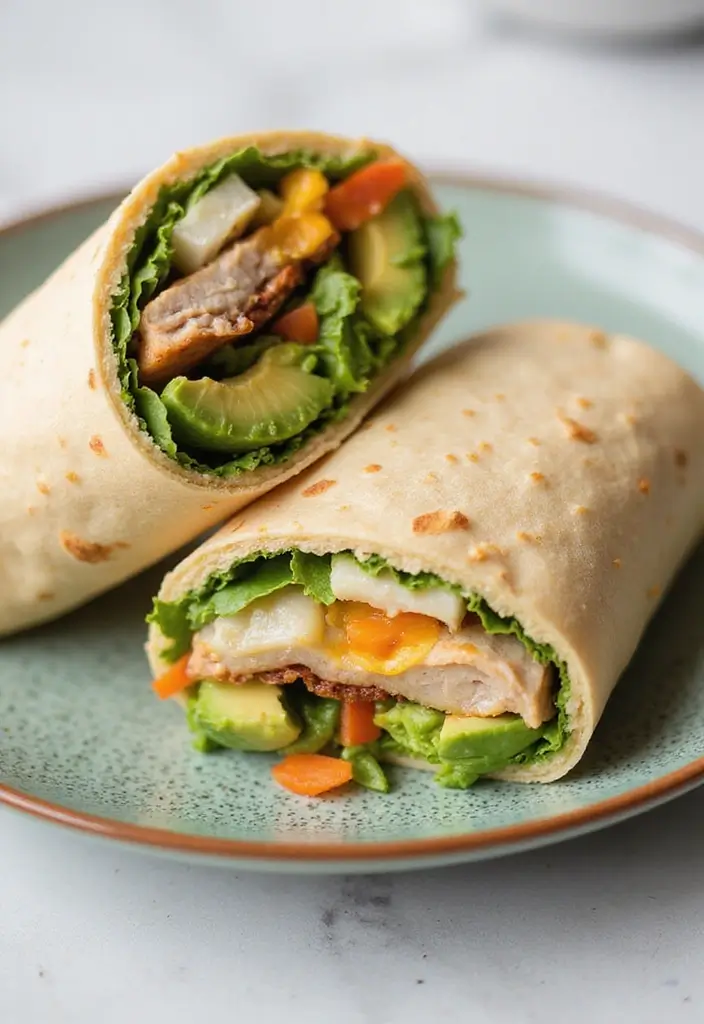
Looking for a quick, tasty lunch that packs a protein punch? A Turkey and Avocado Wrap is your go-to solution! This wrap is not just satisfying; it’s a delightful mix of flavors and textures. The creamy avocado pairs perfectly with juicy turkey and fresh veggies, making every bite enjoyable. Plus, it’s super easy to whip up in just five minutes!
To make it extra healthy, choose a whole grain tortilla or opt for lettuce leaves for a low-carb delight. Just layer your ingredients, roll it up, and you’re ready to take on the rest of your day!
Here’s what you’ll need:
– 1 whole grain tortilla
– 4 slices turkey breast
– 1/2 avocado, sliced
– 1/2 cup lettuce
– 1/4 cup diced tomatoes
– Mustard or mayo for spreading (optional)
Follow these simple steps:
1. Lay the tortilla flat and spread mustard or mayo if you like.
2. Layer turkey, avocado, lettuce, and tomatoes on top.
3. Roll the tortilla tightly, then slice it in half for easy eating.
Want to kick it up a notch?
• Add cheese for extra creaminess.
• Mix in your favorite sauce or dressing for a flavor boost.
This wrap isn’t just quick; it’s also a nutritious choice! Each serving contains about 300 calories, with 20g of protein. Perfect for a busy work-from-home lunch!
FAQs:
• Can I switch the protein? Yes, chicken or ham works great too!
• How do I prevent it from getting soggy? Keep the sauce separate until you’re ready to enjoy your wrap.
This Turkey and Avocado Wrap is a fun, satisfying lunch that fuels your day with energy and flavor!
Fun fact: a Turkey and Avocado Wrap can deliver about 20g of protein in just five minutes, boosting focus for work-from-home lunch ideas. Pair with a whole grain tortilla for fiber and steady energy throughout the afternoon.
Turkey and Avocado Wrap
Editor’s Choice


50 Pack (100-Piece) 32 oz Meal Prep Containers Reusable with Lids 3-Comp…
 Amazon$21.99
13. Shakshuka
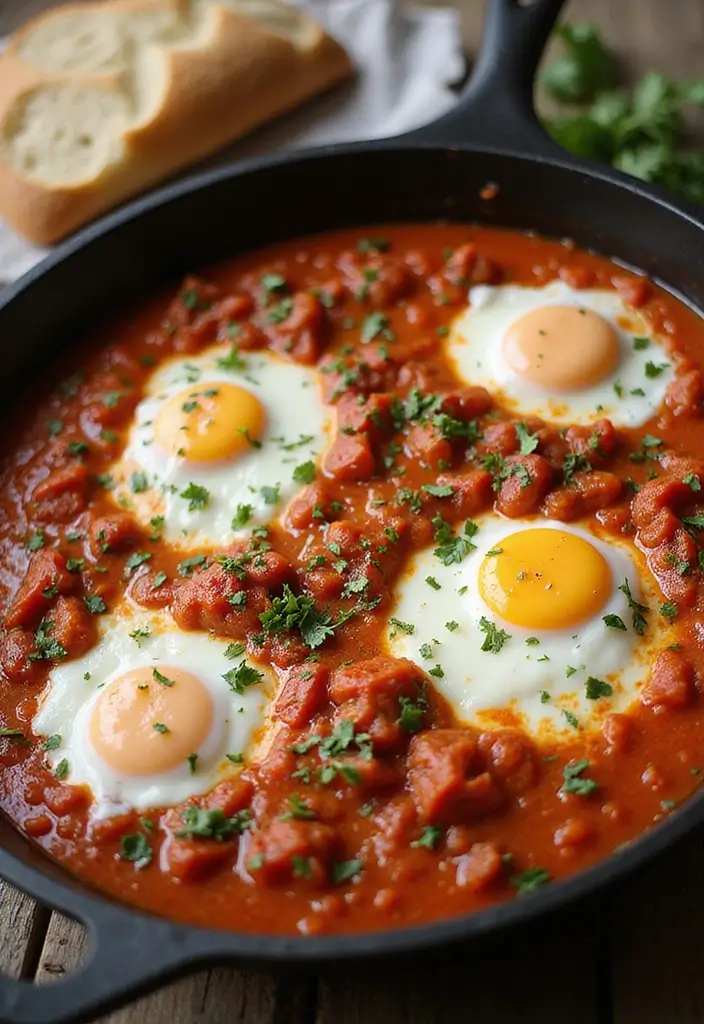
Brighten up your lunch break with a delicious plate of Shakshuka. This North African and Middle Eastern delight features poached eggs nestled in a spicy tomato sauce. It’s not just a feast for your taste buds; it’s also a protein-packed meal that fuels your afternoon.
Pair it with crusty bread for a delightful dipping experience. The best part? You can whip it up in one pan, which means less time cleaning and more time enjoying your meal!
Here’s how to make your own Shakshuka:
Ingredients:
– 2 tbsp olive oil
– 1 onion, diced
– 2 bell peppers, diced
– 4 tomatoes, diced
– 4 eggs
– 1 tsp paprika
– Salt and pepper to taste
– Fresh parsley for garnish
Instructions:
1. Heat the olive oil in a pan over medium heat. Add the diced onions and peppers. Sauté until they soften, about 5 minutes.
2. Stir in the diced tomatoes, paprika, salt, and pepper. Let it simmer for 10 minutes.
3. Create small wells in the sauce and crack an egg into each well.
4. Cover the pan and cook until the eggs are set to your preference.
5. Garnish with fresh parsley and serve with crusty bread for dipping.
Want to elevate your dish? Add feta cheese for a creamy twist! If you prefer a milder flavor, feel free to reduce the paprika to suit your taste.
FAQs:
– Can I prepare Shakshuka ahead of time? Yes, it reheats beautifully!
– What if I don’t like spicy? Adjust the spices to your liking.
This Shakshuka recipe is a perfect way to refresh your lunch routine. It’s flavorful, satisfying, and sure to impress your taste buds during that midday break!
Shakshuka
Editor’s Choice

Lodge 12 Inch Cast Iron Skillet with Red Silicone Hot Handle Holder – Pr…
 Amazon$39.90
Olive Oil Dispenser Bottle, 2 Pcs Glass Olive Oil Dispenser and Vinegar …
 Amazon$8.54
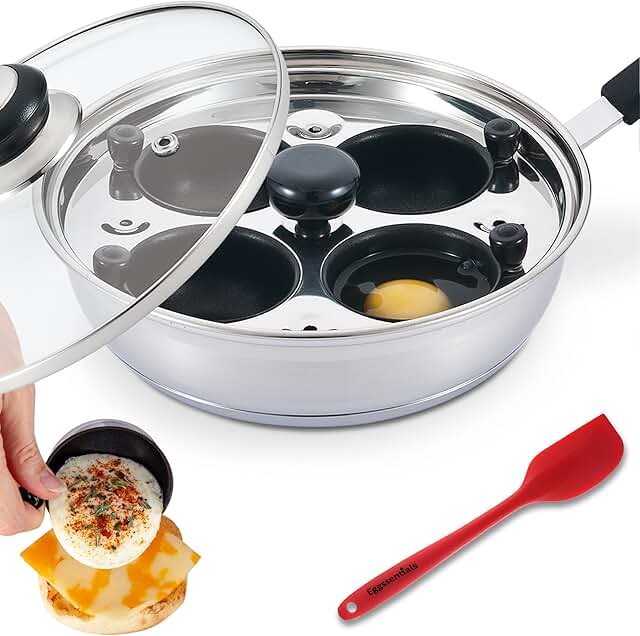
Egg Poacher – Eggssentials Poached Egg Maker, Stainless Steel Egg Poachi…
 Amazon$39.97
14. Coconut Curry with Chickpeas
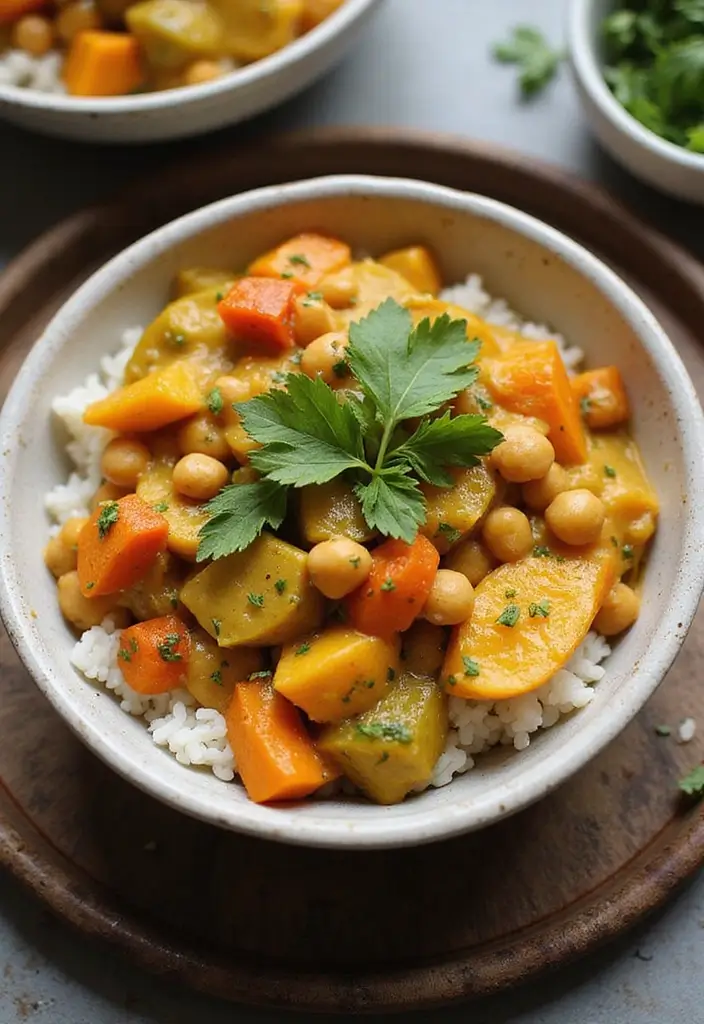
Warm up your lunch hour with a delicious bowl of Coconut Curry with Chickpeas. This vegan delight is not just creamy and rich; it’s packed with flavor and spices that will tickle your taste buds. The combination of coconut milk and chickpeas with your favorite veggies creates a nutritious, hearty meal that you can whip up in no time.
Imagine sitting down to a steaming bowl of curry, the fragrant aroma filling the air. Serve it over fluffy rice or alongside warm naan to make it even more satisfying. This recipe is perfect for batch cooking, allowing you to enjoy it multiple days a week without the hassle of daily prep.
Here’s how to make this cozy dish:
Ingredients:
– 1 can coconut milk
– 1 can chickpeas, drained
– 2 cups mixed vegetables (like broccoli, bell peppers, or carrots)
– 2 tablespoons curry paste
– 1 cup vegetable broth
– Cooked rice or naan for serving
Instructions:
1. In a large pot, heat the coconut milk and curry paste over medium heat.
2. Add the chickpeas and mixed vegetables, then pour in the vegetable broth.
3. Let it simmer for about 15 minutes, or until the veggies are tender.
4. Serve hot over rice or with naan for a complete meal.
Need to adjust the spice level? Just tweak the amount of curry paste to your liking. For a fresh touch, sprinkle some chopped cilantro on top before serving.
FAQs:
– Is this dish gluten-free? Yes, just choose gluten-free naan.
– Can I swap protein? Try using tofu or chicken for variety!
This warming curry is ideal for those chilly lunch moments when you crave something hearty yet healthy! Enjoy your cozy meal!
Coconut Curry with Chickpeas
Editor’s Choice

Thai Kitchen Gluten Free Unsweetened Coconut Milk, 13.66 fl oz (Pack of 12)
 Amazon$18.96
Mae Ploy Green Curry Paste, Authentic Thai Green Curry Paste for Thai Cu…
 Amazon$11.35
Stonefire Tandoor Baked Mini Naan, 7.05 oz (Frozen)
 AmazonCheck Price
15. Grilled Veggie and Hummus Wrap
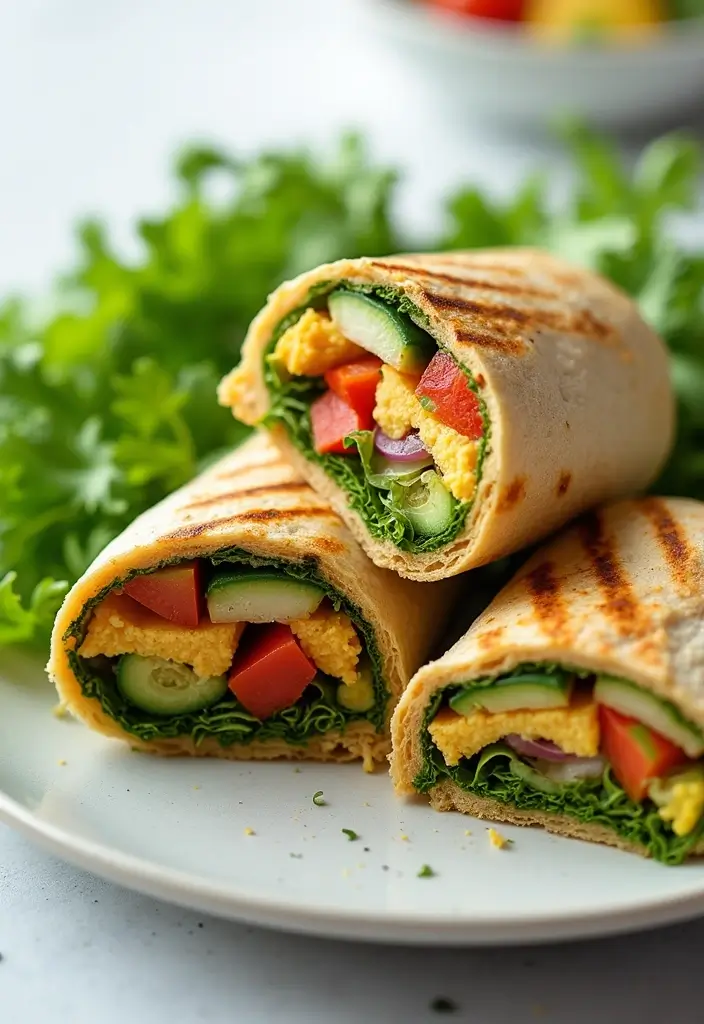
Looking for a quick and delicious lunch that feels a bit fancy? Try the Grilled Veggie and Hummus Wrap. This wrap is a delightful mix of grilled vegetables and creamy hummus, all snugly wrapped in a soft tortilla. It’s not just tasty; it’s a meal that can elevate your lunch experience during those busy workdays. Plus, you can grill your veggies ahead of time, making it super convenient!
This wrap is colorful, packed with flavor, and perfect for anyone wanting to enjoy a healthy meal without a lot of fuss. It’s a fantastic way to use seasonal produce, and you can customize it to your taste!
Here’s how you can whip it up:
Overview:
– Servings: 2
– Prep Time: 10 min
– Cook Time: 10 min
– Total Time: 20 min
– Calories: 300 per wrap
Nutrition Information:
– Protein: 9g
– Carbohydrates: 40g
– Fats: 10g
– Fiber: 6g
Ingredients:
– 2 whole grain tortillas
– 1 zucchini, sliced
– 1 bell pepper, sliced
– 1 eggplant, sliced
– 1 cup hummus
– Olive oil for grilling
– Salt and pepper to taste
Instructions:
1. Preheat your grill or grill pan to medium heat.
2. Toss the sliced veggies in olive oil, salt, and pepper for flavor.
3. Grill the vegetables for about 4-5 minutes on each side until they’re tender and slightly charred.
4. Spread hummus over each tortilla. Top with the grilled veggies, then roll them up tightly.
Want to take it up a notch? Add fresh herbs like basil or parsley for an extra flavor boost. For more protein, consider adding grilled chicken or tofu!
FAQs:
– Can I use any veggies? Absolutely! Feel free to mix in your favorites.
– How do I store leftovers? Just wrap them in foil and refrigerate for up to 2 days.
This wrap is not only a great way to enjoy healthy seasonal veggies, but it also makes your lunch feel special. Give it a try—your taste buds will thank you!
Grilled Veggie and Hummus Wrap
Editor’s Choice

365 By Whole Foods Market, Organic Original Hummus, 16 Ounce
 Amazon$5.69
SENSARTE Nonstick Grill Pan for Stove Tops, Versatile Griddle with Pour …
 Amazon$19.99
16. Baked Salmon with Asparagus
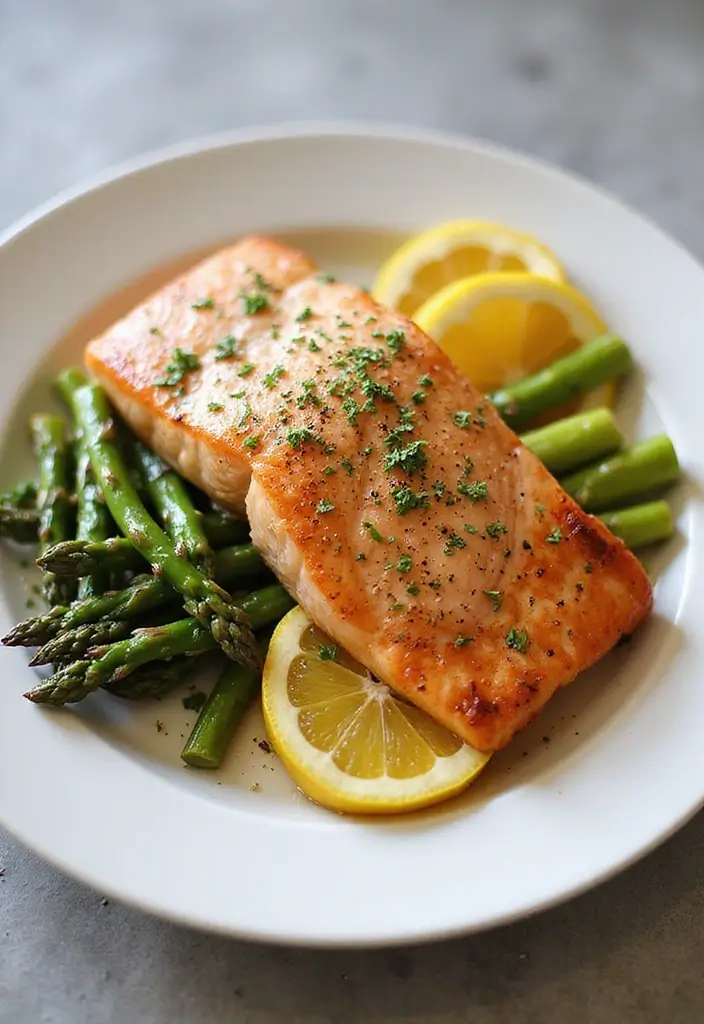
Looking for a quick yet classy lunch to brighten your work-from-home day? Try Baked Salmon with Asparagus. This dish is not only delicious; it’s packed with omega-3 fatty acids, making it a smart choice for your health. Imagine the rich flavor of salmon paired with vibrant, tender asparagus, all cooked to perfection in just 20 minutes!
To whip this up, you just need to season the salmon with your favorite herbs, toss it on a baking sheet with asparagus, and let the oven do the magic. The aroma that fills your kitchen will make your mouth water. Plus, it’s a meal that looks impressive, so it’s perfect for video calls or impressing your family!
Here’s how to make it:
Overview:
– Servings: 2
– Prep Time: 5 min
– Cook Time: 15 min
– Total Time: 20 min
– Calories: 400 per serving
Nutrition Information:
– Protein: 35g
– Carbohydrates: 6g
– Fats: 28g
– Fiber: 3g
Ingredients:
– 2 salmon fillets
– 1 bunch asparagus, trimmed
– 2 tbsp olive oil
– 1 lemon, sliced
– Salt and pepper to taste
Instructions:
1. Preheat your oven to 400°F (200°C).
2. Arrange the salmon and asparagus on a baking sheet. Drizzle with olive oil, and sprinkle salt and pepper on top.
3. Place lemon slices on the salmon for extra flavor.
4. Bake for 12-15 minutes until the salmon flakes easily with a fork.
For a complete meal, serve this dish alongside a side of quinoa. You could also switch up the herbs—try dill or rosemary for a delightful twist!
FAQs:
– Can I eat salmon every day? Yes, but moderation is key!
– Is frozen salmon okay? Absolutely, just adjust the cooking time slightly.
Enjoy this vibrant dish that’s simple to make and bursting with flavor—perfect for your busy day!
Baked Salmon with Asparagus
Editor’s Choice

GoodCook Everyday Nonstick Carbon Steel Baking Sheet Set, 3 Pack – Small…
 Amazon$17.99
AOZITA 17oz Glass Olive Oil Bottle Dispenser – 500ml Green Oil and Vineg…
 Amazon$9.99
Amazon Fresh Brand, Wild Caught Pink Salmon Skinless Fillet Portions, Fr…
 Amazon$8.49
17. Lentil Soup
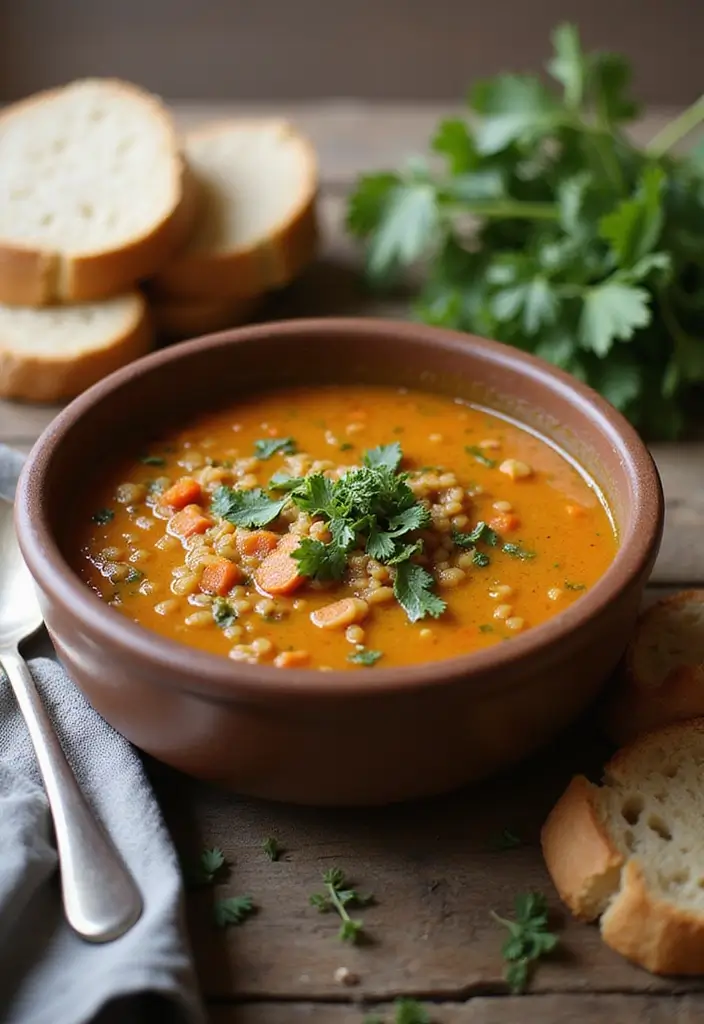
There’s nothing quite like a steaming bowl of Lentil Soup to fuel your busy workday. This dish is hearty, flavorful, and packed with nutritious ingredients. With lentils, fresh vegetables, and aromatic spices, it warms you up and keeps your energy high.
You can whip up a big pot of this soup in no time and store it in the fridge or freezer for quick lunches all week. Pair it with crusty bread for a satisfying meal that feels like a hug in a bowl!
Overview:
– Servings: 4
– Prep Time: 10 min
– Cook Time: 30 min
– Total Time: 40 min
– Calories: 250 per serving
Nutrition Information:
– Protein: 17g
– Carbohydrates: 40g
– Fats: 5g
– Fiber: 15g
Ingredients:
– 1 cup lentils, rinsed
– 1 onion, diced
– 2 carrots, diced
– 2 celery stalks, diced
– 4 cups vegetable broth
– 1 tsp cumin
– Salt and pepper to taste
Instructions:
1. In a large pot, sauté the onions, carrots, and celery until they’re soft and fragrant.
2. Stir in the lentils, vegetable broth, cumin, salt, and pepper.
3. Bring the mixture to a boil, then reduce the heat and let it simmer for about 30 minutes until the lentils are tender.
4. If you like a creamy texture, blend it with an immersion blender until smooth.
Want to make it even healthier? Add some fresh spinach or kale for extra nutrients. Top it off with a sprinkle of feta cheese for a burst of flavor.
FAQs:
– Can I freeze this soup? Yes, it freezes well for up to 3 months.
– How do I know when lentils are done? They should be tender but not mushy.
This lentil soup is perfect for those chilly afternoons when you crave something warm and comforting!
Lentil Soup
Editor’s Choice

KitchenAid Variable Speed Corded Hand Blender KHBV53, Contour Silver
 AmazonCheck Price
50 Pack (100-Piece) 24 oz Meal Prep Containers Reusable with Lids, Sturd…
 Amazon$23.99
Jiva Organic Split Red Lentils 4 Pound LARGE Bag – Masoor Dal – Non-GMO,…
 Amazon$16.99
18. Pita Bread with Tzatziki and Veggies
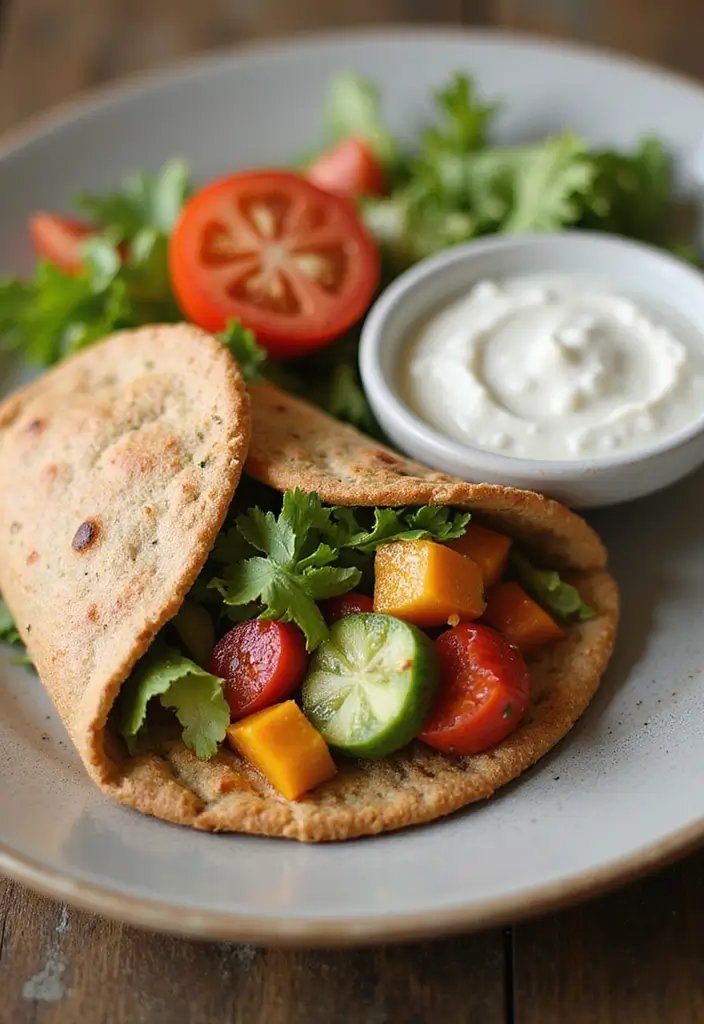
Savor the fresh taste of Pita Bread with Tzatziki and Veggies for a quick and satisfying work-from-home lunch. This Mediterranean-inspired dish is not just easy to make; it also delivers a burst of flavor and crunch. The creamy tzatziki sauce, made with yogurt, cucumber, and herbs, perfectly complements crisp vegetables like cucumbers, bell peppers, and cherry tomatoes. You’ll love how refreshing this meal feels, especially when you’re on a tight schedule.
Preparing this dish takes only about five minutes. Simply pack everything into whole grain pita pockets for a healthy, satisfying meal. This is a fantastic way to sneak in your daily veggie servings without sacrificing taste. Plus, it’s a fun dish to share with family or friends during a lunch break!
Ingredients:
– 2 whole grain pita breads
– 1 cup tzatziki sauce
– 1 cucumber, sliced
– 1 bell pepper, sliced
– 1 cup cherry tomatoes, halved
Instructions:
1. Cut each pita bread in half to create pockets.
2. Stuff each pocket with tzatziki sauce and your choice of veggies.
3. Serve right away and enjoy every bite!
Feel free to get creative! Add olives for a salty punch. If you want a homemade touch, make your tzatziki sauce using Greek yogurt for an even creamier texture.
FAQs:
– Can I use Greek yogurt for tzatziki? Yes, it adds creaminess!
– What else can I add? Try adding grilled chicken or feta cheese for extra flavor!
This pita bread dish is quick, light, and perfect for keeping your energy up while you work from home!
Pita Bread with Tzatziki and Veggies
Editor’s Choice

Joseph’s Bakery Whole Wheat Pita Bread, 1-Pack, Fresh Baked (4 Pitas per…
 Amazon$2.98
McCormick Greek Style Gyro Seasoning with Tzatziki Sauce Mix, 1.5 oz (Pa…
 AmazonCheck Price
Mueller The Real Original Pro Chopper since 2013 Vegetable Chopper Mando…
 Amazon$29.99
19. Apple and Almond Butter Sandwich

Looking for a quick and satisfying lunch that won’t weigh you down? Try an Apple and Almond Butter Sandwich. This delightful treat combines the crispness of fresh apples with the creamy richness of almond butter. It’s not just tasty; it’s also packed with healthy fats and fiber that keep you full and energized throughout your day.
To make this sandwich, simply slice your favorite apple into rounds. Spread a generous layer of almond butter on half of those slices, then top with the remaining apple rounds to create a delicious sandwich. If you’re feeling adventurous, a sprinkle of cinnamon on top adds a warm touch. This meal is perfect for those busy afternoons when you need something light yet satisfying!
Here’s how to whip it up:
Overview:
– Servings: 1
– Prep Time: 5 min
– Cook Time: 0 min
– Total Time: 5 min
– Calories: 300 per serving
Nutrition Information:
– Protein: 6g
– Carbohydrates: 35g
– Fats: 18g
– Fiber: 5g
Ingredients:
– 1 apple (any variety you love)
– 2 tbsp almond butter
– Optional: sprinkle of cinnamon
Instructions:
1. Slice the apple into rounds.
2. Spread almond butter on half of the slices.
3. Top with the remaining apple slices to form a sandwich.
4. If you like, sprinkle with a dash of cinnamon for added flavor.
Want to mix it up?
Try these tips:
– Use different nut butters like peanut or sunflower seed butter.
– Add raisins or granola for a crunchy twist!
FAQs:
– Can I use peanut butter instead? Yes, it works great!
– How do I keep the apple from browning? A light sprinkle of lemon juice does the trick!
This sandwich is not just a meal; it’s a fun way to enjoy a healthy snack that satisfies your sweet tooth. Perfect for a busy work-from-home day or a quick midday pick-me-up!
Apple and Almond Butter Sandwich
Editor’s Choice

365 by Whole Foods Market, Organic Creamy Almond Butter, 16 Ounce
 Amazon$13.99
Fruit Slicer Cup – Strawberry, Banana, Grape Cutter, Egg Slicer for Hard…
 Amazon$6.99
365 by Whole Foods Market, Organic Ground Cinnamon, 1.9 Ounce (Pack of 2)
 AmazonCheck Price
20. Spinach and Feta Omelette
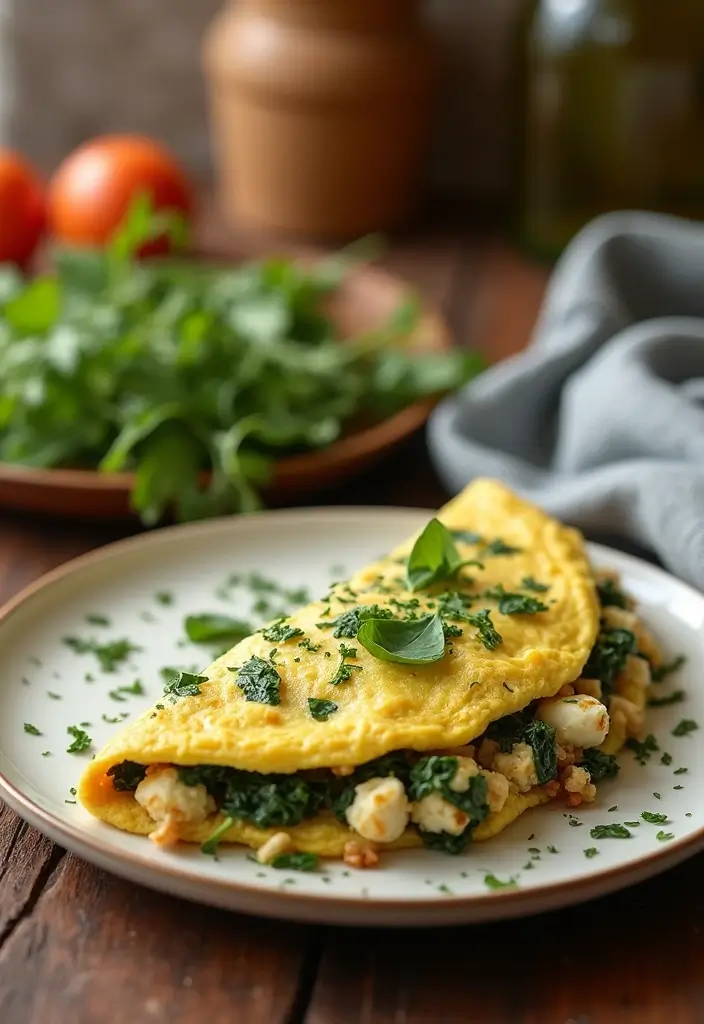
Elevate your lunch game with a scrumptious Spinach and Feta Omelette. This dish isn’t just tasty; it’s loaded with protein and essential nutrients, making it an ideal choice for a midday boost. Plus, it’s quick to whip up, so you won’t waste precious work time.
Imagine fluffy eggs mingling with fresh spinach and tangy feta. The vibrant green of the spinach pops against the creamy white cheese, making your plate as appealing as it is satisfying. You can even throw in extra veggies like bell peppers or onions for a flavor-packed experience that Pinterest users rave about.
Ready to make it? Here’s how to create this delightful omelette in just ten minutes. It’s budget-friendly and requires minimal ingredients. You’ll enjoy a fresh, fulfilling meal that keeps your energy levels up for the rest of the day.
Ingredients:
– 2 eggs
– 1 cup fresh spinach
– 1/4 cup feta cheese, crumbled
– Salt and pepper to taste
– Olive oil or butter for cooking
Instructions:
1. Start by whisking the eggs in a bowl with salt and pepper.
2. Heat a small amount of olive oil or butter in a skillet over medium heat.
3. Add the spinach and sauté until it wilts, about 1-2 minutes.
4. Pour the whisked eggs into the skillet, allowing them to cook until nearly set.
5. Sprinkle the feta on top, fold the omelette in half, and let it cook for another minute.
6. Serve hot and enjoy!
Want a twist? Add a dollop of salsa for a spicy kick!
FAQs:
– Can I use egg whites? Absolutely! It’s a lighter option that still tastes great.
– How do I store leftovers? Keep them in an airtight container in the fridge for up to 2 days.
This delicious omelette not only satisfies your hunger but also supports your health. Enjoy a nutritious lunch that’s packed with flavor and easy to prepare!
Spinach and Feta Omelette
Editor’s Choice

CAROTE Nonstick Frying Pan Skillet,Non Stick Granite Fry Pan Egg Pan Ome…
 Amazon$14.99
Stainless Steel Egg Whisk, Hand Push Rotary Whisk Blender, Versatile Mil…
 Amazon$7.15
Airtight Food Storage Containers with Lids, Vtopmart 24 pcs Plastic Kitc…
 Amazon$35.99
21. Thai Peanut Quinoa Bowl
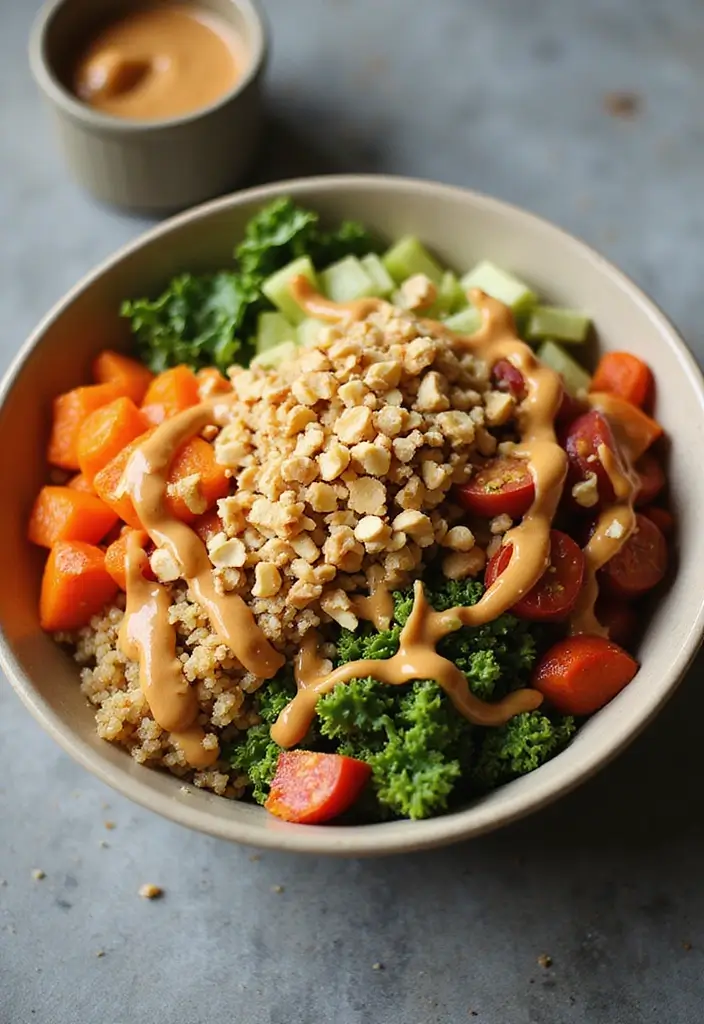
Craving a satisfying lunch that’s both quick and delicious? Look no further than the Thai Peanut Quinoa Bowl. This meal combines fluffy quinoa, packed with protein, and colorful vegetables, all drizzled with a creamy peanut sauce. It’s a vibrant, flavorful dish that will keep you energized for the rest of your workday.
Making this bowl is simple and perfect for meal prep. You can whip it up in just 25 minutes, so it’s ideal for busy afternoons. The peanut sauce adds a nutty richness that balances perfectly with the fresh veggies. Plus, it’s a versatile recipe—feel free to mix in your favorite ingredients!
Overview:
– Servings: 2
– Prep Time: 10 min
– Cook Time: 15 min
– Total Time: 25 min
– Calories: 400 per serving
Nutrition Information:
– Protein: 15g
– Carbohydrates: 60g
– Fats: 15g
– Fiber: 8g
Ingredients:
– 1 cup quinoa, rinsed
– 2 cups mixed vegetables (like carrots, bell peppers, or broccoli)
– 1/4 cup peanut butter
– 1 tbsp soy sauce
– 1 tbsp honey or maple syrup
– Water to thin the sauce
Instructions:
1. Cook the quinoa according to the package instructions.
2. Steam or sauté the mixed vegetables until tender.
3. In a small bowl, whisk together the peanut butter, soy sauce, honey (or maple syrup), and enough water to make a smooth sauce.
4. In serving bowls, layer the cooked quinoa, veggies, and drizzle generously with the peanut sauce.
Want to add more protein? Include grilled chicken or tofu. For a delightful crunch, sprinkle some crushed peanuts on top.
FAQs:
– Is this vegan? Yes, just use maple syrup for sweetness!
– Can I swap the quinoa? Absolutely! Brown rice or farro are great alternatives.
This Thai Peanut Quinoa Bowl is not just a meal; it’s a burst of flavor that will keep you full and satisfied. Enjoy your lunch without the hassle, and keep your energy up throughout your workday!
Thai Peanut Quinoa Bowl
Editor’s Choice

Pride Of India – Natural Red Royal Quinoa – 100% Bolivian Superior Grade…
 Amazon$11.99
Amazon Grocery, Crunchy Peanut Butter, 40 Oz, Pack of 2 (Previously Amaz…
 AmazonCheck Price
50 Pack (100-Piece) 32 oz Meal Prep Containers Reusable with Lids 3-Comp…
 Amazon$21.99
22. Berry Smoothie Bowl
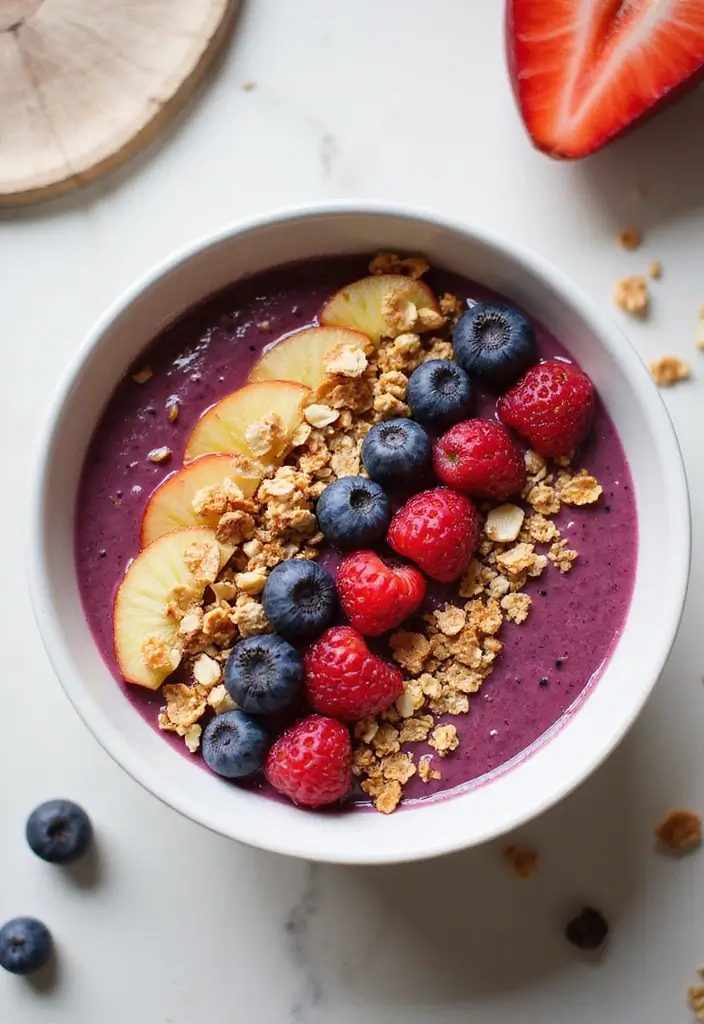
Looking for a quick and healthy lunch that energizes you? Try a Berry Smoothie Bowl. This delightful dish is not only refreshing but also packed with antioxidants and vitamins. It’s a perfect midday treat that will leave you feeling revitalized and ready to tackle the rest of your day.
To make this smoothie bowl, simply blend a mix of your favorite berries with yogurt or almond milk until smooth. Pour it into a bowl and get creative with toppings! Add granola, nuts, and fresh fruit. This meal looks as stunning as it tastes, making it a feast for both your eyes and your taste buds.
Here’s how to whip it up:
Ingredients:
– 1 cup mixed berries (strawberries, blueberries, raspberries)
– 1/2 cup yogurt or almond milk
– 1/4 cup granola
– Toppings: sliced fruit, nuts, seeds
Instructions:
1. In a blender, combine the mixed berries and yogurt or almond milk. Blend until smooth.
2. Pour your smoothie into a bowl.
3. Top with granola, sliced fruit, and your choice of nuts or seeds.
Want to boost the nutrition even more? Add spinach or kale to your blender. You won’t taste the greens, but your body will thank you. Feel free to experiment with toppings for endless variety!
FAQs:
– Can I use frozen berries? Yes! Just blend a little longer for the right consistency.
– Is this recipe vegan? Absolutely! Just use almond milk and dairy-free yogurt.
This Berry Smoothie Bowl is a delicious, quick solution for your lunch cravings, perfect for a midday energy boost! Enjoy your vibrant and nutritious meal!
Berry Smoothie Bowl
Editor’s Choice

Ninja BL660 Professional Compact Smoothie & Food Processing Blender, 110…
 Amazon$99.99
Oatsome Granola Variety Pack – Berry Coconut (6g Protein), Vanilla Almon…
 AmazonCheck Price
23. Savory Oatmeal with Egg
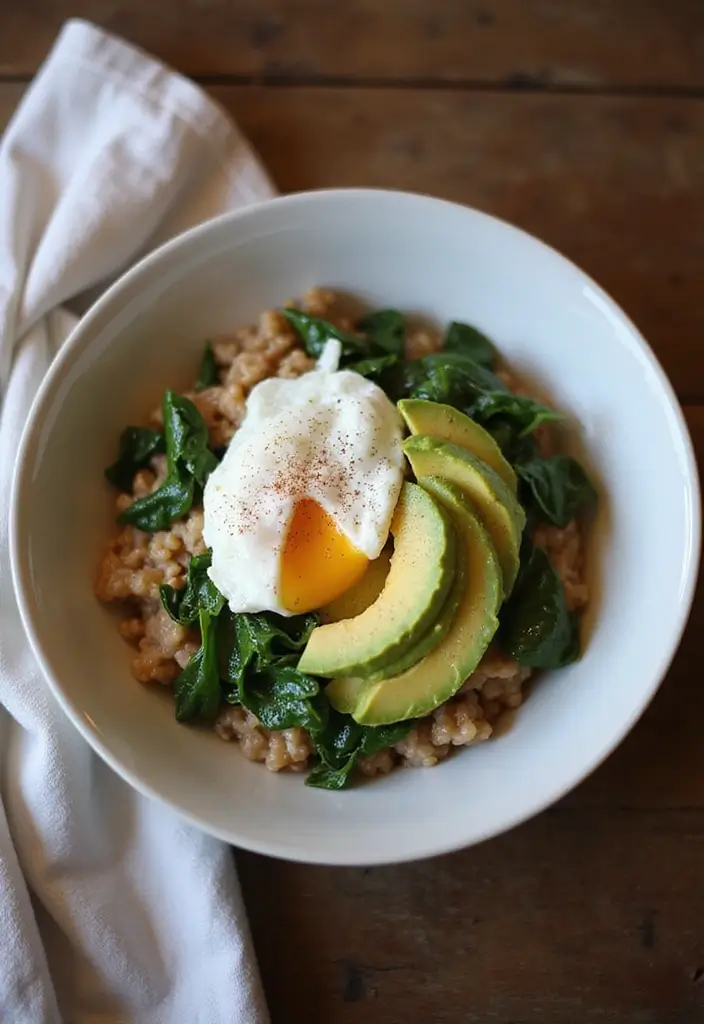
Break away from your usual lunch choices and try Savory Oatmeal with Egg. This dish is not only quick to make but also loaded with nutrients. Picture creamy oats topped with a perfectly poached egg, fresh spinach, and creamy avocado. It’s a filling meal that will keep you energized for the rest of the day!
You can whip this up in just 10 minutes, making it ideal for busy work-from-home days. Oatmeal isn’t just for breakfast; it’s a versatile base that can transform into a savory delight. Plus, it helps curb hunger, so you won’t be reaching for snacks later!
Here’s how to make it:
Overview:
– Servings: 1
– Prep Time: 5 min
– Cook Time: 5 min
– Total Time: 10 min
– Calories: 300 per serving
Nutrition Information:
– Protein: 12g
– Carbohydrates: 40g
– Fats: 12g
– Fiber: 8g
Ingredients:
– 1/2 cup rolled oats
– 1 cup water or vegetable broth
– 1 egg
– 1/2 avocado, sliced
– 1 cup fresh spinach
– Salt and pepper to taste
Instructions:
1. In a saucepan, bring the water or broth to a boil. Add the rolled oats and cook for about 5 minutes, stirring occasionally.
2. While the oats are cooking, poach your egg in another pot of boiling water until the whites are set but the yolk is still runny.
3. Stir the fresh spinach into the oatmeal until it wilts down, adding a splash of color and nutrients.
4. Serve the oatmeal in a bowl. Top it with the poached egg and sliced avocado. Season with salt and pepper for extra flavor.
Feel free to get creative! Add your favorite spices or a drizzle of Sriracha if you like some heat.
FAQs:
– Can I use instant oats? Yes, but adjust the cooking time accordingly.
– Is it gluten-free? Just choose certified gluten-free oats if needed.
This savory oatmeal is perfect for those days when you want something hearty and different for lunch! Enjoy this unique twist on a classic dish!
Savory Oatmeal with Egg
Editor’s Choice

Quaker Old Fashioned Rolled Oats, Non GMO Project Verified, Two 64oz Bag…
 Amazon$7.03
Egg Poacher – Eggssentials Poached Egg Maker, Stainless Steel Egg Poachi…
 Amazon$39.97
24. Grilled Chicken Salad
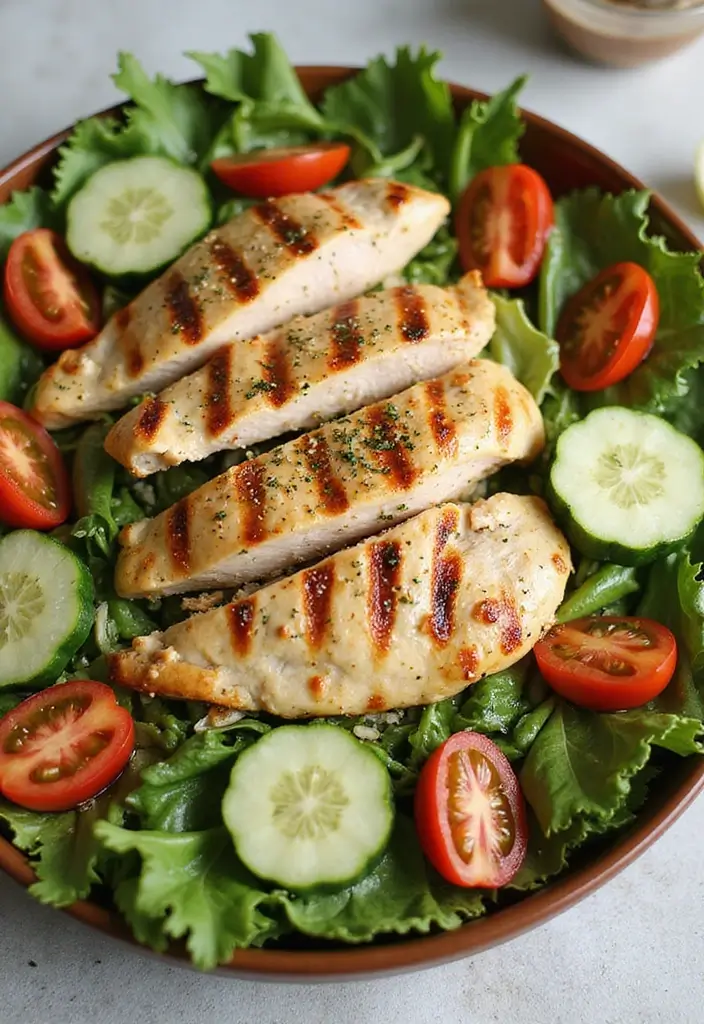
When you need a quick, healthy lunch, a Grilled Chicken Salad is your best friend! This dish is not only delicious but also packed with protein and fresh veggies. It gives you the energy boost you need to power through your workday without feeling heavy. You can whip it up in no time, making it a perfect choice for busy afternoons.
Start with juicy grilled chicken breast. Toss it with crisp mixed greens and a rainbow of vegetables like cherry tomatoes and cucumbers. Drizzle on your favorite dressing, and you’ve got a meal that’s both satisfying and refreshing. Feel free to play around with the recipe—add avocado for creaminess or nuts for a lovely crunch. It’s all about what you enjoy!
Here’s how to make it:
Ingredients:
– 2 grilled chicken breasts, sliced
– 4 cups mixed greens
– 1 cup cherry tomatoes, halved
– 1 cucumber, sliced
– 1/2 red onion, thinly sliced
– Dressing of choice (try a homemade vinaigrette!)
Instructions:
1. In a large bowl, mix the greens, cherry tomatoes, cucumber, and red onion.
2. Add the sliced grilled chicken on top.
3. Drizzle with your dressing and gently toss everything together.
Tips:
– Use leftover chicken to save time!
– Keep the dressing separate until you’re ready to eat for a fresh crunch!
This salad will not only keep you full but also make lunchtime a bit brighter. Enjoy this tasty and nutritious meal that fits perfectly into your busy work-from-home routine!
Grilled Chicken Salad
Editor’s Choice

50 Pack (100-Piece) 32 oz Meal Prep Containers Reusable with Lids 3-Comp…
 Amazon$21.99
OXO Good Grips Salad Spinner | Lettuce Spinner | Fruit Washer | Fruit Wa…
 Amazon$28.99
SENSARTE Nonstick Grill Pan for Stove Tops, Versatile Griddle with Pour …
 Amazon$19.99
25. Cauliflower Rice Bowl
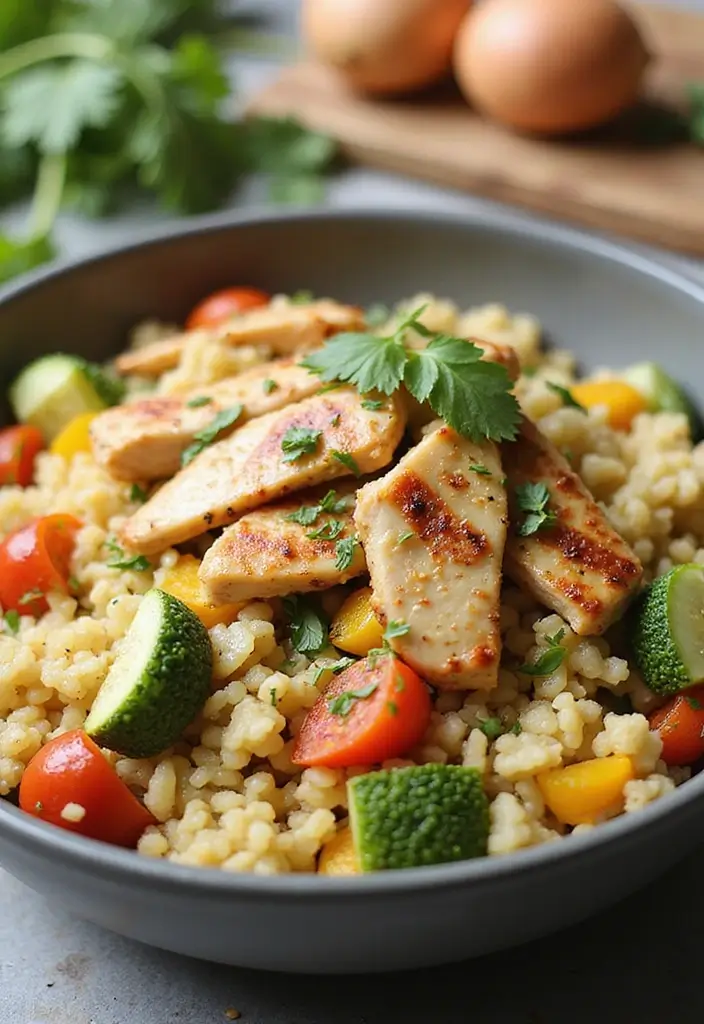
Cauliflower Rice Bowl is a delicious and healthy twist on your typical rice dishes. This meal uses riced cauliflower as a base, making it low in carbs yet packed with nutrients. It’s a perfect choice if you want something light but filling during your busy work-from-home day.
Imagine digging into a colorful bowl topped with grilled chicken and vibrant veggies. You can customize it with your favorite sauce, like soy or teriyaki, to add an extra burst of flavor. Plus, it’s great for meal prep! Make a batch, store it in the fridge, and you have quick lunches ready to go for the week.
Overview:
– Servings: 4
– Prep Time: 10 min
– Cook Time: 10 min
– Total Time: 20 min
– Calories: 200 per serving
Nutrition Information:
– Protein: 12g
– Carbohydrates: 15g
– Fats: 8g
– Fiber: 5g
Ingredients:
– 1 head cauliflower, riced
– 2 cups mixed vegetables (like broccoli, bell peppers, and carrots)
– 1 cup grilled chicken, diced
– Soy sauce or teriyaki sauce for drizzling
Instructions:
1. In a large pan, sauté the riced cauliflower for 5-7 minutes until it’s tender.
2. Add the mixed vegetables and cook until they’re heated through.
3. Stir in the diced grilled chicken and drizzle with soy or teriyaki sauce.
4. Serve hot in bowls, and enjoy!
Tip: Add sesame seeds for a delightful crunch. You can also switch up the sauces to keep things interesting!
FAQs:
– Can I use frozen cauliflower rice? Yes, absolutely! It works just as well.
– How do I store leftovers? Keep them in an airtight container in the fridge for up to 3 days.
This bowl is not just low-carb; it’s a nutritious option that fuels your energy for the rest of the day while you work from home!
Cauliflower Rice Bowl
Editor’s Choice

Kitchen & Love Organic Riced Cauliflower 8 oz (6 Pack) | Low Carb, Low C…
 Amazon$27.19
50 Pack (100-Piece) 24 oz Meal Prep Containers Reusable with Lids, Sturd…
 Amazon$23.99
26. Almond-Crusted Chicken Tenders
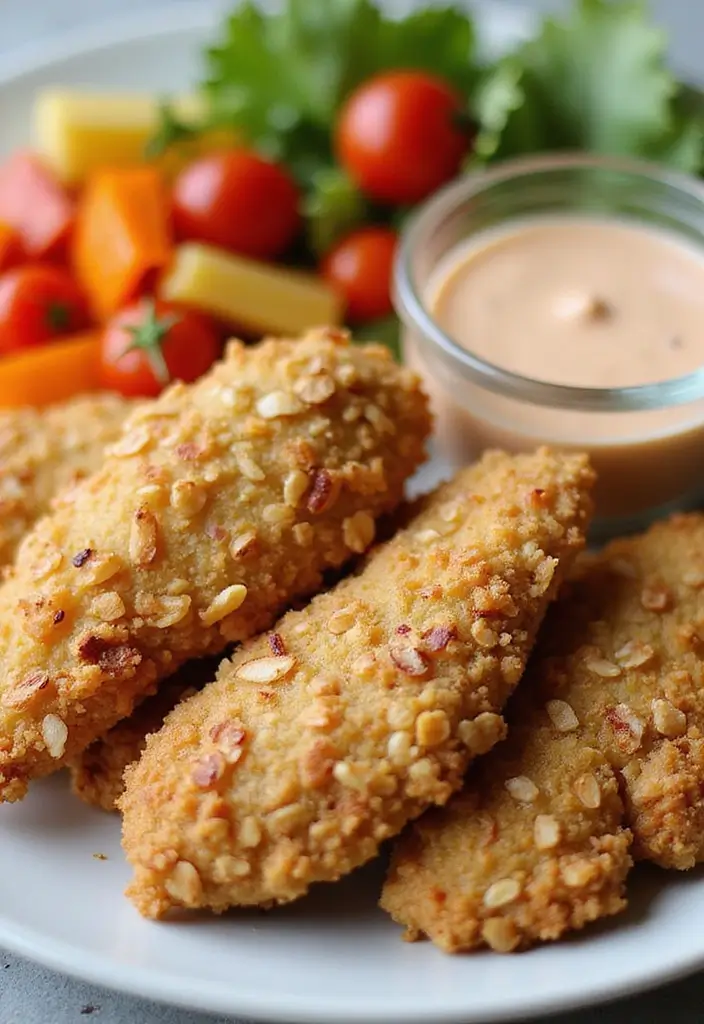
If you’re looking for a quick, healthy meal during your busy work-from-home day, try Almond-Crusted Chicken Tenders. These tenders are baked to crispy perfection, offering a delightful crunch without the guilt of frying. The almond flour coating keeps the carbs low while adding a nutty flavor that pairs beautifully with your favorite dipping sauces.
Imagine enjoying these tenders fresh out of the oven, perfect for a midday snack or tossed into a salad for a more filling lunch. They’re not just easy to make—they’re also a nutritious option that will keep you energized for the rest of your day!
Here’s how to make them:
Overview:
– Servings: 4
– Prep Time: 10 min
– Cook Time: 15 min
– Total Time: 25 min
– Calories: 300 per serving
Nutrition Information:
– Protein: 25g
– Carbohydrates: 10g
– Fats: 20g
– Fiber: 3g
Ingredients:
– 1 lb chicken tenders
– 1 cup almond flour
– 1 egg, beaten
– Salt and pepper to taste
– Olive oil spray
Instructions:
1. Preheat your oven to 425°F (220°C) and line a baking sheet with parchment paper.
2. Season the chicken tenders with salt and pepper.
3. Dip each tender in the beaten egg, then coat it with almond flour.
4. Place the tenders on the baking sheet and lightly spray them with olive oil.
5. Bake for 15 minutes or until they are cooked through and golden brown.
These tenders are excellent served with a side of fresh veggies. You can also experiment with herbs or spices for an extra flavor boost!
FAQs:
– Can I use regular flour instead? Yes, but it will increase the carb count.
– How do I store leftovers? Keep them in an airtight container in the fridge for up to 3 days.
Try this healthy twist on chicken tenders for your next work-from-home lunch. You’ll love how easy and delicious they are!
Keeping work from home lunches simple pays off: almond-crusted chicken tenders bake up in minutes and stay crunchy without frying. Just dunk in your favorite sauce and toss with a salad for a satisfying, low-carb midday boost.
Almond-Crusted Chicken Tenders
Editor’s Choice

Blue Diamond Almonds Almond Flour, Gluten Free, Blanched, Finely Sifted,…
 Amazon$9.91
TrendPlain 16oz/470ml Glass Olive Oil Sprayer for Cooking – 2 in 1 Olive…
 Amazon$8.99
360 Count 12″x 16″ Heavy Duty Parchment Paper Sheets for Baking, No-Stic…
 Amazon$24.99
27. Tomato Basil Soup
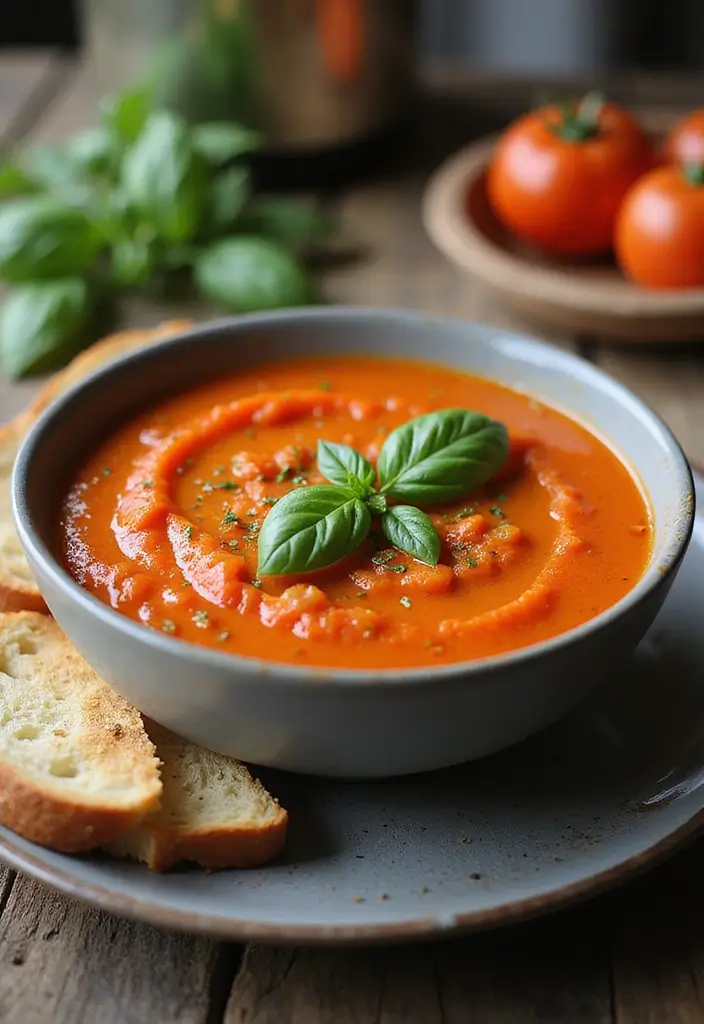
Tomato Basil Soup is a warm hug in a bowl. Imagine the rich, savory taste of tomatoes blended with the fresh, aromatic scent of basil. This classic dish pairs wonderfully with a crispy grilled cheese sandwich, making it a perfect midday meal. Plus, you can whip it up in just 30 minutes!
This soup is not only delicious but also easy to prepare ahead of time. You can store it in the fridge and simply reheat it for a quick lunch break. It’s like your own personal comfort food, ready whenever you need a pick-me-up.
Overview:
– Servings: 4
– Prep Time: 10 min
– Cook Time: 20 min
– Total Time: 30 min
– Calories: 150 per serving
Nutrition Information:
– Protein: 5g
– Carbohydrates: 20g
– Fats: 6g
– Fiber: 3g
Ingredients:
– 3 cups canned crushed tomatoes
– 1 onion, diced
– 2 cloves garlic, minced
– 1 cup vegetable broth
– 1/4 cup fresh basil, chopped
– Olive oil, salt, and pepper to taste
Instructions:
1. Heat olive oil in a pot and sauté the diced onion and minced garlic until they are soft and fragrant.
2. Add the crushed tomatoes and vegetable broth. Season with salt and pepper.
3. Let the mixture simmer for about 15 minutes, allowing the flavors to meld.
4. Stir in the fresh basil and blend the soup with an immersion blender until it’s smooth.
Tips:
– Top your soup with a swirl of cream to enhance the flavor.
– Serve it alongside crusty bread for dipping to make your lunch extra satisfying!
FAQs:
– Can I freeze this soup? Yes, it freezes beautifully for up to 3 months.
– Is it vegan? Absolutely! This dish is plant-based and packed with flavor.
This Tomato Basil Soup is not just a meal; it’s a moment of comfort during your busy work-from-home day. Enjoy the simplicity and satisfaction it brings!
Tomato Basil Soup
Editor’s Choice

Immersion Blender Handheld Corded Hand Blenders Set 1100W, Trigger Varia…
 Amazon$35.99
50 Pack (100-Piece) 32 oz Meal Prep Containers Reusable with Lids 3-Comp…
 Amazon$21.99
AOZITA 17oz Glass Olive Oil Bottle Dispenser – 500ml Green Oil and Vineg…
 Amazon$9.99
28. Balsamic Roasted Vegetable Quinoa Bowl
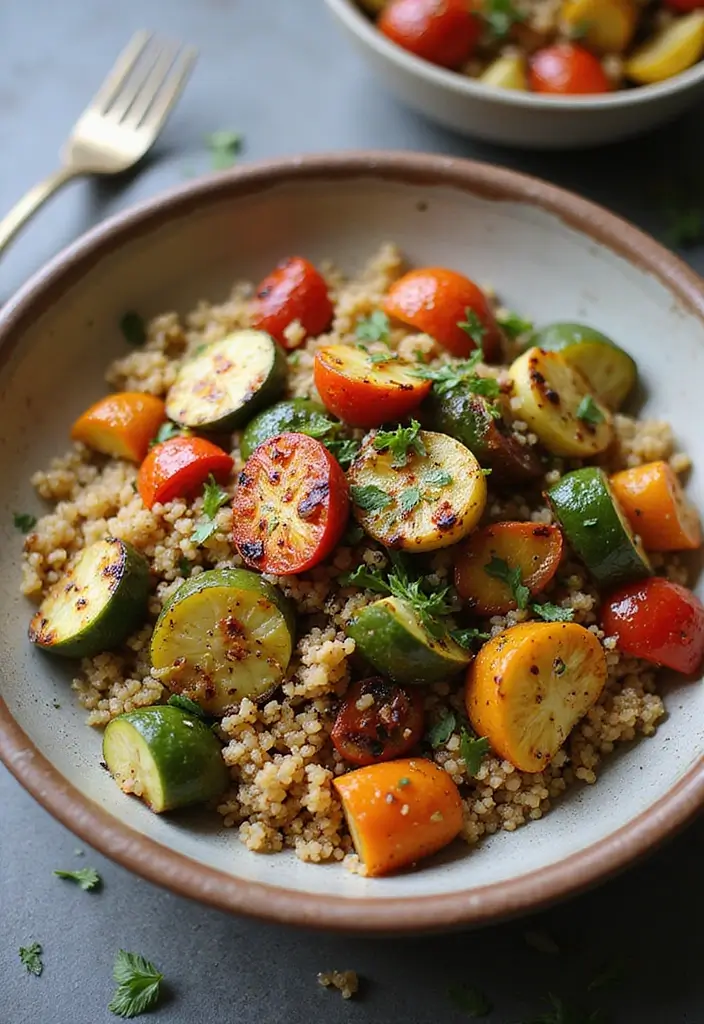
Looking for a quick and nutritious lunch? Try the Balsamic Roasted Vegetable Quinoa Bowl. This colorful dish not only looks great but also bursts with flavor. Roasting vegetables enhances their natural sweetness and the balsamic glaze brings a delightful balance of tanginess.
This bowl is perfect for meal prep. You can whip up a big batch and enjoy it throughout the week. It’s filling, satisfying, and packed with nutrients to help you power through your busy days.
Overview:
– Servings: 4
– Prep Time: 10 minutes
– Cook Time: 30 minutes
– Total Time: 40 minutes
– Calories: 400 per serving
Nutrition Information:
– Protein: 12g
– Carbohydrates: 60g
– Fats: 15g
– Fiber: 8g
Ingredients:
– 1 cup quinoa, rinsed
– 2 cups mixed vegetables (like zucchini, bell peppers, and carrots)
– 1/4 cup balsamic vinegar
– 2 tablespoons olive oil
– Salt and pepper to taste
Instructions:
1. Preheat your oven to 425°F (220°C).
2. In a bowl, toss the mixed vegetables with olive oil, balsamic vinegar, salt, and pepper until well coated.
3. Spread the vegetables on a baking sheet and roast for 25-30 minutes, or until tender and slightly caramelized.
4. Cook the quinoa according to package instructions.
5. Once cooked, serve the roasted veggies over a hearty scoop of quinoa in bowls.
For an extra protein boost, add chickpeas or grilled chicken. You can also experiment with seasonal veggies to enhance flavor and nutrition.
FAQs:
– Can I use frozen vegetables? Yes, just adjust the roasting time to ensure they cook through.
– How do I store leftovers? Keep them in airtight containers in the fridge for up to 4 days.
This bowl is not just a meal; it’s a delicious way to enjoy healthy ingredients while keeping your lunch exciting!
Balsamic Roasted Vegetable Quinoa Bowl
Editor’s Choice

50 Pack (100-Piece) 24 oz Meal Prep Containers Reusable with Lids, Sturd…
 AmazonEUR 20.74
BetterBody Foods Organic Quinoa, Vegan, Gluten Free, Low Glycemic Rice R…
 Amazon$11.49
365 by Whole Foods Market, Organic Balsamic Vinegar of Modena, 16.9 Fl Oz
 Amazon$7.99
29. Whole Wheat Pasta Salad
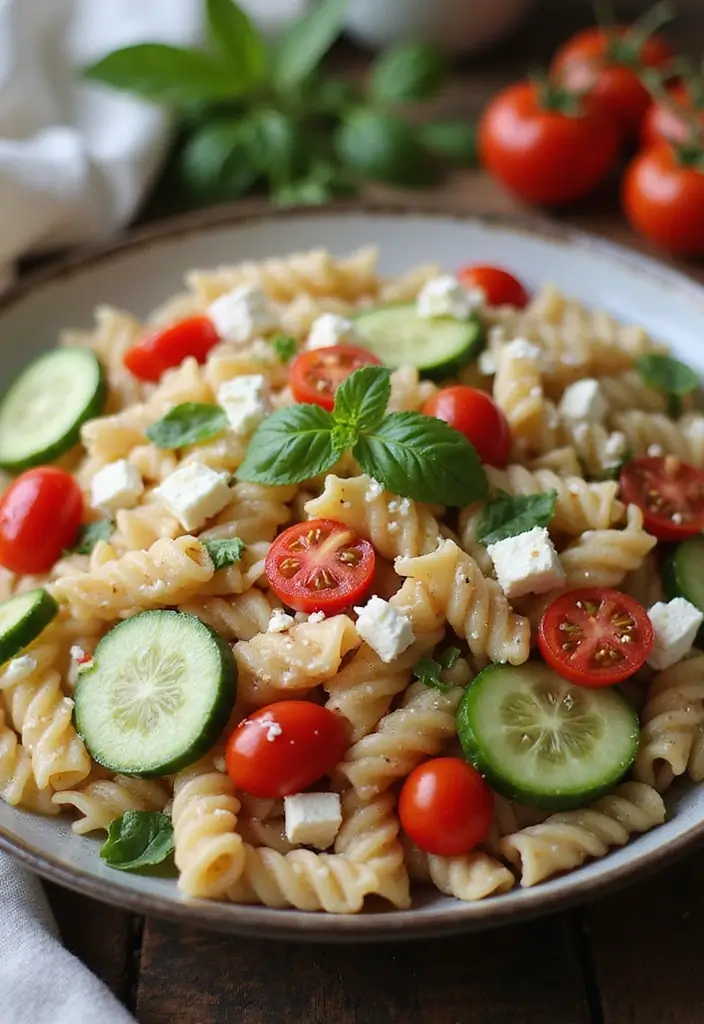
Whole Wheat Pasta Salad is your go-to option for a quick, satisfying lunch at home. This dish is filling and incredibly easy to modify with whatever veggies, cheeses, or proteins you have on hand. Toss it with a zesty vinaigrette, and you have a meal that’s just as delicious cold as it is at room temperature.
Imagine digging into a bowl of colorful pasta, crunchy cucumbers, and sweet cherry tomatoes. The feta crumbles add a creamy touch that complements the whole wheat pasta perfectly. Plus, it’s a fantastic choice for meal prep! Make a big batch on Sunday, and you’ll have tasty lunches ready all week long.
Here’s how to whip up this delightful salad:
Overview:
– Servings: 4
– Prep Time: 10 min
– Cook Time: 10 min
– Total Time: 20 min
– Calories: 350 per serving
Nutrition Information:
– Protein: 12g
– Carbohydrates: 55g
– Fats: 10g
– Fiber: 5g
Ingredients:
– 2 cups whole wheat pasta
– 1 cup cherry tomatoes, halved
– 1 cup cucumbers, diced
– 1/4 cup feta cheese, crumbled
– 1/4 cup olive oil
– 2 tbsp red wine vinegar
– Salt and pepper to taste
Instructions:
1. Cook whole wheat pasta according to package instructions. Drain and let it cool.
2. In a large bowl, combine the cooled pasta, cherry tomatoes, cucumbers, and feta cheese.
3. In a small bowl, whisk together olive oil, red wine vinegar, salt, and pepper.
4. Pour the dressing over the pasta salad and toss everything to combine well.
Want more protein? Add grilled chicken or chickpeas!
Looking for a pop of color? Use a variety of vibrant veggies.
FAQs:
– Can I make this ahead of time? Yes, it stays fresh in the fridge for up to 4 days.
– Is it gluten-free? You can easily switch to gluten-free pasta if needed.
This Whole Wheat Pasta Salad is not just another lunch; it’s a delightful, healthy meal that fits perfectly into your work-from-home routine! Enjoy deliciousness that keeps you energized throughout your busy day.
Whole Wheat Pasta Salad
Editor’s Choice

365 by Whole Foods Market, Organic Whole Wheat Penne Rigate, 16 Ounce
 Amazon$2.49
Pompeian Robust Extra Virgin Olive Oil, Contains Polyphenols, First Cold…
 Amazon$15.64
8 Pack 36oz Large Glass Meal Prep Containers with lids, Glass Food Stora…
 Amazon$30.39
30. Cabbage and Apple Slaw
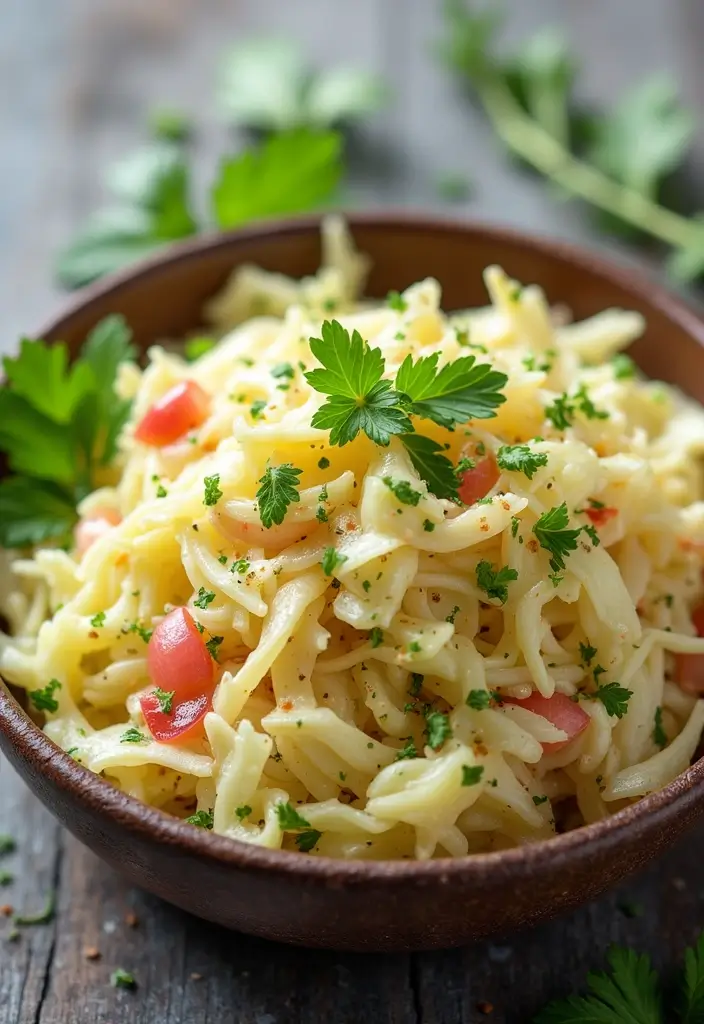
Enjoy a delicious and refreshing Cabbage and Apple Slaw that brings a crunch to your lunch! This slaw blends crisp, green cabbage with sweet apples, creating a perfect balance of flavors. Toss in a light dressing, and you have a side dish that’s not just tasty but also easy to whip up in no time. Ideal for warm days, it complements grilled meats beautifully or serves as a vibrant filling for wraps.
Your slaw can be ready in just 10 minutes, making it a fantastic choice for busy work-from-home lunches. Plus, it’s loaded with nutrients to keep you energized. Picture yourself biting into the crisp cabbage and juicy apple—it’s a delightful way to elevate your midday meal!
Here’s how to make it:
Ingredients:
– 2 cups green cabbage, shredded
– 1 apple, diced (try a sweet variety like Fuji or Honeycrisp)
– 1/4 cup carrots, shredded
– 2 tbsp olive oil
– 1 tbsp apple cider vinegar
– Salt and pepper to taste
Instructions:
1. In a large bowl, mix the shredded cabbage, diced apple, and shredded carrots.
2. In a separate small bowl, whisk together the olive oil, apple cider vinegar, salt, and pepper.
3. Drizzle the dressing over the slaw. Toss gently until everything is well coated.
4. Serve immediately or store in the fridge for up to 2 days for a quick grab-and-go lunch!
Want to add a bit more crunch? Add walnuts or your favorite nuts! You can also experiment with different apple varieties for unique flavors.
FAQs:
– Can I use red cabbage? Yes! It adds a pop of color and extra flavor.
– Is it vegan? Absolutely! This slaw is entirely plant-based.
This Cabbage and Apple Slaw is not just a side dish; it’s a versatile, fresh option that can brighten any lunch. Enjoy the crunch and flavor—your taste buds will thank you!
Cabbage and Apple Slaw
Editor’s Choice

OXO Good Grips Salad Spinner | Lettuce Spinner | Fruit Washer | Fruit Wa…
 Amazon$28.99
50 Pack (100-Piece) 24 oz Meal Prep Containers Reusable with Lids, Sturd…
 Amazon$23.99
OXO Good Grips Handheld Mandoline Slicer for Kitchen, Adjustable Vegetab…
 Amazon$18.50
Conclusion
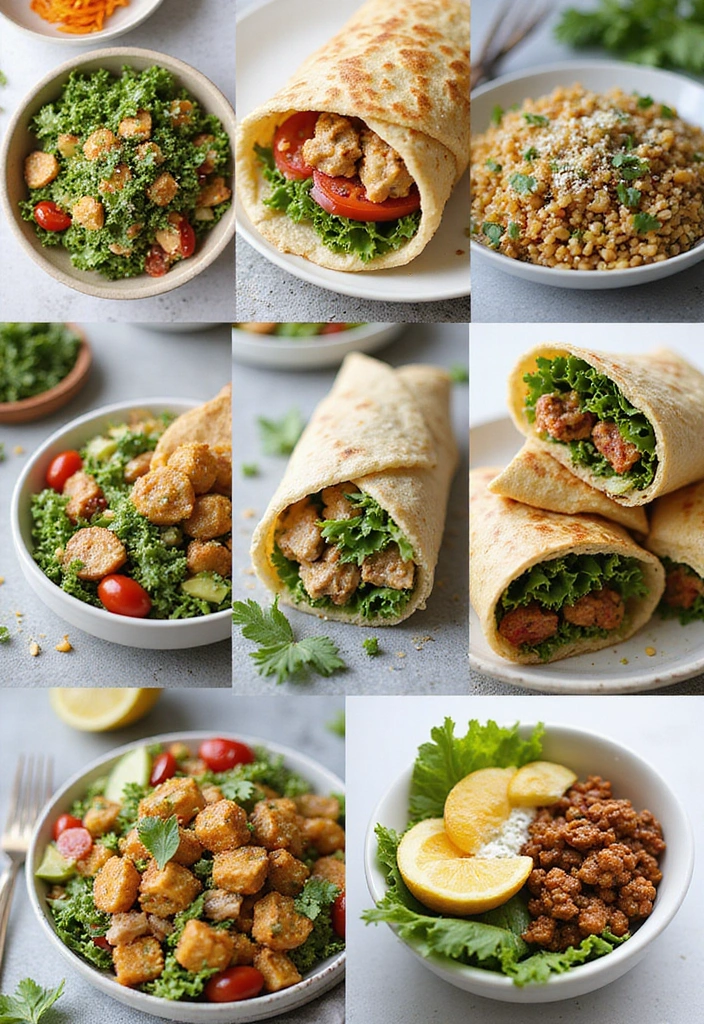
Finding satisfying work-from-home lunch ideas can turn your midday meal into a highlight of the day. With these 30+ quick and healthy lunch recipes, you can break away from the monotony and enjoy nutritious options that fit your busy schedule.
By mixing up your meals and embracing creativity in the kitchen, you’ll keep your energy levels high and maintain focus for the rest of the day. So, grab your apron and get cooking—your perfect lunch awaits!
Note: We aim to provide accurate product links, but some may occasionally expire or become unavailable. If this happens, please search directly on Amazon for the product or a suitable alternative.
This post contains Amazon affiliate links, meaning I may earn a small commission if you purchase through my links, at no extra cost to you.
Frequently Asked Questions
What Are Some Quick and Easy Work from Home Lunch Ideas?
If you’re looking for quick and easy work from home lunch ideas, you’re in for a treat! Think about simple lunch ideas like wraps filled with veggies and proteins, or salads with a variety of toppings. You can also try soup that you can prepare in bulk and freeze for a quick meal or grain bowls with quinoa or brown rice topped with your favorite ingredients. These options not only save time but are also healthy work from home meals.
How Can I Prepare Healthy Work from Home Meals in Advance?
Preparing healthy work from home meals in advance can save you time and stress during busy workdays. Start by planning your meals for the week and choosing easy lunch recipes that can be batch cooked, like chili or stir-fries. Invest in some good containers for meal prep, and set aside a few hours on the weekend to cook and portion your meals. This way, you’ll have quick meals for remote workers ready to go, making lunchtime a breeze!
What Are Some Fast Midday Snacks I Can Enjoy While Working From Home?
When you need a quick pick-me-up, there are plenty of fast midday snacks you can enjoy while working from home. Consider options like Greek yogurt with fruits, hummus with veggies, or a handful of nuts for a boost of energy. You could also whip up some energy balls made of oats and nut butter for a satisfying treat. These snacks are not only delicious but also align with your goal of healthy work from home meals.
Can I Create Healthy Work from Home Lunch Ideas With Leftovers?
Absolutely! Creating healthy work from home lunch ideas with leftovers is a smart way to minimize waste and save time. For instance, you can repurpose last night’s roasted chicken into a chicken salad or toss leftover veggies into a quick omelet. You can also mix and match leftovers to create grain bowls or wraps. This not only keeps your meals interesting but also ensures you’re enjoying nutritious options every day!
What Ingredients Should I Stock for Quick Work from Home Lunch Ideas?
To make quick work from home lunch ideas a reality, stock your pantry and fridge with versatile ingredients. Keep items like whole grain bread, canned beans, fresh veggies, and lean proteins on hand. Don’t forget about whole grains like quinoa and brown rice, as well as healthy snacks like nuts and seeds. This variety will allow you to whip up easy lunch recipes and quick meals for remote workers in no time!
Related Topics
work from home lunch
easy lunch recipes
quick meals
healthy snacks
midday meals
simple lunch ideas
remote work food
fast healthy meals
meal prep
time-saving recipes
busy professionals
nutritious lunches
