
Are you tired of the same old sandwich for lunch? If you’re like me, the daily lunch grind can feel a bit stale. I created this post because I know how important it is to keep mealtime exciting, especially for kids. It’s not just about feeding them; it’s about making lunch fun and enjoyable!
If you’re a parent trying to find creative ways to keep your little ones interested in their meals, you’re in the right place. Kids can be picky, and they often want something more than just plain food on a plate. They love colors, shapes, and a bit of adventure in their meals. Trust me, I get it. You want them to eat well, and you want to avoid the dreaded lunchbox leftovers.
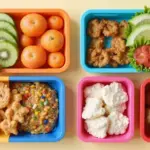
In this post, you’ll discover 30+ fun lunch ideas for kids that turn mealtime into playtime. These ideas are colorful, easy to prepare, and sure to bring a smile to your child’s face. Whether you’re looking for quick snacks, bento box inspirations, or themed lunch ideas, you’ll find something that fits your needs. Plus, many of these ideas can be made with ingredients you likely have at home. So, let’s ditch the boring lunches and make mealtime a little more playful!
1. Rainbow Veggie Wraps

Turn lunch into a colorful adventure with Rainbow Veggie Wraps! These wraps not only look amazing but also taste delicious. They are loaded with a variety of vibrant veggies, including red peppers, carrots, spinach, and purple cabbage. Your kids will be excited to dig into these bright wraps, and you’ll appreciate how quick and easy they are to prepare.
Start by grabbing a whole wheat tortilla. Spread a layer of hummus on top, then pile on those colorful veggies. Roll it up tightly like a burrito, then slice it into fun shapes or pinwheels. This playful twist on lunch makes for a healthy, delightful meal that’s perfect for any lunchbox.
Here’s how to whip up these wraps in no time:
Recipe Overview:
– Servings: 2
– Prep Time: 10 minutes
– Total Time: 10 minutes
– Calories: 180 per serving
Nutrition Information:
– Protein: 6 grams
– Carbohydrates: 22 grams
– Fats: 7 grams
– Fiber: 5 grams
Ingredients:
– 2 whole wheat tortillas
– 1/4 cup hummus
– 1/4 red pepper, sliced
– 1/4 cup shredded carrots
– 1/4 cup spinach leaves
– 1/4 cup purple cabbage, shredded
Instructions:
1. Spread hummus evenly over each tortilla.
2. Layer the sliced veggies on top of the hummus in colorful patterns.
3. Roll the tortilla tightly and slice into pinwheels or fun shapes.
4. Pack them in a lunchbox with grape tomatoes or a small fruit cup for a complete meal.
Here are some extra tips to make them even better:
• Use different dips like ranch or tzatziki for added flavor.
• Add protein like grilled chicken or cheese for a filling option.
Frequently Asked Questions:
– Can I use different veggies? Absolutely! Choose colorful options for that beautiful rainbow effect.
– How do I keep them fresh? Wrap them tightly in plastic wrap or use an airtight container.
With these Rainbow Veggie Wraps, lunchtime will be both nutritious and fun. Enjoy making them, and watch your kids light up with every bite!
Rainbow Veggie Wraps
Editor’s Choice

Mission Soft Taco Whole Wheat Tortillas, Medium Size, 10 Count, Whole Grain

365 By Whole Foods Market, Organic Hummus, Original, 8 Ounce

Rubbermaid Brilliance Food Storage Containers BPA Free Airtight Lids Ide…
2. Fun Fruit Kabobs

Get ready to make lunchtime a blast with Fun Fruit Kabobs! These colorful skewers not only look great but also pack a nutritious punch. Kids will love choosing their favorite fruits, turning snack time into a playful experience. Imagine the joy on their faces as they munch on a rainbow of flavors!
Start by selecting a mix of fruits like juicy strawberries, sweet melon, crisp grapes, and tangy pineapple. Cut them into bite-sized pieces for easy handling. You can even use cookie cutters to create fun shapes like stars or hearts. For an extra treat, slide a few marshmallows or yogurt-covered raisins between the fruit. Serve these kabobs with a side of creamy yogurt for dipping, or sprinkle a little cinnamon to elevate the flavor.
Here’s how to make these delightful kabobs:
Ingredients:
– 1 cup strawberries, hulled and halved
– 1 cup melon, cubed
– 1 cup grapes
– 1 cup pineapple, cubed
– 1/2 cup marshmallows (optional)
– Yogurt for dipping (optional)
Instructions:
1. Wash and cut the fruit into bite-sized pieces.
2. Take a skewer and start layering the fruit in any order you like.
3. If desired, alternate fruit pieces with marshmallows for added sweetness.
4. Serve with yogurt on the side for dipping.
Feel free to mix it up! Use seasonal fruits for variety or opt for different shapes to keep things exciting. Just remember to choose kid-friendly skewers—blunt-ended ones are best for little hands, and you can always cut them down to size.
Tips to Enhance Your Fruit Kabobs:
– Choose vibrant fruits for a colorful display.
– Add a drizzle of honey for extra sweetness.
– Mix in some nuts for crunch and protein.
– Let kids assemble their own kabobs for fun.
These fruity creations are perfect for parties, picnics, or a simple lunch at home. With each bite, your kids will enjoy a tasty treat while you feel good knowing they’re eating healthy. What a win-win!
Fun lunch ideas for kids work best when snacks feel like play—study shows kids eat 30% more fruit when it’s on colorful skewers. Let them pick their favorites, assemble the rainbow, and watch lunchtime turn into a mini celebration.
Fun Fruit Kabobs
Editor’s Choice

Bamboo Skewers 10 Inch Kids Friendly/True Semi Pointed, Safe Non Pointy …

12 Pieces Round Cookie Biscuit Cutter Set,Graduated Circle Pastry Cutter…

LE TAUCI Sauce Cups 2 OZ, Small Dipping Bowls, Mini Ceramic Ramekins Sou…
3. Silly Face Sandwiches

Make lunchtime a blast with Silly Face Sandwiches! These playful creations are not just fun to look at, but they also encourage kids to eat healthy. By turning ordinary sandwiches into amusing characters, you can spark your child’s imagination while ensuring they enjoy a balanced meal.
Start with whole grain bread for a nutritious base. Use cookie cutters to make exciting shapes like stars, hearts, or even animals. Spread a layer of cream cheese or peanut butter for a tasty canvas. Then, decorate with colorful toppings such as sliced cucumbers for eyes, cheese for smiles, and diced bell peppers for hair. Each sandwich can have its own unique expression, making every bite a joyful surprise!
Here’s how to whip up these delightful sandwiches:
Ingredients:
– 4 slices of whole grain bread
– 2 tablespoons cream cheese
– 1/4 cucumber, sliced (for eyes)
– 2 slices cheese (for mouth)
– 1/4 bell pepper, diced (for hair)
Instructions:
1. Use cookie cutters to cut the bread into fun shapes.
2. Spread cream cheese evenly across each piece.
3. Assemble the face using cucumber slices for the eyes and cheese for the mouth.
4. Add diced bell pepper for hair and feel free to mix in any other favorites!
Let your kids pick their own toppings for a personal touch. Pair these silly sandwiches with crunchy veggie sticks for added nutrition and fun.
Pro Tip: To keep your sandwiches fresh, wrap them tightly in plastic wrap and store them in the fridge until it’s time to eat!
With these silly sandwiches, you’ll create a lunchtime experience that’s both nutritious and full of giggles. Perfect for making mealtime memorable!
Silly Face Sandwiches
Editor’s Choice

Elfkitwang Sandwich Cookie Cutters Set, Dinosaur,Heart,Star,Mouse,Sandwi…

Joie Crinkle Cutter Knife, Wavy Slicer for Potatoes, Vegetables and Frui…

Bee’s Wrap Beeswax Wraps for Food – Honeycomb 3 Pack (S, M, L) Made in U…
4. Pasta Salad Characters

Turn lunchtime into a creative adventure with Pasta Salad Characters. This dish is not just colorful but also a fun way to engage your kids in the kitchen. With a little imagination, you can transform plain pasta into delightful characters that make eating a playful experience. Imagine tiny pasta bows and shells mingling with bright cherry tomatoes and cool cucumbers. The best part? Kids can customize their creations!
Here’s a simple way to make these characters. Gather some small pasta shapes, toss them with vibrant veggies, and let your kids design their own edible pals. Top it off with olives for eyes and bell peppers for smiles. It’s a meal that promises both nutrition and creativity.
Ready to dive into a fun recipe? Here’s what you’ll need:
Ingredients:
– 2 cups cooked mini pasta shapes
– 1 cup cherry tomatoes, halved
– 1 cup cucumbers, diced
– 1/2 cup mini mozzarella balls
– 1/4 cup olives (for eyes)
– 1/4 cup diced bell peppers (for mouth)
Instructions:
1. Cook the pasta according to the package instructions. Drain and let it cool.
2. In a large bowl, mix the cooled pasta, cherry tomatoes, cucumbers, and mozzarella.
3. On a plate, arrange the pasta salad and use olives and bell peppers to create fun faces.
4. Serve right away or pack it in a lunchbox for later.
Feel free to add cold cuts or other proteins for extra flavor and nutrition. You can also experiment with different veggies to keep it exciting.
• Choose colorful mini pasta shapes for fun
• Pick fresh veggies like cucumbers and tomatoes
• Add olives and peppers for character features
• Mix in proteins for a heartier meal
This pasta salad not only pleases the palate but also sparks creativity, making it perfect for your little ones’ lunchbox. Enjoy the smiles at mealtime!
Pasta Salad Characters
Editor’s Choice

Barilla Limited Edition A Sign of Love Pasta, 12 oz. Box

Chanking 13 Pieces Kids Safe Knife Set for Real Cooking Child-Friendly P…

Bento Box Adult Lunch Box, Containers for Adults Men Women with 4 Compar…
5. Cheese and Crackers Art

Turn lunchtime into a fun art project with Cheese and Crackers Art. This creative idea lets your kids express themselves while munching on tasty snacks. Using simple ingredients, they can craft edible masterpieces that are as delightful to the eyes as they are to the tummy.
Gather a mix of crackers and cheeses, like whole grain, cheddar, and string cheese. Add in some colorful extras, like cherry tomatoes, olives, and sliced deli meats. Kids can arrange these goodies into faces, animals, or anything their imagination conjures up. It’s a hands-on lunch experience that keeps changing with every creation!
Recipe Overview:
– Servings: 2
– Prep Time: 10 minutes
– Cook Time: 0 minutes
– Total Time: 10 minutes
– Calories: 200 per serving
Nutrition Information:
– Protein: 10 grams
– Carbohydrates: 15 grams
– Fats: 12 grams
– Fiber: 1 gram
Ingredients List:
– 10 whole grain crackers
– 2 slices cheddar cheese
– 2 slices monterey jack cheese
– 1/4 cup olives
– 1/4 cup cherry tomatoes
Step-by-Step Instructions:
1. Lay out the crackers on a plate.
2. Use cookie cutters to slice cheese into fun shapes.
3. Add olives and cherry tomatoes for eyes and smiles.
4. Invite your kids to design their own snack masterpiece!
Want to make it even sweeter? Add fruits like grapes or apple slices. If you need a nut-free option, swap cheese for hummus or nut butter.
Frequently Asked Questions:
– Can I prepare this the night before? Yes, just cover everything and store it in the fridge.
This lunch idea not only fills their bellies but also sparks creativity and makes mealtime a joyous adventure. Watch your kids dive into their artistic expressions while enjoying healthy snacks!
Cheese and Crackers Art
Editor’s Choice
12 Pieces Round Cookie Biscuit Cutter Set,Graduated Circle Pastry Cutter…

American Greetings 50-Count 7 in. x 7 in. Rainbow Paper Dessert Plates
6. Veggie Sushi Rolls

Transform lunchtime into a fun adventure with Veggie Sushi Rolls! These colorful rolls let your kids take charge in the kitchen. They can choose their favorite vegetables, making each roll unique and packed with nutrition. Plus, it’s a fantastic way to explore new flavors and textures together!
Start by gathering sushi rice and nori sheets. Let your kids fill their rolls with vibrant options like crunchy cucumber, creamy avocado, and sweet carrot sticks. For an extra touch, add a little cream cheese for richness. Once they roll them up tightly, slice the sushi into bite-sized pieces. Don’t forget to serve them with a small container of soy sauce or a fun dipping sauce for added excitement!
Recipe Overview:
– Servings: 4
– Prep Time: 20 minutes
– Cook Time: 30 minutes
– Total Time: 50 minutes
– Calories: 160 per serving
Nutrition Information:
– Protein: 4 grams
– Carbohydrates: 34 grams
– Fats: 2 grams
– Fiber: 3 grams
Ingredients:
– 2 cups sushi rice
– 4 nori sheets
– 1/2 cucumber, sliced into strips
– 1 avocado, sliced
– 1 carrot, julienned
– 1/4 cup cream cheese (optional)
Step-by-Step Instructions:
1. Rinse the sushi rice under cold water and cook according to package instructions.
2. Once the rice cools down, spread a thin layer of rice over a nori sheet.
3. Place your favorite veggies and cream cheese in the center.
4. Roll the nori tightly around the fillings and slice into rounds.
Encourage your kids to experiment with different fillings like bell peppers or sprouts for even more fun! Using a bamboo mat can make rolling easier and more uniform.
Frequently Asked Questions:
– Can I make these ahead of time? Yes, just wrap them in plastic and store them in the fridge to keep them fresh!
This delightful sushi-making experience not only fills bellies but also creates lasting memories in the kitchen. So, roll up your sleeves and enjoy creating these delicious veggie sushi rolls together!
Veggie Sushi Rolls
Editor’s Choice

2 Pack Bamboo Sushi Rolling Mat, Sushi roll maker,Sushi making kit, Bamb…

Soeos Premium Sushi Rice, 4 lb (2 Pack), Calrose Rice, Medium Grain, Whi…

Gimme Seaweed Sushi Nori Premium Organic Roasted Seaweed Sheets, Keto, V…
7. Pancake Faces

Pancake Faces are not just for breakfast anymore; they can transform lunchtime into a fun, creative experience! Kids love getting hands-on, and this dish allows them to unleash their imagination. With colorful fruits and playful toppings, each pancake becomes a unique masterpiece.
Start with a basic pancake batter made from flour, milk, and eggs. Once you cook the pancakes, let your kids get creative. They can use banana slices for eyes, blueberries for pupils, and a wedge of strawberry for a big smile. A drizzle of pure maple syrup or a dollop of yogurt adds the perfect finishing touch. It’s like art on a plate, making lunchtime feel special!
Here’s how to make them:
Ingredients:
– 1 cup pancake mix
– 1 cup milk
– 1 egg
– Sliced banana, blueberries, and strawberries for decoration
– Maple syrup or yogurt for serving
Directions:
1. In a bowl, mix the pancake batter according to the package instructions.
2. Heat a skillet over medium heat and pour in the batter. Cook until bubbles form on top.
3. Carefully flip and cook until golden brown on both sides.
4. Allow the kids to decorate their pancakes with fruit to create fun faces.
Want more fun? Here are some tips:
– Make mini pancakes for bite-sized fun.
– Use seasonal fruits to match the time of year.
– Let kids choose their favorite toppings to boost excitement.
– Pair with smoothies for a complete meal.
This lunch idea not only satisfies hunger but also sparks creativity. Plus, it’s a great way to get kids interested in cooking. So grab some fruits, and let the pancake decorating begin!
FAQs:
Can I use a pancake mix? Yes! Any mix you have works perfectly.
Pancake Faces
Editor’s Choice

Whiskware Pancake Bottle, Batter Dispenser and Mixer with BlenderBall Wi…

10 Pcs Pineapple Corer and Slicer Set – Sturdy, Sharp & Easy to Clean Pi…

CAROTE Nonstick Frying Pan Skillet,Non Stick Granite Fry Pan Egg Pan Ome…
8. DIY Mini Pizzas

Turn lunchtime into a fun adventure with DIY Mini Pizzas. Kids love getting creative in the kitchen, and these mini pizzas let them be the chefs! Each child can personalize their pizzas with toppings they adore, transforming a simple meal into an engaging culinary project.
Start with mini pizza crusts, or for a twist, use bagels or English muffins. Spread a generous layer of pizza sauce on top, then let your kids sprinkle cheese and add their favorite toppings—think pepperoni, colorful veggies, or even sweet pineapple. Pop them in the oven until the cheese is melty and bubbly. Not only are they tasty, but they also encourage kids to explore their culinary skills!
Here’s how to make these mini pizzas:
Recipe Overview:
– Servings: 2
– Prep Time: 15 minutes
– Cook Time: 10 minutes
– Total Time: 25 minutes
– Calories: 350 per serving
Nutrition Information:
– Protein: 12 grams
– Carbohydrates: 40 grams
– Fats: 15 grams
– Fiber: 2 grams
Ingredients:
– 2 mini pizza crusts (or bagels)
– 1/2 cup pizza sauce
– 1 cup shredded cheese
– Pepperoni slices or assorted veggies for topping
Instructions:
1. Preheat your oven to 400°F (200°C).
2. Spread pizza sauce evenly on each crust or bagel.
3. Sprinkle cheese generously and arrange your chosen toppings.
4. Bake for about 10 minutes, or until the cheese is nice and melted.
Want to make it even more fun? Set up a pizza bar! Lay out a variety of toppings so kids can mix and match to their heart’s content. You can also choose whole wheat crusts for a healthier option. This way, lunch becomes a fun, interactive meal that everyone will love.
Tips:
– Use whole wheat crusts for extra nutrition.
– Choose a mix of cheeses for a flavor twist.
– Add fruits like pineapple for a sweet touch.
– Get kids involved in the cooking process for more fun!
FAQs:
– Can I prepare these ahead of time? Yes! Make them in advance and store in the fridge until you’re ready to bake. This makes lunchtime a breeze, even on busy days.
DIY Mini Pizzas turn lunch into a tiny culinary adventure. Let kids pick two toppings and spread the sauce; quick, easy, and mess-friendly. It’s a simple way to boost fun lunch ideas for kids while turning mealtime into creative play.
DIY Mini Pizzas
Editor’s Choice

(Club Pack) Boboli Original Crusts, 2 count, (5.0 oz each), White Pizza …

Amazon Saver, Traditional Pizza Sauce, 15 Oz (Previously Happy Belly, Pa…

Amazon Grocery, Mexican-Style Four Cheese Blend, Finely Shredded, 16 Oz …
9. Fruit and Yogurt Parfaits

Bring a burst of fun to lunchtime with Fruit and Yogurt Parfaits! These tasty treats are more than just delicious—they’re a feast for the eyes and a healthy choice for your kids. Imagine layers of creamy yogurt mingling with fresh fruits and a crunchy granola topping. It’s a playful presentation that invites kids to dig in, making mealtime feel like a treat rather than a chore.
To create your parfait, simply grab a container and start layering. Use creamy Greek yogurt as your base and add colorful fruits like juicy strawberries and sweet blueberries. Sprinkle in a handful of crunchy granola for that delightful texture. A drizzle of honey adds a touch of sweetness, making each bite irresistible. Not only do these parfaits look stunning, but they also pack essential nutrients for growing bodies.
Here’s how to whip up this fruity delight:
Ingredients:
– 1 cup Greek yogurt
– 1/2 cup strawberries, sliced
– 1/2 cup blueberries
– 1/2 cup granola
– Honey for drizzling (optional)
Instructions:
1. Start with a layer of Greek yogurt in a cup or jar.
2. Add sliced strawberries and blueberries on top.
3. Sprinkle a layer of granola.
4. Repeat the layers until the jar is full, finishing with fruit on top. Drizzle honey if you wish.
Feel free to mix things up! Try using seasonal fruits for a new twist or even flavored yogurt to keep it exciting.
Tips for Success:
– Use fresh, seasonal fruits for the best flavor
– Choose low-sugar granola to keep it healthy
– Experiment with different yogurt flavors for variety
– Prepare a batch ahead of time; they stay fresh in the fridge for 2-3 days
These Fruit and Yogurt Parfaits are perfect for busy parents looking to make healthy meals fun for their kids. They’re quick to prepare, visually appealing, and bursting with flavor—ideal for turning lunchtime into a delightful experience!
Fruit and Yogurt Parfaits
Editor’s Choice

HOMBERKING 10 Pack Borosilicate Glass Meal Prep Containers with Locking …

KIND Healthy Grains Clusters, Granola Variety Pack, Healthy Snacks, Good…

Apple Peeler Corer, Long lasting Chrome Cast Magnesium Alloy Apple Peele…
10. Cheesy Veggie Muffins

Turn lunchtime into a mini celebration with these Cheesy Veggie Muffins. They’re not only fun to eat but also sneak in nutritious veggies that your kids will love. Imagine the surprise on their faces when they bite into these fluffy muffins, packed with cheesy goodness and colorful vegetables. Perfect for school lunches or an after-school snack, these muffins make eating healthy feel like a treat!
To whip up these delightful muffins, start by mixing whole wheat flour with shredded cheese and your choice of diced veggies, like spinach, zucchini, or bell peppers. Then, blend in a few eggs for protein, and you have a batter ready to bake. Once they’re golden and fluffy, you’ll have a delicious snack that stays fresh for days.
Here’s how to make them:
Recipe Overview:
– Servings: 12
– Prep Time: 15 minutes
– Cook Time: 20 minutes
– Total Time: 35 minutes
– Calories: 150 per muffin
Nutrition Information:
– Protein: 6 grams
– Carbohydrates: 18 grams
– Fats: 7 grams
– Fiber: 1 gram
Ingredients List:
– 1 1/2 cups whole wheat flour
– 1 cup shredded cheese (cheddar works great)
– 1 cup mixed veggies (spinach, zucchini, bell peppers)
– 2 eggs
– 1 cup milk
– 1/4 cup olive oil
Step-by-Step Instructions:
1. Preheat your oven to 350°F (175°C).
2. In a large bowl, mix together the whole wheat flour, shredded cheese, and chopped veggies.
3. In another bowl, whisk the eggs, milk, and olive oil until combined.
4. Pour the wet ingredients into the dry mix and stir until just blended.
5. Fill muffin tins about two-thirds full and bake for 20 minutes or until a toothpick comes out clean.
Tips:
– Use muffin liners for easy cleanup.
– Feel free to swap in your kids’ favorite veggies or cheeses.
– These muffins freeze well, so make a batch and save some for later!
These Cheesy Veggie Muffins are not just a meal; they’re a fun way to get your kids excited about healthy food. Enjoy the smiles at mealtime!
Cheesy Veggie Muffins
Editor’s Choice

2Pack Silicone Muffin Pan for Baking with Metal Reinforced Frame, 12 Cup…

200pcs Natural Tulip Cupcake Liners for Baking Cups Unbleached European …

Fullstar The Original Pro Chopper – Vegetable Chopper and Spiralizer, Fo…
11. Colorful Quinoa Salad

Introduce your kids to the colorful world of quinoa with this Colorful Quinoa Salad. Not only does it look fun on the plate, but it’s also loaded with protein and essential nutrients. The bright mix of ingredients makes lunchtime exciting for your little ones!
Start by cooking quinoa according to the package instructions. Once it’s cool, combine it with diced cucumbers, halved cherry tomatoes, sweet corn, and black beans. A splash of lime juice and a drizzle of olive oil bring all the flavors together. This salad is perfect for meal prep; you can make it on Sunday and enjoy it throughout the week.
This recipe is a win-win for busy parents and picky eaters alike!
Recipe Overview:
– Servings: 4
– Prep Time: 15 minutes
– Cook Time: 15 minutes
– Total Time: 30 minutes
– Calories: 220 per serving
Nutrition Information:
– Protein: 9 grams
– Carbohydrates: 32 grams
– Fats: 7 grams
– Fiber: 5 grams
Ingredients List:
– 1 cup quinoa
– 1 cup cherry tomatoes, halved
– 1 cup corn
– 1 cup black beans, drained and rinsed
– 1 cucumber, diced
– Juice of 1 lime
– 2 tablespoons olive oil
Step-by-Step Instructions:
1. Cook quinoa according to package directions, then let it cool.
2. In a large bowl, mix together the quinoa, tomatoes, corn, black beans, and cucumber.
3. Drizzle with lime juice and olive oil, and stir well to combine.
4. Serve chilled or at room temperature.
Want to make it creamier? Add avocado or any veggies your child loves! This salad stays fresh in the fridge for 3-4 days, making it a quick lunch option.
Frequently Asked Questions:
– How long can this salad last? It stores well in the fridge for 3-4 days.
With its vibrant colors and delicious taste, this Colorful Quinoa Salad is sure to be a hit at lunch!
Colorful Quinoa Salad
Editor’s Choice
Bento Box Adult Lunch Box, Containers for Adults Men Women with 4 Compar…
12. Sweet Potato and Black Bean Tacos

Transform lunchtime into a fun fiesta with these Sweet Potato and Black Bean Tacos. Packed with flavor and nutrition, these tacos are perfect for kids who love to customize their meals. The naturally sweet taste of roasted sweet potatoes pairs beautifully with hearty black beans, creating a delicious feast that your little ones will adore.
Start by roasting sweet potatoes until they are golden and caramelized. Mix them with black beans and add a sprinkle of cumin and chili powder for a tasty kick. Serve this delightful filling in soft taco shells, and let your kids choose their favorite toppings like creamy avocado, zesty salsa, and shredded cheese. Not only are these tacos fun to make, but they are also a healthy choice for lunchtime!
Recipe Overview:
– Servings: 4
– Prep Time: 15 minutes
– Cook Time: 25 minutes
– Total Time: 40 minutes
– Calories: 300 per serving
Nutrition Information:
– Protein: 10 grams
– Carbohydrates: 50 grams
– Fats: 8 grams
– Fiber: 10 grams
Ingredients List:
– 2 sweet potatoes, diced
– 1 can black beans, drained
– 1 teaspoon cumin
– 1 teaspoon chili powder
– 8 small taco shells
– Toppings: avocado, cheese, salsa
Step-by-Step Instructions:
1. Preheat your oven to 425°F (220°C).
2. Toss the diced sweet potatoes with olive oil, cumin, and chili powder. Roast for 20-25 minutes until tender.
3. Warm the taco shells according to the package instructions.
4. Fill each taco with the sweet potato and black bean mixture. Let your kids add their favorite toppings.
Make it vegetarian by skipping the cheese or using a plant-based option. You could even add fresh cilantro for an extra burst of flavor!
Frequently Asked Questions:
– Can I prepare these ahead of time? Yes! Roast the sweet potatoes in advance and assemble the tacos when you’re ready to eat.
With these Sweet Potato and Black Bean Tacos, lunchtime will never be boring again! Enjoy the smiles as your kids dig into their delicious creations.
Fun fact: One medium sweet potato delivers over 400% of the daily Vitamin A in a single serving. When you pair it with black beans, these tacos pack 7-8 g of protein per serving—great for making fun lunch ideas for kids feel exciting and satisfying.
Sweet Potato and Black Bean Tacos
Editor’s Choice

Mission Street Taco Flour Tortillas, Mini Soft Taco Size, 12 Count


Amazon Grocery, Ground Cumin, 2.6 Oz (Previously Happy Belly, Packaging …
You might also like

13. Chocolate-Dipped Fruit

Finish lunch on a delightful note with Chocolate-Dipped Fruit. This simple yet delicious treat is sure to excite your kids! Not only does it satisfy a craving for something sweet, but it also sneaks in some healthy fruit. Your little ones will love finding this fun surprise in their lunchbox.
Melt some dark chocolate chips, and let your kids dip fresh strawberries, banana slices, or apple wedges into the gooey goodness. Place them on parchment paper to cool and harden. This activity is a fun way to involve your children in lunchtime prep, and they’ll be thrilled to enjoy this delicious snack!
Here’s how to whip up this tasty treat:
Recipe Overview:
– Servings: 4
– Prep Time: 10 minutes
– Cook Time: 5 minutes
– Total Time: 15 minutes
– Calories: 150 per serving
Nutrition Information:
– Protein: 2 grams
– Carbohydrates: 20 grams
– Fats: 7 grams
– Fiber: 2 grams
Ingredients:
– 1 cup dark chocolate chips
– 1 cup strawberries
– 1 banana, sliced
– 1 apple, sliced
Instructions:
1. Melt the dark chocolate in the microwave or over a double boiler until it’s smooth.
2. Dip your chosen fruit into the melted chocolate, coating it halfway.
3. Place the chocolate-covered fruit on parchment paper and let it cool until the chocolate hardens.
4. Pack the treats in a lunchbox with a small container of extra chocolate for dipping!
Want to make it even more fun?
– Try white chocolate or milk chocolate for a different taste.
– Add colorful sprinkles on top before the chocolate sets for a festive touch.
Frequently Asked Questions:
– How do I store these? Keep them in the fridge to prevent melting.
Now, you have a sweet ending to your child’s lunch that they’ll look forward to every day!
Chocolate-Dipped Fruit
Editor’s Choice

Wilton Candy Melts Melting Pot, Perfect for Dipping, Drizzling & Decorat…
Bento Box Adult Lunch Box, Containers for Adults Men Women with 4 Compar…
14. Peanut Butter and Banana Sushi

Peanut Butter and Banana Sushi is a delightful twist on the usual sandwich that your kids will love! This fun lunch idea not only brings a bit of playfulness to mealtime but also packs in protein and energy to keep them fueled for the day. With just a few simple ingredients, you can turn a typical lunch into a mini culinary adventure!
Start by spreading creamy peanut butter over a whole wheat tortilla. Then, place a whole banana at one edge and roll it up tightly. Slice it into bite-sized pieces that resemble sushi rolls. This makes lunch feel special and satisfies those sweet tooth cravings without too much sugar. Plus, it’s super easy to prepare in just ten minutes!
Here’s how to make it:
Recipe Overview:
– Servings: 2
– Prep Time: 10 minutes
– Cook Time: 0 minutes
– Total Time: 10 minutes
– Calories: 200 per serving
Nutrition Information:
– Protein: 8 grams
– Carbohydrates: 27 grams
– Fats: 9 grams
– Fiber: 3 grams
Ingredients List:
– 2 whole wheat tortillas
– 2 bananas
– 1/4 cup peanut butter
– Optional: honey or cinnamon for a sprinkle
Step-by-Step Instructions:
1. Spread peanut butter evenly over each tortilla.
2. Place a whole banana at one edge and roll tightly.
3. Slice into bite-sized pieces like sushi rolls.
4. Pack with a side of apple slices for an extra crunch!
Want to switch things up? Here are some ideas:
– Try almond butter or sunflower seed butter for a nut-free option.
– Add chocolate chips for a sweet surprise inside!
Frequently Asked Questions:
– Can I make these ahead of time? Yes, but it’s best to roll and slice them just before serving to keep everything fresh.
This fun and nutritious lunch idea is perfect for kids of all ages. They’ll love the taste, and you’ll love how easy it is to make!
Peanut Butter and Banana Sushi
Editor’s Choice
Mission Soft Taco Whole Wheat Tortillas, Medium Size, 10 Count, Whole Grain

Bento Box Adult Lunch Box, Containers for Adults Men Women with 4 Compar…
15. Savory Oatmeal Cups

Make lunchtime fun and nutritious with Savory Oatmeal Cups. These little bites are a delightful twist on traditional meals. Packed with flavor and healthy ingredients, they can turn any boring lunch into an exciting adventure. Imagine your kids enjoying a muffin-shaped cup filled with cheesy goodness and vibrant veggies!
To create these tasty treats, you’ll use vegetable broth instead of water for the oatmeal. This adds depth and richness. Mix in some chopped spinach, shredded cheese, and a sprinkle of herbs. Then, pour the mixture into muffin tins and bake until golden brown. Not only are they easy to prepare, but they can also be made ahead of time, making them perfect for busy days.
Here’s how you can whip up a batch:
Recipe Overview:
– Servings: 6
– Prep Time: 10 minutes
– Cook Time: 20 minutes
– Total Time: 30 minutes
– Calories: 120 per serving
Nutrition Information:
– Protein: 4 grams
– Carbohydrates: 20 grams
– Fats: 3 grams
– Fiber: 3 grams
Ingredients:
– 2 cups rolled oats
– 2 cups vegetable broth
– 1 cup spinach, chopped
– 1/2 cup shredded cheese
– 1 teaspoon garlic powder
Instructions:
1. Preheat your oven to 350°F (175°C).
2. In a mixing bowl, combine the oats, vegetable broth, chopped spinach, cheese, and garlic powder.
3. Grease your muffin tins and pour the mixture evenly into each cup.
4. Bake for 20 minutes until the tops are set and lightly golden.
These cups are versatile! You can add diced cooked chicken for a protein boost or switch up the veggies based on what you have at home. They store well in the fridge for up to a week, making them a great grab-and-go option.
Quick Tips:
– Prepare these in batches for easy lunches.
– Kids can help mix the ingredients for a fun cooking session.
– Serve with a side of fruit for a well-rounded meal.
Your kids will love these Savory Oatmeal Cups, and you’ll feel good knowing they’re eating something healthy and satisfying!
Savory Oatmeal Cups
Editor’s Choice

Amazon Basics Nonstick Round Muffin Baking Pan, 12 Cups, Set of 2, Gray,…

Swanson 100% Natural Vegetable Broth, 32 oz Carton
16. Mini Frittatas

Turn lunchtime into a fun adventure with Mini Frittatas. These bite-sized delights are packed with protein and flavor, making them a hit with kids. Plus, they’re super easy to make and can be customized with whatever veggies you have on hand. Think of bright bell peppers, leafy spinach, or even leftover broccoli. The best part? They taste great warm or cold, which means they fit perfectly in lunchboxes!
Imagine your child opening their lunch to find colorful mini frittatas, looking like little treasures. You can whip up a batch in just about 25 minutes. These frittatas not only keep your little ones full but also make mealtime more exciting.
Here’s how to create these tasty treats:
Recipe Overview:
– Servings: 12
– Prep Time: 10 minutes
– Cook Time: 15 minutes
– Total Time: 25 minutes
– Calories: 80 per frittata
Nutrition Information:
– Protein: 5 grams
– Carbohydrates: 2 grams
– Fats: 6 grams
– Fiber: 1 gram
Ingredients:
– 6 eggs
– 1/2 cup milk
– 1 cup chopped veggies (spinach, peppers, onions)
– 1 cup shredded cheese
– Salt and pepper to taste
Step-by-Step Instructions:
1. Preheat your oven to 350°F (175°C).
2. In a bowl, whisk together the eggs and milk until blended.
3. Stir in the chopped veggies and cheese, seasoning with salt and pepper.
4. Pour the mixture into greased muffin tins.
5. Bake for about 15 minutes, or until they puff up and are golden.
These mini frittatas are perfect for using up leftover veggies, saving you time and reducing waste. You can easily freeze them for future lunches; just pop them in the microwave when you’re ready to eat!
Quick Tips:
– Use leftover veggies from last night’s dinner for a quick prep.
– Try adding different cheeses for a flavor twist.
– Serve them with a side of fruit for a balanced meal.
– Make them a breakfast option on busy mornings!
Now, you’re all set to make lunchtime fun and nutritious with these delightful mini frittatas!
Mini Frittatas
Editor’s Choice
2Pack Silicone Muffin Pan for Baking with Metal Reinforced Frame, 12 Cup…

15 Pack- Meal Prep Containers 32oz, Plastic Food Prep Containers Reusabl…
Fullstar The Original Pro Chopper – Vegetable Chopper and Spiralizer, Fo…
17. Zucchini Noodles

Zucchini Noodles are a fantastic way to make lunchtime both fun and nutritious! These playful ‘zoodles’ serve as a healthy substitute for traditional pasta, allowing you to dress them up with various sauces and toppings. Imagine twirling vibrant green noodles on your fork, topped with a rich marinara sauce and melted cheese. Kids love the texture and you can feel good knowing they’re enjoying more veggies.
To create zucchini noodles, grab a spiralizer. Simply twist the zucchini to create long, curly strands. Lightly sauté these in a splash of olive oil for about five minutes. Then, mix in your favorite marinara sauce and let the flavors meld together. Finish off with a sprinkle of shredded cheese for a delicious and nutritious meal. It’s an easy way to satisfy those pasta cravings without the carbs!
Recipe Overview:
– Servings: 2
– Prep Time: 15 minutes
– Cook Time: 5 minutes
– Total Time: 20 minutes
– Calories: 150 per serving
Nutrition Information:
– Protein: 4 grams
– Carbohydrates: 8 grams
– Fats: 10 grams
– Fiber: 2 grams
Ingredients List:
– 2 medium zucchinis
– 1 cup marinara sauce
– 1/2 cup shredded cheese
– Salt and pepper to taste
Step-by-Step Instructions:
1. Spiralize the zucchinis to create long noodles.
2. In a pan, sauté the zoodles in olive oil for about five minutes until tender.
3. Stir in the marinara sauce and heat until bubbling.
4. Serve topped with shredded cheese and a pinch of salt and pepper for extra flavor.
Feel free to get creative! Add cooked chicken or shrimp for a heartier dish. Serve these zoodles cold during hot summer days for a refreshing twist that kids will love!
Frequently Asked Questions:
How do I store leftovers? Keep them in an airtight container in the fridge for 2-3 days. Enjoy a quick meal later in the week!
Zucchini Noodles
Editor’s Choice

Brieftons 5-Blade Vegetable Spiralizer: Strongest-Heaviest Spiral Slicer…

YARRAMATE 16oz/470ml Glass Olive Oil Sprayer for Cooking with Stickers, …
Amazon Grocery, Mexican-Style Four Cheese Blend, Finely Shredded, 16 Oz …
18. Caprese Skewers

Looking for a fun and tasty twist for your child’s lunch? Try Caprese Skewers! These colorful Italian-inspired bites are not just delicious; they’re also simple to make. Each skewer is filled with juicy cherry tomatoes, creamy mozzarella, and fragrant basil, creating a delightful flavor explosion. Your kids will love the mix of fresh ingredients, and you’ll appreciate how healthy they are!
To prepare these skewers, alternate threading cherry tomatoes, fresh mozzarella balls, and basil leaves onto small skewers. For an extra kick, drizzle with balsamic glaze or olive oil. These skewers are visually appealing and offer a satisfying combination of acidity and creaminess that kids adore.
Recipe Overview:
– Servings: 4
– Prep Time: 10 minutes
– Cook Time: 0 minutes
– Total Time: 10 minutes
– Calories: 120 per serving
Nutrition Information:
– Protein: 6 grams
– Carbohydrates: 4 grams
– Fats: 9 grams
– Fiber: 1 gram
Ingredients List:
– 1 pint cherry tomatoes
– 1 cup fresh mozzarella balls
– Fresh basil leaves
– Balsamic glaze or olive oil for drizzling
Step-by-Step Instructions:
1. Take small skewers and thread cherry tomatoes, mozzarella balls, and basil leaves in alternating order.
2. Once assembled, drizzle with balsamic glaze or olive oil to enhance the flavor.
3. Pack them in lunchboxes for a fresh and fun snack!
These skewers are also perfect for picnics or birthday parties!
Tips for Success:
– Use different colors of tomatoes for an exciting look.
– Make them ahead to save time in the morning; they taste great cold!
– Let your kids help with assembly to make lunchtime fun!
– Consider pairing with whole-grain crackers for a balanced meal.
With these Caprese Skewers, mealtime becomes a playful adventure. Your kids will enjoy every bite, and you’ll love how easy they are to prepare!
Caprese Skewers
Editor’s Choice

HOPELF 12″ Natural Bamboo Skewers for BBQ,Appetiser,Fruit,Cocktail,Kabob…

365 by Whole Foods Market, Organic Balsamic Glaze, 8.45 Fl Oz (Pack of 2)

4 Pack Bento Lunch Box Set 3 Compartment Food Storage Containers Wheat S…
19. Corn and Cheese Quesadillas

Get ready for a flavor-packed treat with Corn and Cheese Quesadillas! These delightful bites are not only easy to whip up but also allow you to sneak in your kids’ favorite veggies. Perfect for lunch, they transform mealtime into a fun and tasty experience.
Imagine warm, melty cheese mingling with sweet corn, all tucked inside a crispy tortilla. You can personalize these quesadillas with whatever ingredients you have on hand, making them a flexible choice for busy days. Pair them with zesty salsa or creamy guacamole for an extra flavor kick. Your kids will love dipping them!
Now, let’s dive into the recipe details:
Recipe Overview:
– Servings: 2
– Prep Time: 10 minutes
– Cook Time: 10 minutes
– Total Time: 20 minutes
– Calories: 250 per serving
Nutrition Information:
– Protein: 10 grams
– Carbohydrates: 30 grams
– Fats: 11 grams
– Fiber: 3 grams
Ingredients:
– 4 whole wheat tortillas
– 1 cup shredded cheese (cheddar, mozzarella, or your favorite)
– 1 cup corn (canned or frozen)
– 1/2 cup chopped bell peppers (optional)
Instructions:
1. Heat a skillet over medium heat.
2. Place a tortilla in the skillet. On one half, layer cheese, corn, and any extra veggies.
3. Fold the tortilla in half. Cook until golden brown on both sides, about 3-4 minutes.
4. Remove from the skillet and cut into wedges. Serve with salsa or guacamole for dipping.
Pro Tips:
– Use non-stick spray to keep the quesadillas from sticking.
– Add cooked chicken or black beans for extra protein and flavor.
FAQs:
– Can I use different fillings? Yes! Get creative with whatever you have—think beans, spinach, or even leftover grilled chicken.
These quesadillas are perfect for a quick lunch or a fun snack. Enjoy turning ordinary ingredients into a tasty adventure!
Corn and Cheese Quesadillas
Editor’s Choice
CAROTE Nonstick Frying Pan Skillet,Non Stick Granite Fry Pan Egg Pan Ome…

Nordic Ware Microwave Tortilla and Pancake Warmer, 10-Inch Holder – Fits…

20. Spinach and Feta Pinwheels

Make lunchtime exciting with Spinach and Feta Pinwheels. These fun, bite-sized snacks are not only delicious but also a sneaky way to get kids to eat their veggies. Perfect for little hands, these pinwheels offer a delightful crunch and burst of flavor that kids will love!
Start by spreading a creamy layer of cream cheese over a whole wheat tortilla. Then, pile on fresh spinach, tangy crumbled feta, and a sprinkle of sun-dried tomatoes for a pop of color. Roll it all up tightly and slice into pinwheel shapes. These tasty bites are great for lunchboxes and taste just as good cold, making them a versatile choice for busy days.
Here’s how to make them:
Recipe Overview:
– Servings: 4
– Prep Time: 15 minutes
– Cook Time: 0 minutes
– Total Time: 15 minutes
– Calories: 160 per serving
Nutrition Information:
– Protein: 6 grams
– Carbohydrates: 24 grams
– Fats: 6 grams
– Fiber: 2 grams
Ingredients:
– 2 whole wheat tortillas
– 1/2 cup cream cheese
– 1 cup fresh spinach
– 1/2 cup feta cheese, crumbled
– 1/4 cup sun-dried tomatoes, chopped
Instructions:
1. Spread cream cheese evenly over each tortilla.
2. Top with spinach, feta cheese, and sun-dried tomatoes.
3. Roll the tortilla tightly into a log shape.
4. Slice the log into pinwheels and pack with a side of hummus for dipping.
Feel free to mix it up! Use flavored cream cheese for a tasty twist, or add other veggies like bell peppers or cucumbers. These pinwheels aren’t just for lunches; they make excellent party snacks or after-school treats.
Tips:
– Choose whole wheat tortillas for added fiber.
– Pick seasonal veggies to keep it fresh and interesting.
– Serve with a dip like hummus or ranch dressing for extra flavor.
– Add protein with turkey or chicken slices if desired.
This simple recipe brings fun to mealtime while ensuring your kids enjoy healthy ingredients. Give it a try and watch your little ones eagerly reach for these colorful pinwheels!
Spinach and Feta Pinwheels
Editor’s Choice
Mission Soft Taco Whole Wheat Tortillas, Medium Size, 10 Count, Whole Grain

Kraft Philadelphia Original Cream Cheese Pouches (50 Pack)

Mezete Hummus Snack Pack with Breadsticks | Traditional Classic Hummus |…
21. Sweet Potato Hummus and Veggies

Turn lunch into a fun adventure with Sweet Potato Hummus and Veggies. This tasty dip not only brings a splash of color to your table but also offers a wealth of nutrients. Kids love to dip, and this is a healthy twist on traditional hummus that they won’t be able to resist!
To make this delicious dip, start by roasting a sweet potato until it’s soft. Blend it with tahini, garlic, and a squeeze of fresh lemon juice for a creamy texture. Pair it with vibrant veggies like crunchy carrots, sweet bell peppers, and crisp cucumbers. This combo is perfect for little hands eager to explore new flavors!
Here’s how to whip up this delightful dish:
Recipe Overview:
– Servings: 4
– Prep Time: 10 minutes
– Cook Time: 25 minutes
– Total Time: 35 minutes
– Calories: 180 per serving
Nutrition Information:
– Protein: 4 grams
– Carbohydrates: 32 grams
– Fats: 5 grams
– Fiber: 5 grams
Ingredients:
– 1 large sweet potato
– 2 tablespoons tahini
– 1 garlic clove
– Juice of 1 lemon
– Assorted veggies for dipping (like carrots, bell peppers, and cucumbers)
Step-by-Step Instructions:
1. Preheat your oven to 400°F (200°C).
2. Roast the sweet potato in the oven for about 25 minutes, or until it’s soft. Let it cool down a bit.
3. In a blender, mix the roasted sweet potato, tahini, garlic, and lemon juice until smooth and creamy.
4. Serve the hummus alongside an assortment of fresh veggies for dipping.
For an extra crunch, add pita chips! You can even make a larger batch and store it in the fridge for quick snacks throughout the week.
Frequently Asked Questions:
– Is this suitable for freezing? Yes, it freezes well. Just thaw it before serving, and you’re good to go!
Make lunchtime exciting with this delightful Sweet Potato Hummus. Your kids will love the taste, and you’ll appreciate the healthy ingredients!
Sweet Potato Hummus and Veggies
Editor’s Choice

Ninja BL660 Professional Compact Smoothie & Food Processing Blender, 110…

Bento Box Adult Lunch Box, Containers for Adults Men Women with 4 Compar…
22. Apple and Cheddar Sandwiches

Turn lunchtime into a delightful experience with Apple and Cheddar Sandwiches. This unique combo of sweet apples and sharp cheddar cheese creates a fun and nutritious meal your kids will love. The crunch of the apples paired with the creamy cheese makes for a tasty bite that keeps mealtime exciting!
Start with slices of whole grain bread for a healthy base. Layer thin slices of crisp apple and rich cheddar cheese. If you want to add a twist, spread a hint of honey or mustard between the layers. To make these sandwiches even more playful, use cookie cutters to create fun shapes. Not only are they quick to prepare, but they also pack a perfect balance of carbs, protein, and fiber.
Here’s how you can make them:
Ingredients:
– 4 slices whole grain bread
– 1 apple, thinly sliced
– 4 slices sharp cheddar cheese
– Honey or mustard for spreading (optional)
Instructions:
1. Start by spreading honey or mustard on two slices of bread.
2. Layer the apple slices and cheddar cheese on top.
3. Place the remaining slices of bread on top and cut into fun shapes.
4. Serve with a side of baby carrots to add extra crunch!
Feel free to customize! You can swap out apples for pears or try different cheese varieties for a unique twist. These sandwiches are perfect for school lunches or a quick snack at home. Watch your kids smile as they enjoy this playful take on lunch!
Quick Tips:
– Use whole grain bread for added nutrition.
– Choose sharp cheddar for a stronger flavor.
– Add a sprinkle of cinnamon on apples for a sweet twist.
– Pack with a side of veggie sticks for a colorful plate.
Your lunch game just leveled up! Enjoy making these delicious sandwiches and watch your kids ask for them again and again.
Apple and Cheddar Sandwiches
Editor’s Choice

Halloween Cookie Cutters Set – 12 Pieces Stainless Steel Halloween Cooki…

Dave’s Killer Bread 21 Whole Grains & Seeds Thin-Sliced, Whole Grain Org…
Bento Box Adult Lunch Box, Containers for Adults Men Women with 4 Compar…
You Might Also Like
23. Cucumber and Cream Cheese Sandwiches

Cucumber and Cream Cheese Sandwiches are a delightful twist on lunchtime classics! These easy-to-make sandwiches are not only refreshing but also a hit with kids. You can whip them up in no time, making them perfect for busy mornings or lunchboxes.
To create these tasty treats, start with whole grain bread. Spread a generous layer of cream cheese on two slices. Next, stack thin cucumber slices on top for a crunchy, cool bite. Want to add some zing? Toss in a sprinkle of dill or chives! For extra fun, cut the sandwiches into small squares or triangles, making them perfect for dipping into a side of hummus or yogurt.
These sandwiches are light and provide a good balance of nutrients, making them a fantastic snack or lunch option. Plus, kids love the colorful look of the cucumber peeking out from the creamy filling!
Here’s how to make your own delicious Cucumber and Cream Cheese Sandwiches:
Ingredients:
– 4 slices of whole grain bread
– 1/2 cup cream cheese (plain or flavored)
– 1 cucumber, thinly sliced
– Dill or chives for garnish (optional)
Instructions:
1. Spread cream cheese evenly on the slices of bread.
2. Layer cucumber slices over two of the slices.
3. Top with the remaining slices and cut into fun shapes.
4. Pair with some fruit for a well-rounded meal.
Tips:
– Use flavored cream cheese for a delicious twist.
– Add smoked salmon or turkey for an extra protein boost.
Frequently Asked Questions:
– Can I make these the night before? Yes! Just store them in the fridge covered to keep them fresh.
With this simple recipe, you can turn a regular lunch into a fun and nutritious meal your kids will love! Enjoy the crunch and creaminess in every bite!
Cucumber and Cream Cheese Sandwiches
Editor’s Choice
Dave’s Killer Bread 21 Whole Grains & Seeds Thin-Sliced, Whole Grain Org…
Kraft Philadelphia Original Cream Cheese Pouches (50 Pack)

OXO Good Grips Handheld Mandoline Slicer for Kitchen, Adjustable Vegetab…
24. Pita Bread Pockets

Pita bread pockets are not only delicious but also a fun way to make lunchtime exciting for your kids! They offer a blank canvas, allowing you to fill them with whatever your little ones love. Whether you choose creamy hummus, crunchy veggies, or tender grilled chicken, each bite is an adventure. Kids can mix and match their favorite ingredients, turning mealtime into a mini cooking session right at the table. It’s a hands-on lunch that encourages creativity while ensuring they eat nutritious food.
Here’s a simple recipe to get you started. It takes just ten minutes, making it perfect for busy mornings. Plus, it’s a great meal prep option! You can prepare the ingredients beforehand and let your kids build their own pockets at lunchtime. This way, they’ll look forward to eating while you can be confident they’re having a wholesome meal.
Ingredients:
– 4 whole grain pita breads
– 1 cup hummus
– 1 cup mixed veggies (like carrots, cucumbers, and bell peppers)
– 1 cup cooked chicken or turkey (optional)
Instructions:
1. Cut each pita bread in half to create pockets.
2. Spread a generous layer of hummus inside each pocket.
3. Fill them with a mix of veggies and meat if desired.
4. Serve with a side of refreshing yogurt or juicy fruit.
Tips:
– Keep the fillings cold for a refreshing twist.
– Opt for whole wheat pita for extra fiber.
– Pack them in airtight containers if preparing the night before to keep everything fresh.
With these tips, you can turn a simple lunch into a fun and interactive experience for your kids. They’ll enjoy the process, and you’ll love knowing they’re eating healthy!
Pita Bread Pockets
Editor’s Choice

Joseph’s Bakery Whole Wheat Pita Bread, 1-Pack, Fresh Baked (4 Pitas per…

Flour Sugar Storage Containers (5.3L/4pk) Great Rice Canisters Sets For …

Mezete Hummus Variety Pack | Authentic Middle Eastern | Free from Preser…
25. Berry Smoothies

Looking for a fun and healthy way to liven up lunchtime? Berry smoothies are your answer! These delicious drinks are packed with fruity goodness, making them perfect for kids. They’re not just tasty; they’re quick to whip up and loaded with nutrients. Plus, they can double as a refreshing snack anytime.
Start by blending together a mix of frozen berries, creamy yogurt, and a splash of juice or milk. If you want to sneak in some greens, toss in a handful of spinach. The kids won’t even taste it! Pour the smoothie into colorful cups or fun bottles to make mealtime even more exciting.
Here’s how to make them:
Recipe Overview:
– Servings: 2
– Prep Time: 5 minutes
– Cook Time: 0 minutes
– Total Time: 5 minutes
– Calories: 120 per serving
Nutrition Information:
– Protein: 3 grams
– Carbohydrates: 25 grams
– Fats: 2 grams
– Fiber: 3 grams
Ingredients List:
– 1 cup frozen mixed berries
– 1/2 cup yogurt (any flavor you like)
– 1/2 cup juice or milk (your choice)
– Spinach (optional)
Step-by-Step Instructions:
1. Toss the frozen berries, yogurt, and juice or milk into a blender.
2. Blend until smooth. If you’re adding spinach, do it here!
3. Pour the smoothie into cups or bottles for serving.
4. Pack them in lunchboxes with a spoon or a straw for easy sipping.
Want to mix it up? Try using different fruits like bananas or mangoes for a new flavor. You can even freeze leftover smoothies in popsicle molds for a fun treat later!
Frequently Asked Questions:
– How long can I store these smoothies? They’re best enjoyed fresh but can be kept in the fridge for a day.
These berry smoothies not only taste great but also make lunchtime a bit more playful. Your kids will love the flavor, and you’ll love knowing they’re getting their nutrients!
Berry Smoothies
Editor’s Choice
Ninja BL660 Professional Compact Smoothie & Food Processing Blender, 110…

Hefty Party On Disposable Plastic Cups, Assorted, 16 Ounce, 100 Count

Popsicle Molds Set 6 Pieces Ice Popsicle Maker-BPA Free,Easy-Release Ice…
26. Veggie & Hummus Bento

Make lunchtime a colorful adventure with a Veggie & Hummus Bento. This fun and nutritious meal is perfect for kids who need a little coaxing to eat their veggies. By combining a variety of vibrant, crunchy vegetables with creamy hummus, you create a dish that looks as good as it tastes!
Start by filling a bento box with an assortment of fresh, bright vegetables. Think about sweet carrot sticks, crisp bell pepper slices, refreshing cucumber rounds, and juicy cherry tomatoes. Don’t forget a small container of hummus for dipping! This way, you turn a simple lunch into a delightful experience that encourages children to enjoy their greens.
Here’s how to whip up this tasty bento in no time:
Recipe Overview:
– Servings: 2
– Prep Time: 10 minutes
– Cook Time: 0 minutes
– Total Time: 10 minutes
– Calories: 150 per serving
Nutrition Information:
– Protein: 5 grams
– Carbohydrates: 20 grams
– Fats: 6 grams
– Fiber: 5 grams
Ingredients:
– 1 cup carrot sticks
– 1 cup bell pepper slices
– 1 cup cucumber rounds
– 1 cup cherry tomatoes
– 1/2 cup hummus
Instructions:
1. Wash and cut all vegetables into bite-sized pieces.
2. Neatly arrange the veggies in a bento box for a colorful display.
3. Place hummus in a small container for dipping.
4. For a sweet touch, add a small piece of fruit to balance the meal.
Feel free to get creative! Mix up the veggie choices to keep things exciting. You can even use flavored hummus to add an extra kick of taste.
Tips:
– Use seasonal veggies for the freshest flavors.
– Choose whole-grain crackers as a crunchy side.
– Pack with a small treat like a piece of dark chocolate for a surprise.
– Involve your kids in choosing their favorite veggies to promote healthy eating habits.
This bento is best enjoyed fresh but can last in the fridge for a day. Make mealtime a playful moment that kids will look forward to each day!
Veggie & Hummus Bento
Editor’s Choice
Bento Box Adult Lunch Box, Containers for Adults Men Women with 4 Compar…

Vegetable Chopper,12-in-1 Multifunctional Food Chopper,Professional Onio…

ProKeeper Progressive International Prepworks Mini Deli Air Tight Silico…
27. Roasted Chickpeas Snack

Roasted Chickpeas are a fantastic snack that kids will adore! They’re crunchy, delicious, and packed with protein, making them perfect for lunchboxes. Plus, whipping them up is a breeze. Just think about tossing some chickpeas with olive oil and your favorite spices for a snack that’s both nutritious and fun.
Start by choosing chickpeas—canned or freshly cooked. Coat them in olive oil and sprinkle on spices like paprika, garlic powder, or even a dash of cumin. Roast them in the oven until they’re golden and crispy. These little bites are great on their own or can add a delightful crunch to salads.
Here’s a simple recipe for you to try:
Recipe Overview:
– Servings: 4
– Prep Time: 10 minutes
– Cook Time: 30 minutes
– Total Time: 40 minutes
– Calories: 130 per serving
Nutrition Information:
– Protein: 7 grams
– Carbohydrates: 20 grams
– Fats: 4 grams
– Fiber: 5 grams
Ingredients:
– 1 can chickpeas, drained
– 1 tablespoon olive oil
– 1 teaspoon paprika
– 1 teaspoon garlic powder
– Salt to taste
Instructions:
1. Preheat your oven to 400°F (200°C).
2. Drain and rinse the chickpeas, then pat them dry with a towel.
3. Toss the chickpeas in olive oil and your chosen seasonings.
4. Spread them out on a baking sheet and roast for 30 minutes until they’re crispy.
Feel free to switch up the spices to keep things fresh and exciting! Store any leftovers in an airtight container for up to a week, and enjoy them as a snack or a salad topper.
Frequently Asked Questions:
– Can I eat these cold? Yes, they’re just as tasty at room temperature!
Enjoy this healthy and fun snack that turns mealtime into playtime!
Roasted Chickpeas Snack
Editor’s Choice

365 by Whole Foods Market, Unsalted Garbanzo Beans, 15.5 Ounce (Pack of 4)

Pompeian Robust Extra Virgin Olive Oil, Contains Polyphenols, First Cold…

The Spice Lab Complete Organic Spices and Seasonings Set – 30 Jar Spice …
28. Nut Butter Energy Bites

Nut Butter Energy Bites are your go-to snack for busy days! They’re not just simple to make; they’re packed with protein and energy, making lunch fun for your kids. Imagine your little ones munching on these tasty bites, staying energized for playtime.
Start by combining oats, creamy nut butter, and a drizzle of honey. Feel free to add chocolate chips or dried fruit for a sweet twist. Roll the mixture into small balls and pop them in the fridge. In just 15 minutes, you’ll have a delicious snack that’s easy to grab and go!
Recipe Overview:
– Servings: 12
– Prep Time: 15 minutes
– Cook Time: 0 minutes
– Total Time: 15 minutes
– Calories: 100 per bite
Nutrition Information:
– Protein: 3 grams
– Carbohydrates: 13 grams
– Fats: 5 grams
– Fiber: 2 grams
Ingredients List:
– 1 cup rolled oats
– 1/2 cup nut butter (peanut or almond)
– 1/4 cup honey
– 1/4 cup chocolate chips or dried fruit
Step-by-Step Instructions:
1. In a large bowl, mix the rolled oats and nut butter until well combined.
2. Pour in the honey and stir until the mixture is smooth.
3. Fold in chocolate chips or dried fruit for an extra treat.
4. Roll the mixture into small balls, about the size of a tablespoon.
5. Place the bites on a tray and refrigerate until firm, about 30 minutes.
Tips:
– Use sunflower seed butter for a nut-free option.
– Add protein powder for a boost if your kids are super active!
Frequently Asked Questions:
– How long can I store these? They last up to a week in the fridge or freeze them for longer storage.
These Nut Butter Energy Bites not only satisfy hunger but are also a hit with kids. Make lunchtime exciting and nutritious with this quick and easy recipe!
Nut Butter Energy Bites
Editor’s Choice


Bob’s Red Mill Organic Old Fashioned Rolled Oats, 32oz (Pack of 4) – Non…

Orgain Kids Protein Powder Shake Mix, Vanilla Bean Ice Cream – 8g Grass-…
29. Veggie Pizza Rolls

Bring some excitement to lunchtime with these Veggie Pizza Rolls. Imagine your kids biting into a warm, cheesy snack that’s packed with colorful veggies. These rolls combine the fun of pizza with the goodness of vegetables, making them a hit for both kids and parents.
To make these delightful bites, you’ll use crescent roll dough as your base. Fill it with pizza sauce, a generous sprinkle of cheese, and finely chopped veggies like bell peppers and spinach. Roll them up, bake until they’re golden brown, and slice into fun pinwheels. Not only are they tasty, but they also make for a hands-on cooking experience that kids will love!
Here’s how to prepare them:
Recipe Overview:
– Servings: 4
– Prep Time: 15 minutes
– Cook Time: 15 minutes
– Total Time: 30 minutes
– Calories: 250 per serving
Nutrition Information:
– Protein: 8 grams
– Carbohydrates: 30 grams
– Fats: 10 grams
– Fiber: 2 grams
Ingredients:
– 1 can crescent roll dough
– 1/2 cup pizza sauce
– 1 cup shredded cheese (mix different types for extra flavor)
– 1 cup chopped veggies (like bell peppers, spinach, or mushrooms)
Instructions:
1. Preheat your oven to 375°F (190°C).
2. Roll out the crescent dough and spread the pizza sauce evenly over it.
3. Sprinkle the cheese and chopped veggies on top.
4. Roll the dough tightly into a log, slice it into pinwheels, and place on a baking sheet.
5. Bake for 15 minutes or until golden brown. Let cool slightly before serving.
For a fun twist, you can add pepperoni or sausage for meat lovers. Want to save time? Prepare these ahead of time and freeze them. Just heat them up when you need a quick lunch option!
With these Veggie Pizza Rolls, lunchtime will never be boring again!
Veggie Pizza Rolls
Editor’s Choice

Pillsbury Butter Flake Crescent Rolls, Dough, 8 Rolls, 8 oz

Wisconsin Cheese Company – Specialty 100% Wisconsin Cheese Block Assortm…
Fullstar The Original Pro Chopper – Vegetable Chopper and Spiralizer, Fo…
30. Fruity Trail Mix

Wrap up your kid’s lunch with a delightful and crunchy Fruity Trail Mix. This treat is not just tasty; it’s also a fun and healthy option that kids love to munch on anywhere they go!
Imagine the blend of sweet dried fruits like raisins, cranberries, and apricots, mixed with crunchy nuts or seeds. Add a dash of chocolate chips for a sweet surprise. You can easily pack this mix in small bags or containers, making it a perfect addition to lunch boxes. It’s nutritious, satisfying, and keeps well, which is why kids can’t get enough of it.
Here’s how to make it:
Recipe Overview:
– Servings: 4
– Prep Time: 10 minutes
– Cook Time: 0 minutes
– Total Time: 10 minutes
– Calories: 180 per serving
Nutrition Information:
– Protein: 5 grams
– Carbohydrates: 25 grams
– Fats: 8 grams
– Fiber: 3 grams
Ingredients List:
– 1 cup mixed dried fruits
– 1 cup mixed nuts or seeds (for nut-free, use seeds)
– 1/2 cup chocolate chips (optional)
Step-by-Step Instructions:
1. In a large bowl, mix together the dried fruits, nuts or seeds, and chocolate chips.
2. Pack the trail mix into small zip bags or containers for easy transport.
3. Serve it as a fun side in lunchboxes or enjoy it as an after-lunch snack.
Feel free to adjust the ingredients based on your child’s favorites. If nuts aren’t allowed at school, simply swap them out for seeds.
Frequently Asked Questions:
– How long can this be stored? It stays fresh for up to two weeks in a cool, dry place.
With this Fruity Trail Mix, you can create a tasty snack that brings joy and energy to your little one’s day. Easy to make and packed with goodness, it’s a sure hit at lunchtime!
Fruity Trail Mix
Editor’s Choice

10 Pack Dishwasher Safe Reusable Bags, Leakproof Reusable Freezer Bags, …

Umite Chef Mixing Bowls with Airtight Lids Set, 8PCS Stainless Steel Kha…

Snackle Box Container,Portable Snack Box 8 Compartment Divided Serving T…
Conclusion

Finding creative and fun lunch ideas for kids doesn’t have to be a challenge. With these 30+ lunch ideas, you can turn mealtime into a playful experience that keeps kids excited about eating healthy!
Experiment with different flavors and presentations to keep things fresh and engaging. Kids will love the variety, and you’ll love how easy it is to make lunch a fun adventure every day.
Note: We aim to provide accurate product links, but some may occasionally expire or become unavailable. If this happens, please search directly on Amazon for the product or a suitable alternative.
This post contains Amazon affiliate links, meaning I may earn a small commission if you purchase through my links, at no extra cost to you.
Frequently Asked Questions
What Are Some Easy Lunchbox Ideas for Kids?
If you’re looking for easy lunchbox ideas for kids, think outside the traditional sandwich! Try wraps with turkey and cheese, or roll up some hummus and veggies in a tortilla. You can also create mini bento boxes with bite-sized fruits, vegetables, and proteins like cheese cubes or hard-boiled eggs. Remember, variety is key to keeping mealtime exciting!
How Can I Make Healthy Meals for Children More Fun?
Making healthy meals for children fun is all about presentation! Use cookie cutters to shape fruits and sandwiches into fun designs, or create colorful fruit skewers. You can also turn meals into a game by letting your kids assemble their own tacos or create their own fruit parfaits. Engaging them in the process makes eating healthy an enjoyable adventure!
What Are Some Creative Lunch Recipes for Kids?
For creative lunch recipes for kids, consider making ‘sushi’ with rice, seaweed, and colorful veggies. Alternatively, you can create a ‘pizza’ using whole grain pita bread topped with tomato sauce, cheese, and various toppings. These playful options not only taste great but also encourage kids to try new foods in a fun way!
How Can I Incorporate Playful Food Presentations into Lunches?
Incorporating playful food presentations can turn an ordinary lunch into a delightful experience. Use colorful plates, arrange food into fun shapes, or create faces with fruits and veggies. You could also try themed lunches, like a ‘rainbow’ lunch with a variety of colorful foods or a ‘nature’ lunch with animal-shaped sandwiches. Let your creativity shine!
What Are Some Kid-Friendly Snacks to Include in Lunches?
When packing kid-friendly snacks for lunches, think of options that are both nutritious and appealing. Consider including yogurt tubes, trail mix with nuts and dried fruits, or crunchy veggie sticks with a small container of dip. Cheese sticks or fruit cups are also great choices that kids love. Keep it fun and colorful to entice them to eat healthy!